Sewing machines
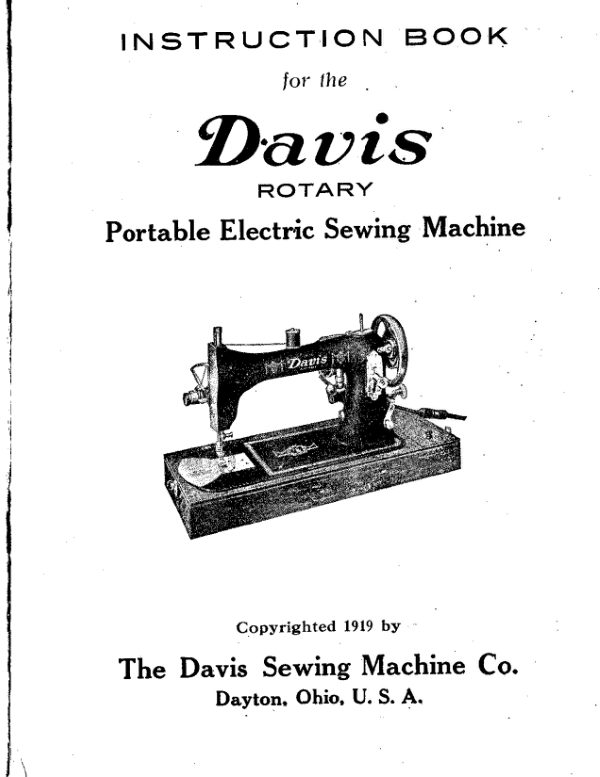
Davis Portable Rotary — User manual
User manual for Davis Portable Rotary. 30 pages in English. Read the original PDF, download or print a copy without registration.
30 pagesEnglish8.7 MB PDF
Loading your manual…Open PDF directly
Document details
- Brand
- Davis
- Model / document
- Davis Portable Rotary
- Document type
- User manual
- Language
- English
- Pages
- 30
- File size
- 8.7 MB
- Category
- Sewing machines
- Document date
- Not specified in catalog
Search available document text
Find a term, then jump to its page in the original PDF. Image-only pages may not be searchable; check the PDF for exact wording and diagrams.
Page 2 · Read text
3
between, cloth no with teeth feed the on resting foot
presser the with machine sewing the run Never
         '          machine. the out tried have you until ing
 sew practical attempt not Do  foot. presser the der
un- cloth practice a Insert   8. and 7 Paragraphs der
un- instructions to according machine the Thread
          13. Paragraph under instructions to cording
ac— set is needle the that See   6. and 5 Paragraphs
under instructions the to according  it Oil  sew. to
starting before cloth soft a with carefully machine
the clean so holes, oil the around particularly chine,
ma— the on collected doubt no have dirt and Dust
                                         booklet. this
in explained  as them  of understanding thorough
a have you until adjustments the change not Do
respect. every in perfectly work to found and thread
of sizes various with tested and adjusted carefully
been has it factory the leaves machine the Before
                                     run? to
ready machine the get to done be should Z—What
                                  cover. and base wood
the within enclosed be should All  pin. spool central
the on placed and cord connecting the with ped
wrap- rheostat and pedal foot the with arm, the der
un- back folded but head, the to attached be should
motor The   base. the of drawer the in 24) graph
Para-  (see  accessories  and  attachments  of  set
full  a with you to_ come  should machine The
    new? when come machine the should 1—How


                                                                                                                                                                                                                                                                                                                                                                            '
             PARTI
     1115true:Lluua                uenerai
View original page 2Page 3 · Read text
4
                               dealer. your from meter
the O1<ler  kind. this of plants with use for charge
additional  slight  at furnished be can motor  volt
32— special a volts; 30 generate ordinarily outfits,
lighting farm so——called orthe plants, lighting Home
motor. this for limits right the within  is current
the 120--Vy or 115—V llO—V, 105—V,  either marked
are they If  house. iniyour bulbs light the on pasted
label the at look to necessary only is it this of sure
make to but theseVoltages, of limits the within is
stations power central by nished fui current light tric
elec— every Practically  volts. 120 to 105 cu1“,1e11t ing
alternat- or direct either for wound is motor The
   current? light. electric any on operate  it 4—Will
stOp. will motor and altogether pressure the Release
faster. run  it make will pressure greater A  motor.
                                                                                                                                                                                                                                                                                                                                                                                                                                                                          .
the start will pedal foot the on p1ess11re slight A
                        run. to ready is motor the and
way, usual the in socket light electric nearest the
to controller the from cord other the attach Then
controller. the from cord short the with moto1ED the
from cord short the of end loose the together Plug
                    wheel. hand the with contact in
comes shaft armature the of end the 011 pulley fiber
and cork small the that so around  it swing arm, the
under is motor the If   foot. right your for position
convenient a  in floor the on controller the Put
run? to ready motor get to done be should 3--What

                                   motor. the tach
at— to ready now is machine The  needle. the break
or bend and tangle thread-will the that possibility
a  is there Also   dulled. be will teeth feed the and
lunl:  the injure will feed the of teeth sharp the as
View original page 3Page 5 · Read text
6
                                                                     oil.
machine sewing high-grade with thoroughly oil and
clean wipe rapidly, machine the run Then  gum. the
remove to benzjne or kerosene little a use standing,
long from or oil poor from gummed is machine the
If   oiled. properly not is bearing some that certain
is  it hard, runs machine the  If  sew. to mencing
com— before clean is part every that sure Be   fully.
care- it wipe then and oil the distribute to olutions
rev— several swiftly machine the run oiling, After”
                               2. Fig. in indicated point each
at oil apply and hinges its on head the back turn and
plate bed the of front the in screw the remove chine
ma- the of part under the oil To   1. Fig. in cated
indi— as bearings the of each on or holes oil the of
each in oil of drop one put and point highest its to
bar needle the raise head, the inside parts oil To
                             material. sewing the soil
and machine the gum to apt is more any   ; sufficient
is  oil of drop One  them. without reached be not
can— which bearings all for found be will holes Oil
       another. against moves part metal one where
places all oil doubt, of case In   “oil.” word the ing
underlin- by illustrations the in indicated are points
these and others than important more are points
Some    6. and   1  Figs. on  indicated  all  are  these
and oiled be should that places nineteen are There
                      wear. prevents and running of
ease insures this to attention Proper  work. day’s             _
each of beginning the at oiled and cleaned oughly
thor- be should machine The  answer. the  is ingly
spar— but frequently  it using and  oil, good Using
oiled. properly  it keeping  is machine sewing your
of care the in points important most the of One
                oiled? machine sewing the is 5—How
View original page 5Page 6 · Read text
the  ‘through and  up
                                11)  Fig.  see  (N,  wire
                               controller  thread  the
                               of  loop  the  through
                            (C) guide curve                              the  of  back  and  up
                            then (B), discs tension
                             the  between          ' around
                         and down then  3) Fig.
                           A,  (See  check  thread
                             the in discs the tween
                              be—  thread  the  draw
                         spool; the   of  back.
                              the from leading thread
                             the  with   pin   spool
                               central  the  on  spool
                              the  Place    lifter.  bar
                              presser  the  raise  and
                             point highest  their  to
                          finger takeup and bar
                             needle the raise First
                                     threaded?
                          machine the is 7—How
                                           forefinger.
                         and thumb  the tween
 be— rubbed when gritty feels that oil an use not Do
 kerosene. as liquid as almost and clear be should
 oil The   oil; thick very or  oil castor use not Do
                  wear. excessive causing dry, runs
machine the and overlooked or forgotten then are
which holes oil the up fills clogs, oil Poor   oil. grade
high? as well as friction eliminate not will oil Poor
features.  essential most the  of one  is  oil Good
              used? be should on of kind G—What
View original page 6Page 7 · Read text
4), Fig. B, (See hand right the of forefinger and
thumb the with case bobbin the of front the Grasp
 position. highest its bar-to needle the raise go, will it
as far as case the in pushed is bobbin the that sure
being   8,  Paragraph   in             4 Flg'
instructed as case bobbin                                               ,
the   threading   After
                   tion?          ,
posi-  in  placed  case
bobbin  the   is 9—How
    case. the from hanging                 -
thread  of  inches  three
about  leaving  “K,”   at
spring tension the of end
the under slips it until you
towards  it  pull and  (J)
slot thread the into thread
the draw hand right the
With and  hand  left  the
of finger second the with
case  the  in  bobbin  the
Hold  you. toward bobbin
the of top the from ing
lead— thread the with case
the in bobbin wound the
place hand right the With  up.  (I) spring tension
the with 4)ʼ Fig. A, (See hand  left the of fingers
and thumb the between  case bobbin  the Hold
              threaded? case bobbin the IS8—How'
                                    long. inches three
about thread the leavingg right, to left from needle
the of eye the through end the thread and clamp
needle the on (F) hook the and plate face the (E)Instaple tlu of back then (D), er fing -uptake- the slotin
View original page 7Page 8 · Read text
machine the while            " 6 Fig.
wound  be  may
 11  i b-b 0 b The
     wound?
n  i b b  ‘o b
the  is 10—How
             hook.
the and  case  the
between   caught
thread the get to
not careful Be   5:
Fig.  in shown  as                    -.
in  case  the  hold
to up “G”  catch
          the turnlittle


                                                         llllllllllllllll
                         then and go will it as far
                            as hook the  in shaft the
                             to, on and it over case the
                               slip and  straight  out  5)
                            (Fig.  “GʼIʼ catch  little the
                     Turn   top. the  at  rectly
                               di-  (L)  hole  needle  the
                        with and hand  the over
                         laying  thread  the  with
View original page 8Page 9 · Read text
10
 the on stamped also is which needle, length proper
 the shows Fig.'7  length. exact the particularly and
 needle, size right the use to important very is It
                                         used?
 be should thread and needles" of  sizes ll—What
                                  “tighten.” word the
 preceding arrow by indicated as right the to nut tion
 fric- the turning by wheel hand the tighten bobbin,
 the winding through When   “loosen.” word  the
 preceding arrow the by indicated as left the to nut
 friction the turn hand right the with and hand left
 the with wheel hand the grasp this do To   idle. run
 will it that so wheel hand the loosen time, same the
 at sew and bobbin the wind to want not do you If
                                             break. to
 thread the cause will this and do you if case bobbin
 the  in freely revolve not will  it as  full even than
more- bobbin the wind not Do  work. good for sary
 neces—  is bobbin wound smoothly and evenly. An
                                evenly. and smoothly
 bobbin the wind and thread the on tension uniform
 a keep easily can you manner this In   6). Fig. (See
hand right your of forefinger and thumb the tween
 be~ pass thread the letting you, toward wheel hand
 the turning by wind to Start  possible. as far as on
 it pushing spindle, spooler the over bobbin the slip
and wind, to starting when it hold to as so bobbin,
the in hole the through thread the of end the Put
 rubber. the out wear quickly will this as tightly too
wheel hand the against rubber squeeze-the not Do
 operate. to winder bobbin the cause to enough far
just right the to screw thumb the turning by wheel
hand the with contact in rubber spooler the Draw
    6.) Fig. (See   pin. spool hand right the on thread
                                                                       isof.  spool  the putting by  desired,  so  if sewing,
View original page 9Page 10 · Read text
11-
                         used. be not should and work
  bad and trouble cause will needle hooked—point or
,
  blunt A   left. the to it turn pressure, the decrease To
  right. the to 9) (Fig. screw adjusting bar presser
  the turn goods, the upon pressure more create To
  enough. heavy not is foot presser the on pressure the
 when seams heavy extremely sew to trying in ever,
  how- break, may needle The   plate. throat the in
  hole the of side the strikes needle the that manner
  a such in operator the from or to goods the pulling
  by caused generally  is needle the  of Breaking
          cause? the is What. breaks, needle the 12—If
        thread. rough cheap, with stitch even smooth,
  a expect cannot You  thread. inferior use not Do

  Cloth Heavy  Extra                                                                                                                                                                                                                                                                             ' Coarse    No.6

                                                               5 NO-      Cloth Cotton   D and C B,   50 to 30
   and Wool Heavy

                                         70 to 50       4 NO-    Work General    B and A
   and  Dressmaking

         Shirting          0 to 00                    ' 100 to 70     No.3      and Muslin

    and  155111511 Fine     00 to 000  200 to 100      2 No.

   W0  0 SS   C     Silk       Cotton      Needle
                                       ' RK    F    LA                                                                                                                                                                                                                                                                 '                          of Size
                        Thread of Sizes

  THREAD AND NEEDLES OF SIZES RELATIVE
                                              table. lowing
  fol- the by shown are work of classes different for
  '
 thread and needles of sizes relative The  cover. race
View original page 10Page 11 · Read text
12
                                              feed. not will
 machine the and neutral  into mechanism feeding
 the throws scale the on “O” at regulator the Setting
 knob. regulator the on out pull regulator, stitch the
 move To  inch. the to stitches 16 give to set ulator'
 reg— stitch the shows 8 Fig.  inch. the to stitches of
 number the indicate plate the on figures The  wheel.“
 hand the of left the to head the of front the on cated
 lo— conveniently  is  8) (Fig. regulator stitch The
           adjusted? stitch of length the is 14—How
                                        screw. clamp
 needle the with firmly it secure position, in is needle
 the When  stitches. skip to liable is it pin, stop the
 against up fit not does or long, too is needle the If
 7). Fig. (See   bar. needle the in pin stop the against
tightly  fits end
 its  that  so  up                    7 Fig.
go  should  dle
nee- The   bar.                            ’J
the toward side   /GR°°VE
flat the with go     suom’
will it as far as
                                   G;%%3Ebar  needle  the

                                                                                                                                                                                                                                                                                                                                                                                                                                                                                 '                                                     '
in groove the to
1n—   up shank the                                   NEEDLE         .                                                     or SIZE                     h-FLATSIDE                   EXACTPass  hand. left
the  of  finger
                                                      CLAMPfore- and thumb
                                           GUIDE            NEEDLEe h t  between {3              THREAD
needle the Hold                                           P'”
                                                          STOP                 sanwpoint.   'highest                      CLAMP'       \
its to bar needle
the  e s  i a R
       position? proper in set needle the is 13—How
View original page 11Page 12 · Read text
13
finger take-up and needle the bring and bar presser
 the Raise   foot. press'er the of back  laid be then
should threads» Both   thread. under the up bring
 will  This  hand."  left  the  in  thread  of  end  the
holding time same-  the at movement, complete one
                   made  has needle  the  until
                     wheel hand the turn rected,           8 Fig.
                            di-  as below and above ed
                        thread— being machine The
                            sew? to start to
                  way proper the IS16'—-What


                                                                                                                                                                                                                                                                                       ‘
                                              out. pulled
                          easily is stitch This  thread.
                     upper  the  on  tension  the
                       loosen  and  7  at  regulator
                          stich  the set basting For
                                necessary. if stretch
                          to  goods  the  permit   to
                    seam the in enough loose  is
                       thread the that so mended,
                     recom-  is thread upper the
                               011  tension, loose and stitch
                        short  a  material  fine  on
                        bias the on sewing When
                                         feed. the verse
                            re-  to stopped be not need
                     machine The   seam.  a  of
                      ends the tieing  for venient
                       con—  especially  is and feed
the of direction the reverses. This   8. Fig. in lines
dotted the On shown as plate, the on “0” mark the
above point a to knob regulator stitch the lifting
by backward sew to made be may machine "The
        backward? Sew machine the will 15~H0w
View original page 12Page 15 · Read text
15
in Bear  arrow. the forward turns “Loose”~- word
the so  or  direction,.      opopsite'        the in Nut Tension
                              the  turn  tension  the
                11 Fig.          diminish to arrow; the
                          toward comes “Tight”
                        word the so or t0p the
                                at you toward Nut sion
                          Ten— the turn tension
                               the increase To   tion.
                                 direc— either  in turned
                          be  may  nut  tension
                                 the.  tighter  or  looser
                                 trifle a stitch a obtain
                               to Operator the permit
                      To   11.  Fig.  in shown
                               as  arrow  the   posite
                             op—  is “Medium” word
                              the through line the 30
                           nut adjusting the ting
                                  set— by obtained  is and
                             expert an by termined
                               de-  is adjustment This
                               used. ordinarily  terials
                        ma-  all on stitch tight
                       medium a making 150
to 30 from thread of sizes different handle to justed
ad— properly is factory the leaves it when and tension
upper automatic an with fitted  is machine This
            adjusted? tension upper the is 18'—How

    10.) Fig. C, (See   side. upper the on loops in ing
show- thread upper the goods, the of side under the
along straight lie will thread lower the tight) too one
lower the (or loose too is tension upper the If  10).
B,,'Fig. (See   side. under the on loops in showing
View original page 15Page 16 · Read text
18
          17. paragraph See  tight. too Tension
                                            8. and 7 graphs
para-      See   machine.  of threading  Incorrect
                    .
                      bre-aking-— thread l—Upper
                     are: breakage thread of account
on trouble of causes common more the of Some
        cause? the is what breaks, thread the 21—If
      long. inches three about thread the of ends the
Leave  bar. presser to‘the attached cutter thread the
011 thread the cut and needle the of back directly out
work the draw hand, left the With  automatically.
released be will thread upper the on tension the and
litter the of means by foot presser the Raise  point.
highest  its at needle the with machine the Stop
  machine? the from removed work the is ZO—How
         feed. the on resting be must foot presser the
hand tensionby the through thread the drawing by
thread upper the on tension of amount the termine
de— To  upper-thread. the from removed  is tension
all and operation in is release tension automatic the
raised  is  lift foot presser the when that Remember
tension. lower the of adjustment the of changing
unnecessary  against  cautioned  are  Operators
             loosen. to left the to. and tighten to right
the to  it turning screw, tension case bobbin the of
means by done be may  it work special for tension
lower the change to necessary becomes  it case In
attention. further no needs ordinarily and factory
the leaves machine the when sewing ordinary  all
for adjusted properly also  is tension lower The
            adjusted? tension lower the is 19—How
                                        direct1on. either
in for provided  is nut the of turn half a only mind
View original page 16Page 17 · Read text
19


used. needle of size the for heavy too be may thread
the possibly or bent, or blunt is needle the because is
it' Sometimes  set. properly not is that one or needle
size wrong a to due generally is stitches Skipping
      cause? the is what skipped, are stitches 22—If
     10. paragraph See   full. too wound Bobbin
   19. paragraph See   tight. too tension Lower
                                                 8. graph
para- See  case. bobbin of threading Incorrect
                    breaking—— thread 2—Lower
                                           13. paragraph
See   incorrectly. set or bent“ or blunt Needle
                                                        11.
paragraph See  needle. for coarse too Thread
View original page 17Page 18 · Read text
20
 there— and attachments the use to how know should
 operator Every   sewing. regular her  in  it apply
 to operator the enable to sufficient usually  is ment
 attach- each with practice minutes’ Twenty  time.
 of saving and convenience great a found be will they
 acquired, is them using of knack the Once  pages.

                            12 Fig.


following the on given are attachment each of use
the in instructions Complete  sewing. of classes tain
cer- doing  in operator the facilitate greatly which
and  9) Fig. (See  foot, presser the of place in ally
gener- machine, the to attached easily be can which
devices mechanical simple are attachments The
       attachment? the of purpose the is 23—What
        ERIE
       Attachments
View original page 18Page 19 · Read text
21
  under- from foot hemmer the of scroll the into edge
 raw the insert hand right the With  hand. left the
  of fingers the in hold and made be would hem the
  as and hem the of size the material the of edge the
 over fold hemmer, the in material the insert To
                                                                                                '         ) 13. Fig (See   foot. hemmer the hole1n
 needle the through passes needle the that sure make
  to slowly wheel hand  the Turn   teeth.  feed the
 with straight  and  true  stands   it  that  sure Be
 screw. thumb the tightening and go will  it far'as
 as bar presser the on it pushing foot, hemmer row
 nar— the substitute and foot, presser the Remove
                                   ming?
 hem- narrow for used foot. hemmer the 1526—How
                                       you. towards
 off drawn be can foot the when loosened is foot the
 until left the to it turning by foot) presser the above
 (just screw thumb bar presser the Unscrew  points.
                                take—1—1p and needle the until highest. atthe are finger
 wheel hand the turn and  lifter, bar presser the ing
 rais- by point highest its to bar presser the Raise
            removed? foot presser the is 25—How
                                   can. 23———Oil  Stiletto.
 22”.  driver. screw 21—Small  driver. screw Large
 20——  .19—-Tucker.  braider. lS—Under  gauge. ing
 17~Quilt—   needles. l6—Extra  screw. 15——Gauge
 gauge. l4—Tailor  13~—Key.   plate. 12—Separating
 foot. ll—Braider  bobbins. lO—Three  9—Ruffler.
 8—Binder.   Stitcher.  7—~—Edge   foot. 6—Hemmer
 hemmers. of sizes 5-——Five to  1 Nos.  12) Fig. (See
 follows: as are accessories and attachments The
             there? are attachments many 24—Ho-w
                                                   chine.
 ma- sewing her of percentuse hundred one make by


.._,____  ..,..__        A    -..   ._._—-—..,..-
View original page 19Page 20 · Read text
22
    flat, work the Open   scroll. the fill to seam enough
    just  leave  to  as  so  necessary, where  edges  the
                                               13 Fig-   off Trim   possible. as                                                                                                                                                                                                                                     -
   cloth upper the of edge
   the to closely  as Sew
   one. upper the beyond
   inch  one—fourth about
   project   should   one
   lower the  that except
  way usual the in gether
   to- cloth of pieces two
   the  Stitch    26. graph
   Para- in described way.
   the in foot hemmer the
  Attach   13. Fig. See
         felling? for used foot hemmer the is 27—How
                   foot. hemmer the of use the by quickly
  seam neat a produce to necessary is that all is cloth
   the guiding in Practice  carefully. work the guiding
  and slightly feed the resisting material, the on back
  hold goods, slazy or flannel or curve hemming-a In
                                  left. the to material the carry
   in, feeds much too  if right; the to slightly terial
                                             even  ma- the carry in, feeds cloth little too If   full.
  just hemmer the of scroll the keep to and smooth
                      the with material  the Guide  it keep to fingers
                    back. directly pulling and thread of
  ends two the of hold taking by material, the gages


,,  en- feed the until or stitches three or two first the
  for, foot hemmer the under material the assist to sary
  neces- be will it point, needle the under directly  is
  edge extreme the that so drawn is material the If
                                 bar. presser the Lower
  needle. the of back just position  in  fold the ing
  hold— and you, towards material the drawing neath,
View original page 20Page 21 · Read text
23
scroll the of mouth the in edge raw the insert hand
right the with and hand.  left the of fingers the  in
fold the Take   start. to is hem the where corner the
from inch one—half about for made be would hem the
as and hem the of width the cloth the over Fold
      ) 12. Fig. (See  sins five are There  desired. mer
hem— width the we pl:  its in attach and foot presse1
the remove bar, presser the Raise   15.  Fig. See
      used? hemmers of sizes five the are 29—How
        it: through stitch to needle the enable to slot the
in enough far lace  tll( keeping right. the with lace
the and hand left the clothwith the guiding sew, to
proceed andbare3 presser the Lower  needle. the der
un-- back it (llawing foot hemmer the in slot needle
the into lace the of (dgit the Insert  bar. piesser the
raise and point, highest its at needle the with chine,
                         ma— the stop properly
                           running   is  hem  the
                        when and "26 Paragraph
                                   in described hem'as the
                               Start    14.  Fig.  See
                                     lace? on ing
                           sew- and hemming
                                for used foot mer
                         hem-  the  is 28—Ho-w
                            hemming. narrow
                       when as same the fully
                                care— work  the  guide
and bar presser the Lower  hem. narrow a making
when as way same the in foot hemmer the in sert
in— uppermost, fold the 1With  made. be would hem
the as edge narrow the over left the towards seam
the of edge wide the over fold and up, side wrong
View original page 21Page 22 · Read text
figure. desired the to
                              pointer  the move and             16  Fig.
                             tucker  the  of  center
                               the   in  screw  thumb
                              the  loosen  adjust, To
                                tuck. of width the caie
                                    indi- tucker the of plate
                              the of back the on scale
                               the  on  figures The
                                                          tion.
                                posi-  this  in  securely
                                             it  fasten  then  tucker,
                              the  in  hole round  the
                                 of  center  the  through
                              passes needle the that
 so place  its in tucker the attach and foot presser
 the remove bar, presser the Raise   16. Fig. See
                     used? tucker the is 30—How
                                                                left. the
 to  it carry  in, turns cloth much too  if right; the to
 slightly material the carry properly, edge the turn
 and scroll the fill to required are goods more If
      full. even scroll the
                                          15 Fig. keep to lingers the with
 111aterial   the  guiding
sew,  to  proceed  and
bar presser the Lower
needle.    e h t   under
is hem the of ginning
be— the until needle, the
of  back  just  position
in fold the holding you,
towards     it   drawing
and scroll the around it
curving  left,  the from
View original page 22Page 23 · Read text
25'
 with plate, needle the on rest should binder the of
 scroll the of end small The  place. its in binder the
 attach and foot linesser the Remove   17. Fig. See
                      used? binder the is til—How
             6  ______________________ space no with tucks %”
             4  ____________________ space  Vz’.’ with tucks V2”
              4  ...................... space no with tucks 12”
              2  .................... space V2” with tucks M”
              2  .................... space %” with tucks M”
             2  ______________________ space no with tucks M”                        O\O\-P-P-QJNN            1                              ____________________ space %” with tucks  I/é”
  IVZ              1   .................... space %3” with tucks %”
       1              1   ...................... space no with tucks %3”
      1               ya, ________________ space %” with tucks UM”
  at Guide       at Guide                     FOR
 Space Set    Tuck Set
            Tucker Setting for ‘Scale
                                                         sired.
 de— not is tuck a where mark a making avoid thus
 and screw clamp needle the clears  it that so lever
 movable the  raise tuck  last  the making When
                               tucks. of number desired
 the for operation this Continue   before. as tucker
 the  in place and creaser the by made crease the on
 cloth the fold completed,  is tuck first the After
                                                usual. as
 sew and bar presser the Lower  gauge. against-the
 edge folded the with frame, tucker the and lip spring
 the between under, fold the with  it, place and tuck
 firs*. the for cloth the fold tucking, commence To
    spacer. and tucker the setting in you help will 25
 page on table The  screw. thumb the tighten Then                       ,
figure._ desired the to pointer the move and screw
 thumb ”the loosen adjust, To  tucks. between space
 the indicate tucker the of front the On figures“ The
View original page 23Page 25 · Read text
Sion.
ten- upper  the  loosen
slightly   to    visable
ad— is It  screw. clamp
needle  the  over  lever
the  of  fork  the  with
bar presser the on place
its  in  ruffler  the  tach
at- and foot presser the
Remove  18. Fig. See
            used?
ruffler the  is 33-Holw
                  pattern. the following sew, to ceed
pro— and bar presser the Lower   start. should ing
braid— the where above directly needle the of point
the with and up side pattern the with foot presser
the under  it Place   material. the  of  side wrong
the on stamped or marked be should pattern The
                                  stitch. of length 16 about
and needle 4 No. a Use   braid. the of center the
through passes needle the that see and foot presser
the Raise   tube. the of side  left the under  it ing
draw- by braider—tube the through braid the Draw
                        plate. needle the in hole needle
the  of front  in  just  is tube braider the  of point
the that so possible as far as forward plate braider
the Push   needle. the of right the to plate needle
the in holes rectangular the in prongs the serting
in— by plate, needle the on position in plate braider
under the Put  prongs. short two with foot special
the attach and foot presser regular the Remove
              used? under-braider the is SZ—How
                                              under.
turned be not  will binding the  of edge the row,
View original page 25Related documents and language editions
DavisPDF
Davis New Minnesota Model A
User manual
20 pages · EnglishRead →
DavisPDF
Davis Vertical Feed
User manual
52 pages · EnglishRead →
DavisPDF
Davis Vertical Feed
User manual
56 pages · EnglishRead →
DavisPDF
Davis Vertical Feed
User manual
38 pages · EnglishRead →
DavisPDF
Davis Vertical Feed (1879)
User manual
65 pages · EnglishRead →
DavisPDF
Wilson (Davis Underfeed)
User manual
32 pages · English, German, French, Spanish, SwedishRead →
From the ISMACS International. Original publisher and archive notices are retained.
Check the model and edition against your equipment.
PDF verified 2026-10-11.