Sewing machines
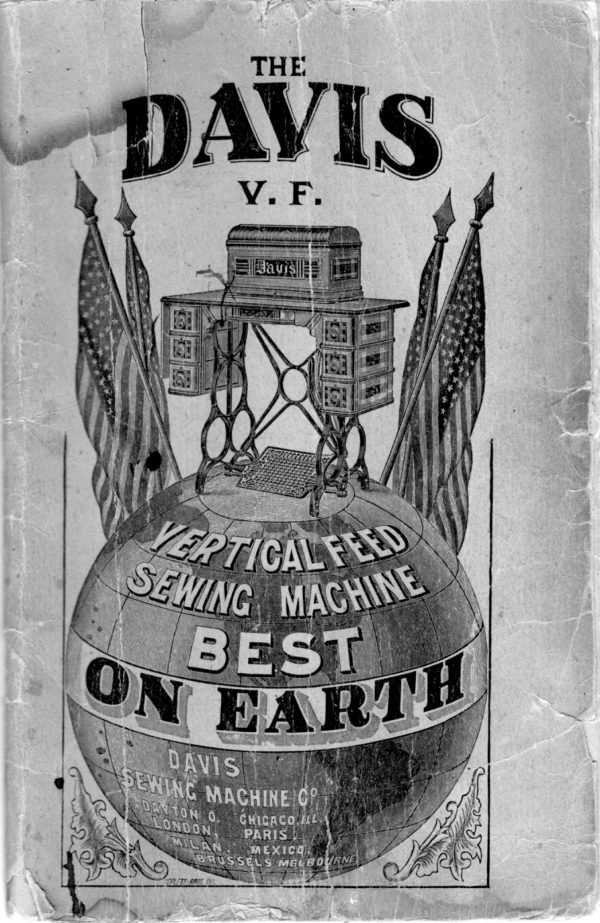
Davis Vertical Feed — User manual
User manual for Davis Vertical Feed. 56 pages in English. Read the original PDF, download or print a copy without registration.
56 pagesEnglish32.7 MB PDF
Loading your manual…Open PDF directly
Document details
- Brand
- Davis
- Model / document
- Davis Vertical Feed
- Document type
- User manual
- Language
- English
- Pages
- 56
- File size
- 32.7 MB
- Category
- Sewing machines
- Document date
- Not specified in catalog
Search available document text
Find a term, then jump to its page in the original PDF. Image-only pages may not be searchable; check the PDF for exact wording and diagrams.
Page 4 · Read text
GENERAL INSTRUCTIONS.

             (Read Carefully, and Follow to the Letter.)


                                                                           operator,                     machines will occasionally cause trouble to the   The best of sewing
                                                  Machine Company areand while the machines manufactured by the Davis Sewing
                                                                machines, yet                                    that are ever present  in otherentirely free from many difficulties
                                      patrons formulated the  following generalwe have  for the information of our

                                 :instructions
                  desire to impress upon  those who have our machines  to never     First: We
                                                   sewing machine repairer                          other company or a “tramp”permit an agent of any
                                                                             to the extent                            almost any case they will damage  itto touch your machine, as in
                                    to the factory for repairs.        will have to be returnedthat it
                                                                                               is possible for    The following directions, if observed, will remedy any defect it
                                   trouble, always carefully consult your instruction                 In case of anyyou to remedy.
                                                  shuttle and proper sizes of needlesbook with regard to threading the machine and
                                        machine and stand should be oiled.              also the page showing where theand thread;
                                                                 unless its sewing                  cautioned not to attempt to adjust the machine    Operators are
                                      unless they are perfectly familiar with itsqualities are impaired, and not then
              mechanism.principles and
                                                        repair a machine often does               by any unskilled person to adjust or    The attempt
                                wear could produce.greater injury than years of ordinary
                         taken apart, and the bars be taken out of the head of    Should the machine be
                                                 when taking them                             the position of each bar, or part,the machine, notice carefully
                                                      places.                   put them back in their properout, and be sure and
                                                                                       is placed back of                  spring which presses forward the feed bar    See that the


                                                                                                                                                                -the bar.
                 HARD RUNNING.


                                                                                                                              ;                                                                freely oil all the bear-                          hard, clean out all the ail holes     If your machine runs
                                            few seconds, then wipeoff the                   or coal oil.  Run  it rapidly aings with kerosene
                                                                           ” high                                                               the “ Davis                       put on each oiling place one drop of              after whichoil and gum,
                                                  from any other cause.                                                                          ’                           is caused by poor oil than                hard runninggrade oil.  More


                                                 always send with the                      Needles,  Bobbins,  Shuttles,  etc.,   When ordering
                                                           race  cover.                                stamped on the front                   of the machine,order the number
View original page 4Page 6 · Read text
4                            DIRECTlONS FUR      THE                                  csm;


                  CAUSE OF A MACHINE MISSING STITCHES.

                   Should there at any time be skipped or long stitches at intervals,  it is owing:
                   to the needle being set too low  (or too high  in very heavy sewing). or its having
              become bent away from the shuttle, or  its being too small for the thread in use,
              and sometimes the point of the shuttle becoming  accidentally blunted.  When
                using very                                 fine. needles, and also when  stitching heavy work, be sure that the
                 points of the needles are perfect and on a line with the center of the direction  of“


r'.                 the needle. and not blunted or turned over.  An imperfect needle may cause the
                 best machine to miss stitches.
                                                                             to hold the goods down when                The presser-bar spring must be strong enough
                the needle                                                           is. being pulled up out of the goods.   If not, then the machine  is liable
                  to skip.   Dirt or gum                                                      011 the shuttle race often cause machines to both skip and.
               break threads.
                           BAD STITCHING.

                                    should make bad stitching. uneven, etc.,  it is due to the ten--                         If your machine
                 sions not. being properly adjusted.   The machine must be threaded right, and the
               proper sized needles used for the thread.  Many people use too large threads when

                                                                                                                                              :                                                                   It is impossible. to make a good looking stitch              sewing light fabrics.  To illustrate
               on any machine with. say, No. 40’cotton when sewing two thicknesses of calico or
                  shirting.   No. 70 cotton is stronger than the fabric, and  will make a handsome
                   stitch.
               Do not allow  lint or dust  to accumulate in the shuttle or under the shuttle
                                                                                                            in the-                tension spring, as any foreign substance inside of the shuttle. (particularly
                inner end) ,will prevent the proper action of the bobbin; and under  the  tension.
                spring will render the shuttle tension inoperative.
                                                         be. fine enough so that it will be bedded or drawn into the                The thread should
                  fabric.   The garment wears longer and looks better.  When coarse threads are
                 used, the stitching lies on the outside of the fabric, and  is therefore worn away
                   first.


.3               No part of  the machine head should touch  the. wood-work.  The machine
               should rest entirely upon the rubbers.

                                                                                                                                             (it me with  the-                                                                     race, covers open, except  it  is                  Never run the machine with the
                hand, and very slowly.
                                                 do not attempt practical sewing  until you                    Practice upon strips of cloth, and
                                                          a tegular motion of the machine.               can guide the material and produce


                                                                                      with  the               When ordering  Needles,  Shuttles,  Bobbins,  etc., always send
                                                                                            cnrcr.                                                     on  the front race               order the number of the machine. stamped
View original page 6Page 11 · Read text
VERTICAL FEED SEWING MACHINE.


                                                             —_-:                        T      L:-


                                                                                                                                    '."'6"ll


              SETTING THE NEEDLE.-             s

                                   (See Fig. 6.)


                                                                                                                            :    Raise the needle bar to its highest point                                             hold the needle between the thumb
and first finger of the left hand and pass the shank up through the hole  in the
needle yoke 144 as far as it will go, with the flat side to the needle  bar.   Secure
the needle firmly by the nut 145.  The side E of the Combination Screw Driver,
                                                    SILK                                                           COARSE(Fig. 5), can be used to tighten the  nut.                                           Ir 1.1an on                                                   on vnnr
COTTON  IS USED,  TIIE NEEDLE MAY  BE  SET A  LITTLE LOWER THAN THE
             S INDICATE.DIRECTION
                   CA     01V.                      UTI
    For cut showing exact size of the “DA VIS V. F.                                                             ” needles, see page 13.
     If you cannot                   purchase. DAVIS V. F. needles from an authorized agent of the
          then order direct from the office of the Companyat Dayton, Ohio, or anyCompany,
                             35 cents per doz.of its Bran’ch offices.   Price,


                L                                        LI
   When  ordering  Needles,  Bobbins,  Shuttles,  etc, always send with  the
                         the machine, stamped on the front race  cover.order  the number of
View original page 11Page 12 · Read text
10               DIRECTIONS FOR USING THE

     TO PLACE THE SHUTTLE IN THE MACHINE.

                          race     I’Vithdraw the from       cover, and place the shuttle in  the shuttle carrier,
point first and towards the operator.

                     is sometimes more convenient to withdraw the back race cover and   Nora—It
                                                                iS in the hack part of the race.  Thisput the shuttle in its place when the carrier
is especially the case when some of the attachments are in use.

             THE SHUTTLE RACE.

                     shuttle race must he kept clean, and free from  dirt or gum.   The face otthe

                                                                                                                             it,                                     a piece of  cloth having  a drop of oil on   do this, rub it occasionally withTo


                                                     a.                                                                neglect,  the  race has                           dry clean cloth.    If, through                             it withafterwards wiping


                                                                                                                                                                                     ;                                                    it with a cloth Saturated with kerosene  thenbecome very “ gummy." first clean
                                      cloth, as above.   Breaking of threads and skip-use an oiled cloth and a clean dry
                                                        the Shuttle race clean.                 are frequently caused by failing to keepping of stitches

        TO DRAW UP THE LOWER THREAD.


                                                                                                                                                                                                                                          ',          the upper thread Slack with the left hand  turn the hand wheel towards    Hold

                                                                                         to          the right. hand. slowly, until the needle has passed down and up againyou, with
                                                           the slufltle race, throughits highest point.  The upper thread will form a loop in
                                        needle. when  it  rises.  will draw the lowerwhich the shuttle will pass, and the
                                                          (”lose the race cover (or covers,  ifthread up through the slot in the throat plate.
both have been withdrawn). and draw the ends of the thread back

              LENGTH OF STITCH.

                                                 the stitch adjuster screw 146  (see   The length of stitch is regulated by turning

                                        left.                                                        the.  screw  to the left to lengthen the                              TurnFig. 2, page 7) to the right or
                     it to the right to shorten the stitch.stitch.  Turn

             COMMENCING TO SEW.


                 " ‘                            threaded above and below, the lower thread grawn    The machine being fully
up, as heretofore explained, the presser bar raised, and the needle bar at its high-
est point, you are ready to sew.


                                                                                the   When ordering  Needles,  Bobbins,  Shuttles,  etc, always send  with
order  the number of the machine, stamped on  the front race  cover.
View original page 12Page 13 · Read text
FEED b'IflVINti MACHINE.                  11             VERTICAL
            ._1                                                    —f-h

     Place the goods under the presser bar and feed bars, with the needle directly  ‘i‘m—1“
 over the point where you wish to begin the stitching.  Lower the  presser bar by
 the presser lifter (see Fig. 2, page 7) and start the machine by turning the hand
wheel toward you.  In sewing heavy or hard fabrics, greater pressure  is required
than for light goods.  The pressure is regulated by the adjusting nut   (see Fig. 2,                                                  I
 page 7 ).  Turn the nut to the right to increase the pressure, or to the left to de-

crease   it.

                                            a regular and easy motion to the treadle,    NOTE.—-If it is found difficult to get

 it.  should be learned by running the machine before it has been threaded, with the
          and with the presser bar raised.shuttle out

     TO REMOVE THE WORK FROM THE MACHINE.

                                                                   at,                                                                                                                                                                                      ;                                                        its highest point     Stop the machine-with the needle                                                                    raise the presser foot,


                                                                                                                                           13,and with the left thumb press back                                 on the tension release                                                                page 7), and                               H  (Fig.
with the right hand. draw the Work                                      out directly back of needle.

              TH E THROAT PLATE.

    The throat plate                                  is provided with two  slots.  The larger one  is adapted to

             a No.the use of                    3 or No. 4 needle;  the smaller one  for  all finer needles.  To
adjust the throat  plate, loosen the screws which hold                                                                                                                                  it,  in place and remove the
plate, reverse and replace the platestaking care  to have  it  in such position that
the needle, when going down, will pass close to the right hand side of the  slot,

                                     it.but without touching
    The needle should pass perfectly straight down through the front end of  the

51m.    without            touching the end or either side.


                          A'OTE.
    Before the WtChi’Iw leaves our hands  it has been minutely inspected, and
every mechanical-  defect  correct-ed;                                                                 it has been tested with various  sizes of
thread, ranging from No.                              40  linen  to No.  150  cotton, and found  to work
satisfactorily in every respect.
   When unpacked  the  Jnutchine should be found  in good running order,
                               with a sample of work under the press-er foot,threaded ready for sewing, and
                 the hands of the inspector.as it came from
                  j:                                         J*
   When ordering  Needles,  Shuttles,  Bobbins,  ctc., always send  with the
order  the number of  the machine, stamped on  the front  race cover.
View original page 13Page 19 · Read text
VERTICAL  I‘lilil) SEWING MACHINE.                    37


                                                                                                                                                                                                                              — ———¢          I                j-                                                                                  -—-v4———-   -


                   HEMMING.


    Having the Hemmer attached, and the cloth  inserted. as shown  in  Fig.  15,
page  16. lower the  presser bar and proceed as with ordinary work, guiding the
material as shown in Fig.  to, above, keeping the scroll filled.


   When ordering  Needles,  Bobbins,  Shuttles,  etc.,  always send with  the
order  the number of  the machine, stamped on  the front  race  eorer.
View original page 19Page 22 · Read text
20                  “ll-{ECTIUNS FUR USlNU THE


                      FELLING.

     Place the two pieces of material together, having the edge of the under piece
project beyond the edge of the upper far enough to admit of  its being turned over
the edge  of  the upper and stitched down, as hereafter explained.  (With such
goods as ordinarily require felled seams. the  under edge should  project about
one-eighth of an inch.)
    Pass the goods through the. llemmer, as shown in Fig. 18. page 19: or use the
Gauge and Sewer. as shown above in Fig. Ill—turning the edge of the lower pieee
over the edge of  the upper, and stitching it down, as shown in both Figs. 18 and
19.   In this operation the edge of the piece should not be turned, but should be
held close to the fold in the lower piece.   The edge of the lower piece should be
turned just enough to be fastened by the scum:  if turned over farther than neces-
sary the edge can be trimmed close to the seam.


                                                                                       the   When  ordering  Needles,  Bobbins.  Shuttles.  ete.. always send  with
order  the number of the machine, stamped on  the front race  cover.
View original page 22Page 24 · Read text
2:3               DIRECTIONS FOR             TIII'I                                          [61th


               TO THREAD AND ATTACH THE BRAIDER.   i

                                                                                                          allow-—                                                                             side of the Braider,                 Thread the braid through the slot from the under
o__                                                          on the upper side about half an                ing the braid to pass out through the  slot, back
                                                             so the slot used will be directly over the                 inch.  Attach the Braider to the machine
<
                                              so the needle will pass down in the  little hole at the                  slot in the throat plate, and
                front end of the Braider slot without trntching.  Fasten the Braider securely with
                the Braider screw B.  Draw the shuttle thread up through the braid. as explained
              on page 10, for “drawing up the lower thread.”
                                                                                      so that when sew-                Have the Upper tension strong and the lower tension light.
                                                                   by the lock would appear                ing tWo or three thicknesses of muslin the knot formed
              on the upper side.
                                       be mar                                                                                                               ' at or stamped on the under side of the material.                The pattern should
                                                  adapt the Braider to different sizes of braid.                  Three sizes of slots are made. to
                 The. braid should pass freely through the slot.


                                                                                                                                                                                                             ,v              When  ordering  Needles,  Bobbins,  Shuttles.  etc  always send  with  the
                                                         on  the               order  the number of the nurchine, stamped                                                                 front race  cover.
View original page 24Page 29 · Read text
VERTICAL FEED SEWING MACHINE.                  27


                                                                                                                                                                                        .:


                   BIAS BINDING.

    Pass the binding through the scroll of the Binder, and draw it back under the

needle.         Place the edge of the goods to be bound in the Binder. and draw  it back
to the needle.  Lower the presser bar, and sew as usual.
     Fig. 25. page 26. shows the machine with the Binder  attached, the  binding.r
and the goods to be bound, in the Binder in proper position.
                                                be used.  For the Binder ordi)    For bias binding. goods of any description can
                              be cut three-quarters of an inch wide.   (If verynarily used, the binding should
                                               it may be necessary to cut the binding a little wider light,   slazy‘" material is used,     "
in order to have the edges properly turned under.)


      TO BIND WITH COMMON DRESS BRAID.

                                                     as explained above.  The only    Proceed the same as when using bias binding,
                                              the edges will not be turned under asditi’erence is, the dress braid being narrower,

is the case with bias binding.
                                                                                           left, to bring                                           be bent to the right or                            of the Binder may   Norm—The shank M

                                                    edge.the line of stitching the desired distance from the


                                                                                                                                                                ,                                                             etc                                                 always send.                      Needles,  Bobbins.  Shuttles.   When  ordering                                                            with.  the
                                                                                    cotter.                                      on the front race                         the machine, stampedorder  the number of
View original page 29Page 42 · Read text
l-‘oR                                                                     Till-1 to                            l)ll-tl2("l‘lo.\'s                                       l'Sth}


           TO            MAKE PLAITED TRIMMING.

     Attach the Rut’ller the same as for gathering. as before explained.  Turn the
 nut  It to the left, nearly to the extreme end of  the screw.  to make a fncrg                                                                            full
gather or plait.  Have the stitch of medium  length.
                                                                                it  in the center. and press the folded      (‘ut the material an inch wide.   Fold
.e.dge down smooth.   Place                                                      it in the lower  slot  of the feeder  I’ (when making the
trimming straight). and sew as usual.

                  it.              is desired to make the trimming in s allops. follow the instructions given      If
              Make Scalloped l’laited 'l‘rimtning."on page 43. “ To


    When ordering  Needles,  Shuttles,  Bobbins,  eta. always send with  the
                           the machine, stamped on  the front  race cover.order  the number of
View original page 42Page 45 · Read text
VERTICAL FEED SEWING MACHINE.                43


                                        - ——__              I               :_A                                                                                  J, 0.‘          I      ——m-

     TO MAKE SCALLOPED PLAITED TRIMMING.

                               See Figs  47 and 48.

    Place the. folded material under the feeder P.  While sewing, move the goods
to the right and left alternately, as indicated by the dotted  lines in Fig. 47, far
enough to make the scallops the desired depth.  The length of the  scallops de-
pends on the frequency of these alternate movements of the goods.
   A regular and even movement can easily be acquired, by which the scallops
will be made perfectly uniform.


    Cambric is the most suitable for this trimming,  if used on white garments
           be washed, although it can be made of other materials, according to thethat areto
purpose for which the trimming is intended.
                                                                                             if desired.    The goods may be wide enough to have both edges folded,
                                                                                            on’ col-    The plaitedtrimtning, either straight or scalIOped, is extensively used
lars, cuffs. aprons, children’s dresses and ladies’ underwear.
                                                  on which  it can be made        "' THE VERTICAL FEED”  is the only machine
practically.


            THE SCALLOP PLAITER.

                                   See Page 42

                                     as explained on page 40.   Raise the needle bar    Attach and adjust the Itutfler
to  its highest point.   Place  the hook which is on the end of the lever, over the
                                                           of the machine with theneedle yoke nut, and fasten the Plaiter firmly to the bed
gauge  screw.
    Pass the folded material through the guide Y (having the tongue in the guide
within the fold), and then through the slot Z, and back under the Ruffler feeding
spring and needle.
     Fig. 49 shows the Plait-er properly attached, with the material  in  its correct
position.


                                  ~ —    -—         ——<—wo—‘                                    :—:  ‘                r
   When ordering  Needles,  Shuttles,  Bobbins,  etc., always send with the
                                                                         cove“.order  the number of the machine. stamped on  the front race
View original page 45Page 47 · Read text
VERTICAL FEED SEWING MACHINE.                45


                  EMBROIDERER.

    Thread the machine above and below, as  for ordinary sewing.  Remove the
screw from the lower back corner of the face plate.  Raise the presser bar, and
 bring the needle bar to its highest point.  Pass the weaving arms                                                            and M of the                                             L
Embroider under the presser foot, from the back part of the machine, placing the.
 lever    N over             the needle. yoke nut. Lower the presser bar. Fasten the Embroiderer
 securely with the screw 0, in such position that the ends of the weaving arms,
when they pass each other, shall                           come as close as possible to the front side of the
                                         it.needle without touching
    Attach the spool stand                                to the lower front corner of the face plate, and fasten
 it with the screw                             (‘.  Place the spools on the stand, and draw the threads over the
guides on          the spool stand, then through the holes in the weaving arms.  Draw  all
the threads directly back under the feed bar.  Place the material under the presser
 foot, and sew as usual.
     The. cut shows the Embroiderer properly attached and threaded, as when  in
operation.
              ever run the machine with the presser bar raised when the Embroi-   N ore—N


                                                                                                                                                                                                                                       ’derer is attached.
                   can be made in the embroidery  stitch. by the use of diit'erent   A great variety
 sizes and colors of silk, or other thread, in the needle and Embroiderer, according
 to the taste and ingenuity of the operator.  A very pretty stitch  is made by using
one thread only                     in the Embroiderer,  it being crossed back and  forth with the
needle thread.                                                  at.
                   leaves,  flowers,  etc., with chenille, arrasene or tinsel, a single     In working
thread is ordinarily used in the Embroiderer, though in large patterns a good effect
may sometimes                be produced by running two threads of arrasene together, in one
         arm.  When this is done, the stitch should be very long.weaving


                                       '                                                        colors, shades, etc., must depend    The selection of the etnbroidering materials,
        on the judgment and taste of the Operator.entirely

                                                                                                                                                                 a.              he Embroiderer can he used with other attachments, thus making   N (nu—T
                   etc., with a handsome embroidered seam.hem, binding.


          The price of the Embroiderer is Three Dollars.


                                                                                                         -. h:
                      Needles,  Shuttles,  Bobbins,  etc., always send with  the   When orderingM
                         the machine, stamped on  the front race  corcr.order the number of
View original page 47Page 49 · Read text
VERTICAL FEED                                   MACHINE.                47                     snwmo


    Make milliners’ folds with different colors and pieces of goods at one opera-
tion, and sew them on at the same time.
         will turn the edge of a bias band. sew on either one or two pipings,~and     It


                                                                                                                                                                                                                                                                                                                                                                                                                                                                                    istitch them on the dress at the same time.
      It will sew a bias                   band on a dress, and run in either one or two pipings, with-
out showing the stitches.
        will cover a cord and sew it in between edges at one operation.      It
      It will cover the cords for seams of waists, cushions or  furniture covers, and
sew the seams at the same time.
     It        will sew in a sleeve, covering a cord and stitching  it into the seam, at the
same time.
          sew the corner on the edge of military coats, jackets, etc.     It will
                                                will gather and sew on at the same time.’        will gather without sewing on.  It     It
           gather between two pieces and sew on at the same time.     It will
      It will gather                 between two bands, showing the stitches on the right side, at

                                                                                                                                               ,one operation.
         make and sew a ruffle on any part of a dress skirt and. sew on a bias     It will
fold for heading at one operation, showing the stitching on the right side.
           gather and sew on a band, with piping between ruffle and band, at one     It will
Operation.
     It will sew a band and ruffle on a dress skirt, stitching in piping at the head
of the band, at one operation,
                                                   or scalloped.     It will make plaited trimming, either straight
   Make plaited trimming and sew on at the same time.
        will make knife plattlng.     It
     It will shirr any kind of goods.
     It will, with one operation for each variety, without basting, execute twenty
practical varieties of rufiling, being twelve mOre than can be produced on any
other machine with the same number of operations.
                more elastic stitch than any other machine.     It will make a
          is the only machine that will sew  velvet or plush without drawing or     It
puckering.
            not change length of stitch on scroll work.     It does
                    lace to leather, without changing stitch or tension.     It sews from
                                                                               dress—    For tucking,  cording,  braiding.  quilting,  embroidering,  shoe-fitting,
                                                          no equal.making, tailoring, family use, or general manufacturing,  it has


                                                 always send with the   When ordering  Needles,  Shuttles,  Bobbins,  etc.,
                                                            race cover.                         the machine, stamped on  the frontorder the number of
View original page 49Related documents and language editions
DavisPDF
Davis New Minnesota Model A
User manual
20 pages · EnglishRead →
DavisPDF
Davis Portable Rotary
User manual
30 pages · EnglishRead →
DavisPDF
Davis Vertical Feed
User manual
52 pages · EnglishRead →
DavisPDF
Davis Vertical Feed
User manual
38 pages · EnglishRead →
DavisPDF
Davis Vertical Feed (1879)
User manual
65 pages · EnglishRead →
DavisPDF
Wilson (Davis Underfeed)
User manual
32 pages · English, German, French, Spanish, SwedishRead →
From the ISMACS International. Original publisher and archive notices are retained.
Check the model and edition against your equipment.
PDF verified 2026-10-11.