Sewing machines
Davis Vertical Feed — User manual
User manual for Davis Vertical Feed. 38 pages in English. Read the original PDF, download or print a copy without registration.
38 pagesEnglish7.6 MB PDF
Loading your manual…Open PDF directly
Document details
- Brand
- Davis
- Model / document
- Davis Vertical Feed
- Document type
- User manual
- Language
- English
- Pages
- 38
- File size
- 7.6 MB
- Category
- Sewing machines
- Document date
- Not specified in catalog
Search available document text
Find a term, then jump to its page in the original PDF. Image-only pages may not be searchable; check the PDF for exact wording and diagrams.
Page 1 · Read text
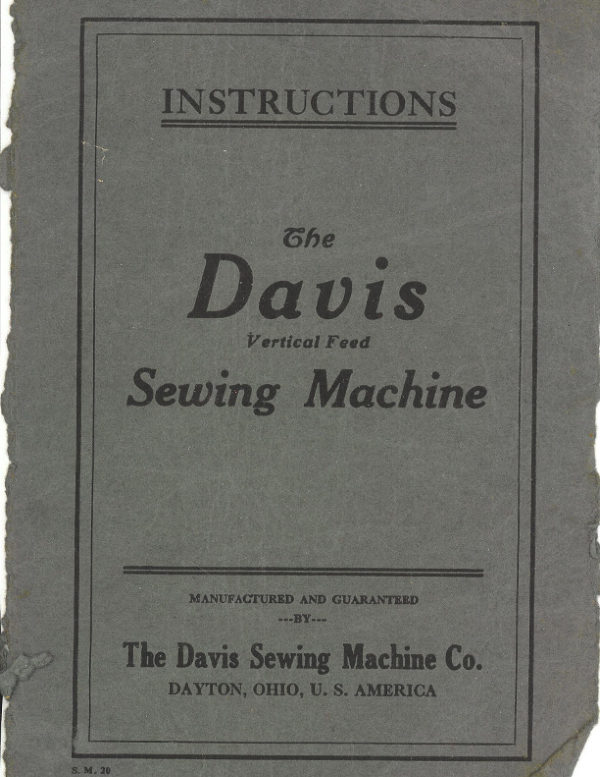
INSTRUCTIONS


            The
  Davis
                  Vertical Feed

  Sewing Machine


             MANUFACTURED AND GUARANTEED
                               ---BY---

    The Davis Sewing Machine Co.

          DAYTON, OHIO, U. S. AMERICA


S. M: 20
View original page 1Page 2 · Read text
WHEN ORDERING NEEDLES
            OR PARTS

    Always be sure to furnish the correct serial

number of the machine which will be found on the

front shuttle race cover immediately in front of the

needle plate. This is imperative.


            CAUTION

    Do not allow inexperienced persons or children

 to run the machine and never attempt to take the

machine apart or to change the general adjustment.


        IMPORTANT NOTICE

    The market is full of needles of an inferior

quality made to sell cheap. It is of first importance

that every owner of a Davis Vertical Feed Sewing

Machine, to use it with satisfaction, use Genuine

needles, stamped "Davis Short" on shank.
       If there is no dealer in Davis Sewing Machines
near you, write direct to the office of the Davis

Sewing Machine Co., Dayton, Ohio, U. S. A., en-

closing 50 cents in stamps for one dozen needles
stating sizes you require and your order will be
given prompt attention.
View original page 2Page 3 · Read text
STRUCTIONS


   Ben       JAVIS VERTICAL FEED" Sewing Machine
 leaves the factory, it has been carefully inspected and adjusted,
 and tested with various sizes of needles and thread, and found
 to work perfectly in every respect.
    The operator shouldstudy this book carefully before at-
 tempting to operate the machine even on plain sewing. By
becoming familiar with your machine through a carefulstudy
 of your instruction book, you will be able to overcome many
of the apparent difhculties usually experienced by beginners
 and your machine will become your most willing helpmate.
    Never run the machine with the shuttle race covers open,
 except to turn the wheel very slowly by hand, or the shuttle

 will, possibly, strike on the needle plate which is sure to cause
 serious injury to the machine.
     Practice on strips of cloth and do not attempt practical
 sewing until you can guide the material and produce a regular

 motion of the machine.
     Do not attempt to assist the feed by pulling the material

lest you bend or blunt the point of the needle. The machine

 will feed without assistance. If it does not it is because the

feed is entirely turned off at the stitch adjuster. If so, lengthen

 the stitch and the machine will perform its work properly.

     Do not run the machine when it is threaded up unless there

 is cloth under the presser foot, or the thread will snarl and tan-
 gle, and perhaps bend or break the needle.
   Do not allow lint or dust to accumulate in the shuttle or

 under the tension spring outside of the shuttle as any substance

 inside the shuttle will prevent the proper action of the bobbin,

 or under the tension spring will interfere with the tension on

 the lower thread.
     To turn a corner; stop the machine with the needle part

 way in the material but just after it has begun to rise, raise the

 presser foot, and turn the material using the needle as a pivot.
    When ordering needles, shuttles or parts of any kind,
always give the name and number of the machine. The num-

 ber will be found on the top side of the front shuttle race slide,

 directly in front of the needle plate.
View original page 3Page 4 · Read text
FIG.
                        OIL


    REEP COTTON WASTE
     IN OILWELL
UNDER FRONT RACE COVER
    WELL SATURATED
    WITH OIL.


                               FIG. 2


             LINDER ]CHUTTLE RACE COVER
View original page 4Page 5 · Read text
OILING THE MACHINE.

    Great care should be exercised in keeping all bearings of
the machine properly oiledas neglect inthis respect is re-
sponsible for many apparent defects unjustly blamed on the
machine.
    Properly oiled bearings improve with the use of the ma-
chine but if the old oil is allowed to gum on the bearings and
corrode them, they get rough and cause the machine to run hard.
    Oil holes are placed in the head of machine for the purpose
of reaching the bearings that cannot be reached directly.These
points are indicated in Figures 1 and 2 page 4 by arrows run-
                           the location. These oil holesning from the word "oil"to
should be kept free from gum and dust to allow the oil to flow
through the tubes to the bearings.
   One drop of oil is sufficient on each bearing and your own
good judgment should tell you when the machine requires oil.
Do not neglect it.
    The bearings underneath the head requiring oil are the ball
races above and below the shuttle lever andthe ball tip and
 slides forming the connection between the shuttle lever and
 the eccentric lever as shown by the arrows in Figure (2). These
can be reached by throwing the belt off the hand wheel pulley
 and tilting the head back on its table hinges.
   The standparts will, of course, require oil occasionally.
 The points requiring oil are both ends of the pitman, the ball
 race at both ends of the balance wheel crank and both ends of
 the treadle.
            THE SHUTTLE RACE.

     The face of the shittle race must be kept clean, and free
 from dirt or gum. To do this, rub it occasionally with a piece
 of cloth having a drop of oil on it, afterwards wiping it with a
 dry, clean cloth. If, through neglect, the race has become very
 "gummy,"first clean it with a cloth saturated with kerosene;
 then use an oiled cloth and a clean, dry cloth, as above. Break-
 ing of threads and skipping of stitches are frequently caused by
 failing to keep the shuttle race clean.

            THE NEEDLE PLATE.
    The needle plate is provided with two slots. The larger
 one is adapted to the use of a No. 6 or No. 7 needle; the smaller
 one for all finer needles. To adjust the needle plate, loosen the
 screws which hold it in place and remove the plate, reverse and
 replace the plate, taking care to have it in such position that the
 needle, when going down, will pass close to the right hand side
 of the slot, but without touching it.
    The needle should pass perfectly straight down through the
 front end of the slot without touching the end or either side.
View original page 5Page 6 · Read text
SELECTING SIZES OF NEEDLES AND THREAD.

          By carefully consulting the accompanying table showing the
     relative sizes of needles and threadand being guided by
      information contained therein, you will have gone far in assist-
      ing your machine to make a perfect stitch.
         Never use a large needle and very fine thread nor try to

     force a coarse thread through the eye of a fine, needle ; this
      will in itself cause the machine to do imperfect work.

                  Relative Sizes of Necdles and Thread.

        Size of         SIZES OF THREAD
                                             CLASS OF WORK       Needle   COTTON         SILK

                                                     Fine Linen and       No. 2     100 to 200         000 to 00-
                                                                  Silk

                                                     Muslin and      No. 3     70 to 100        00 to 0                                                             Shirtings
      No. 4     50 to 70     A and B         Dressmaking and                                                 General Work
      No, 5     36 to 50      B. C. and D.      Heavy Wool and                                                 Cotton Cloth
    No 6     Coarse                          Extra heavy Cloth


                 This cut shows the exact length of needle to use on this machine.
        Always specify the name and number of your machine when
     ordering needles or parts.
              SETTING THE NEEDLE.
              Raise the needle bar to its highest posi-
              tion, then loosen the needle clamp serew (N),
            take the needle between the thumb and fore-
             finger of the left hand, pass the shank up into
            the slot in the needle bar, with the Flat Side of
             the Shank toward or against the bar, until the
             end of the shank sets firmly against the Stop
          Pin, then turn the Needle Clamp Screw (N)
 STOP  PIN        tight.
             The accompanying illustrations show the
            correct position of the needlein theneedle
             bar slot and the needle clamp with needle set.
          When the needle is set right the long
Fie. 3     groove is to the left and the short groove to        FIG. 4
           the right.
                 It is not necessary to remove the needle "ROOVE,
            clamp from the bar when taking out or setting        SHORT
            a needle.  To remove the needle, loosen the        GRODVE
           screw (N) only enough to free the needle and
            the clamp will remain in position.
View original page 6Page 7 · Read text
FRICTION
                                                     NUT

                                                                       IGHTEN


                                                          LOOSEN


            WINDING BOBBINS
    A smooth, firmly wound bobbin, together with the careful
selection of needles and thread of the proper size will assist
in producing a good stitch.
     The Friction Nut shown in the accompanying illustration
loosens or tightens the hand wheel.
    Loosen the hand wheel when operating the bobbin winder
by turning the nut as indicated by the arrow and the word
"loosen."
    Bring the bobbin winder forward and place the belt back
                 Place the bobbin in the spooler between
the points (L) and (K) by pulling the step nut (M) to the left
far enough to admit it, placing the end of the thread between
the head of the bobbin and the spindle (K) then through the
slot in the end of the automatic distributing lever (J)down
under threadguide (N) aliowing the thread to glide between
the thumb and hinger trom the spool.
    Start the bobbin winder by turning the hand wheel of the
machine toward you from the top and wind the bobbin even
full. Do not wind the thread higher than the bobbin heads as
this would make the bobbin fit too tight in the shuttle and make
the shuttle tension appear as though it was set too tight.
  A minute drop of oil should be placed on the step (L) so
that the bobbin will turn freely. The spindle on the other side
of spooler should also be oiled as indicated.
View original page 7Page 8 · Read text
FIG. 6                FIG. 7                FIG. S

                           T


           THREADING THE SHUTTLE

     Hold the shuttle in the left hand with the point toward
you.  Place the bobbin in the open end of the shuttle with the
 thread drawing off over the top of the bobbin to the right as in
Figure 6. Place the forefinger of the left hand over the end of
 the shuttle to form a slight tension on the end of the bobbin.
Draw the thread down into the thread slot "g" and under the
point "" of the shuttle tension spring,Figure 7.  After the
thread has die drawn to the eft sie po, which brings the

machine.
  TO PLACE THE SHUTTLE IN THE MACHINE.
   Remove the front race slide cover, turn the hand wheel until
the shuttle carrier comes to its extreme forward position. Take
the shuttle in the right hand between the thumb and second
finger placing the forefinger over the end of the shuttle to hold
the bobbin in position. Place the point of the shuttle in the car-
rier first and it will drop into the proper position in the carrier.
The shuttle should always be placed in the carrier with the
spring up.  Close the shuttle race being careful not to catch
the thread between the race cover and needle plate. It is some-
times more convenient to remove the back race cover to place
the shuttle in the machine especially when some of the attach-
ments are in use.
View original page 8Page 9 · Read text
ADJUSTING
                 NUT...,


                  B  LEVEREUTION
                                    -STIT HADJUSTERS
                                -TENSION NUT.

      FEED BAR SPRING
       ADJUSTING SCREW
                        NEE LESTAME


          THREAD
          CUTTER


                                 FIG. 9
         THREADING THE MACHINE

     Place the spool of thread on the spool pin and draw the thread
over the stud and between the discs of check spring (A), then down
and around the stud and between the tension discs (B), up through
takeup eye (C), down through eyelet (D), and needle clamp thread
guide (E), then through the eye of the needle leaving the thread
about three inches long.
     TO DRAW UP THE SHUTTLE THREAD.
     The machine being threaded above in accordance with the
 instructions, take the end of the thread between the thumb and
 forefinger of the left hand but leave the thread slack so it will
 pass freely around the shuttle. With the right hand turn the
 hand wheel slowly toward you from the top until the needle
 passes down through the hole in the needle plate and up to its
 highest position again, then draw up the thread with the left
hand and the lower thread will come with it. Draw both threads
back under the presser foot and the machine is ready to sew.
           HIGH AND LOW LIFT.
    The low lift gives as much rise to the presser and feed
feet as is necessary in sewing any ordinary goods. When ex-
tremely heavygoods is to be stitched, or to sew over heavy
 seams, the High Lift can be thrown into operation by lifting
lever (G) (Fig. 9) to its highest position.

А. Т.
View original page 9Page 10 · Read text
After the machine has been properly threaded above and
 below and the threads drawn back into position under the pres-
 ser foot, place the material under the presser foot with the needle
 directly above the place where you desire to commence stitch-
 ing.Lower the presser foot and start the machine by turning
 the top of the hand wheel towards you.

           TO TURN A CORNER.
    Stop the machine with the needle in the goods but just as
 it has started to rise. Raise the presser foot and turn the goods
 to the proper position using the needle as a pivot. Lower the
 presser foot and start the machine as before described.

  TO REMOVE THE WORK FROM THE MACHINE.

     Stop the machine with the needle at its highest point, raise

 the presser foot which will automatically release the upper ten-
 sion and with the right hand draw the work out directly back
 from the needle.
            STITCH ADJUSTMENT

                        The Stitch Adjuster Nut is conveniently
                      located under the arm, above the needle clamp
                   SCrew. (See Fig. 9, Page 9.)
                         This nut is stamped with figures from 0 to
                      Turning the nut with the pointer to 1
                     Sives the sho tist site it the s oint lo tes
                      stitch.  Intermediate lengths of stitch may be
STITCH ADJUSTER                     obtained by setting the nut with the pointer
                      at or between any of the figures on the scale.
   CAUTION: Turning the NUT so the POINT is at (0) turns
 the FEED ENTIRELY OFF and the machine will refuse to FEED.

              TO FASTEN THE THREAD ENDS
                 OR TO BACK STITCH
                                   It is often desirable to secure the ends
                      of the thread in commencing or ending a
                   seam. This can be done by simply press-
                    ing the lever button (A) shown in the
                    accompanying illustration, which reverses.
                       the feed mechanism and causes the machine
                       to sew backward as far as required or as
                          long as pressure is placed on the lever. It
                        is not necessary to stop the machine when
                          reversing the feed.

                                   - 10--
 FEED REVERSE LEVER
View original page 10Page 11 · Read text
THE TENSIONS
                     This machine is fitted with an Automatic
                   upper tension and when it leaves the factory
                          is properly adjusted to handle different sizes
                    of thread from 30 to 150 making a medium

                       tight stitch on all materials ordinarily used ;

                     this adjustment is determined by an expert
                      and is obtained by setting the adjustingnut
                  so the line through the word "Medium" is
 opposite the arrow +O as shown in cut. To permit the operator
 to obtain a stitch a trifle looser or tighter the tension nut may be
 turned in either direction from the line marked Medium. Toincrease
 the tension turn the Tension Nut to the right at the top or so the
 word "Tight" comes toward the arrow 4-O; to diminish the ten-

 sion turn the Tension Nut in the opposite direction or so the word
"Loose" turns toward the arrow 4-O.

   Bear in mind--only a half turn of the nut is provided for in either
 direction.

   The lower tension is also
 properly adjusted for all or-
dinary sewing when the ma-
 chine leaves the factory and     SHUTTLE
                                      TENSION
ordinarily needs nofurther      SCREW
 attention. In case it becomes          LOWER TENSION

 necessary to change the lower tension for special work it may be

 done by means of the shuttle tension screw turning it to the right

to tighten and to the left to loosen.

   Operators are cautioned against unnecessary changing of the
adjustment of the lower tension.

  NOTICE-When the presser foot lifter is raised the automatic
tension release is in operation and all tension is removed from
the upper thread. To determine the amount of tension on the
upper thread by drawing the thread through the tension by
hand the presser foot must be resting on the needle plate.

   Both upper and lower tensions being set properly will produce

a stitch with the thread locked in the material thus:

if the upper tension is set too tight the loops will

                                                           if the
showlower ontensionthe upperis toosidetightofthetheloopsmaterialwill showthus: E           on the
under side of the cloth thus:
View original page 11Page 12 · Read text
DIFFICULTIES MOST FREQUENTLY ENCOUNTERED
           AND THEIR REMEDIES.

                     Hard Running.

      If your machine runs hard, clean out all the oil holes; freely
 oil all the bearings with kerosene or coal oil. Run it rapidly
 a few seconds, then wipe off the oil and gum, after which put
 on each oiling place one drop of good high-grade oil. More
 hard running is caused by poor oil than from any other cause.


                        Don't Feed.


 gummed up by the use of poor oil.
 hard running.
    The feed may be turned off; that is, the stitch may be so
 short that it does not feed the goods through.Remedy: Turn
 the stitch regulator in same direction as in lengthening the stitch
 until the feed works satisfactorily.
    The presser spring may not be.heavy enough. The pressure
 can be increased by turning to the right the thumb screw over
the spring.
    The needle plate may be rough around the needle hole,
 holding back the goods. Remedy: Smooth out with a strip of
very fine emery cloth.


                 Breaking the Upper Thread.
    This may be caused by: Improper threading of the ma-
 chine; the upper tension being too tight; the needle being too
 small for the thread; the needle set the wrong side out, or set
 crooked; the needle being too large for the hole in the needle
 plate; the shuttle race being gummed, in which case it should
be rubbed clean with a piece of cloth having a drop of oil on
 it; or by the shuttle not having sufficient room in its carrier so
that the thread will pass freely around the shuttle. When using
 silk thread, set the needle lower than for cotton. If too high,
silk will rough up and break.


               Breaking the Lower Thread.
    This may be caused by: The shuttle being wrongly
threaded; the tension being too tight; the bobbin being wound
too full, so it will not revolve freely; by the bobbin being wound
too loose and soft; by a rough or sharp place around the needle
hole in the throat plate; or by dirt or lint in the inside of the
shuttle.

                    Breaking of Needles.
       If the needle breaks, it is more than likely your own fault,
caused by pulling the goods to or from you, or in such a man-
                     —12—
View original page 12Page 13 · Read text
ner that the needle strikes the throat plate, and is bound
break. The needle may, however, break in trying to sew
tremely heavy seams when the pressure on the presser foot is
not heavy enough. To create more pressure upon the goods,
turnto thetheright,presserto decreasebar adjustingthe pressure,nut on theturntop ofit tothethepresserleft. bar
blunt or hook point needle will cause trouble and bad work.


              Cause of a Machine Missing Stitches.
    Should there at any time be skipped or long stitches at in-
 tervals, it is owing to the needle being set too low (or too high
 in very heavy sewing), or its having become bent away from
 the shuttle, or its being too small for the thread in use, and
                         the shuttle becoming accidentally blunted.sometimestheWhenpointusing veryof  fine needles, and also when stitch-
 ing heavy work, be sure that the points of the needles are per-
 fect and on a line with the center of the direction of the needle,
 and not blunted or turned over. An imperfect needle may cause
 any machine to miss stitches.
    The presser bar spring must be strong enough to hold the
 goods down when the needle is being pulled up out of the goods.
 If not, then the machine is liable to skip.Dirt or gum on the
 shuttle race often causes machines to both skip and break
 threads.
                          Bad Stitching.

    If your machine should make bad stitching, uneven, etc., it
 is due to the tensions not being properly adjusted. The ma-
 chinefor themustthread.be threadedMany peopleright, andusethetooproperlarge threadssized needleswhen sew-used
 ing light fabrics. To illustrate: It is impossible to make a good
 looking stitch on any machine with, say, No. 10 cotton when
 sewing two thicknesses of calico or shirting.No. 70 cotton is
  stronger than the fabric, and will make a handsome stitch.
    Do not allow lint or dust to accumulate in the shuttle or
 under the shuttle tension spring:as any foreign substance in-
  side of the shuttle (particularly in the inner end) will prevent
  the proper action of the bobbin; and under the tension spring
  will render the shuttle tension inoperative.
    The thread should be fine enough so that it will be bedded or
 drawn into the fabric. The garment wears longer and looks
  better. When coarse threads are used, the stitching lies on the
  outside of the fabric, and is therefore worn away first.
    No part of the machine head should touch the wood-work.
 The machine head should rest entirely upon the rubbers.
    Never run the machine with the race covers open, except it
  is done with the hand, and very slowly.
      Practice upon strips of cloth, and do not attempt practical
  sewing untilyou can guide the material and produce a regular
  motion of the machine.
                                 -13.-
View original page 13Page 14 · Read text
FIG. 13


          GAUGE AND SELF-SEWER.

    Attach the Gauge and Self-Sewer to the machine by means
of the Gauge Screw, having the wire loop on the end of the
spring, over the "toe" of the Presser Foot as shown in the above
illustration.
    Set the gauge as far from the needle (to the right) as you
desire to have the line of stitching from the edge of the material.
Place the material under the spring andagainst the gauge to
the right of the needle; lower the presser foot and sew as usual.
    The spring will hold the material smoothly against the

gauge, thus insuring a perfectly straight seam.


                                 -14--+
View original page 14Page 15 · Read text
FIG. 14


          GAUGE AND SELF-SEWER.


     Figure 14 illustrates the operation of sewing a curved piece
on a straight one, without basting; using for that purpose the
Gauge and Self-Sewer.
    This attachment is invaluable in sewing straight or parallel
seams, a curved edge on a straightone, or two curved edges
together; also in an almost inconceivable variety of similar
work, as all can be done without basting by using this attach-
ment.

    Note-The spring can be detached and the Gauge used
alone when desired.


                            -15-
View original page 15Page 17 · Read text
FIG. 16


               HEMMERS.

    Five hemmers are furnished with each Machine. The larg-
est (1¼-inch)) and smallest (⅙-inch) are of the "shank" pat-

tern which attach to the bed plate by means of the gauge screw
shown on the opposite page. The slot in the shank of hemmer

permits of adjustment to the right or left to bring the line of
stitching to the desired position on the hem.
   The three intermediate sizes of hemmers are of the race
cover pattern which fit in the bed plate in place of the front
shuttle race slide and should fit up close to the needle plate.
These three hemmers are adjusted by means of the lever (L)
which moves the scroll either to the right or left as the case
may require.
   When the hemmers have been attached, work the edge of
the goods to be hemmed into the scroll until it is just full enough
to make a nice even hem; lower the presser foot and commence
to sew, guiding the goods to keep the scroll properly filled.
                      -17-
View original page 17Page 18 · Read text
FIG. 17


     HEMMING AND STITCHING ON LACE IN
              ONE OPERATION.


    Attach the hemmer and insert the material as shown on
Page 17, Figure 16. Place the lace over the scroll of the hem-

mer and under the presser foot so that the needle catches the
edge. Lower the presser foot and sew as in regular hemming,

guiding the lace so the needle will catch it.
View original page 18Page 19 · Read text
FIG. 18


          FELLING WITH HEMMER.

    Select a hemmer to turn the desired width of fell; attach
to the machine as instructed on Page 1% Arrange the material

so the under piece will extend from under the upper about one-
eighth of an inch; work both pieces into the scroll of the hem.
mer, the same as in hemming, for the first operation. The sec-

ond operation is to sew the welt down stitching close to the edge
which makes a perfect felled seam. See Fig. 20, Page 21.
   When the first felling operation is done with the hemmer, the
welt can be folded either to the right or left before stitching down.


                               -19--
View original page 19Page 20 · Read text
FIG. 19


    FELLING WITH GAUGE AND SELF-SEWER.

     Attach the gauge and self-sewer to the bed plate by means
of the gauge screw. See that the staple on the end of the
spring is over the toe of the presser foot and taise the foot.
     Arrange the material with the under piece extending from

under the upper to form a felled seam as wide as desired. Place
the foldedend under the spring and presser foot, lower the

presser foot and sew as usual for the first operation. Remove
the gauge, spread the goods out and sew the welt down by
 stitching close to the edge as shown on the following page.
(Fig. 20.)


                                         --20--*
View original page 20Page 21 · Read text
FIG. 20


FELLING WITH GAUGE AND SELF SEWER.


        (Second operation as described on opposite page.)


                        - 21—
View original page 21Related documents and language editions
DavisPDF
Davis New Minnesota Model A
User manual
20 pages · EnglishRead →
DavisPDF
Davis Portable Rotary
User manual
30 pages · EnglishRead →
DavisPDF
Davis Vertical Feed
User manual
52 pages · EnglishRead →
DavisPDF
Davis Vertical Feed
User manual
56 pages · EnglishRead →
DavisPDF
Davis Vertical Feed (1879)
User manual
65 pages · EnglishRead →
DavisPDF
Wilson (Davis Underfeed)
User manual
32 pages · English, German, French, Spanish, SwedishRead →
From the ISMACS International. Original publisher and archive notices are retained.
Check the model and edition against your equipment.
PDF verified 2026-10-11.