Camera accessories
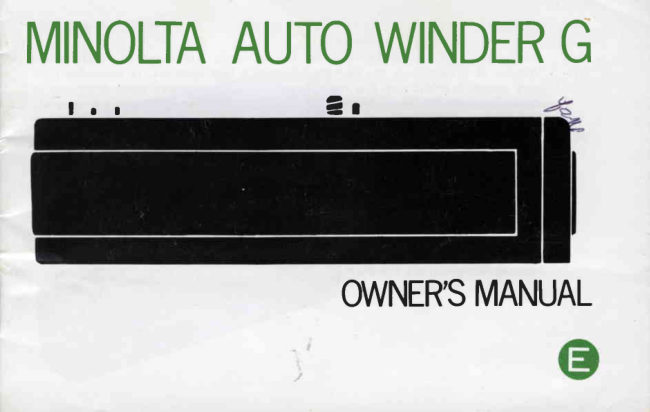
Minolta Auto Winder G User manual
User manual for Minolta Auto Winder G. 16 pages in English. Read the original PDF, download or print a copy without registration.
16 pagesEnglish1.0 MB PDF
Loading your manual…Open PDF directly
Document details
- Brand
- Minolta
- Model / document
- Minolta Auto Winder G
- Document type
- User manual
- Language
- English
- Pages
- 16
- File size
- 1.0 MB
- Category
- Camera accessories
- Document date
- Not specified in catalog
Search available document text
Find a term, then jump to its page in the original PDF. Image-only pages may not be searchable; check the PDF for exact wording and diagrams.
Page 2 · Read text
Specially  designed  for  use on  the  Minolta  XG  cameras,  your  Auto
Winder G attaches to  the camera body  in a few seconds.  lt advances film
and  resets the XG  for  the  next  exposure automatically  after each one  is
taken  in single-frame or continuous  operation up to two frames per second,
stopping  automatically   at  the end  of each cartridge, The highly  efficient
coreless motor  winds  well  over  150  cartridges  per  charge  with  Ni-Cd
batteries, and also uses ordinary  or alkal ine penlight  cells. One of smallest
and  lightest  to  date,  the Auto  winder  G  is designed  for  optimum   total
balance and lightness of the camera/winder  combination,
    Before using your  winder  for  the  first  time, please read this manual  all
the way  through   -  or  at leastfar enough to cover your own  picture-taking
needs  -   while  loading  batteries,  attaching  to camera, and  handling  and
acquainting  yourself with  the unit and  its parts and features. This way, you
can  take good  pictures and  begin  to  realize the  potential  of  your  Auto     --1
Winder G right from  the start.


                  www.orphancameras.com
View original page 2Page 5 · Read text
BATTER IES


Installingbatteries                          2. Insert   four   penlight   (AA-size)
1. With  pow€r  switch  at  "OFF,"        1.5-volt  alkaline, Ni-Cd,  or sealed
  slide the battery-chamber lock in      carbon-zinc  batteries with  plus (+)
  the direction  of  the arrow and      and minus  (-)  ends positioned  as
  remove the battery holder.               indicated  in the battery  holder.


                    www.orphancameras.com
View original page 5Page 6 · Read text
3. Insert the battery holder   into the    C A U T I O N
  winder  body  so  that  the  white     o When  replacing  batteries, be zure
  marks  are on  th€ same side and        to change  all four  batteries at one
  snap it securely into place.                time.    lf  €xhausted  batteries  are
    (lt   is shaped  so  that    it  will  not       used  with  fresh ones, or   if  differ-
   seat properly    if  the white  marks        ent  types   of  batteries  are  used
  are not on the same side.)                together,  there  is a possibility  of
                                               battery leakage or explosion.
                                           o Do  not attempt  to charge alkaline
                                                  or  carbon-zinc   batteries  as  this
                                            could  cause  battery   leakage  or
                                             e xp lo sio n .
                                           o   lf the winder  is not to be used for
                                          two   weeks   or  more,   batteries
                                           should be removed.
                                          o   lf Auto  Electroflash 2OOX is to be
                                        used  with   the XG  cameras and
                                           Auto  Winder G  in successive  f lash
                                             operation,  be  sure  to  use  only
                                                freshly charged Ni-Cd  batteries  in
                                              the    f lash.   lf  partially  charged  or
                                               other  batteries  are used, the  flash
                                   may not synchronize  properly.
View original page 6Page 7 · Read text
A T T A C H I N G  A N D R E M O V I N G

o  lf    t h e w i n d e r  d o e s  n o t  o p e ra te    To attach
  a f t e r  r e p l a c i n g t h e b a tte rie s, co ck      1. With  the power  wvitch at  "OFF",
    t h e  s h u t t e r o n c e m a n u a l l y u s i n g         in se rt th e a u to w inder 's guide pin
    t h e       f i l m - a d v a n c e    le ve r.  Th is         into  the camera's guide-pin socket
  s h o u l d  r e c y c l e  t h e win d e r me ch a -       and align the attaching screw with
  n is m ,  a n d  n o r m a l  o p e ra tio n  ca n        the  tripod  socket on  the bottom
  b e  r e s u m e d .                                    of the camera.
                                                  2. Fold  out  the attaching screw and
Cold-weather  operation                        tu rn   it clo ckwise until the winder
   Batteries   generally  decrease   in         is se cu re ly in p lace.
capacity  as  the  temperature   goes
d o w n ,  a n d   t h e a m o u n t  o f  film  th e
winder  can advance  per  set lessens
a c c o r d i n g l y .  A l k a l i n e   a n d  se a le d
carbon-zinc  batteries can be used  in
temperatu res d own   to OoC  (32" Fl
w h ile  n i c k e l - c a d m i u m  b a tte rie s ma y
be qsed  in  temperatures  as low  as
-2O -C   e 4 - F    ) .     l t     i s  th u s  re co m-
mended  that  the winder  be loaded
with  fresh  batteries  for  use  in cold
w e a t h e r  a n d    t h a t  y o u  ca rry  fre sh
spares in a warm  inside coat pocket
f o r   r e p l a c e m e n t    i f  n e ce ssa ry d u rin g
s uc h o p e r a t i o n ,
                    www.orphancameras.com
View original page 7Page 8 · Read text
To remove                        C A U T I O N
1. With  the power  w\ritch at"OFF,',      Do  not  attach  the  winder   to  the
   fold  out  the  attaching  screw and   camera  with   ths   winder's  power
   turn    it  counterclockwise   out  of    snritch  at "ON"   as  this may  cause
   the camera's tripod  socket.         damage to the camera.
2. Separate the winder  and camera,
  mak in g s u r e t h e g u i d e p i n   i s dra wn   N O T E
   straight out of the guide-pin srrckst.     Becausa the  bellows  supports  ex-
                                        tend  behind  the  body  mount,  the
                             XG  with  a u to  win d e r  ca n  not  be
                                     used on the Auto  Bellows   I without
                                        modif ication. For information  about
                              mo d ifica tio n  o f yo u r Au to  Bellows  I
                                         contact    an   authorized   M inolta
                                          service facility.
View original page 8Page 9 · Read text
O P E R A T I O N

                                           2 . To  ma ke  a single exposur e, de-
                                           press the operating  button  to  trip
                                               the  shutter  and  immediately   re-
                                                       le a se th e b u tto n.   ( T he winder  will
                                              a u to ma tica lly  advance  the    f ilm
N o r m a l w i n d i n g                       when  the €xposure  is complete,)
  With  serviceable batteries  loaded      wh e n  th e o p e rating button  is held
and winder  attached  to  the camera:         in   its  release position,  successive
1 . T u r n    t h e p o w e r  s w itch to "ON."       exposures  will  be made  and  the


                                        www.butkus.us


                   www.orphancameras.com
View original page 9Page 10 · Read text
win der w ill  a d v a n c e  t h e  f  i l m a fte r   N O T E
  each one  at  a rate  of  up  to  two     o  Excess tension  on  the  film  may
     f rames  per   second.   In   either       stop  the winder  drive mechanism
   sin gle -f ra me o r c o n t i n u o u s  o p e ra -        in  mid-cycle  before  the  film   is
   tion,   t he p i l o t    l i g h t w i l l  c o m e o n       e xh a u ste d ; th e p ilo t  lig h t will also
  du rin g eac h a d v a n c e c y c l e .                re ma in   lit. S h o u ld  th is  happen,
3. At  the end of each cartridge, the      move  the  winder's  power  switch
  win der  w ill  a u t o m a t i c a l l y   s to p ,        to  "OFF"    a n d  th e n  to  "ON."
  an d  t he pilo t   l i g h t w i l l s t a y  l i t .           This  should  reset the winder  and
                                             p ilo t   lig h t  fo r  n o rma l  o per ation.
C A U T I O N                                                         ff  the winder   still does not  oper-
  Do not  release the battery  holder       ate,  replace  the     f ilm  cartridge
w h i l e  t h e w i n d e r    i s o p e r a t i n g a s t h i s       and/or  batteries.
could  in t e rru p t   t h e w i n d i n g  c y cle .  lf    o When  the  camera's shutter-speed
t his h a p p e n s a n d  r e p l a c i n g  t h e h o ld -       selector  is set at "B"   the winderer do e s  n o t    r e s t o r e w i n d e r  o pe ra -                                                         will  advance  after  the  operating
tion, c oc k  t h e s h u t t e r o n c e m a n ua lly       button   is released.
using   t h e    f il m - a d v a n c e     l e v e r . Th e    o Du rin g   win d e r   o p e ra tion,   the
wind e r  mec ha n i s m  s h o u l d   t h e n  b e     advance lever should be kept at its
 r ecyc le d , and  n o r m a l  o p e r a t i o n ca n       rest position.
be  r es ume d .                             a  Keep  the  winder's  power  switch
                                             a t "OFF"  wh e n  th e win d er  is not
                                             b e in g u se d .
View original page 10Page 11 · Read text
R E W I N D I N GF I L M

Manu a l a d v a n c e
   T h e   f i l m  c a n b e a d va n ce d ma n u a l-
ly  with  the  winder  attached   if de-
sired, whether  or not  battery  power
is suff icient, To do so,  it is necessary
to make sure the power  wi/itch  is at
"OFF"   before  releasing the shutter.
Generally  speaking, however,  to  re-
d u c e    t h e  s i z e  a n d w e ig h t  o f  th e
c a me r a ,  y o u w i l l  p r o b a b ly wa n t  to   When  the  auto  winder   is attached:
d e t a c h   t h e w i n d e r w h en   it  is n o t  in     1. Move    the   power    switch    to
use.                                                                                   , , O F F . "


                   www.orphancameras.com
View original page 11Page 12 · Read text
3. Fold  out  the  rewind  crank  and
                                                turn    it  in the  direction  indicated
                                          by  the arrow  on   it  until  the  red
2. Turn   the   auto   winder's      f ilrrr      Safe Load Signal bar moves out  of
  advance release to the  right as far       the window   to  the  left. You  will
  as  it  will  go and  sl ide  it  into  the      then   feel  tension  on  the     f ilm
   indention   in the  direction   of the       increase and  d isappear, and  the
  arrow  until  a faint  click  is heard.      cra n k will tu rn   f re e ly.
View original page 12Page 15 · Read text
T E C H N I C A L  D E T A I L S

12        ,       T y p e :  A u t o m a t ic    f ilm win d e r fo r u se o n Min o lta XG cam er a body
           Function:   Operates camera's film-advance/shutter-cocking  mechanism  as
                    soon as advance lock releases after each exposure  "-      Windin g  t i m e :  .Approx. O.4 sec,
     Windin g s p e e d :  Up to 2 fps  in successive operation
      Usable shutter
            speeds:  Single-frame/successive operation  at  all electronic auto/manual
                    speeds 1 through  1/1OOO sec.; single-frame only  at,,B,,  setting
     Power source:  Four  1.5v AA-size  (penlight)  cells connected  in series (6v)
      D riv e m o t o r :  Co rel ess-ty pe micromotor
  Windin g ca p a c i t y :  Succe^ssive 3^6-exp. cartridges  per fresh set or  full charge of cells
                             at 20- c  (68" F )
                   S e a l e d c arb o n -zin c   A lka lin e -ma n g a n e se    Nickel- cadm ium
                      A p p r o x.  5 0 *         A p p ro x, TO*        A p p r o x . 1 5 0 r
                                                                    ' as determined  by Minolta's  standard testing method
              Other:   Tension-type   switch   to  stop  advance  at  end  of  cartridge;
                      Contact   switch  prevents  operation  when   not  attached  to
                     camera; LED  monitor   light, film-advance  release,
   S iz e a n d w e i g h t :  b o d y 3 5 x 3 7 x 1 3 8 mm  (1 -3 l8 x 1 -7 /1 6 x S- 7/16  in.l
                       2 1 O g ( 7 - 3 /a o z.) with o u t  ce lls

 Specifications subject to change without  notice

                          www.orphancameras.com
View original page 15Page 16 · Read text
.1,w

    CARE AND STORAGE

'     o Your  Auto  Winder  G  may  be    o Remove   batteries  whenever  the
       wip e d  w ith   a   s i l i c o n e - t r e a te d      win d e r  is n o t  to b e u se d for m or e
        clo t h    t o  c l e a n    i t , D o  n o t  allo w        th a n two we e ks,
        alc o h o l o r  c h e m i c a l s o f a n y  kin d
        to touch  its surface.
     o Do  n o t  k e e p   t h e  u n i t     i n  p la ce s'       subject  to high temperature,  high
       humidit y ,  d u s t o r d i r t . S t o r e  it in
       a c o o l, w e ll v e n t i l a t e d p l a c e ,


.'   MinoltaCameraCo., Ltd., 30, 2-Chome,Azuchi-Machi,Higashi-Ku,Osaka541, Japan
    MinoltaCorporation,101 WilliamsDrive,Ramsey,New Jersey07446.U.S.A.
I    MinoltaCamera(Canada)lnc.,1344FewsterDrive,Mississauga,OntarioL4W, 144 Canada
I    MinoltaCameraHandelsgesellschaftm.b.H.,Kurt-Fischer-Strasse50, D-2O7OAhrensburg,WestGermany
f    MinoltaFranceS.A.,357 bis,rue d'Estienned'Orves92700 COLOMBESFrance
v    MinoltaVertriebsgesellschaftm.b.H.,Seidengasse19, A-1O72Wien,Austria
.    MinoltaNederlandB.V. Groenvan Prinstererlaan '114AmstelveenNederland
     MinoltaHong Kong Limited,49 ChathamRoad, Kowloon, Hong Kong
     MinoltaSingapore(Pte) Ltd., Chin SweeTower,52-E,Chin SweeRoad,Singapore3
tr
F


                                                                                                                                            .  *'.U I
View original page 16Related documents and language editions

MinoltaPDF
Minolta Electronic Power Winder
User manual
7 pages · EnglishRead →

MinoltaPDF
Minolta MD-90 text
User manual
27 pages · FrenchRead →

MinoltaPDF
Minolta Motor Drive MD-90
User manual
26 pages · FrenchRead →
MinoltaPDF
Minolta Auto Winder G
User manual
25 pages · German, French, SpanishRead →
MinoltaPDF
Minolta MOTOR DRIVE 1
User manual
29 pages · German, French, SpanishRead →
MinoltaPDF
Minolta Power Grip 2 Set
User manual
22 pages · German, French, SpanishRead →
From the M. Butkus archive. Original publisher and archive notices are retained.
Check the model and edition against your equipment.
PDF verified 2026-10-10.