Camera accessories
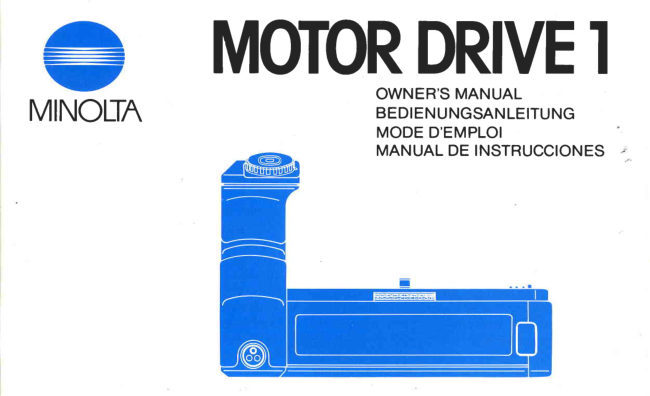
Minolta MOTOR DRIVE 1 User manual
User manual for Minolta MOTOR DRIVE 1. 29 pages in German, French, Spanish. Read the original PDF, download or print a copy without registration.
29 pagesGerman, French, Spanish1.7 MB PDF
Loading your manual…Open PDF directly
Document details
- Brand
- Minolta
- Model / document
- Minolta MOTOR DRIVE 1
- Document type
- User manual
- Language
- German, French, Spanish
- Pages
- 29
- File size
- 1.7 MB
- Category
- Camera accessories
- Document date
- Not specified in catalog
Search available document text
Find a term, then jump to its page in the original PDF. Image-only pages may not be searchable; check the PDF for exact wording and diagrams.
Page 2 · Read text
MOTORDRIV                             OWNER'SMANUAL
                              BEDIENUNGSANLEITUNGMINOLTN
                          MODE D'EMPLOI
                            MANUALDE INSTRUCCIONES
View original page 2Page 6 · Read text
Specially designed for  the  Minolta       Der MotorantriebMinolta Motor-Drive
x-700, x-500, x-570,x-300,X-370and    1 wurde speziellfi.irdem Minolta-Kamera
XG-M cameras,your Motor Drive 1 is     x-700, x-500, x-570, x-300, X-370 und
extremely  light-weight, compact,  and    XG-M entwickeltund ist duBerstleicht
efficient. lt attaches quickly and simply    und kompakt sowie sehr leistungsstark.
to the camera body without any caps or     Er  ldBt sich schnell und einfach am
coversto remove or store away.            Kameragehaiuse montieren,   ohne
   The Motor Drive 1, with only slight     irgendwelche Abdeckungen abnehmen
pressure on  either  of  its two  Minolta    und wegpackenzu miissen.
exclusive touch switch/operating buttons,       Bei nur leichtemDruck auf einender
advancesthe film and resets the shutter     beiden  exklusiven M inolta  ,,touch-
fbr the next exposure automatically for     switch"-Auslosertransportiertder Motor-
either single-frameor continuous.opera-     drive 1 sofort nachBelichtungsendeauto-
tion up to 3.5 frames per second, stop-     matischden Film weiter und spanntden
ping automatically at  the end of  thd     VerschluB- sowohlim Einzelbildbetrieb
cartridge. A convenient LED advisesyou      als auch im Dauerlaufbis zu 3,5 Bilder
the motor drive is advancingor the film     pro Sekunde.Am Filmendeschaltetsich
roll has come to a.n end, and film can be     der Motor automatischab. Die praktische
rewound and reloaded with  the motor     Leuchtdioden-Anzeigeam Motor-Drive1
drive attached.                              signalisiertden Filmtransportund das
  The  powerful  and  highly  eff icient     Filmende.Fi.irdie Ri.ickspulungund das
corelessmicromotor can wind more than     Einlegen eines neuen Films kann der
View original page 6
Page 7 · Read text
100 rolls of film per chargewith Ni-Cd     Motor-Drive 1 an der Kamera montie,rt
cells;standardalkalineor sealedcarbon-    bleiben.  Der  leistungsfdhige, kernlose
zinc penlightbatteriescan alsobe used.      Mikromotor mit seinem hohen Wirkungs-
   Before using your Motor Drive 1 for     grad zieht pro NC-Akkuladung mehr als
the first time, pleasereadthis manualall    100 Filme durch. Es lassensich nicht nur
the way through to acquaint yourself    aufladbare NC-Akkus, sondern auch jede
with the unit, its partsand features.This     Art  von  Mignon-Trockenbatterien ver-
way, you can realizethe potentialof your    wenden.
Minolta Motor Drive 1 right from the       Bevor Sie den Motor-Drive 1 zum
start.                                      ersten Mal benutzen, lesenSie bitte diese
                                        Bedienungsanleitungsorgfiiltig und voll-
  Throughoutthe text you will find a      stiindiE durch, damit Sie mit dem Gerdt
seriesof numbers and letters. Each of     und seinen Bedienungselementenvertraut
these refersto a picture on the fold-out    werden. Auf diese Weise werden Sie das
pages.                                                volle  Leistungspotential des  Minolta
                                          Motor-Drive 1 von Anfang an erkennen
                                       und ausschopfen.

                                            lm Text finden Sie bestimmte Zahlen
                                      und Buchstaben,die sich jeweils auf eine
                                         Abbildung  auf  den  herausklappbaren
                       www.orphancameras.comSeiten beziehen.
View original page 7Page 9 · Read text
T                   tr
 NAMES OF PARTS               BEZEICHNUNGENDER TEILE

 (A-1)  Touch switch/operating button                       ( A - 1 ) , , t o u c h - s w i t c h " / A u s l i i s e r
          (for horizontal operation)                               (fur Ouerformathaltu ng)
  lA-21  Selectordial ("S", "OFF",  "Hi", and          lA-2!.  Hauptschalter(mit Positionen ,,S,,,
        "Lo"  indications)                                                                , , o F F " , , , H i , , u n d , , L o , ' )
 (A-31 Attach ing screw                            {A-3)  Befestigungsschraube
 (A4)  G r i p                                        (A-4)  G r i f f
  ( 4 6 )  Battery holder                             (A-5)  Batteriehalter
 (A-6)  Battery-holder releases                     (A-6)  Batteriehalter-Entriegelung
 (A-7) Tripod socket (on bottom of unit:           (A-71  Stativgewinde(an Unterseite,
         not shown)                                         nicht sichtbar)
 (A€)  Cable-MDterminal                          (A-8)  M D-Kabel-AnschluB
 (A-9)  Selectordial release                    (A-e) H au ptschalter-Entsperrung
 (A-10) Film-advancecoupler                                     ( A - 1 0 ) Fi lmtransportkupplung
 (A-11 I Connectionterminals                                    ( A - 11 ) AnschluBkontakte
  (A-12l. Guide pins                                                      ( A - 1 2 ) F uhru ngsstifte
  ( A - 1 3 ) P i l o t l i g h t                                                      ( A - 1 3 ) Kontrollampe
 (A-14) Film-rewindslide                                           ( A - 1 4 ) R i.ickspul-Entsperrschieber
 (A-15) Touch switch/operatingbutton                       ( A - 1 5 ) ,,touch -switch "/Ausl ijser
          (for vertical operation)                                            (fijr Hochformathaltung)
 (A-16) Lock switch                             (A-161 Sperrschalter
 (A-17) Rewind-sliderelease                       (A-17) Arretierknopf fiir Ruckspulentsperrung


                       www.orphancameras.com
                                                                                                                                                                                  i  '
View original page 9Page 10 · Read text
C            .ffi                    il
BATTERIES                     BATTER I EN
   Your  Minolta Motor Drive 1 is powered by         Der Minolta Motor-Drive 1 wird von acht
eight AA-size (penlight) batteries'These may be      Mignonbatterien (Kohle-Zink- oder  Alkali-
of   sealed  carbon-zinc,  alkaline-manganese    Mangan-Batterien) oder  gleichgroBen  auf-
("AM"  or "alkaline"), or rechargeablenickel-      ladbarenNC-Akkus mit Strom versorgt.
cadmium ("Ni-Cd" or "nicad") type cells.
                                                Einsetzender Batterien
Installing batteries                                       1. Wdhrend der  Hauptschalter lA'21  in der
1. With the selector dial (A'2) in the "OFF"          Position OFF  steht (Gl, gleichzeitig mit
    position (G), press in with your thumb and       Daumen und  Zeigefinger beide  Batterie-
    forefinger at the same time both battery-         halter-Entriegelungen(4-6) eindriicken und
   holder releases(4-6), and remove the holder        den Batteriehalterherausziehen(Bl'
      ( B ) .                                                 2. Acht Mignonbatterienoder NC-Akkus mit
2.  Insert eight AA-size batterieswith their plus        den Plus (+) und Minus (-)  Seiten gemiiB
    (+) and minus (-)  ends positioned as indi-        den  Markierungen im  Batteriehalter ein-
   cated inside the battery holder (C).                 setzen (C).
3. Reinsert the holder so that its white dot is       3.  Batteriehalter so ins Motor-Drive-Gehduse
   aligned with the white dot on the body of          einschieben, daB die weiBen Punkte iiber-
    the motor drive (D). Slidethe holder all the        einstimmen (D); dann eindrijcken bis zum
   way  into the body  until  it snaps securely       E i nrasten.
    into place.
                                          A C H T U N G
CAUTIONS                                       o Wird  der  Batteriehalter nicht  richtig  ein'
 o   lf the battery holder is inserted incorrec'tly, it           gesetzt, rastet er nicht ein, und der Motor-
     will not snap shut and the motor drive will          Drive  fu nktioniert   nicht.  Niemals  mit
                                                        Garualt eindriicken!
View original page 10Page 11 · Read text
1 0        not operate. Never force it into place.            o  Alle  Batterien  oder Akkus  sollen immer
       e  Mixing of battery types, or using exhausted          gleichzeitig ausgetauscht werden. Kommen
           batteries with fresh ones could cause battery          Batterien   unterschiedlichen  Typs   oder
         leakageor bursting.                              Ladezustands zusammen,  ist die  Leistung
       o   lf  batteries are incorrectly  inserted in the          schlecht, und es besteht Auslauf- oder sogar
           holder, leaking or bursting of the batteries        Explosionsgefahr.
          could result.                                   o  Falsch  in  den  Batteriehalter  eingelegte
       o When using Ni-Cd cells,chargethem only in          Batterien  kiinnen  auslaufen  oder  sogar
            their  designated chargers. Never  try   to          platzen.                                                                                                                                                  ,         recharge  alkaline-manganese  or   sealed      o NC-Akkus  diirfen  nur  in den zugehiirigen
          carbon-zinc batteries.                            Ladegerdten aufgeladen werden. Versuchen
                                                             Sie niemals, Trockenbatterien aufzuladen!
     NOTES
       o When film advance becomes too slow or     A N M E R K U N G E N :
         stops completely, turn the selector dial to      o Wird der Filmtransport auffallend langsam
         "OFF"  and replace the batteries. Batteries       oder bleibt der Motor ganz stehen, drehen
         can be replaced with  the Motor  Drive 1        Sie  den  Hauptschalter auf  OF F  und
          attached to the camera.                          erneuern  die   Batterien.  Die   Batterien
       o   lf the Motor Drive 1 is not to be used for         kcinnen ausgewechseltwerden, wdhrend der
         two or more weeks, the batteries should be        Motor-Drive an der Kamera montiert ist.
         removed.                                      o Wird der Motor-Drive 1 ldnger als etwa 2
                                               Wochen nicht benutzt,  ist es ratsam, die     Co ld.weather operat ion                                                             Batterien (Akkus) herauszunehmen.          Batteries generally decrease in capacity as
      ambient temperaturesdrop, and the amount of                                                            Keltebetrieb
        film  and speed at  which  the  motor  drive                                                             Batterien  tendieren  generell  dazu,  bei      advances will drop accordingly. Alkaline and
                           www.orphancameras.comniedrigen  Temperaturen  in  der  Kapazitdt
                                                                                                                                                                                                                  ;;.;l;i$
View original page 11Page 12 · Read text
I                                         il
1 2    sealed carbon-zinc batteries can be used in      nachzulassen-  die Anzahl der vom Motor-
      temperatures down to 0oC 132"Fl, while nickel-      Drive pro  Batteriesatz transportierten Filme
     cadmium batteries can be used in temperatures      verringert sich entsprechend.Trockenbatterien
      as low as -20oC  (-4"F).    lt  is recommended     konnen bei Temperaturen bis 0"C verwendet
       that  the  motor  drive be loaded with  fresh      werden, NC-Akkus  bis  -2O" C.   Fiir  einen
      Ni-Cd batteries for use in cold weather (espe-     geplanten Kdltebetrieb sollte der Motor-Drive
        cially below 0oC), and that you carry a set of       mit  frischen Batterien oder  voll  geladenen
            f resh spares  in  a warm,  inside pocket   f or     NC-Akkus bestiickt werden. AuBerdem ist es
      replacement if necessary during cold-weather     empfehlenswert,  einen  weiteren   Batterie-
       use.                                            (Akku-)satz in einer warmen Innentaschezum
                                                    Auswechseln m itzufi.ihren.


                               MONTIERENUND ABNEHMENDES
    ATTACHING AND REMOVING       MOTORANTRI EBS

      To attach                                       Montieren
        1. Turn selector dial to the "OFF"  position,       1. Mit dem Hauptschalterauf OFF bringt man
        and align the Motor  Drive  l's guide pins          die Fi.ihrungsstifte(A-12) mit den Buchsen
         (n^-121and attaching screw (A-3) with the               .  im  Kameraboden und  die  Befestigungs-
          locating holes and tripod  socket on  the         schraube (A-3) mit dem Stativgewinde der
         bottom of the camera (E)                      Kamera in Ubereinstimmung{E)
       2. Turn  the  attaching screw's knurled  ring        2. B ef estigungsschraube im   Uhrzeigersinn
         clockwise until the motor drive is securely        drehen  (von  unten  betrachtet), bis  der
            in place (F-l)                                     Motor-Drive fest sitzt (F-l)
                                                                                                                                                                         'Jb
View original page 12Page 13 · Read text
,Mt_                                 il
*oillEh""                                   A N M E R K U N G
          attaching the motor  drive to  your         Beim Montieren des Motor-Drive an die
camera, make sure nothing gets lodged between     Kamera achten Sie darauf, daB nichts zwischen
the  camera and  motor  drive, such as the     Kamera und Motorantrieb eingeklemmt wird
camera's carrying-strap rings. Also make sure      (wie z.B. der rechte Ring fi.irden Trageriemen).
the location holes and drive coupler are free of      Achten Sie auch darauf, daB die AnschluB-
foreign matter. Clean the  motor  drive and      kontakte und die Filmtransportkupplungnicht
camera electrical terminals with  a clean dry      verschmutztsind. ReinigenSie die elektrischen
cloth to assureproper contact.                     Kontakte am  Motor-Drive und am Kamera-
                                           boden mit einem sauberen,trockenen Tuch, um
                                                 einwandfreie Kontaktgabe sicherzustellen.
                                                                                                t                       AbnehmenTo remove
 1. Turn the selector dial to the "OFF"  posi-       1. Mit dem Hauptschalterin der.OFF-Position
    tion, and turn the attaching screw's knurled         wird die Befestigungsschraubeentgegendem
    ring counterclockwise out  of the camera's        Uhrzeigersinn (von unten betrachtet) aus
    tripod socket G-21.                        dem  Stativgewinde der  Kamera heraus-
2. Separate the  camera and  motor   drive,          gescliraubt lF-z!'.
   making  sure the  guide  pins  are drawn       2. Trennen Sie Kamera und Motor-Drive und
    straight out of the locating holes.                  achten Sie darauf, daB die Fiihrungsstifte
                                                gerade aus den  kameraseitigen Buchsen
CAUTION                                        herausgezogenwerden.
   When  attaching  or  removing  the  motor     A C H T U N G
drive, always be sure the selector dial is in the        Beim Montieren und Abnehmen des Motor-
"OFF"  position. lf  it is in one of the operating                                                  Drive muB dessen Hauptschalter immer in der
positions, the camera or motor drive could be      Position OFF stehen, da anderenfalls Kamera
damaged.                www.orphancameras.comoder Motor-Drive beschddigt werden konnten.
                                                                                                                                                                                                                                            , d6
View original page 13Page 14 · Read text
.,il  x
   OPERATION                   DER MOTORBETRIEB
1 6      The Motor Drive 1 can be actuated in several        Der  Motor-Drive  1  ldBt  sich  auf  ver-
     ways:  by  either  of   its two  touch  switch/      schiedene Weise in Betrieb setzen: Entweder
      operating buttons,  by  the  camera's touch       mit einem der beiden,,touch*witch"-Auslciser
      switch/operating button,  by  a remote cord,     am Griff , mit dem ,,touch-switch"-Auslciserder
      cable release,or the Minolta WirelessController      Kamera, mit einem Auslosekabelbzw. Draht-
       lR-l  Set connected to the camera's remote-      auslcjser an  der Kamera, mit dem  Minolta
      releasesocket, by the operating button of Power      Wireless Controller lR-1  Set, der  mit dem
      Grip 2 when connected by Cable MD  to the       Ausloser*teckdoseder Kamera verbunden wi rd,
      motor  drive's Cable-MD terminal, or by the       mit einem Ausloser von Power-Grip 2, wenn es
      Multi-Function Back used on the X-700, X-500,      durch ein MD-Kabel mit dem MD-Kabet-An-
       or X-570.                                         schluB des Motordrives verbunden wird, oder
         However, to  use any of these the selector       mit dem Multi-Function Back fi.ir den X-700,
       dial on top of the Motor Drive 1's grip must       X-500, oder X-570.
        first  be  set  at  one  of   its  three  operating             Fiir  den  Motorbetrieb muB  zuerst der
      positions ("S",  "Lo",  or  "Hi")  (H,  l, J). To       Hauptschalter an der Oberseite des Griffs auf
      turn  the  dial, depress and  hold down  the       eine der drei moglichen Funktionen ,,S", ,,Lo"
      selector-dialrelease (G-1) and turn the dial to       oder ,,Hi" (H, l, J) eingestelltwerden. Um den
      the desired operating position (G-2). When the       Hauptschalter  in  die  gewiinschte Position
      desired operating indication is aligned with the      drehen zu konnen (G-21, halten Sie die Haupt-
      white index line on the grip, take your finger      schalter-Entsperrunggedrlickt (G-1]. Steht die
       off  the selector-dial release and the dial will       gewiinschte Funktionsbezeichnung am weiBen
      lock  in  place. The  dial  locks  at  all  four        Indexstrich, lassen Sie den Entsperrknopf los
      indication positions, and the release must be      und  und  rasten den  Hauptschalter in  der
     used to move the dial from one position to        richtigen Position ein.  Alle  vier markierten
      another.                                          Positionen sind arretiert und zum Drehen des
                                                      Hauptschalters muB  jeweils die  Entsperrung
                                                                gedriickt werden.
View original page 14Page 15 · Read text
1 8     Sing le-f rame operation                        E inzelbildbetrieb
        To  take a  single picture each time  the           Fijr den Einzelbildbetriebwird der Haupt-
      operating button  is depressed,push and hold      schalter nach Drijcken der Entsperrungin die
     down the selector-dialreleaseand turn the dial      Position ,,S" (,,S" = single= Einzelbild)gedreht
        until the  "S"  indication is aligned with the     und dort eingerastet(H). War der Film nicht
      white index mark (H).  lf the camera is not     schon transportiert, lauft sofort der motorische
      cocked, the f ilm will be automatically advanced     Filmtransport, sobald der Hauptschalter von
     when the selectordial is moved from "OFF"  to      der OFF-Stellung in die ,,S"-Stellunggedreht
       the "S" position. The shutter will now fire once      wird. Bei jedem Druck auf einen Ausloserwird
      each time the operating button is pushed, and      der VerschluBeinmal ausgelost,der Fitm aber
       the film will advance one frame when pressure     erst dann motorisch weitertransportiert, wenn
         is removed from  the button. The pilot  light    man den  Ausloser wieder  losldBt. Wdhrend
      (A-13, M-1) on the back of the motor drive will      jeden Filmtransportsleuchtetdie Kontrollampe
     come on during each advancecycle.                 (A-13, M-1) an der Riickseitedes Motor-Drive.
                                                    -'                 Dauerlauf
                                                                          Fijr den Dauerbetrieb(Belichtungund Film-
      Continuous operation                               transport abwechselnd, solange ein Ausloser
         For continuous film advance and shutter      gedriickt wird) dreht man, nach Driicken der
       operation, depressand hold down the selector-     Entsperrung,  entweder  die   Hauptschalter-
       dial releaseand turn the dial to align the "Lo"      Markierung ,,Lo"  (ll  frir bis zu 2 Bilder pro
       indication with  the white index  (1, for  a     Sekunde oder die Markierung ,,Hi"  (J) firr bis
      framing rate up to 2 frames per second,or "Hi"      zu  3,5  Bilder pro Sekunde an den wei8en
         (Jl for an up to 3.5 frames-per-secondrate. lf      Indexstrich. War der Film nicht schon trans-
       the  shutter  is not cocked, the  film  will be       portiert,  lduft  sofort  der  motorische Film-
      automatically advanced when the selector dial      transport, sobald der  Hauptschalter aus der
        is moved from "OFF"  to either "Lo"  or "Hi".      StellungOFF gedrehtwird.                           www.orphancameras.com
                                                                                                                                                                                                                                                                                              *............
View original page 15Page 16 · Read text
."il
   The pilot light will come on briefly each         Bei  jedem  Filmtransport  leuchtet  die
time the film is advanced.                       Kontrollampekurz auf.                               's   The Motor  Drive 1   continuous framing         Die  tatsdchlich erreichbare Bildfrequenz
rate  will  also be determined by  the  auto-      h6ngt u.a. von der automatisch gesteuertenoder
matically or manually set shutter speed.This is     manuell eingestelltenVerschluBzeitab. Grund-
because the motor  will  not advance the film       sdtzlich beginnt der Motor-Drive 1 erst nach
until the exposure of a frame is complete. For      Belichtungsendemit dem Filmtransport. Aus
example,with the selectordial set to "Hi" and     diesem Grund konnen bei ldngerenVerschluB-
a shutter speed of  1/60 sec. or slower, the      zeiten als 1/60 s die 3,5 Bilder pro Sekunde
framing rate of the motor drive will be lessthan       nicht  erreicht werden  -  die  Bildfolge wird
3.5 frames per second. Therefore, to take full      entsprechend langsamer. Um  die E instellung
advantage of the Motor Drive 1's "Hi" mode        ,,Hi"  voll  nutzen zu k6nnen (und korrekte
(and to assureproper automatic exposureswith      automatische Belichtung sicherzustellen mit
the XG-M), a shutter speed of  1/60 sec. or     den XG-M), muB die VerschluBzeit1/60 s oder
higher should be usedwhen making continuous       kiirzer sein. Bei ldngeren VerschluBzeiten als
automatic exposures.When speedsbelow 1/60      1/60 s  sollte wegen der Verwacklungsgefahr
sec. are used, extra care should be taken to      besonders auf ruhige Kamerahaltung geachtet
avoid camera movement  that  could  cause     werden.
blu rred pictu res.                       ACHTUNG
C A U T l O N                                   Wdhrend des Motorlaufs auf keinen Fall den
   Do not remove the battery holder while the       Batteriehalter herausziehen,da hierdurch der
motor drive is operating, as this could interrupt      Ablauf  gestort  wird.  Sollte  das  trotzdem
the advancingcycle. lf this should happen and      passierenund nach dem Wiedereinschiebendes
replacing the holder does not restore motor       Batteriehalters der  Motorantrieb nicht funk-
operation, cock  the  shutter once manually      tionieren, betiitigen Sie  einmal den  Film-
using the film-advance lever. This will recycle     transporthebel von Hand. Dadurch wird  der
the motor drive, and normal operation can be      Funktionsablauf normalisiert und der Motor-
resumed.                                             betrieb kann fortgesetzt werden.
                                                                                                                                                                                                        ;::u*aai
View original page 16Page 17 · Read text
x    .MEw]            il
22   NOTES                                   A N M E R K U N G E N :
       o Keep the Motor Drive 1's selectordial at the       o  Bei Nichtgebrauch des Motorantriebs stellt
         "OFF"  position when the drive is not being       man den  Hauptschalter am  Motor-Drive-
         used.                                G r i f f a u f O F F .
       o  During motor-drive operation, the camera's      o Wdhrend  des  Motorbetriebs  sollte  der
         advance lever should be kept folded to  its         Filmtransporthebel der Kamera  in seiner
           rest position.                                    Ruhestellung (angelegtam Kameragehduse)
       o When  the  XG-M's shutter-speed/function        verbleiben.
          selector is set at "8", the camera'soperating      o Steht das VerschluBzeiten-und Funktions-                                f
          button  or remote-releasesocket should be         rad der Kamera XG-M auf ,,8", muB zur
         used to  fire the shutter.  lf  either of the        Auslosung der  Kamera-Auslciseroder  ei n
         motor drive's operating buttons are used,         Draht- bzw. Fernausloserbenutzt werden.
          the shutter will remain open a maximum of         Wird einer der beiden Ausloser am Motor-
        one second.                                       Drive  gedriickt,  bleibt   dei  VerschluB
                                                                   ''                                                                                            ''                  maximal eine Sekunde offen,
      Manuaf advance
        The film can be advanced manually and the       Filmtransport von Hand
       shutter  released exactly as described in  the          Selbstverstdndlich konnen  Filmtransport
      camera's owner's manual, when the motor drive      und Auslosung trotz montiertem Motor-Drive
         is attached and the selector dial is set at the      auch normal von Hand vorgenommen werden,
          " O F F " p o s i t i o n( K ) .                             wie  in  der Bedienungsanleitungzur Kamera
                It  is best however, to remove the Motor      beschrieben. Dazu muB der Hauptschalter am
       Drive 1 when  it is not being used to reduce the      Motor-Drive-Griff in der Position OFF stehen
       size and weight of the camera and facilitate          ( K ) .
      handling.                                        Normalerweisewird man jedoch den Motor-
                                                       Drive 1, wenn man ihn nicht braucht, besser
                            www.orphancameras.comvon der Kamera abnehmen, um GroBe und
View original page 17Page 18 · Read text
24     Vertical holding                                 Gewicht der Kamera zu reduzieren und die
        To  increase ease of  handling when  the     Handhabungzu erleichtern.
      camera and motor drive are held vertically, a
      secondary touch switch/operating button near
       the baseof the grip is provided.                    Hochformat-Haltung
          This  secondary  touch  switch/operating      Um  die  Handhabung bei  Hochformat-
       button  fu nctions exactly  the same as the      Haltung  der  Kamera mit  Motor-Drive zu
      camera's and the primary one on top of the       erleichtern, ist  ein  zweiter,,touch-switch"-
       grip. The only difference is the lock switch       Auslciserrechts unten am Griff angebracht.
      around its collar that permits turning it on or         Der ,,touch-switch"-Ausliiserunten am Griff
         off .                                                 funktioniert genauso wie der Ausloser an der
        To  use  the  secondary touch  switch/       Griff-Oberseite. Allerdings kann der  untere
      operating button, proceed as follows:                Ausloser mit  Hilfe seines Sperrschalters aus-
        1. Set the selectordial to the desiredoperating      geschaltetwerden.
        mode.  The  secondary  touch   switch/        Den   zweiten,  unteren  ,,touch-switch"-
          operating button activates the motor drive       Ausltjserverwendet man folgendermaBen:
          only  for  the operating mode set by the        1. Hauptschalter auf  die gewtinschte Funk-
          selectordial.                                           tionsart  einstellen. Der  zweite  ,,touch-
       2. Turn the lock switch (4-16) so  its white          switch"-Ausl6ser setzt den Motor-Drive in
         index is alignedwith the white index line on          der gewahltenFunktionsform in Betrieb.
         the motor-drive body (L).                           2. Drehen Sie den Sperrschalter(A-16) so, daB
       3. Place your   f inger on  the  touch  switch/          seine weiBe Markierung dem weiBen Punkt
         operating button  to  obtain a viewfinder       am GehdusegegenUbersteht(L).
        meter display, and depressthe button to  f ire        3.  Fiir die LEDSucheranzeigeberilhren Sie den
         the cameraand motor.                               "touch-switch" im Ausliiser nur leicht; fiir
                                                              die Aufnahme drricken Sie den Ausloser
                                                    ganz durch.
View original page 18Page 19 · Read text
T                                      ]il
26      When not using the secondarytouch switch/         Wollen Sie den zweiten (unteren) ,,touch-
       operating button, turn the lock switch to its off       svvitch" -  Ausloser nicht benutzen, drehen Sie
       position by aligning the switch's white index      den Sperrschalter mit seinem weiBen Index an
       with the red index on the motor drive body.       die  rote Markierung auf dem Gehduse. Der
       This prevents accidental firing  cf  the camera       ,,touch-switch"-Auslijser  wird  dadurch  abge-
      and battery drain.                                     schaltet  und  gesperrt  -  das h ilft  Batterie-
                                                      strom sparen und versehentlichesAuslosen ist
                                                    unmoglich.
    END OF FILM AND REWINDING                                FILMENDEUND FILMRUCKSPULUNG
       When the end of a film cartridge is reached      Am  Filmende stoppt unabh6ngig von der
       using any of the three operating modes, the      gewdhlten Funktionsform der Motor-Drive 1
      Motor Drive 1 will automatically stop and the      automatisch und  die  Kontrollampe  leuchtet
        pilot light will remain lit (M-1).                    stdndigweiter (M-1).
                                                       Der  Film  wird  folgendermaBen zurUck-
        The film should now be rewound using the      gespult:
       following procedure:                                    1. Arretierknopf der Riickspulentsperrungein-
        1. Press and hold the rewind-slide release all          driicken  und   festhalten  (M-21.  Dann
          the  way  in  (M-2), and then move  the         RUckspul-Entsperrschieber(A-14)  bis zum
          film-rewind slide (A-14) up as far as it will         Anschlag nach oben schieben(M-3).
         so (M-3).                                             2.  Riickspulkurbelder Kamera ausklappenund
        2. Unfold the camera's film-rewind crank and           in Pfeilrichtung drehen, bis der Film voll-
           turn  it  in the direction of the arrow, until         stdndig zuriickgespultist (Nl.
          the film is completely rewound (N).                3.  Rilckwand-Entsperrknopfnach oben ziehen,
        3.  Pull up on the back-cover release knob to           bis die Riickwand aufspringt (O) und Film-
         open the back (O), and remove www.orphancameras.comthe film.             patrone herausnehmen.
View original page 19Page 20 · Read text
After the Motor Drive  t has automatically       Nach dem automatischen Stop des Motor-28      stopped at the end of a film roll and the film      Drive am Filmende leuchtet die Kontrollampe
      has been removed,the pilot light will remain lit      auch weiter, wenn der Film entnommen ist,
      and  the  drive  will  not  operate. To  restore     und der Motorantrieb arbeitet nicht. Zur Wieder-
      operation,turn the selectordial f rom an operat-     aufnahme des Motorbetriebs stellen Sie den
       ing position ("S",  "Lo",  or "Hi")  to "OFF"       Hauptschalterder Motorbetriebs kurz auf OFF
     and then back to an operating position. Opera-     und dann wieder auf (,,S", ,,Lo" oder ,,Hi"l.
       tion can also be restoredby manual cocking of      StattdessenkcinnenSie auch den Filmtransport-
      the  fi lm-advancelever, or turning the motor      hebel einmal von Hand betdtigen oder den
       drive's selector dial to  a different operating     Hauptschalterdes Motor-Drive kurz in die OFF-       /
      position.                                         Positiondrehen.
        Excesstension on the film or weak batteries        LdBt sich der Film zu schwer transportieren,
     may cause the motor drive to stop in mid-cycle        ist der Filmtransport aus irgendeinem Grund
      before the end of the film roll; the pilot light      behindert oder sind die Batterien zu schwach,
        will also remain lit. Should this happen, turn       schaltet sich der Motor-Drive sicherheitshalber
      the selector dial to "OFF"  and then ba'ck to      mitten im Filmtransport ab. Die Kontrollampe
     one of the three operating positions.  lf you       leuchtet dabei weiter.
      hear the motor drive cycle and the pilot  light           In einem solchen Fall stellenSie den Haupt-
     goes off,  continue normal operation. But,  if      schalter des Motor-Drive auf OFF und dann
     you hear the motor drive cycle and the pilot      wieder zuri..ickauf die gewtinschte Funktions-
       light remains  lit,  turn  the  selector dial  to       form. Horen Sie den Motor laufen und erlischt
     "OFF" and advancethe film manually. lf you       die  Kontrollampe,  ist  die  Normalfunktion
      cannot hear the motor, or  it is very faint, the      wieder hergestellt.Horen Sie jedoch den Motor
      batteries are too weak and should be replaced      laufen und die Kontrollampe leuchtet weiter,
      with a complete set of fresh cells.                 drehen Sie den Hauptschalter des Motor-Drive
                                                        auf OFF  und transportieren den  Film von
                                                 Hand. Konnen Sie den Motorlauf nicht oder
View original page 20Page 21 · Read text
,#lEffi                                          ilx
CAUTION                                         nur  schwach horen,  mi.issen die  Batterien
   Never turn the selector dial back and forth      erneuert werden.
between "OFF"  and an  operating position     A C H T U N G
("S", "Lo",  or "Hi"l  repeatedlyat the end of a         Hat  der  Motor-Drive am Filmende abge-
film roll. This could damagethe film.                  schaltet, darf der Hauptschalternicht mehrmals
                                            zwischen OFF und den anderen Einstellungen
FLASH OPERATION                              (,,S", ,,Lo" oder ,,Hi") hin und her gedreht
   For flash synchronization with  the Motor      werden, da sonst der Film besch6digt werden
Drive  1, Minolta makes four dedicated flash     kon nte.
units: the Auto  Electroflash 360PX, 280PX,    BLITZBETRIEB
32OX, and 200X. As the touch switch/operat-            Fiir die Synchronisationvon Blitzlicht mit
ing buttons of the Motor Drive 1 are identical    dem Motor-Dauerlauf eignen sich speziell die
in type and functions to the camera's,the dedi-      Minolta-Blitzge16te Auto-Electroflash 360PX,
cated flash functions (automatic X-sync setting     32OX,280PX und 200X. Da die ,,touch-switch"
and flash-ready signal in the X-700, X-500,      Ausloser am Motor-Drive 1 funktionsgleich mit
X-570, and XG-M viewfinder, and Minolta    dem Kamera-Auslcisersind, sieht man auch wie
Direct  Autof lash Metering with  the  X-700,     gewohnt das Blitzbereitschafts-Signalim Sucher
X-500, or X-570 and 360PX or 280PX) of these     der X-700, X-500, X-570 und XG-M (blinkende
accessory units will  still operate. Flashes-per-    LED) und die kamera schaltet sich bei Blitz-
second rates and operation detailsare as follows:      bereitschaftautomatisch auf X-Synchronisation
                                            um. Bei der X-700, X-500 und X-570 in Verbin-
With Auto  Electroflash 360PX, 280PX, Power     dung   mit  dem  Auto-Elektroflash  360PX,
Grip 2                                 28OPX blinkt zusdtzlich nach dem Ziinden des
   See respective owner's manuals for opera-      Blitzgerdtes die  Blitzbereichskontrolle. Nach-
tion procedure and applicable rates with  the      stehend Einzelheiteniiber den Blitzbetrieb.
Motor Drive 1.                                        Mit dem Auto-Electroflash 32OX
                       www.orphancameras.comlst  der  Auto-Electroflash 320X  mit NC-
View original page 21Page 23 · Read text
T                              I
34     With Auto Electroflash 200X                          Mit dem Auto-Electroflash 2O0X
        When the 200X   is used with  the Motor          Bei  Verwendung  des  Auto-Electrof lash
       Drive 1 for successiveflash operation, set the     20OX zusammen mit dem Motor-Drive 1  ftir
       selector dial to "Lo" and the mode selector of      Motor-Blitz-Serien darf der Hauptschalter des
       the  flash to  M-Lo (WINDER SYNC.). This      Motor-Drive nur auf ,,Lo" (entsprechendbis zu
       provides  up   to  2    f rames-per-second  f lash      2 Bilder pro Sekunde) eingestellt werden. Der
       synchronization. Be sure to  use only  fully      Funktionswdhler  des  Blitzgerdts wird  auf
      charged Ni-Cd batteries in the flash. lf partially      ,,M-Lo" (WINDER SYNC.) geschoben. Ver-
       charged or other types of batteries are used, the     wenden Sie nur voll aufgeladeneNC-Akkus im          /        flash may not synchronize with the motor drive       BlitzgerSt. Sind die NC-Akkus teilweise ent-
      and underexposedpictures could result.             laden oder befinden sich Trockenbatterien im
                                                               Blitzgerdt, ist es moglich, daB das Blitzgerdt
                                            dem Motor-Drive nicht mehr folgen kann (Blitz-
    CABLE.MDTERMINAL                      Aussetzer)  oder  daB  unterbelichtete  Auf-
                                              nahmen entstehen.
          Located at the base of the Moior Drive 1's      Mit der Auto-Electroflash 360PX und 280PX
        grip  is a threaded electrical terminal for con-          Bitte  lesen Sie den entsprechenden Ab-
       necting the motor drive to the Power Grip 2       schnitt in der Bedienungsanleitungvom Auto-
       using Cable MD to control the viewfinder LED       Elektroflash 360PX, 280PX.
       readout, release the shutter, and actuate the                                                               Mit dem Power-Grip 2
       motor  drive from  the power  grip's operating                                                                     Bitte  lesen Sie den entsprechenden Ab-
       button. When Cable MD  is not connected, the       schnitt in der Bedienungsanleitungvom Power-
       terminal's screw-in cap should be left in place                                        G r i p 2 .
        to avoid dirt or moisture entering the socket.
                                 MD-KABEL.ANSCHLUSS
                             www.orphancameras.comVorn,  unten am  Griff  bef indet sich ein
View original page 23Page 24 · Read text
:i                                                 il
36  ACCESSORYNI-CD CHARGER NC.2       elektrischerAnschluB mit Schraubgewinde,an
    WITH BATTER IES (P)                  dem iiber das zusdtzlicherhdltliche MD-Kabel                                                         eine Verbindung zum Power Grip 2 hergestellt
                                                              wird. Vom Ausloseknopf am Power Grip 2 l6Bt         Nickel-cadmium    batteries   are   usable                                                          sich dann die LED-Anzeige im Sucher ein-       indefinitely  through   recharging, and  are                                                        schalten und der VerschluB sowie auch der        virtually unaffected by usual low temperatures.                                                   Motor Drive 1 auslosen.     A compact charger and set of four  batteries,
       plus extra cells for use with your Motor Drive 1,
      are available as accessoriesfrom  Minolta. This    ZUSATZLICHESAKKULADEGERAT
      can charge either two  or four  batteries in an     NC.2 MIT NC.AKKUS (PI
      eight-hourperiod with lighted LED's indicating        NC-Akkus konnen immer wieder neu auf-
      proper installation and charging. The charger is      geladenwerden und sind unempfindlicher gegen
       available in Edison (American-type)plug model       niedrige  UmgebungstemperatuFen. Minolta
        for direct connection to any 1 1 $volt socket or         liefert als Zubehijr ein Ladegerdt-Setmit vier        in corded models with Siemens(European-type)                                                NC-Akkus und weitere Akkus, passend in den
     and SAA  (Australian-and New Zealand-type)     Motor-Drive 1. lm Ladegerdt konnen entweder      plugs              for                230-volt                          alternating current of SOHz                                                      zwei oder vier                                                              Akkus innerhalb                                                                               von                                                                                          8 Stunden               (cycles)       or 60Hz                        only.                                                              gleichzeitig                                                                aufgeladen                                                                          werden.                                                                                 Dabei                                                                                                  signa-
                                                                 lisierenzwei Leuchtdio$en das richtige Einlegen
                                                    und  Laden. Das Ladegeriit ist verfiigbar ent-
                                                  weder als Steckermodell mit amerikanischem
                                                    Stecker  (DirektanschluB an   115   Volt-
                                                   Steckdose)   oder   als  Kabelmodell  mit
                                                    europdischem oder SAAStecker   (letzterer fiir
                                                        Australien und Neuseeland)zum AnschluB an
                                                  Wechselstromum 230 Volt mit 50 oder 60 Hz.
View original page 24Page 25 · Read text
L*_                                il
38   TECHNICALDETAILS             TECHNISCHEDATEN
                  Type:  Automatic    f ilm-advancing                  Typ:  Automatischer   Filmtrans-
                        detachable motor drive for                         Portmotor zum AnshluB an
                       use with  Minolta X-700,                           die X-700, X-500, X-570,
                     x-500,  x-570,  x-300,                       X-300, X'370  und XG-M'
                       X-370 and XG-M cameras                      Kamera-gehduse.
               Function:  Operates  camera's  film-            Funktionen:   Betdtigt den Filmtransport
                      adva n ce /sh u tt er-cocking                     und VerschluBaufzug;drei               I
                      mechanism with  four-posi-                       .           F u n k t i o n s a r t e n ;    z w e i                                    i
                               tion  selector dial and two                                ,,tou ch -sw i tch "-A u sliise r.             ^ I
                         touch switch/oPeratingbut-               Bildfolge:  Bis  zu  3,5   Bilder  Pro
                          tons                                      Sekunde  je  nach  auto-       Film-advancerate: Up to 3.5 frames per sec. is                       matisch   oder   manuell     t
                          possible  depending  on                          eingesteller VerschluRzeit.                          automatic- or manually set                      Drei      F unktionsarten          l
                            shutter speed; three operat-                            (arretierte Einstellung am
                             ing modes set by selector                        Hauptschalter):
                              dial  with  click-stops and                       Funktion ,,S" = Einzelbild-
                          lock                                                  betrieb
                           "S" mode:   single frame                        Funktion ,,Lo" = bis zu 2
                           "Lo" mode: up to 2fps                              Bilder pro Sekunde
                             "Hi" mode:  up to 3.5fps                         Funktion ,,Hi" = bis zu 3,5
         Film rewinding: Manual  rewinding  using                          Bilder pro Sekunde
                           film-rewind    slide   and       Filmriickspulung: Manuelle    Rtickspulung;
                         camera's  rewind   crank;                   R ii c ksp u le ntsPerrschieber
                              film can be rewound and                  am Motor-Drive; Film kann
                            www.orphancameras.com        zurilckgespult und heraus-
View original page 25Page 26 · Read text
I     $M                       il
                 unloaded without removal                    genommen werden bei an-
                      of motor drive.                                  gesetztem Motor- Drive.
  Usableshutter                                Verwendbare
          speeds: Stepped or automatic step-       Verschlu Bzeiten: Stufenlose  oder   stufige
                    lessspeeds1 through 1/1000                         Einstellung zwischen 1 s
                   sec. and "8";  with XG-M,                         u n d  1 / 1 0 0 0 s  u n d    , , 8 " .
                   "B"  setting for long time                         Einstellung ,,B" wird  bei
                 exposures  by   use   of                          der XG-M  tiber Kamera-
                 XG-M's  operating button                        Ausloser oder Fernauslose-
                     or remote-releasesocket                         anschluB der XG-M aus-         F
          Power:  Eight  AA-size  (penlight)                            gel<ist.
                      cells connected in series (=        E nergiequellen: Acht Mignonbatterien (AA)
                   1 2 v l                                                        in Serienschaltungl= 12 Vl .
      Drive motor:  Coreless-type qlicromotor          Antriebsmotor:  KernloserMikiomotor.
Usable exposure-                                MoglicheBelich-
    control modes: Automatic or manual            tungsfunktionen: Automatisch oder manuell.
Film-cartridge                                              Batterie-
winding capacity*: Successive   36-exposure         Ausnutzung*: Aufeinanderfolgende Film-
                        rolls  per  set  of  fresh  or                        patronen (36 Aufnahmen)
                        fully charged cells at 2OoC                         pro    f rischem  Batteriesatz
                               ( 6 8 ' F )                                                                oder voller Akkuladung bei
                  Alka line-manganesel                          20"c:
                                approx. 100                     A I k a l i - M a n g a n - B a t t e r i e n
                 Sealedcarbon-zinc:                              etwa 100
                                 approx.  80                         Kohle-Zink-Batterien etwa
                 Nickel-cadmium:                                80
                                approx. 100                     NC-Akkus etwa 100
View original page 26Related documents and language editions
MinoltaPDF
Minolta Auto Winder G
User manual
16 pages · EnglishRead →
MinoltaPDF
Minolta Electronic Power Winder
User manual
7 pages · EnglishRead →

MinoltaPDF
Minolta MD-90 text
User manual
27 pages · FrenchRead →

MinoltaPDF
Minolta Motor Drive MD-90
User manual
26 pages · FrenchRead →
MinoltaPDF
Minolta Auto Winder G
User manual
25 pages · German, French, SpanishRead →
MinoltaPDF
Minolta Power Grip 2 Set
User manual
22 pages · German, French, SpanishRead →
From the M. Butkus archive. Original publisher and archive notices are retained.
Check the model and edition against your equipment.
PDF verified 2026-10-10.