Sewing machines
New Home Electric Rotary — Part 2, printed pages 14–25 — User manual
User manual for New Home Electric Rotary — Part 2, printed pages 14–25. 6 pages in English. Read the original PDF, download or print a copy without registration.
6 pagesEnglish4.8 MB PDF
Loading your manual…Open PDF directly
Document details
- Brand
- New Home
- Model / document
- New Home Electric Rotary — Part 2, printed pages 14–25
- Document type
- User manual
- Language
- English
- Pages
- 6
- File size
- 4.8 MB
- Category
- Sewing machines
- Document date
- Not specified in catalog
Search available document text
Find a term, then jump to its page in the original PDF. Image-only pages may not be searchable; check the PDF for exact wording and diagrams.
Page 1 · Read text
d MEW=sNOME OILING INSTRUCTIONS WEW=SNOME OILING INSTRUCTIONS

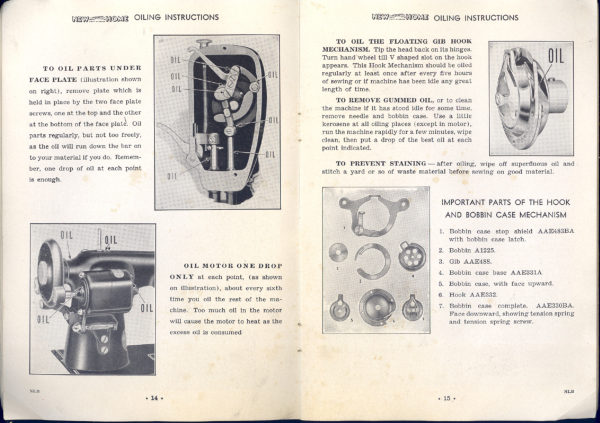
TO OIL THE FLOATING GIB HOOK
MECHANISM. Tip the head back on its hinges.
Turn hand wheel till V shaped slot on the hook
appears. This Hook Mechanism should be oiled
regularly at Ieast once after every five hours
of sewing or if machine has been Idle any great
Iength of time.

20 REMOVE GUMMED OIL, or to clean

the machine if it has stood idle for some time,

remove needle and bobbin case. Use a little

Kerosene at all olling places (except in motor),

run the machine rapidly for a few minutes, wipe

+ clean, then put a drop of the best oil at each
point indicated.

TO OIL PARTS UNDER
FACE PLATE (illustration shown
on right), remove plate which is
held in place by the two face plate
serews, one at the top and the other
at the bottom of the face plat. Oil
parts regularly, but not too freely,

as the oll will run down the bar on

| to your material if you do. Remem-
| TO PREVENT STAINING —after oiling, wipe off superfluous oil and
arcane on ft seek Doles stitch a yard or so of waste material before sewing on good material.

is enough.

IMPORTANT PARTS OF THE HOOK
AND BOBBIN CASE MECHANISM

1. Bobbin case stop shield AAHM83BA
with bobbin ease latch.

Bobbin A1225,
Gib AAEASS.
Bobbin case base AAESSIA

OIL MOTOR ONE DROP
ONLY at ench point, (as shown

on illustration), about every sixth

Bobbin case, with face upward.
Hook AATS32

Bobbin case complete. AAEIJ0BA,
Face downward, showing tension spring
and tension spring screw.

time you oil the rest of the ma-

chine, Too much oll in the motor
will cause the motor to heat as the
excess oil is consumed

sl4e +e :
View original page 1
Page 2 · Read text
NEW ROME
INSTRUCTIONS FOR OPERATION OF ATTACHMENTS

Several Hemmers are furnished with your Machine. They will turn, finish
and stitch hems from % to % of an inch in width

NARROW HEMMER — A443.

At left is the Narrow Hemmer,
(sometimes called the Hemmer
Foot, or Feller), To operate
Remove Presser Foot, attach
Hemmer in its place on Presser
Bi

Before entering material, turn
over for a few inches, % inch of
‘material along the edge, then in:
sert between scrolls in Hemmer,
folded edge on top, draw back
until end is under needle; lower
Presser Bar and begin to sew,
guiding material so that neither
foo much feeds into scroll
causing wide and uneven hems—nor too little, not allowing for a second turning,
thus leaving a raw edge.

‘To trim a hem with contrasting colors at the same time hem is being turned
and stitched, mercerized floss is used on the bobbin.

‘Wind bobbin with floss as illustrated on page 3.

‘To thread the bobbin case with mercerized floss follow instructions for regular
threading: but eliminate threading into slots (A) & (B). ‘This is accomplished
easily if floss is thrown around fourth finger of left hand (forming a tension)
before it enters position (C) and tongue (D). Threading in this manner requires
no change in bobbin tension.

‘Set Sewing Machine stitch longer than for regular stitching; 6, 8 or 10 ai
commonly used. Draw up floss irom bobbin before starting to stitch as

structed on page 6.

To trim a hem with contrasting color as illustrated, complete hem's first
stitching, then start work from other end and enter edge of hem in hemmer
from the right. The hem will All the scroll and stitching will appear at ex-

treme edge.
x HEMMING AND SEWING ON LACE

these two tasks can be accom-
plished in one operation. The
material to be hemmed is in-
serted into the Hemmer in the
regular way; the lace edge is in-
serted in the slot as illustrated
at right. Guide the lace well into
the slot so that the needle will

Pierce the edge at each stitch.
xen

16+

Mawes

ATTACHMENT INSTRUCTIONS

APPLYING LACE
(Fronch, Style)

Lace edge, when applied, as il-
tustrated fs termed “french Ap
plication” due to the fact that
When hem is pressed back onto
wrong side of fabric no stitching
IS visible. It 1s also possible to
draw up a little fullness in lace
when applied in this manner.

Tenter material to be hemmed
as described. for regular hem-
fing: right side of material face
up.

Draw fullness in lace by pull-
ing one of the straight threads that form the selvedge. Enter this edge in hem-
mer from the left allowing right side of lace to lie on right side of material as
It is being hemmed, Feed lace in at edge of hemmer sufficiently 30 that the
stitching in hem of fabric will hold laee at the same time.

A French seam is made in the
same manner as described above
by sewing two edges of cloth to-
gether, making a hem in one and
Sewing the edge of second piece
within it,

The French seam can be
turned into a fell seam by enter-
ing the edge of hem into the
hemmer from the right, as illus
trated. A seam thus stitched is
simple to make and affords great
strength to garments.

French Fell Seam

LARGE HEMMERS — A125!

Attach the desired size of
Hemmer to machine in place of
presser foot; crease over % inch
of material to be hemmed for
about two inches before insert-
ing edge of goods. Enter ma-
terial and guide it around scroll
of Hemmer using both hands to
draw it back and forth a few
times while gradually feeding
the cloth into the Hemmer so
ag to fill the scroll completely.
Draw material back so. that
creased edge fits around edge of scroll in Hemmer and selvedge edges meet.
Hold both upper and under threads and proceed to stitch.

4 an sat
View original page 2
Related documents and language editions
New HomePDF
1881 Light Running New Home
User manual
36 pages · EnglishRead →
New HomePDF
1899 New Home
User manual
28 pages · EnglishRead →
New HomePDF
New Home Attachments
User manual
4 pages · EnglishRead →
New HomePDF
New Home Electric Rotary — Part 1, printed pages 1–13
User manual
8 pages · EnglishRead →
New HomePDF
New Home Electric Rotary — Part 3, printed pages 26–36
User manual
6 pages · EnglishRead →
New HomePDF
New Home Hand
User manual
10 pages · EnglishRead →
New HomePDF
New Home Light Running "Pre A"
User manual
19 pages · EnglishRead →
New HomePDF
New Home Light Running ZigZag Attachment
User manual
10 pages · EnglishRead →
New HomePDF
New Home NH
User manual
28 pages · EnglishRead →
New HomePDF
New Home New National
User manual
10 pages · EnglishRead →
New HomePDF
New Home New National
User manual
10 pages · EnglishRead →
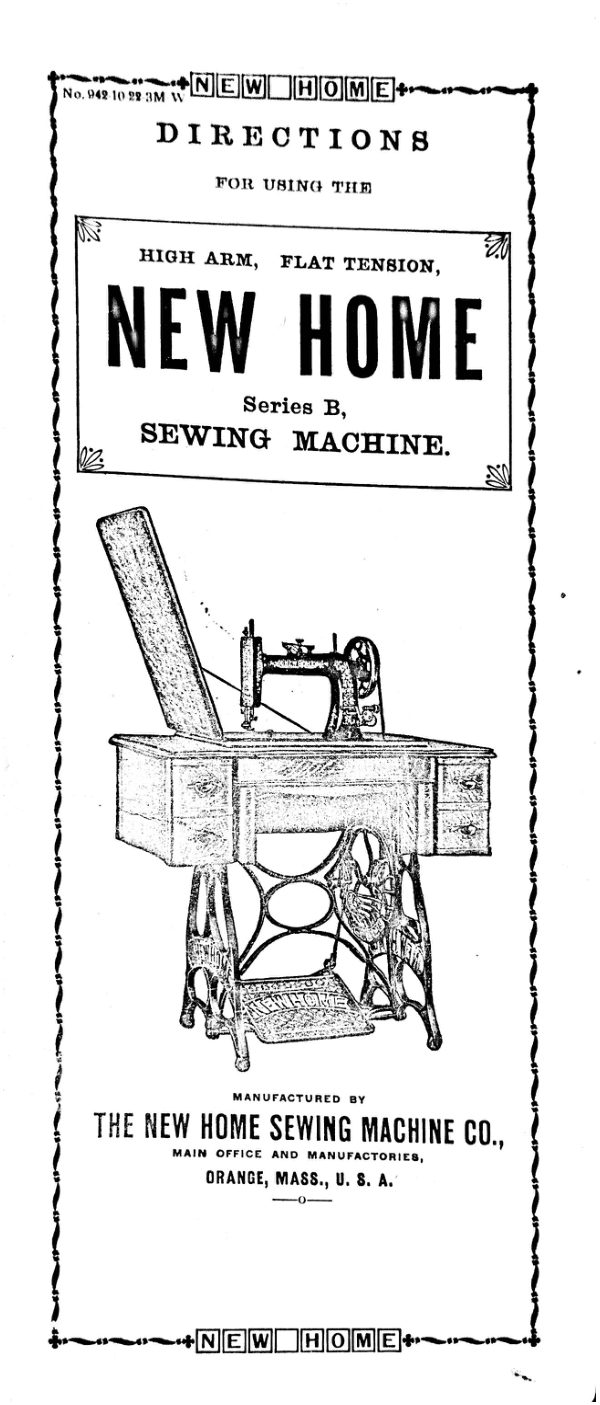
New HomePDF
New Home Series B
User manual
9 pages · EnglishRead →
From the ISMACS International. Original publisher and archive notices are retained.
Check the model and edition against your equipment.
PDF verified 2026-10-11.