Sewing machines
New Home Series B — User manual
User manual for New Home Series B. 9 pages in English. Read the original PDF, download or print a copy without registration.
9 pagesEnglish5.2 MB PDF
Loading your manual…Open PDF directly
Document details
- Brand
- New Home
- Model / document
- New Home Series B
- Document type
- User manual
- Language
- English
- Pages
- 9
- File size
- 5.2 MB
- Category
- Sewing machines
- Document date
- Not specified in catalog
Search available document text
Find a term, then jump to its page in the original PDF. Image-only pages may not be searchable; check the PDF for exact wording and diagrams.
Page 1 · Read text
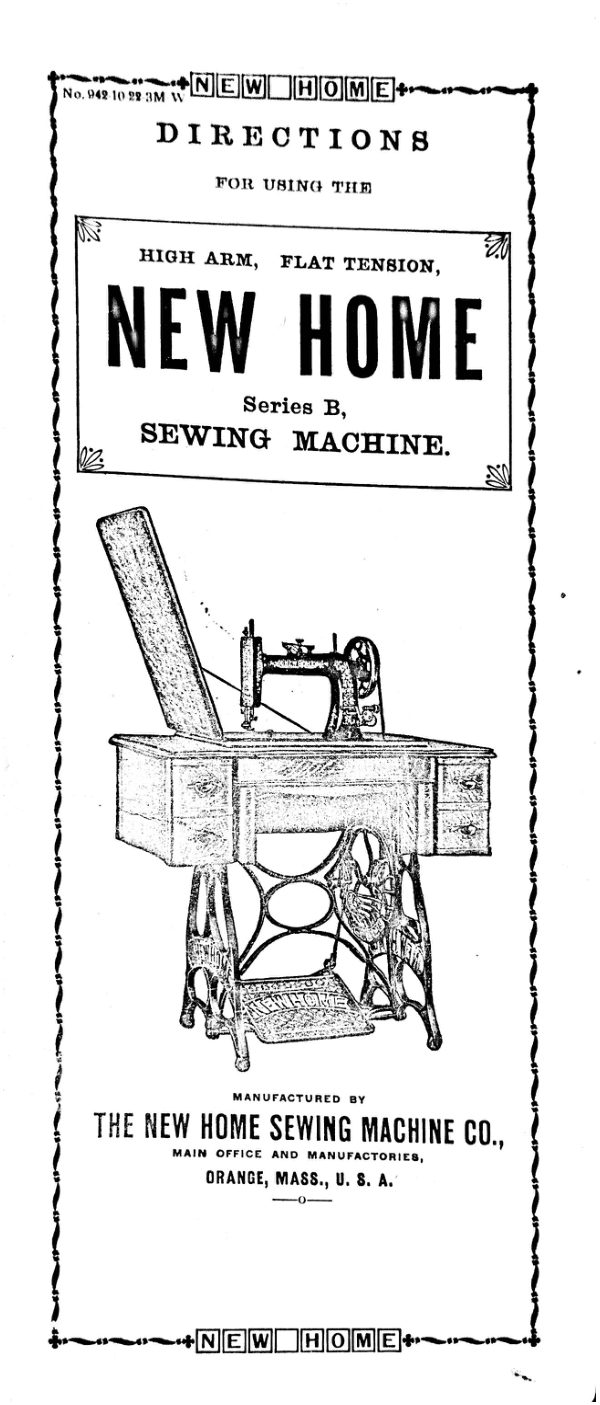
DIRECTION S

          FOR USING THE


      HIGH ARM, FLAT TENSION,

 NEW HOME
                Series B,
    SEWING MACHINE.


                 MANUFACTURED BY

THE NEW HOME SEWING MACHINE CO.,
             MAIN OFFICE AND MANUFACTORIES,

              ORANGE, MASS., U. S. A.
View original page 1Page 2 · Read text
INSTRUCTIONS     INDEX.
                                                                                   POR OPERATING THE

                                               HIGH ARM, FLAT TENSION,

                                                         VIBRATING SHUTTLE,
  Bed Look

  Bobbin, How to Wind            NEW HOME  Breaking Lower Thread
  Breaking Upper Thrend                                  Series B,
 Felling'
   Foot, To Remove                        Sewing Machine.
   Foot, To Adjust
  Gauge, Use of
  General Remarks
  Hemstitching                          2
 Hemming

  Hemming and Sewing on Lace
   Important

  Illustrated Parts
List of Parts
Missing Stitches
 Needles

I steelle, To Set

  Needles and Thread, To Select                                             10

 Outfit

Parts of Stand and Cabinet
  Quilting

i Sewing, Ready for
j Shuttle Ejector  Shuttle, To Thread
  Shuttle, To Place                                                                    MANUFACTURED BY
Shuttle Thread, To Draw Up        8               THE NEW HOME SEWING MACHINE CO.,
 Stand, To Adjust                                                                           MANOFFICE AN• MANUFACTORIES.
  Stitch, Length of
                                                           ORANGE, - MASS., U.S. A.
Tension, To Regulate
 Threading Machine
  To Oil Machine
  To the Learner
  Treadle
   Work, To Remove

     NEWCHOME
View original page 2Page 3 · Read text
3
! Important.                                                                   Do not use a dull or bent needle, or draw the work
                                                                                                 faster than the feed will naturally carry it. as needleg
           When you receive the machine you will observe a                             are frequently broken by failing to observe the latter

         small tag attached to the bed of the machine by the
        screw which holds the head of machine in place while                      When ordering parts always give the plate number
         in transit. Remove this screw as directed on the lag so                                  of machine
         the head can be turned back for oiling and cleaning.
     Do not replace the screw unless you desire to reship the           Oil.        machine, when it should be replaced.
                                                                                                    Poor oil is dearer than good oil, because it ruins the
                                                                                                parts of the machine and does not last as long. It makes To the Learner.                                                       the machine run hard: corrodes and eats into the bear-
                                                                                               ings, making them rough and hard to operate. It clogs
      A little time given to the study of the instructions,                                                                          and fills up the oil holes, so that, unless the operator
        before commencing to use the Machine. will be found                                                                                          carefully and laboriously picks out the holes, the oil       of great advantage. Any one can learn to use the
    New Home. It is simple in construction, and requires                              cannot penetrate to the bearings and soon the machine
       so little change for any kind of work, that its operation                              begins to run hard. Be sure you get the best.
         can be easily understood.

                                                                                                                                        ...OIL
          Attention to the instructions here given, and a litle
        practice, will soon enable the learner                                                           OIL THE UPPER
       operate the Machine                                      OIL
         Do not attempt to use the Attachments until you car                                            PARTS AS HERE
                                                                                        OIL
        manage the Machine with ease on plain sewing.
          The cause of a machine not working properly may                                                  INDICATED.

         be due to poor thread, or a size too large for the needle,

         or in the wrong adjustment of the tensions.
             If at any time the Machine fails to perform its work

        properly refer to the instruction book to ascertain the
     Cause This will help you out of the trouble if you           THE BEST OIL IS THE CHEAPEST.
        carefully follow the directions.
                                                                OIL THE UNDER PARTS AS HERE INDICATED
        For example, if your machine misses stitches, you
       turn to the index: (inside front cover,) Missing
      Stitches." On page 8 you read, " Should there at any

        time be skipped or long stitches at intervals, it is owing

       to the needle being set too low, or its having become

        bent away from the shuttle, or its being too small for
     the thread in use. etc., etc ou wil theretore be
      able to easilv remedy the trouble.We advise a careful
      perusal of " General Remarks.
 General Remarks.                     To Oil Machine.
                                                                                             Oil the centers on which the driving wheel of stand
          The presser foot must never be let down on the feed,                              turns, and where the foot piece rests on the rod.After
       unless when you are sewing and have cloth under it.                                 the machine has been oiled, run it (with presser-foot up
    When the shuttle is in. the machine must not be rur                             and shuttle out for a minute, and then wipe off the
      with either of the shuttle slides out or partlv open as the                                 superfluous oil. If the machine runs hard after standing
       shuttle is liable to get out of position and break some                                   idle for some time, use a little kerosene oil in the usual
       portion ot the machinery.                                            way and run rapidly, then wipe clean, and oil with the
         We caution purchasers to see that the manufacturers'                              best prepared oil. Oil the bobbin-winder in places
       plate number of the machine is plain and in good con.                         where there is any friction

       dition. If defaced or obliterated, it is sure evidence of      traud, and we will not warrant, or in any way be re.         Bed Lock.

                                  To avoid imposition buy
        only trom us or authorized dealers                                          The head of the lock is depressed in the front of the
                                                                                      bed-plate. Push down on the lock head, this will re.
         Do not run the machine backward or with both                             lease the machine bead so it can be turned back and
        threads in, without sewing,                                                          the parts can be oiled and cleaned.
View original page 3Page 4 · Read text
The Treadle.                        ? The Belt.

          Familiarity with the motion of the treadle is first to                                The belt should always be tight enough to prevent
                                                                                                                                                          . Should it become too loos, cut it to the
      be learned, and practice is necessary in order to give .                                  slipping
                                                                                         desired length, observing to make a new hole at right
       steady and uniform revolution to the driving wheel. The
                                                                                        angles with the grain side of the leather, that you may
       presser-foot, which holds the work in place on the feed,
        should be raised to prevent the feed from injury by con                              obtain its full strength
       tact with it. Place the fect on the treadle with instep
      directly over the rod upon which the treadle rests.                         BalanceTo put theWheelbeltandon,holdplaceit init thein thenotchgrooveof theofdrivethe
       Start the machine by placing the right hand upon the                            wheel, then turn the balance wheel toward you.

      top of balance wheel and revolving it towards you,
       laking care to give it impetus enough; keep up a regular            Needles.
     movement by pressing alternately with the heel and ball

       of the foot with equal effect. This should be practiced

     until a uniform motion of the wheel is obtained. Do
       not attempt to sew until you are familiar with the treadle                WE MAKE OUR OWN NEEDLES, therefore,

                                                                                                             if andyouourcannottradegetmarkthe ofgenuine,a Greyhoundwith "NEWstampedHOME"on the
To Adjust Stand.                                                        shank, write direct to us. Poor needles are responsible

        Every Sewing Machine of our manufacture is perfectly                                 many times, for skipped stitches.

     adjusted              in                 all its                         parts                               when                                    it leaves                                              our                                                  factory.

      illustrate                 below                       the                           different                                     parts                                           of the                                                  Stand                                                        to enable            To Set the Needle.

    the inexperienced operator to properly adjust any part                                First loosen the screw that clamps the needle and
      should it in any way become loosened.                                     push to the left sufficient to allow the shank to enter;
                                                                                     allow the needle bar to rest at its highest point; then
                                                                                       take the needle (with the flat side of shank towards the
                                                                              needle bar) between the thumb and finger of the left
                                                                                hand, and insert the needle into the groove (as farOb-up
                                                                         as it will go) under the clamp, and screw fast.
                                                                         serve that the needle passes through the
                                                                 hole in the Throat Plate without touching
                                                                               either side. It it touches, take hold of it near its
                                                                                                point, and press it gently in the opposite direction, un-
                                                                                                                          til it is tree.
                                               104  80 г


                                                                                          AMANOR!


       Should the Foot Plate (K) have any play from right

     to left it needs adjusting; loosen the Plug Nut (M3)

     and adjust the Plug (M2) so that the Foot Plate will


    workagainstevenly,the takingFoot Platecare tonotcauseto setit theto operatePlug toohard;tightlyif

     adjusted properly, it should work with but the slightest

     pressure. Should the Drive Wheel (E) not run true or
    evenly, loosen the Drive Wheel Crank Plug Screw           To Wind Bobbin
    (GG) and adjust the Plug so the Drive Wheel (E) has
                                                                      Loosen the stop motion clamping screw (12) on
     no play, but will run evenly, then screw tight. Should
                                                                          outside of balance wheel by turning it towards     the Pitman (P) work too loose on Pitman Stud (Q),
     loosen nut on lower end of rod and tum the screw                       you, (this will save the trouble and

      slightly to right and tighten out.

     A NEW HOME g
View original page 4Page 5 · Read text
7       6
    of unthreading the needle and removing the work while             To Place the Shuttle.
     the bobbin is being filled). Then swing the bobbin                                   Withdraw the front shuttle slide and place the shuttle
     winder until it is in position and presses firmly against                                  in the carrier, point first, toward the operator; then close
   the belt. Place the spool of thread to be wound from                               the slide. It is sometimes more convenient to withdraw
   on the spindle (80) and put the bobbin in the bobbin                                the back shuttle slide and put the shuttle in its place
     winder. Pass the thread from the spool, once around                              when the carrier is at the back part of the machine.
    the tension screw 104) as shown in cut, thence dowr                           This is especialiy the case when some of the attach-
     between the bobbin winder frame and wire guide at •                         ments are in use,

     (A), then through slot (B) at bottom of thread guide,     then into V shaped slot of thread guide at (C). To            Shuttle Ejector.
     secure the end of thread preparatory to winding, place                                  Pull out the front shuttle slide and press down on the
     it between the head of the bobbin and its socket at the                                ejector head, the shuttle will be raised and is easily re.
    right hand. Proceed as in sewing. When the bobbin                         movcd.
    has been filled, swing the winder from belt and turn
                                    Lower Thread Breaking.    back the key (12)
                                                                                This may be caused by the shuttle being wrongly

                                                                                          threaded; the tension being too tight; the bobbin being
To Thread Shuttle.                                                 wound too full, so it will not revolve frecly; a rough
                                                                                           or sharp place on the edge of the shuttle at the heel;

        Take the shuttle in the left hand, with the point to-                               or by tailing to keep the shuttle race clean. For sew.
     ward you; draw off about two inches of thread from                            ing heavy goods be careful to have the needle and
     the bobbin, thread running from the upper side, (see                            colton. (or silk). according to scale  When needle
                                                                                       coarser than () is used, put in the throat plate with
      Fig. 1); drop the bobbin into the shuttle as far as it will
                                                                                          large needle hole, and lengthen the stitch according to
     go; then draw the thread into the open slot of shuttle,
                                                                                                thickness of goods.
    at the same time putting a little pressure with the finger
     on the end of bobbin; by drawing the thread toward           Threading Machine.
    you it will be forced under the point of shuttle spring,
                                                                                             Put spool upon spindle (80), then, with the left hand
     (see Fig. 2): then draw it back until it passes over
   the point; (see Fig. 3); shutle is ready for sewing.                            catch the thread in slot (102) and draw it between the                                                                                     spring and cap (103) toward the needle bar, then under
     Fig. 4 shows shuttle properly threaded, ready                                     spring eyelet (15), up through slot in needle bar (46),
    SCWIDS                                                  down back of the staple (19); then with the thumb
                                                               und forefinger of the left hand, catch the thread in
                                                                                center or staple 19), and draw it toward you around
                                                                                 the hook of the take-up; then down through eye of
                                                                           needle irom leit lo rght, leaving about four inches of
                                                                              thread lice.
                                                                     .15 102        ,80
                                              103%104


                                    Upper Thread Breaking.
       The tension is regulated by turning the screw in point
      of shuttle to the right or left; to the right, to give more                          This may be caused by improper threading of the
      tension: to the lett, to give less tension.                                              machine; the upper tension being too tight; the needle
                                                                                          being too small for the thread: the ucedle being set the
             It will not generally be necessary to change the tension                              wrong side out, or set crooked; or, the needle being too
       of shuttle for ordinary kinds of sewing.                                                   large for the hole in the throat plate.
                       NEWHOME..on
View original page 5Page 6 · Read text
8
 To Regulate the Tension.                                     When using very fine needles, and also when stitching

                                                                                             heavy work, be sure that the points of the needles are
         Alter threading the shuttle, try the tension by draw.
       ing the thread toward the blunt end; if it draws tightly,                              perfect.

       it is right for goods of firm lexture; thin, soft goods re.
      quire a loose tension. o obtain more or less tension            Ready for Sewing.
     put more or less pressure on the shuttle tension spring,
     as described herctofore. The tension of top thread is                                 The machine being fully threaded above and below,
       adjusted by tension screw 104, luming to the right to                            and the shuttle thread drawn up, you are ready to
       lighten, and to the left to slacken it. Care must be                          commence sowing
     taken in regulating the tension of the lower and upper
       threads. If the tension on either thread is too tight, it                                    Raise the presser foot by presser lifter (to the right
        will cause the thread to break and the seam will be                                  for heavy work, to the left for hemming and felling).
      puckered. If there is not sufficient tension, the thread                               put the work under, and let the presser foot down upon
         will not be drawn into the fabric, but will lie in loops                          the work.
     on the under side. When both tensions are properly
                                                                                 Avoid pushing or pulling the goods through while      adiusted. both threads are drawn to the centre of the
      fabric as shown in houre A                                                                stitching.     In turning a corner stop the machine with.
                                                                                           out raising the needle more than half way out of the
              If the shuttle thread is very tight, and the upper
                                                                                 work; raise the presser foot and turn the work in the
     thread too loose. the under thread will lie straight as
                                                                                                   manner desired, using the needle as a pivot.
      shown in fure B, because there is not sufficient uppes
       lension to draw the under thread in. On the other
       hand, if the shuttle thread draws off too easily and the             Length of Stitch.
      upper thread is too tight, the under thread will draw
       through the fabric and the upper thread will lie straight                                   On the stitch regulator scale will be found marks of

       as shown in figure C.                                                                      different lengths; from these select the length of stitch
                                                                                      you want; then loosen the thumb screw and move it

                                                                                           opposite to the mark chosen; and tighten it. The Nos.

                                                                                                        32, 22, 16, etc., give the numbers of stitches to the inch.  JOE SSE     A    B                                            You can vary the stitch from the scale by setting thumb
                                                                                      screw between numbers.
        The NEW HOME Sewing Machine requires less
       change of tension than others, and it is seldom necessary
        to change the tension of the under thread. Always        To Remove the Work.
       regulate the tension by adjusing the upper tension it

         possible.                                                                                Raise the needle bar to its highest point, lift the

                                                                                                  presser lout, release the tension of the upper thread by
| To Draw Up Shuttle Thread.

        Take hold of the balance wheel with one hand and
        the needle thread with the other, keeping the latter
          slack, so as not to spring the needle; move the wheel
        toward             you                 once                      around                           and                                           pull up                                           the needle
                                                     thread            To Adjust Presser Foot.         with your                hand,                          to                      draw the                                      shuttle                                         thread                                        up through
        the throat plate hole. Then take both threads and pass
                                                                                               At the top of the Machine, back of the needle bar,
      them under the presser toot, toward the back of the
                                                                                             will be found a screw, which, by turning to the right,
       machine.
                                                                                                  increases, and to the left, decreases the pressure of the
  Missing Stitches.                                                   lightpressergoods.Toofoot. Heavymuch goodspressurerequirewill morepuckerpressurefine cloth,than
                                                                                      while too little pressure on heavy cloth will let presser
           Should there at any time be skipped or long stitches                              foot rise as the needle ascends. Care should be taken
          at intervals, it is owing to the needle being set too low,                              to adjust the pressure correctly. All machines are         or its having become bent away from the shuttle, or its
                                                                                          properly adjusted for ordinary work, the screw should
         being too small for the thread in use, and sometimes to
                                                                                                  not be changed except on extra thick or thin goods.
          the point of the shuttle becoming accidentally blunted.
                           ONEW HOME in
View original page 6Page 7 · Read text
and NEWTHOME.
               10
Gauge.                                           Outfit.
          Every machine has a Gauge. It is attached to the
        bed plate by means of the thumb screw, and used for                          Every NEW HOME Sewing Machine is threaded
         enabling the operator to sew at a given distance from the                        up and ready for use when it leaves our factory, ac.       edge of the goods.
                                                                           companied by the following accessories; 135 Gauge:
(To Hemstitch.                                             136 Gauge Screw; 244 Throat Plate, coarse; 250
            Fold blotting paper [or other soft paper] which can                            Oil Can, filled; 252 Quiller: 184 Four Bobbins, one

          be readily torn, until you get thickness corresponding to
        the opening desired in the hem-sutching; put one of the                                 at rabid health - needs for we son duster: 2351 Hem.
         pieces of goods under the paper and the other above,

       them.Afterthen place albeingundersewed,the presserboth piecesfoot andwill sewbe double.through
         Fold back the cloth first on one side, then on the other,
             all in the same direction and hold himly while you tear                      252        out the paper.
                Remove the other half of the paper                            244
       andpiccoopenmaythedehem-stitching,cut and passedonethroushedge oftheeach,hemmeror eitheror
         a row of stitching can     • passed along side the hem-
           stitch, and the double edge finished off as you choose.
  To Remove the Foot.                                                            136

          ›Raise the necdle bar to its highest point, loosen the
         binding nut which is just above the foot, by turning to                                                           251
         the nant, then draw the root out.

          To Select Needles and Thread.

       Sizo of                                   Size of Cotton,
     Nacelle CLASS OF WORK TO SEW.    Linen or Silk.
             Very Fine Thin Muslins,                •: INSTRUCTIONS : -
               Cambrics, Linens, etc.    120 to 300 Cotton.
                                                             FOR USING THE
              Very Fine Calicoes, Linens,                                         90 to 120 Cotion.
                Linen Shirtings, I                                  FOOT HEMMER AND FELLER.
                    Goods, etcF.ine Silk 000, &: 00 Silk Twist.
               Shirtings, Sheetings,Bleached
  ½    Calicoes, Muslins,Silks and60 to 90 Cotton,             Generalall classesDomesticof GeneralGoods,Work.and O and 00 Silk Twist.       Hemming.

             All kinds of Heavy Calicoes, 40 to 60 Cotton,                            Raise the needle to its highest point and raise the
             Light Woolen Goods, Heavy                                            presser foot to its first lift by turning the lifter to the
               Silks, Scaming, Stitching, etc. A and O Silk Twist.
                                                                                                               right. Loosen the nut A, take off the presser foot and
                Tickings, Woolen Goods,                                                                                        replace with the Hemmer. Set same to its right place
              Trousers,sets, Cloaks,„BoysMantles,Clothing,etc.  Cor-24A andto040SilkCotton,Twist.                          and fasten nut A by tuming to the left. Raise the
                                                                                            presser bar by turning the presser foot lifter to the right,
              Heavy Woolens and Tickings, 10 to 24 Cotton. A
              Bags, Heavy Coats, Trousers, and B Twist, and                        and pass the edge of the cloth into the hemmer in the
           andHeavy Clothing generally,   60 to 80 Linen.                          manner shown in the illustration, drawing it through the

              Bags, Coarse Cloths, Heavy 40 to 60 Linen, B,                            hemmer as far as the needle hole, in order that the
                                            C, & D Silk Twist, or                            feed may at once catch the cloth. Then let the hem-
                   Goods of any texture.
                                               very Coarse Cotton.                     mer down upon the feed surface, and opcrate the
                                                                            machine as usual. Should the goods begin to run out     For Needles O, B, 1-2 and 1, use throat plate
   with Small needle hole; for 2, 3, and 4 use throat                             of the hemmer, carry them to the Right; should too
   plate with Large hole.                                                               much run into the hemmer. carry the goods to the left
                                                                         About one-fourth of an inch in width is as much of
            Stamped                    on                       front                             shuttle
                                     slide will be found a scale                                  the goods as is usually required to form a perfect hem.           for             selecting                     thread                       and                                needles.
View original page 7Page 9 · Read text
: ILLUSTRATED PARTS OF THE

  High Arm, Flat Tension, Vibrating Shuttle,                         OUR LATEST
New Home, Series B, Sewing Machine Stand.  NEW HOME

                       ATTACHMENT SET.


   , Right Leg B. Left Leg           D. Brace Screw
          bE., Dnve Wheel Set Screw.

             M. Foot Plate Rod -Nut.     Foot Plate Adjust-
ink Screw
Rod Stud.
    sher  T. Pitman Screw     Belt.

  PARTS OF NEW HOME, SERIES B. CABINET BIOS.


D. Drive Wheel. Et. Dnve Wheel Ran
 Screy
Crank Plus
Dress Guard Scre
       dancer lie a
Firman Rod Stud                                      710705000
 Screw Washer.  T. Pitman Sci
  PARTSOF NEW HOME, SERIES B, CABINET B109.
                                      WITH THESE                   E1   DE3
                           VARIOUS ATTACHMENTS                530
                                   a greater variety of work can
                             6 M-0              be accomplished on the                       OL3
        \heel. Es,Drive Wheel Hanger  Ea,                 NeW HOME than on
           Es. Drive Wheel Stud Nut.
              er Screw:     root Plate Hanger Rod.                            any other.
       Bone screw.". Foot Plate Hanker Cone. N. Foot
 Pitman Rod Stud Screw.  S. Pitman Ball Stud
   aNEW             -NEWHOME
View original page 9Related documents and language editions
New HomePDF
1881 Light Running New Home
User manual
36 pages · EnglishRead →
New HomePDF
1899 New Home
User manual
28 pages · EnglishRead →
New HomePDF
New Home Attachments
User manual
4 pages · EnglishRead →
New HomePDF
New Home Electric Rotary — Part 1, printed pages 1–13
User manual
8 pages · EnglishRead →
New HomePDF
New Home Electric Rotary — Part 2, printed pages 14–25
User manual
6 pages · EnglishRead →
New HomePDF
New Home Electric Rotary — Part 3, printed pages 26–36
User manual
6 pages · EnglishRead →
New HomePDF
New Home Hand
User manual
10 pages · EnglishRead →
New HomePDF
New Home Light Running "Pre A"
User manual
19 pages · EnglishRead →
New HomePDF
New Home Light Running ZigZag Attachment
User manual
10 pages · EnglishRead →
New HomePDF
New Home NH
User manual
28 pages · EnglishRead →
New HomePDF
New Home New National
User manual
10 pages · EnglishRead →
New HomePDF
New Home New National
User manual
10 pages · EnglishRead →
From the ISMACS International. Original publisher and archive notices are retained.
Check the model and edition against your equipment.
PDF verified 2026-10-11.