Sewing machines
White Art of Sewing and Dress Creation — Reference guide
Reference guide for White Art of Sewing and Dress Creation. 108 pages in English. Read the original PDF, download or print a copy without registration.
108 pagesEnglish79.7 MB PDF
Loading your manual…Open PDF directly
Document details
- Brand
- White
- Model / document
- White Art of Sewing and Dress Creation
- Document type
- Reference guide
- Language
- English
- Pages
- 108
- File size
- 79.7 MB
- Category
- Sewing machines
- Document date
- Not specified in catalog
Search available document text
Find a term, then jump to its page in the original PDF. Image-only pages may not be searchable; check the PDF for exact wording and diagrams.
Page 1 · Read text
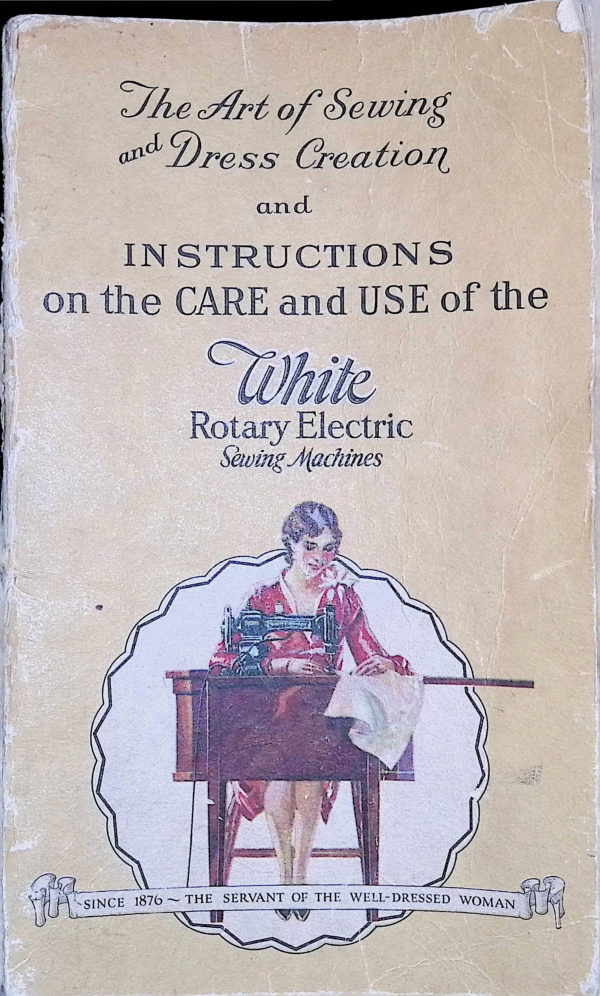
The Art ofofSewingSewing
                   CrecctloJ^     f^^)ressand Dress                Creation
             andand
    INSTRUCTIONSINSTRUCTIONS

;  onon thetheCARE        CARE andand USE               USE ofof thethe


)
i      White
|          RotaryRotaryElectricElectric
                    SewingSewingJ/iachinesMachines


        -SINCE 1876 ~ THESERVANT OF THE WELL-DRESSED WOMAN
View original page 1Page 5 · Read text
CONTENTS

                                                                   Page
Operation and Care of the White Rotary Electric Sewing Machine
  White Course in Sewing and Dress Creation
Brief History of ThomasWhite

Nee Sary Weisf the Sewing Machine
Points for Every Woman to Consider.
Consider the Value of Time.
What Makes the Successful Garment
The Importance of Wise Selection
Consider the Following Definite Lines: In Relation to Your Figure
 After Line Comes Color: Blonde Type
Brunette Type.
The Auburn Haired.
The Grey Haired Woman
Selection of Material..
 Necessary Measurements for Pattern Alteration.
 Simple Pattern Alteration.
 Stitches.
The Value of Time
Seams and Seam Finishes.
The Success of Perseverance
The Tucking Attachment.
 The Dignity of Simplicity
 Hemming by Machine.
 Binding by Machine.
 Bias Folds and Bound Buttonhole.
Worked Buttonhole..
Simple Decorative Stitches.
Mitered Corners.
 Quilting by Machine
 The Edge Stitcher.
Inserts, Volants and Overlays
 The Under-braider - Cord Piping
 Rufiling and Pleating by Machine
 The Guest Room
 To Make a Turned Fold
 Hem Finishes for Wool Material.
 Facings.
 Couching by Machine
 Hems and Hem Finishes for Cotton Materials
 Facings, Bias and Fitted
 Applying Flat Turnover Collar.
 Bound Pocket.
 Inlaid Welt Pocket.
 Curved Bound Pocket.
 To Set in Sleeves
 PlainBound Placket.
 Bound and Faced Placket.
 Sewing on Hooks, Eyes, Snaps, and Buttons
 Darts, Pleats and Gathers
  Essential Stitches in Tailoring.
 Tailored Seams.                                                    93
 Tailored Collars and Cuffs.                                            94
 Tailored Welt Pocket..                                               95
 Tailored Patch Pocket.
 Coat Lining.
 Ornamental Tacks.
 The Joy of Originating...
 Home of White Sewing Machine Co.
View original page 5Page 6 · Read text
- White:


Goth i an a luences my in the
WHITE Sewing Machine Oil, especially prepared
 is a quality product that will satisfy you in
every particular.
      Be Sure to Ask for It

          Repairing

 When repairs are needed get in touch with the nearest
 White Sewing Machine store or White Sewing
 Machine agency where the work will be done right.
 Do not permit unskilled repairmen to fix your
 machine.

   Machine, Machine Heads or
      Motors Returned to Us
              for Repairs
 Should have the name and address of the shipper
 inside of the box, and the express or freight
charges PREPAID
Also be sure to write us promptly stating how and
when the machine or motor was shipped and tell
us just how it acts. Give the plate number of
the machine (this is found on bed plate under
the bobbin winder and close to the arm )

Write us plainly how we are to return your goods —
whether byfreightorexpressand whereit is to besent.
View original page 6Page 7 · Read text
—?Whitc: White
©derationOperation andand CareQare ofof thethe
^htteThite
Rotary6Rotary ElectricElectricjewingSewing£fctacbineMachine
HESE instructions are arranged in sequence as to the proper
THESEstepssteps instructionstoto taketake inin thetheareoperationoperationarranged inofof sequenceaa WhiteWhite RotaryasRotaryto theElectricElectricproperT
SewingSewing Machine.Machine.
TheThe illustrationsillustrations onon pagespages threethree andand fourfour picturepicture thethe differentdifferent typestypes
ofof motormotor applicationapplication toto WhiteWhite
ElectricSewingElectricSewingMachines.Machines.WhenWhen
occasionoccasion callscalls forfor instructionsinstructions
A White uponupon adjustmentadjustment forfor connectingconnecting
thesethese motors,motors, referrefer toto thesethese
illustrationsillustrations andand determinedetermine
whichwhich ofof thesethese picturespictures appliesapplies
toto thethe particularparticular typetype ofof motormotor
equipmentequipment onon youryour machine.machine.
IllustrationIllustration No.No. iI
First,First, determinedetermine thatthat thethe motormotor
pulleypulley isis soso adjustedadjusted thatthat itit centerscenters
onon thethe handwheelhand wheel forfor properproper drive;drive; next,next, removeremove feltfeltpadpadfoundfound
betweenbetween motormotor andand sewingsewing arm,arm, thisthis willwillpermitpermit springspring toto holdhold thethe
motormotor inin perfectperfectcontactcontactwithwiththethe handhandwheelwheel atat allall times;times; thenthen con-con
nectnect thethe shortshort cordcord leadingleading fromfrom thethe
motormotor intointo connectionconnection No.No. 1,1, thenthen
connectconnect thethe cordcord fromfrom thethe sewingsewing
lightlightintointo connectionconnection No.No.2,2, andand lastlast
connectconnect thethe smallersmaller plugplug ofof thethe
longlong cordcord onon toptop ofofconnectionconnection
No.No. 2,2, thethe otherother endend ofof longlong cordcord
isis thenthen readyready toto placeplace inin anyany elec-elec
tricaltrical outlet.outlet.
NoTE:Note: MakeMake thethe aboveabove connectionconnection
inin exactlyexactly thethe orderorder named,named, andand
inin disconnecting,disconnecting, alwaysalways discon-discon
nectnect wallwall plugplug first.first.
IllustrationIllustration No.No. 22
First,First, determinedetermine thatthat thethe motormotor pulleypulley isis soso adjustedadjusted thatthat itit cen-cen
tersters onon thethe handhand wheelwheel forfor properproper drive;drive; next,next, removeremove feltfelt padpad foundfound
3View original page 7Page 8 · Read text
• White:=^Xi)hitc:-----------
betweenbetween motormotorandandsewingsewingarm,arm,thisthiswillwillpermitpermitspringspring toto holdhold thethe
motormotorininperfectperfectcontactcontactwithwiththe thehandhandwheelwheelatat allall times;times; nextnext
placeplace threethreeprongprongplugplugfoundfoundattachedattachedtotomotormotor inin socketsocket onon sew-sew
inging machinemachinetabletabletoptopas asshownshownin inillustrationillustrationNo.No.2,2,thethe plugplug willwill
onlyonly fitfitthethesocketsocketininoneonepositionposition(do(donotnot forceforce connection).connection). NoNo
furtherfurther adjustmentsadjustments arcare necessary.necessary.
IllustrationIllustration No.No. 33
FirstFirst connectconnect thethe shortshort cordcord lead-lead
inging fromfrom thethe motormotor intointo connecconnec
tiontion No.No. 1.1. TheThe nextnext stepstep isis toto
connectconnect thethe cordcord fromfrom thethe sew-sew
inging lightlight intointo connectionconnection No.No. 2.2.
NextNext connectconnect thethe smallersmaller plugplug ofof
thethe longlong cordcord onon toptop ofofconnec-connec
tiontion No.No. 2;2; thenthen connectconnect thethe otherother
endend toto anyany electricalelectrical outlet.outlet.
IMPORTANT:Important: MakeMakethethe aboveabove con-con
nectionsnections inin exactlyexactly thethe orderorder
named,named, andand inin disconnccting,disconnecting, al-al
CONNECTION NEZ COI waysways disconnectdisconnect wallwall plugplug first.first.
Adjustment^Adjustment
IllustrationIllustration No.No. 44
ForFor bestbest resultsresults thethe motormotor pulleypulley
shouldshould bebe adjustedtoadjusted to thethe handhand
wheelwheel inin thethefollowingfollowing manner,manner, seesee
illustrationillustration No.No. 4.4.
First,First, loosenloosen motormotor pulleypulley setset
screw.screw.
Second,Second, placeplacethethepointpoint ofof aa woodwood
screwscrew orornailnailinin thethe centercenter ofof thethe WOOD SCREW
SCREWS
motormotor shaftshaftholdingholdingitit inin placeplace NO 209
withwith aa slightslight pressurepressure ofof thethe
thumbthumb asas illustratedillustrated above.above.
Third,Third,placeplacethetheindexindexandandthirdthirdfingersfingersagainstagainstthethe hubhub ofof thethe
pulleypulley andanddrawdrawthethepulleypulleygentlygentlyagainstagainstthethehandhandwheel.wheel.It Itisisimporimpor
tanttant thatthat thisthis adjustmentadjustmentnotnotbebetootoo tight,tight, thethe bevelbevel facedfaced pulleypulley
shouldshould touchtouchthethehandhandwheelwheelbutbutslightly.slightly.
4View original page 8Page 9 · Read text
• White =
Fourth, holding the pulley in position as stated above,
 tighten the pulley set screw with a screw driver.
 If the adjustment is correct your machine will run properly,
quietly and evenly. To make a test that it is the correct
adjustment, hold the hand wheel of the sewing machine
head stationary and with the power full on, the motor
pulley should slip slightly on the hand wheel..
Special Note--Be certain that screws No. 209 are made
tight with a screw driver as well as the motor pulley set
screw.
                     Lubrication
Two oil cups will be found one at either end of the motor
shaft (do not over-oil), one or two drops of White Sewing
Machine oil in each cup occasionally depending upon the
use of the machine.
                        Control
The desired control is obtained by the amount of pressure
on the knee lever. There are five speeds, increased pressure
on the knee lever increases speed. The same applies to foot
controls on Portable Electrics.

            To Set Needle
Raise the needle-bar to its highest point; loosen the thumb
screw and press it to the left to permit the shank of the
NEEDLE to pass up between the clamp and needle-bar as
far as it will go, flat side to the right the needle being
flattened on one side so it will set itself perfectly, then
 fasten securely by tightening thumb-screw.

 Never run Machine with needle threaded without goods under
presser-foot.

 Do not pull cloth to or from you as it will bend or break the
 needle.
                              (continued next page)
View original page 9Page 10 · Read text
-White -
 To avoid loosening of the needle, always use a screw driver to
fasten same, the needle nut being slotted for that purpose.
 The needle, when descending, shouldpass CENTRAL, 10 the
 needle hole from FRONT tO REAR, but close to the right side
of the hole.

       Needles and Thread to Be Used
 The MOST IMPORTANT consideration is to buy and use perfect
 needles-not bent, nor blunt points.

 When ordering needles for this machine, be sure to ask for
 the genuine White Rotary flat shank needles. Imitation or
 hias goitwithde.W.silS. causeM. stampedtrouble,on theGetshank.the genuine
 Illustration of White
 Rotary flat shank needle
 showing exact length.
 The size of the needle should conform to the size of the
   hread and both be suitable to the material sewed. Use a
   sedle sufficiently large to permit the thread to pass freely
  hrough the eye.
 No. 1 needle should be used for all kinds of family sewing
 where thread from numbers 60 to 90 is used. There is very
 little need to use a coarser cotton than No. 30, because
 stitches made by a sewing machine are doubly as strong as
 those made by hand. In general sewing use the same
 thread above and below.
The following index will show the size of needle, thread
and silk to be used.
     Cotton Thread      Silk Thread No. of Needle
       150 to 300         000          00
        90 to 150             00          0
      60 to 90           0 & A
      40 to 60        B
      30 to 40        C            3
      20 to 30       D
For colored thread use needles one size larger than given
in index above.
View original page 10Page 11 · Read text
= =^Xi)hitcWhite
Directionsdirections forfor^CfpperUpper Threadinghre a ding
1.1. PlacePlace youryourmachinemachine
inin properpositionforproper position for
threadingthreading byby raisingraising thethe
presserpresser foot,foot, usingusing thethe
leverlever atat thethe backback ofof thethe W
N face;face; thenthen turnturn thethe handhand
wheelwheel soso thethe take-uptake-up
No.No. 88 isis atat itsits highesthighest
point.point.
2.2. PlacePlace thethe spoolspool ofof
threadthread onon thethe spoolspool pinpin
nearnear thethe centercenter ofof thethe
arm;arm; useuse thethe firstfirst fingerfinger
andand thumbthumb ofof thethe rightright
handhand toto putput aa slightslight
tensiontension onon therhe threadthread
whilewhile doingdoing thethe subse-subse
quentquent threadingthreading opera-opera
tion.tion. ThenThen taketake therhe endend
ofof thethe threadthread betweenbetween
thethe thumbthumb andand firstfirst
fingerfinger ofof thethe leftleft hand.hand.
NextNext wewe referrefer youyou toto
illustrationsillustrations onon pagepage 8.8.
DependingDepending uponupon thethe
typetype ofof threadthread checkcheck onon
youryour machine,machine, useuse thethe
methodmethod ofof threadingthreading
asas instructedinstructed underunder
illustrations.illustrations. NextNext taketake
therhe threadthread andand hookhook
itit underunder thethe pointpoint
No.No. 55 ofof thethe tensiontension
plate,plate, hookinghooking underunder
fromfrom sideside ofof machinemachine
nearestyou.nearest you. MoveMove
thethe handhand towardtoward thethe
7View original page 11Page 12 · Read text
-?ld)hitcWhite ■..........- =*»
back,back, andandpullpullthethethreadthreadupwardupwarduntiluntilitit passespasses throughthrough
thethe eyeeyeofofthetheauxiliaryauxiliaryspringspringNo.No.6,6,andandintointonotchnotch No.No. 7.7.
NextNextpullpullthethethreadthreadupwards,upwards,hookinghookingitit intointo thethe springspring
on the end of the take-up No. 8. AllAll thesethese stepssteps cancan bebe
donedone withoutwithoutchangingchangingthethepositionpositionofof thethe threadthread be-be
tweentween thethethumbthumbandandfirstfirstfinger.finger.NextNextplaceplace thethe threadthread
throughthrough thetheguideguideNo.No.9 9ononendendofof needlebar,needlebar, whichwhich isis
donedonebybypullingpullingit itin inthroughthroughthetheopenopenslot.slot. WeWe areare nownow
readyready toto snipsnip offoff thethe endend ofof thethe thread,thread, andthreadand thread itit
throughthrough thetheeyeeyeofofthetheneedle,needle,threadingthreadingfromfromthetheleftleft toto
the right.the Allowright. Allowabout abouttwo twoinchesinchesof ofthreadthreadtoto projectproject
beyond thethe needleneedle whenwhenthethe take-uptake-upisis atat itsits highesthighest
point.point.
2
TheThe threadthreadshouldshouldpasspassbackbackof pinof pinNo.No.i {not1 (notwoundwoundaround}around) andand
underunder washerwasherNo.No.2 but2 butininfrontfrontofofpinpinNo.No.j3thenthen toto openopen slotslot No.No. 4./
<_AsAs shownshown inin thethe aboveaboveillustration,illustration, threadthreadasasititcomescomes
fromfromyouryour spoolspoolshouldshouldpasspassunderunderhooksbooksAAandand B11
TheThe aboveaboveillustrationillustrationis isa apicturepictureofofthethe machinemachine asas youyou
looklook downdownuponuponit itandandshowsshowssomesomeveryveryimportantimportant pointspoints
atat whichwhich thethe threadthread passespassesasas describeddescribed onon pagepage 7.7.
8View original page 12Page 13 · Read text
- White

          ToC]oThreadG]breadthethe Bobbinbobbin CaseQase
 ToTo threadthread thethe bobbinbobbin case,case,holdholdititinin thethe leftleft handhand withwith
 thethe firstfirst fingerfinger andand thumbthumbonon thethe outerouter rimrim ofof thethe bobbinbobbin
 casecase (the(the centercenter spindlespindle upward),upward),letlet fourfour toto sixsix inchesinches
 ofof threadthread extendextend fromfrom thethe bobbin,bobbin, placeplace thethe bobbinbobbin inin


                       BOBBINBOBBIN


                  SHUTTLESHUTTLE


thethe bobbinbobbin casecase overover thethe centercenter spindle,spindle, soso thatthat
 threadthread willwill comecome fromfrom bobbinbobbin onon samesame sidesideasasholehole2 2
 in bobbin case, pull the extended end of the thread
indownwardbobbinthroughcrushsloti cheNo. ,1, endearupwards not(or towardsthe threadyou)


                                    9
View original page 13Page 14 · Read text
ff        =^U)hitc: White-     =w
 toto pointpointNo.No.2,2,continuingcontinuingpullingpullingthetheendend ofof thethe threadthread
 towardstowards youyoudowndownthroughthroughslotslotNo.No.3,3,thisthis pullpull toto bebe
 directlydirectlytowardstowardsthethepalmpalmofofyouryourleftleft hand,hand, thenthen byby
 holdingholding thethebobbinbobbinsosoit itwillwillnotnotrevolverevolve inin thethe case,case, re-rc-


               BOBBINBOBBIN CASECASE


          SHUTTLESHUTTLE RACERACE COVERCOVER


verseverse thethemotionmotionof ofyouryourrightrighthandhandpullingpulling thethe threadthread
toto thetheright,right,andandit itwillwill findfind itsits correctcorrectplaceplacethroughthroughthethe
liplip ofof springspringatat pointpoint No.No. 4.4.


                               ---------------------10----------------------
View original page 14Page 15 · Read text
—   —?Xi)hitc:• White

      TooRemoveGRemove bobbinBobbin (faseCase fromfrom ShuttleShuttle
RaiseRaise thethe take-uptake-up toto itsits highesthighestpointpointandand withwith thethe thumbthumb
andand secondsecond fingerfinger ofof leftleft hand,hand, claspclasp bobbinbobbin casecase asas shownshown
inin illustration,illustration, thenthen liftlift latchlatch SS withwith thethe thirdfinger,third  finger,
whenwhen bobbinbobbin casecase maymayreadilyreadilybebewithdrawnwithdrawnfromfromshuttle.shuttle.


       S


             To ReplaceReplaceBobbin(bobbinCaseQase
ToTo replacereplace thethe bobbinbobbin case,case, simplysimplyslipslipitit onon thethe pinpin inin
shuttleshuttle withwith thethe tensiontension projectingprojecting upward,upward, andand pushpush itit
intointo shuttle,shuttle, asas farfar asas itit willwill go,go, whenwhen thethe springspring latchlatch


                                   ----------------------11-----------------------
View original page 15Page 16 · Read text
-^WhitcWhite —---- —
willpasswill pass overoverandandretainretainit itininthatthat position.position. TheThe threadthread
shouldshould bebeallowedallowedto toprojectprojectaboutabouttwotwo inchesinches fromfrom thethe
bobbinbobbin casecase tension.tension.
To ^rawDraw <7C(pUp thethe J^oiverLower ^JhreadThread
HoldHold thethe endend ofofthetheupperupperthreadthreadlooselyloosely inin thethe leftlefthand,hand,
andand withwith thethe rightright handhandgentlygently revolverevolve thethe hand-wheel,hand-wheel,
turningturning thethetoptopsidesidefromfromyouyouuntiluntilthethe needleneedle passespasses toto
itsits lowestlowestpointpointandandreturns.returns.A Alooploopwillwill bebe formedformed andand
drawndrawn upupthroughthroughneedleneedlehole.hole.TheTheendsendsofof thethe threadsthreads
shouldshould thenthenbebepassedpassedunderunderandandto tothetherearrearofof presser-foot.presser-toot.
TheThe machinemachineis isnownowreadyreadyforforpracticalpractical operation.operation.
Importantimportant
Alwaysstopstopthethemachinemachinewithwiththethetake-uptake-up No.No. 88 (see(see
illustration,illustration, pagepage7) 7)at atitsitshighesthighestpoint;point; raiseraise thethe presser-presser
foot,foot,thenthentaketakeholdholdofofthetheworkworkbeingbeingdonedone withwith youryour
leftleft hand,hand,pullpullit itdirectlydirectlyfromfromyouyouorortowardstowards thethe backback
ofof thethe machinemachinekeepingkeepingthetheupperupperthreadthreadininthethe slotslot ofof
thethe presser-foot,presser-foot,whichwhichwillwillpreventpreventbendingbending thethe needle,needle,
thenthen cutcut threads.threads.
12View original page 16Page 17 · Read text
-= White:White -
GJhe pension The Tension Indicatorindicator
ToGJoRegulateRegulate thethe GJensionTension
ToTo loosenloosen thethe tension,tension, turnturn thethe thumbscrewthumbscrew onon thethe dialdial
toto thethe left,left, whichwhich willwill movemove thethe pointerpointer towardstowards figurefigure 1.1.
ToTo tightentighten it,it,turnturn toto thethe right,right, movingmoving thethe pointerpointer to-to
wardswards No.No. 8.8. ByBy thisthis meansmeans thethe samesame tensiontension cancan alwaysalways
LOOSE
TIGH
be duplicated, thus obviating the necessity of experi
hementalduplicated,trials, asasshisisis thethebecasecasecasingwithwiththeotherothernecessiachimachines.machines.sxIfpra
tighttight tensiontension isis desired,desired, bothboth upperupper andand underunder threadsthreads
mustmust necessarilynecessarily bebetight.tight. IfIf thethe upperupper threadthread isis tighttight andand
thethe lowerlower threadthread loose,loose, thethe upperupper threadthread willwill bebe drawndrawn
toto thethe top,top, thus:thus:
1 0000E
IfIf thethe lowerlower threadthread isis tootoo tight,tight, itit willwill bebe drawndrawn straightstraight
onon thethe bottombottom ofof goods,goods, thus:thus:
WhenWhen youyou desiredesire rhethe stitchesstitchestoto looklook alikealike onon bothboth sides,sides,
andand bebe elastic,elastic, balancebalance thethe tensiontension thus:thus:
POOOOOOL
13View original page 17Page 18 · Read text
- White =
Lower Tension
IllustrationIllustration herewithherewithrepresentsrepresentsthethebobbinbobbin case.case. ToIo regu-regu
latelate thethelowerlowertension,tension,turnturnscrewscrewT Ttotothetherightright toto tightentighten
andand toto thethe leftleft toto loosen.loosen.
GJThebe Tensionpension ReleasercReleaser
TheThe tensiontensionreleaserreleaseris isoperatedoperatedbybythethe presser-barpresser-bar lifterlifter
lever.lever. ByBymeansmeansof ofit,it,allalltensiontensionisistakentaken offoff thethe upperupper
threadthread whenwhenthethepresser-footpresser-footis israised,raised,andand thethe workwork cancan
bebe takentakenoutoutwithoutwithoutpullingpullingthethethreadthread downdown byby hand.hand.
AlwaysAlwaysregulateregulatetensiontensionofofupperupperthreadthread whenwhen presser-footpresser-foot isis
down.doivn.
14View original page 18Page 19 · Read text
ffl —=^®hitc• White —:
To^7oRemoveRemove ShuttleShut tie fromfrom ShuttleShuttle RacecRace
FirstFirst removeremove thethe bobbinbobbin casecase (see(seeillustration,illustration, pagepage 11).11)
TurnTurn thethe headhead backback onon itsits hinges,hinges,thenthenturnturn thethe hand-wheelhand-wheel
fromfrom youyou inin thethe samesame directiondirectionasas inin sewing,sewing, untiluntil thethe
pointpoint ofof thethe needleneedle justjust entersenters thethe needle-plateneedle-plate hole;hole; thenthen
removeremove shuttleshuttle racerace covercoverbybypushingpushingononthethe rearrear endend ofof
latchlatch GG atat thethe samesame timetime pullpull shuttleshuttle racerace covercover awayaway
fromfrom shuttleshuttle andand towardstowards latchlatch GG andand fromfrom underunder pinpin H.H
TheThe shuttleshuttle cancan nownow bebe removedremovedbybytakingtaking aa holdhold ofof pinpin
WW (see(see illustrationillustration below)below) withwith thethe firstfirst fingerfinger andand thumb.thumb.
WhenWhen shuttleshuttle hashas beenbeen removedremoved fromfrom racerace bebe suresure toto
cleanclean bothboth andand oiloil thethe racerace slightlyslightly beforebefore replacing.replacing. Occa-Occa
sionallysionally oiloil slightlyslightly pinpin WW inin shuttle.shuttle. AlsoAlso seesee thatthat nono
threadthread isis woundwound aroundaround bottombottom ofof centercenter pinpin W.W.
H
DP DP W
- 1515 -View original page 19Page 20 · Read text
• =>% -^WhitcWhite
ToGJo ReplacecReplace thethe ShuttleShuttle
TurnTurn thethe hand-wheelhand-wheelfromfromyouyouuntiluntilthethe pointpoint ofof thethe
needleneedle justjustentersentersthetheneedleneedleplateplatehole;hole;taketake thethe shuttleshuttle
byby thethe centercenterpinpinWWwithwiththethe leftleft handhand andand placeplace itit inin
thethe race,race,sosothatthat pointpoint ofof shuttleshuttle willwill bebe fromfrom youyou andand
overover arrow,arrow,thisthisisisimperative,imperative,so sothatthatthetheholesholesininthethe
shuttleshuttle willwilldropdroponontotodrivingdrivingpinspins inin race,race, asas shownshown byby
initialsinitials DPonDP on pagepage 15,15, thenthen replacereplace thethe shuttleshuttle racerace
cover.cover. SecSee instructions,instructions, pagepage 15.15-
DODO NOTNOTFORCEFORCEthetheshuttleshuttleintointorace.race.ItIt willwill enterenter
readilyreadily yvhenwhen inin properproper position.position.
ShouldShould thethemachinemachineatatanyanytimetimeactact badlybadly inin sewingsewing oror
running,running, removeremoveshuttle,shuttle,cleancleanit itandandthethe race,race, whichwhich isis
butbut aa moment'smoment's work.work.
STITCH REGULATOR
KNURLED THUMB
SCREW
ToGJo Wind aaBobbin(JJobbiti
PullPull thethe clutchclutchlatchlatchofofthethehandhandwheelwheel outwardoutward soso thatthat
thethe handhand wheelwillwheel will revolverevolve withoutwithout runningrunning thethe ma-ma-View original page 20Page 21 · Read text
- White
 chine. Place the bobbin on bobbin winder spindle. Raise
 the bobbin winder by screwing the knurledthumb-screw
 that raises the bobbin winder and thus engages the rubber
 wheel with the hand wheel.
 Next, place a spool of thread on the spool spindle near-
 est the hand wheel, take the end of the thread and pass
  it downward through open eyelet "A,      wrapping one
 time around the bracket to the left and downward through
 open eyelet "B," then placing the end of the thread
through the hole "C". on the outer edge of the bobbin,
 holding on to the end until you have run the machine
 sufficiently to wind several times around the bobbin, then
break off end of thread at hole "C,," then continue to run
 machine until bobbin is filled to one-sixteenth of an inch
 from edges of bobbin.

         To Change the Length of Sritch

chineThe stitchon theregulatorfront sideisoflocatedarm. (Seeat illustration,the right endpageof 16).ma-
TO SHORTEN stitch, move the lever down. TO LENGTH-

andEN No.stitch,7 themovelongestleverstitchup. No. 1 indicates the shortest,

              To Remove Work
Stop machine with take-up at its highest point; raise the
 presser-foot by means of the lifter; then take hold of your
work with your left hand and pull it directly from you,
keeping the top thread in the slot of the presser-foot,
which willprevent bending the needle. Now raise the
work and draw the threads into the thread cutter on the
 presser-bar and pull downward, which will cut the threads
 the proper length to commence work again.

      Explanation of Difficulties that Sometimes
              Occur with Beginners
 If the upper thread breaks, it may be caused by the needle
not being properly set, or the machine not threaded cor-
View original page 21Page 22 · Read text
• White:
rectly, or the upper tension too tight, or the thread un-
even and the needle too small for it, or the needle eye too
sharp, or the presser-foot attached to the machine so that
the needle rubs it in passing.

If the under thread breaks, it may be caused by the bobbin
case being improperly threaded, or too much tension upon
 it, or by the bobbin being wound too full so that the
 thread slips over the ends of the bobbin in the bobbin case.

 If the needle breaks, it is probably caused by pulling the
 goods to or from you so that the needle strikes the needle-
 plate and is bound to break. The needle may, however,
 break in trying to sew extraordinary heavy seams when
 the pressure on the presser-foot is not heavy enough.

 To create more pressure upon the goods, turn the thumb-

 screw on top of the presser-bar to the right; to decrease

  the pressure, turn it to the left.

  If it makes loop stitches, it is probably caused by too
 loose tension both top and bottom.

 Ifthe machine skips stitches, the needle is either-bent, in wrong
 position, or it is the wrong make of needle— use no other
 than the genuine "White" with W.S.M.stamped on the shank.

 If the stitches are not even, it may be caused by the presser-
 foot not resting evenly upon the fabric sewed, or by the
 feed not being high enough, or by the stitch being too
 short, or by pulling the cloth or by using too fine a needle
 with too coarse or uneven thread.

 If the machine should be run without sewing and thread
 gets in the shuttle race, making the machine run heavy,
 take out bobbin case and run the machine in the wrong
 direction and it will cut the thread out; or remove shuttle
 and clean the race and driving pins. (See illustration,
page 15.)
View original page 22
Page 23 · Read text
- White
Hemming
RaiseRaise thethe take-uptake-up toto itsits highesthighest point,point, removeremove thethe presser-presser
footfoot andand inin itsits placeplace attachattach thethe hemmer.hemmer. StartingStarting aboutabout
¼ inchinch fromfrom thethe corner,corner, trimtrim thethe clothcloth round.round. TurnTurn edgeedge
ofof clothcloth overover toto formform hemhem forfor aboutabout oneone inchinch fromfrom corner.corner.
InsertInsert inin hemmerhemmer farfar enoughenough toto permitpermit thethe needleneedle toto enterenter
thethe clothcloth atat itsits extremeextreme edgeedge (as(as above),above), thenthen proceedproceed toto
sew, keepingsew, keepingthe edgethe edgeturnedturnedas asit itfeedsfeedsthrough.through. IfIf thethe
seamseam isis tootoo nearnear thethe edgeedge ofof thethe hemhem towardstowards thethe cloth,cloth,
movemove thethe hemmerhemmer towardstowards thethe rightright byby pushingpushing thethe hem-hem-
mermer towardstowards thethe right.right. IfIf thethe seamseam isis tootoo nearnear thethe edgeedge
ofof thethe hemhem awayaway fromfrom thethe cloth,cloth, movemove thethe hemmerhemmer to-to
wardswardsthe theleft.left.YouYouwillwillfindtindin inthetheboxboxanan assortmentassortment ofof
widerwider hemmers,hemmers, whichwhich maymay bebe usedused forfor heavierheavier workwork
wherewhere youyou wantwant toto makemake widerwider hems.hems. TheThe principleprinciple ofof
usingusing isis thethe same.same. NoNo difficultydifficulty willwill bebe encounteredencountered ifif thethe
hemhem isis startedstarted byby foldingfolding thethe goodsgoods preparatorypreparatory toto feed-feed
inging itit intointo therhe hemmer.hemmer.
StemmingHemming andand fellingFelling
AA fellfell isis mademadewithwiththethe footfoot hemmer.hemmer. YouYou placeplace two*piecestwo pieces
ofof goodsgoods withwith thethe faceface sidesidetogether.together. TheThe lowerlower piecepiece ofof
goodsgoods shouldshould projectproject towardstowardsthethe rightright aboutabout Vg⅛ inchinch be-bc-
vond rhe edge of the upper piece of goods. Place both
beneath the hemmer, using the hemmer as a presser-foot.
19View original page 23Related documents and language editions
WhitePDF
White Five-Stitch Attachment — Book 12
User manual
18 pages · EnglishRead →
WhitePDF
White Rotary Automatic Series 666
User manual
23 pages · EnglishRead →
WhitePDF
White Rotary Automatic Series 666 Decorative Stitches
Reference guide
2 pages · EnglishRead →
WhitePDF
White Rotary Electric 41 & 45
User manual
16 pages · EnglishRead →
WhitePDF
White Rotary Electric — Book 12
User manual
18 pages · EnglishRead →
WhitePDF
White Rotary Electric — Book 13 (1937)
User manual
14 pages · EnglishRead →
WhitePDF
White Rotary — Book 10
User manual
14 pages · EnglishRead →
WhitePDF
White Rotary — Book 11
User manual
28 pages · EnglishRead →
WhitePDF
White Sewing Machine and Its Attachments
User manual
32 pages · EnglishRead →
WhitePDF
White — Book 6
User manual
16 pages · EnglishRead →
From the ISMACS International. Original publisher and archive notices are retained.
Check the model and edition against your equipment.
PDF verified 2026-10-11.