Sewing machine accessories
White Sewing Machine and Its Attachments — User manual
User manual for White Sewing Machine and Its Attachments. 32 pages in English. Read the original PDF, download or print a copy without registration.
32 pagesEnglish20.8 MB PDF
Loading your manual…Open PDF directly
Document details
- Brand
- White
- Model / document
- White Sewing Machine and Its Attachments
- Document type
- User manual
- Language
- English
- Pages
- 32
- File size
- 20.8 MB
- Category
- Sewing machine accessories
- Document date
- Not specified in catalog
Search available document text
Find a term, then jump to its page in the original PDF. Image-only pages may not be searchable; check the PDF for exact wording and diagrams.
Page 1 · Read text
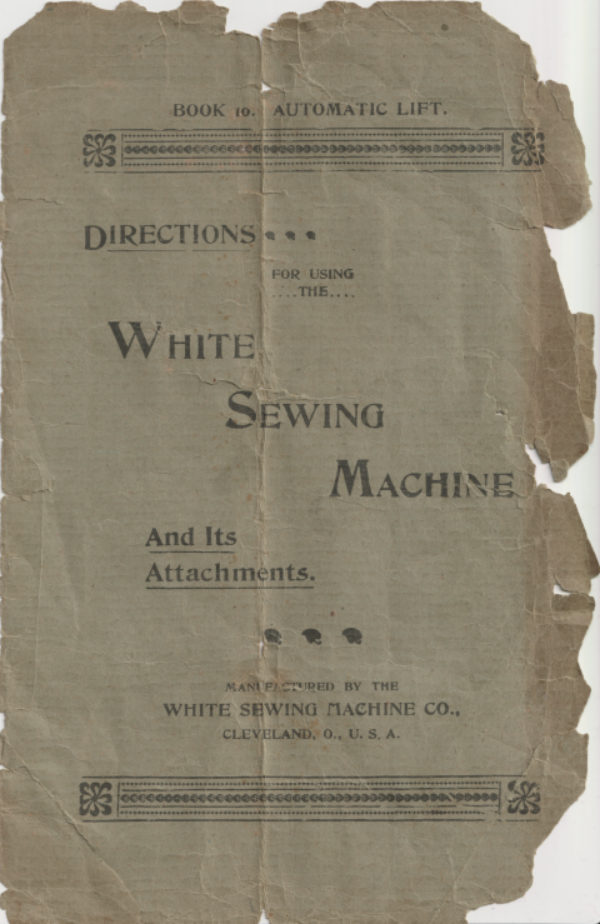
BOOK 10. AUTOMATIC LIFT.


DIRECTIONS . .•

                  FOR USING
                         THE....
 WHITE

      SEWING

         MACHINE

     And Its
    Attachments.


                 MANI PASTURED BY THE
       WHITE SEWING MACHINE CO..

                 CLEVELAND, O., U. S. A.
View original page 1Page 2 · Read text
Our Invatid'e Cable.


No. 1 showing position for use et sagside.


                                              No. 2 shows reversed position for un
                                                          Card, Library or Genere                                  & a Sewing,
         The Top is bevelled                       Table.
         and is 18 by 36 in.
           Adjustable, 24 to 36
          Inches from floor.


  No. 8 with portable Book Rest in position.
                                           No. 4 showing portable Book Rest
                                                    enlarged, closed and opened.
                                     A comfort giving device, can be stant-

                                           ad to almost uny desired angle.
View original page 2Page 3 · Read text
and the top is
                           eitherThe Antiqueiron frameOak, isWalnut,weatly, apinned, anthe Ash
                            or Mahogany, made in layers firmly glued together, and
                           crossing the grain, so as to guard against       or
                                       and is finely polished   The table, in
                             arts, is handsomely and substantially constructed, em
                               odying all that is reliable and desirable, and aside frot
                             its useful qualities, is an ornament fit to grace any home
                            and for the above mentioned uses,HOW                     * IT STANDS WITHOUT AN EQUAL. A *

                 ANTIWALNOT,WALNUT, $6.50.  HUNGARIANMAHOGANY:ASY, $9.00IT                     BIRCH
WORKS.


                                              Pig. 1,

        Please read some of the many letters we receive from purchasers of the
                 •UTILITY TABLE.-
  Gentlemen:-The table came yrsterday in    Received the table yesterday, and am ver
                                  isfactory     11BC7 D011Pr6 LO 100 T0T77081 promptacss ia
 стегуthey respect.epion, and la perfect anting,                   order.  Table
                 Mrs. M.B. RapeNDInk,               and is entirely anthractory. Müwankee, Wis,
                                                       a ve been louking for some similar article for
   Invalide' Table Co..-The table came at   a long time but without succras.
 lant, after  werk      Las morn   UID LE             ST PUTTERICE
                ine reneur                article on the market nou boo     twiste        for
                             Invalid and       the patronage     table
  ope you cat                                                     Yours truly.
  It is as servicable for                          thewell as                                     for                                         thi                                                         HENRY S, HAWLEY 1n18c1L8C1055                   arm-chatr                             and                                 will                                      soon   Chicago, I1.
 ase it acrosn my AimmOrk 10 IT KITC
         You nsed far better descriptive mat-    The tahle is very handsome and we are              circulars than I have scen, While
                        ensible for     invalid, it  well pleased with it   Yours respectfully,
                   aluable for                Homer, Mich.             R. B. GoOnRIC»
  Wouldn't take $5L for mine if I couldn't get
 annther.
  Pittaburg, Pa.      Yours trul P. NTLLER.                                     The Look rest for the table, recently                                                                                               I am sure it
    The LAKRSDE HOSPITAL, Cleveland, O       important adjunct to the table in out
    Gentlemen: —I consideryour table one    family and shoult think every family would
  he most useful pieces of furniture we have it    ICCL the hou-chola  necessities
  this Hospital.   t is sulfilling every expecta    without your table and hook rest LUS T900
  tar.  I recommend them to my friends and   of the table is very beautiful, I think.
  sequaintances in hospital work,                                                                  Cordially yours,             Yours very respectfally,
  (Thirty-eight in use.) J. S. KNOWTER, Supt   Cleveland, 0,       Mes. J. H. MeBunt
View original page 3Page 4 · Read text
NOTICE-All White Machines from No. 1 191 8o1 will be fitted with

    ball-bearing stands; all stand parts for box top machines only.
    must be ordered from numbers given below.   Also mention

    number of your machine and state if drop head or machine wits

   • cover.
View original page 4Page 6 · Read text
INSTRUCTIONS


                              FOR USING THE

  White Sewing Machine,

      THE BEST IN THE WORLD.


                          Manufactured by the

 White Sewing Machine Company,

              Cleveland, Ohio, U. S. A.


     At a very large expense we have had the White Sewing Machine

 explicitly illustrated, and within the following pages we submit these

 illustrations with such explanations as will enable anyone, with little or

 no experience, to readily understand and satisfactorily work the machine

 All we ask is that you will carefully read and follow these directions, and

 you can confidently rest assured that you will find yourself the possessor
 of the best Sewing Machine in the World.


     Before the machine leaves our factory it has undergone a minute in-
 spection, and every mechanical defect corrected; it has been thoroughly

tested as to its perfect sewing qualities, and found satisfactory in every
respect.

     It is a matter of fact that any and all machinery will become worn

sooner or later by constant use, and while the wear in the "Watte" will
be imperceptible for many years, we have so constructed our machine

 that any "lost motion" can be taken up in a few moments, and the parts
kept in their proper position for an indefinite length of time.

     Operators are cautioned not to attempt to adjust the machine unless

its sewing qualities are impaired, and not then unless they are perfectly
 familiar with its principles and mechanism.

     Any unskilled person attempting to adjust or repair any machine

 will often do greater injury than years of ordinary wear could produce.
View original page 6Page 7 · Read text
THE TREADLE MOVEMENT.


    The treadle movement should be thoroughly learned, so that the

operator can readily revolve the balance-wheel by means of the treadle
with either foot.

    Remove the belt from the balance-wheel and place your feet on the

creadle directly over the treadle rod, then take hold of the balance wheel
and turn it toward you, allowing the feet to move freely with the motion
thus commenced, and continue this motion by an alternate pressure of the

heel and toe until a regular and easy motion is obtained.

     Do not attempt to learn anything else until you are proficient in the

use of the treadle, so that you can start it and stop it without ever turning
 it in the wrong direction.


       TO OPERATE THE MACHINE.


     Having become perfectly familiar with the treadle movement, now

replace the belt and connect the fly-wheel of the machine with the balance

 wheel of the stand; raise the presser foot with the lever, remove the slide
over the shuttle and take out the shuttle; then start the fly-wheel of the

 machine towards you and continue the motion thus imparted, with the

 feet, as per instructions given above.
     After becomingexpertly proficient in this motion and without the
 shuttle in or the machine threaded, place a piece of cloth between the feed

and the presser foot; let the presser foot down upon it and operate the
 machine in this way until you are accustomed to guiding the material
 in whatever direction you desire.
    NotE.—Do not run the machine with the presser foot down on the
 feed and no cloth between the two.
    Do not pull the cloth to or from you in such a manner as to bend
 the needle.

      Do not undertake to do practical sewing, but practice upon strips of

 cloth until you can produce a regular motion of the machine and guide the

 work as you wish.
View original page 7Page 8 · Read text
TO SET THE NEEDLE.


    Raise the needle bar to its highest point; loosen the thumb screw ano
 press it to the left to permit the shank of the needle to pass up, between
 he clamp and needle lbar as far as it will go-flat side to the right—-the

weedle being flattened on one side so it will set itself perfectly, then faster
securely by tightening thumb-screw.

     The needle when descending, should pass central in the needle hoke

from front to rear, but a little nearer to the right than to the left of the
hole, as it prevents the needle from glancing into the race and being
 aught by the shuttle; if properly set, the point of the shuttle should enter
 he largest part of the loop formed with the thread


    NEEDLES AND THREAD TO BE USED.


     The most important consideration is to bay and use perfect needles
                        WE PARTICULARLY REQUEST OUR DEALERS ANE
 not bent, nor blunt points.
 PHEIR CUSTOMERS TO BUY THEIR NEEDLES AND OIL FROM US.

     The size of the needle should conform to the size of the thread and
 both be suitable to the material sewed.Use as fine a needle as will per-

 mit the thread to pass freely through the eye.

     A No. 1 needle may be used for all kinds of ordinary family sewing
 where thread from numbers 50 to 6o is used; there, is seldom a necessity
 for using a coarser cotton than No. 30, because every stitch made by a
 sewing machine is just double as strong as one made by hand. In generai
 sewing use the same size of thread above and below.

     The following index will show the size of needle, thread and silv
 te be used :
            COTTON             TWIST.          NEEDLE
                                        000®         00              150 to 300
               90 to 150            0O
              70 to 90
                                A & B              50 to70
              30 to 50
                20 to 30          D-           3
                             E & F              8 to 20
     For Leather, use a twist pointed needle.

     For colored thread use needles one size larger than given in index
 above.

    SKIPPING STITCHES AND BREAKING THREAD is an unheard complaint
 when the genuine "WHIte" needle is used. The market is full of needles
 of an inferior quality-made to sell cheap. and as an inducement for
 every owner of a WHite to use it satisfactorily, (which can only be done
 by the use of a good needle) we will mail one dozen needles, with postage
 prepaid, on receipt of 40 cents.
View original page 8Page 9 · Read text
Transparent View of Machine Head.


    Do not use these numbers to order extra parts from. See page 13
for order list.

                                                                                   1 4PE65

  , No. 4 represents shuttle carrier, No. 6 feed spring, No. 7 feed bar,

No. 12 shuttle lever.
View original page 9Page 10 · Read text
The length of stitch should be governed by the size of the thread;
the coarser the thread the longer the stitch.


        To Fill the Bobbin with Thread
          with the New Worm Gear Automatic Bobbin Winder.

                                     (see cut page 7)

    The automatic bobbin winder is fastened firmly to the arm of the
machine.
    Slip clutch 1 out of fly wheel so that wheel will revolve without
 running machine; push the belt from you, putting it behind the bobbin
 winder pulley                             Now place bobbin in winder                 into groove of same.

"13" isis toto thebe extreeextremeright.right.inch the end of thread between right haint
                                                                  " then down
toendslotof "14,'"bobbinthenandfromwinder;you, nowbackpassof bobbinthreadwinderinto slotframe"I3, up to spool.
Now start to wind with treadle motion running wheel in same direction
 as when sewing, and holding thread between your hngers until it becomes
 taut after which it will finish winding without holding the thread

                    Thread.

     Do not use poor thread. You must not expect to make a nice, smooth
stitch with cheap, uneven thread.   clarke's or Willimantic six cord spo

  otton is the best, and we will fill all orders for it promptly, by mail ‹

express, on receipt of price, viz.: 6o cents per dozen spools.

         Keep the Machine Well Oiled.


     If the machine is dirty or gummed up with poor oil, clean it off by
the use of spirits of turpentine or kerosene, then wipe dry and apply fine

sperm oil in the places indicated by the word oil in the illustration on
page 2.
    Keep the inside working parts thoroughly oiled. In addition to the
oil holes, the upper part of the machine should be carefully oiled on the
needle bar and slot in face on side from you; also in hole in face on side
toward you with needle at its highest point. To oil the under side, slip
the belt off the bal nce-wheel and turn the machine back on its hinges,
and oil all the places indicated by numbers 3. 5, 8 and 10 on page 7.
    Use only the best quality of sperm oil, and whenever you oil the
machine, work it a little to distribute the oil, and then, after standing a
few moments, take a soft cloth and clean the superfluous oil from the
                                                            shuttlejapanned parts of the machine, also from the needle bar.The
                                    Keep this waste slightlyrace is provided with a cup filled with waste.
 moistened with oil, which will keep the shuttle and its race lubricated all
 that is necessary.

                  The Iron Stand.


     Oil should be distributed upon the treadle cones at 380 and balance

wheel arms, also upper and lower end of pitman 388. (See page 2.)
View original page 10Page 11 · Read text
TO THREAD THE MACHINE.

                                     Place the spool of thread on standard No. 11

                                  pass the thread under pin and back of check spring
                                washer No. 2.  Now take the thread in your left

                                hand and pass it down under point No. 3, moving
                               your hand from you when passing under point 3;
                                  then up through slot in end of take up No. 4; then

                                  through slot No. 5 in end of needle bar to needle,

                                  passing the thread through eye of needle from left
                                 to right, drawing two or three inches through
                             THE TENSION.

                                      In illustration above, No. 6 represents the
                                                                 the upper                               Tension Regulator and Indicatorfor                                                             The
                                 thread, an entirely new and useful device.
                                half circle is marked with a scale running from I                                                                  figure 1 and "tight"                                  to 8, with the word "loose"at
                        at No. 8, No. 1 being the slack and No, 8 the
                                    tightest tension.
              TO REGULATE THE TENSION.


     To loosen the tension, turn the thumbscrew on dial No. 6 to the left, which will
move the pointer towards figure L.  To tighten it, turn to the right, moving the
pointer towards No. 8. By this means the same tension can always be duplicated,other ma-
thus obviating the necessity of
chines. If a tight tension is desi eperimentalboth uppertrials,and underas isthreadsthe casemustwithnecessarily
                                                              the upper threadbe tight.
          If the upppr thread is tight and the lower thread loose,
                                              If the lower thread      tight, it
will be drawn to the top,

will be drawn straight on thebottom of goods, thus:

desire the goods to look alike on both sides, and be elastic, balance the tension, thus:
                   THE RELEASER.

     The tension releaser is operated by the presser bar lifter   By means of it, all
 tension is taken off the upper thread when the presser foot is raised, and the work
can be taken out without pulling the thread down hy hand.
              PARTICULAR NOTICE.

     The tension cannot be regulated when the presser foot is up, because the Re-
leaser is operated by the presser bar lifter.
View original page 11Page 12 · Read text
DIRECTIONS FOR THREADING NEW SHUTTLE.


                                      Take the shuttle in the

                                   left hand, the point to.

                                 ward you, holding it an
                                      shown in illustration; drop
                          1
                                        the bobbin into the shuttle
                            and pass the thread into

                                     slot, now draw the thread

                                      toward you from position 1

                                        to 2 until the thread passes
                             under the lip of tension
                                          spring, then pass the thread
                             toward the open end of
                                       shuttle.

                              The shuttle is then ready
                                                 for use.
         2
          To Remove the Shuttle.
   Open the front shuttle-slide to take the shuttle from the machine.                                             Do nos
 undertake to turn the machine back on its hinges for oiling with the rear shuttle
alide partly pulled out.

       To Change the Length of Stitch.

    No, 9, page 7, represents the STITCH REGULATOR,which will be appreciated at
«ight, as the most simple and complete device of the kind ever placed unon a
sewing machine.
   The regulator is located at the right end of machine in front of arm. The round
dial is marked with a scale running from o to 9, representing the limits of the stitch;
No. o being the shortest and No. g the longest.
   To regulate the length of stitch, place your finger on the rough surface of the
 regulator and move it to the number desired, from you to lengthen, and towards you
do shorten the stitch. By this means, the same leugth of stitch can always be dupli
 ated, thus obviating the necessity of experimental trials, as is the casewith other
machines.
        The length of stitch should be governed by the size of the thread; thesoarser the thread the longer the stitch.

              The Vibrator.
    No. 7, page 9, represents the Vibrator thumb-screw, which regulates the Vibrator
in face plate.
              To put Vibrator in gear, loosen thumb-screw and drop it to its lowest
point with presser foot down, and tighten screw again.
    If full vibration of presser foot is desired, let the point of needle down to goods


and Pr only a partial bration of presser foot is desired, let point of needle go dows
through goods and put "vibrator in gear."as above directed.
View original page 12Page 13 · Read text
To Commence Work.

                                                   should leave     In threading the needle and shuttle respectively,,you
                                                   Hold the end of the
an end of thread about two inches in length to each.

upper thread loosely in the left hand, and with the right hand gently re-
volve the fly-wheel until the needle passes to its lowest point and returns,

when if it is set properly, a loop will be formed through which the shuttle
will pass, and, as the needle ascends, it will draw up the lower or shuttle
thread.  Now see that the shuttle slides are both closed over the shuttle,
and the machine is ready for practical operation.
              To Remove Work.

    Stop the machine with the needle at its highest point; raise the
 presser-foot with the lifter which slackens the upper thread; then take
 hold of your work with your left hand and pull it directly from you, keep-
ing the top thread in the slot of the presser-foot, which will prevent bend-
ing the needle. Now raise the work and draw the threads into the thread
cutter on the presser-bar and pull downward, which will cut the threads
the proper length to commence work again.
            Explanation of Difficulties
                 That Sometimes Occur With Beginnors.


     If the upper thread breaks, it may be caused by the needle not being
properly set, or the machine not threaded correctly, or the upper tension
too tight, of the thread uneven and the needle too small for it, or the

needle eye too sharp, or the presser-foot attached to the machine so that
the needle rubs it in passing.
     If the under thread breaks, it may be caused by the shuttle being

woundimproperlytoo fullthreaded,so thatorthetoothreadmuch tensionslips overupontheit,endsor ofby thethe bobbinbobbin inbeingthe


shuttle, or by the thread being caught in the shuttle slides.
     If the needle breaks, it is more than likely your own fault, caused by
 pulling the goods to or from you in such a manner that the needle strikes
                                      The needle may, however, break the throat-plate and is bound to break.

in trying to sew extraordinary heavy seams when the pressure on, the
 presser-foot is not heavy enough.

     To create more pressure upon the goods turn the presser-bar nut on

 top of presser-bar to the rigbt; to decrease the pressure turn it to the left
     If it makes loop stitches, it is most sure to be caused by too loose

tension both top and bottom,
        If the machine skips stitches, the needle is either bent or not in right
 position.
        If the stitches are not even, it may be caused by the presser-foot not resting evenly upon the fabric sewed, or by the feed not beinghigh
 enough, or by the stitch being too short, or by pulling the cloth. or by
 using too fine a needle with too coarse or uneven thread.
                          NOTICE.

                                                                       it     The leather band should always be tight enough not to slip.If

 slips, or does not force the needle through thick goods, cut off a very short
                               The belt should not be so tight as to prevent
 piece and readjust the ends.
 an easy motion of the machine.
                     —11-
View original page 13Page 16 · Read text
Pig. 15.

DIRECTIONS FOR USING THE ATTACHMENTS


                 Hemming.


     Raise the needle to its highest point, remove the presser foot and
in its place attach the hemmer.Trim the edge of cloth on a curve and
insert in hemmer far enough to permit the needle to enter the cloth at

its extreme edge, (See fig. 2 above), then proceed to sew, keeping the
edge turned as it feeds through.

                       Felling.


     The hemmer is also the feller. Sew together two pieces of cloth
with the under edge projecting between ⅛ and ¼ inch beyond the upper

edge; then trim the edges if necessary and open the work flat, wrong side

up, and fold down the wider edge, toward the left, over the narrow edge,
and then pass the folded edge into the feller the same as in ordinary
bemming.

     Fig. 15 represents an operator in the act of completing a fell.


                       —14-
View original page 16Page 17 · Read text
Pig. 1d.


 Hemming and Sewing on Lace--One Operation.


    Our hemmer and felles which accompanies each machine, is now
made with a slot—6. (See illustration above.) In this slot, place the

edge of the lace and sew it on at the same time as in ordinary hemming.

              Wide Hemming.


   Any width hem can be made with the hemmer and feller upon
thin fabrics by simply folding the goods the desired width of hem, and

then passing the edge through as in narrow hemming.


                       —15-
View original page 17Page 18 · Read text
Braiding.


    Remove the presser foot and attach the braider to the presser bar.

    The VIBRATOR must be adjusted (see page 10), at such a height thai
 very downward movement of the needle will cause the braider foot te
raise just enough to allow the goods to pass freely under it.

   The pattern to be braided should first be stamped or drawn on
the cloth. To put the braid into the braider, first raise the foot, then
pass the end of the braid through the slot on braider so that the braid
will pass through the hole 2 in front of the pin and draw it under the
foot and back of the needle; then place the stamped pattern under the
foot and proceed to sew, following the design.

    By the assistance of the vibrator a novice can do better braiding and
more of it, on the White, than an expert can do on any other machin
without such an attachment.
View original page 18Page 19 · Read text
Quilting.


  The QuiLtER is furnished with each machine without extra charge.


   Pass the quilter through hole 2 in presser bar, adjust the quilter
guide to the right of the needle according to the desired space betweee
seams, and high enough to allow the goods to pass freely under it, and
then fasten the quilter securely by screw 3-

    IN STARTiNG to quilt use the outer edge of the cloth for the first
guide, or else crease the cloth on the right and let the quilter guide follow
the crease; quilt the remainder by keeping the guide in a line and over the
last seam stitched.

    NoTIce.—Large quilts should be made in squares or sections and
then sewed together.In quilting squares or diamonds the seams should
be on an equal bias.
View original page 19Page 20 · Read text
Edge Braiding.

    apocial cat attachment, not included with machine, of our own make and pateo
                           adapted onty for the "White"
                           Retail Price • no.


     To adjust the braider for die size braid to be used, loosen the screw
 solding the adjustable piece C, pass the braid through hole A, then dro

 piece C and fasten with the screw, so that the braid will just pass througt


     This can be done best before attaching to the presser bar.
     Now remove the presser foot and attach the braider to the presser
bar.

     The Vibrator must be adjusted (see page 10), at such a height thas

every downward movement of the needle will cause the braider foot te
vaise just enough to allow the goods to pass frely under it.


     To put the braid into the braider, first raise the foot, then pass the
end of braid through the hole A on the braider and draw it under the foot
and back of the needle; then place the stamped pattern under the braider

and proceed to sew. following the design.

     Should the braid lay flat, loosen the screw that holds the braider
on the presser bar, and move the braider a little to the left, the sewing
will then come nearer the edge of braid, and bring it up edge wise on
woe pattern.


     By the assistance of the vibrator a novice can do better braiding and

withoutmore of suchit, onon theattachment.White, than an expert can do on any other machine
View original page 20Page 21 · Read text
Tucking.


    Loosen thumb-screw A and remove presser foot, adjusting the tucker

    on holder, after which tighten A.

    To regulate the size of duck, loosen screw D and placegauge for
any desired width, moving to the right for wide and to the left for narrow
tuck.

    To regulate the space between tucks, loosen screw D and move the
marker to the left for wide space and to the right for narrow.

     The figures on the left of cap show the width of tuck, and those of
the right the width of space.

     By adjusting gauge and marker so that the indicators will point to

 the same figures, the tucks will meet.

    To coMMeNce TUCkING, fold the cloth for the first tuck and place

it beneath the creaser and lip E, with folded edge against the guide; drop

the presser foot and sew as usual.

     The edge of the last tuck made should always pass under the spu
                                                          This will prevent the
 placed immediately in front of the marking blade.
 finished tuck from passing over the marker and will greatly assist in

guiding the work.

     To tuck without marking, throw the lever up.


                     —10-
View original page 21Page 22 · Read text
Ruffling


    Loosen thumb-screw 1, remove presser foot and place the ruffe
in holder, at the same time setting the ruffler-arm-fork z on needle clamp
screw 3; then tighten screw I.

   The goods to be ruffled should be placed between the springs and
then in gauge 4. Gauge 4 should be adjusted to the right or left to get
the desired distance from the edge. The goods will guide itself.

    To make a fine ruffle, shorten stitch of machine and move adjusting
nut 5 upwards.

    For pleating, make a longer stitch, and move nut 5 downward. "I!
a band is required, place it below both springs.

       If two bands are wanted, place the second band above both springs.
drawing cloth back under the needle.
View original page 22Page 23 · Read text
Shirring.

    SEPARATOR'              Remove shuttle slide and put in the
                              shirring plate. Loosen screw 6 (see page
                        20) and remove separator, placing the
                         goods to be shirred between the blades, and
                                  shirr at any desired distance.
                       Be careful not to use ruffler without

                             the separator or shirring blade, and cloth

                               above, for in so doing the ruffler teeth will

                              be broken or injured.

                    To Put Ruffling on a Band
                           with Piping.

                                Take striped calico or plain colored
                               goods cut on the bias in strips one-half inch
                               wide; fold in the center, pressing the folded
                                       Place lip 2 between the bias                           edges down.
                                  fold, then take the band and turn down one
                        edge a quarter of an inch, placing lip 3 be-
                        tween the folded edge, having both ends
                        under separator and on feed of machine.
                         Then place piping and band in slot 4, bring
 ng the piping up and over lip 5, with the ruffing on left and between the
springs in the same manner as plain rufiling; then proceed to sew.
   The ruffling band and piping will guide properly without the aid of
the operator.
    To get the stitching the same distance from the edge of band, move
separator right or left.

           To Make Heavy Pleating.

    Cut Lonsdale cambric in strips one inch wide lengthwise of the goods,
fold in the center and press the folded edge down smooth. Adjust the
 roods with folded edge to thi left and between the springs or ruffier
 Then in gauge 4 (see page 20) set as long a stitch as can be made; turn
adjusting nut 5 to No. 4 on gauge, placing the band on shirring blade
Kp 3 in the same manner as when using piping.
     This will make a very large sized pleat and be stitched on the band.

          To Make Scallop Ruffling.

     Place the goods in ruffer just the same as for making large pleats,
 except to remove gauge 4 from ruffer and shorten the stitch of machine.
 While sewing, move the goods to the right and left alternately and far
enough to make the scallops of desired depth. Scallops can be made of
uniform length by counting the same number of stitches between each
 alternate movement to the right or left.
View original page 23Related documents and language editions
WhitePDF
White Art of Sewing and Dress Creation
Reference guide
108 pages · EnglishRead →
WhitePDF
White Five-Stitch Attachment — Book 12
User manual
18 pages · EnglishRead →
WhitePDF
White Rotary Automatic Series 666
User manual
23 pages · EnglishRead →
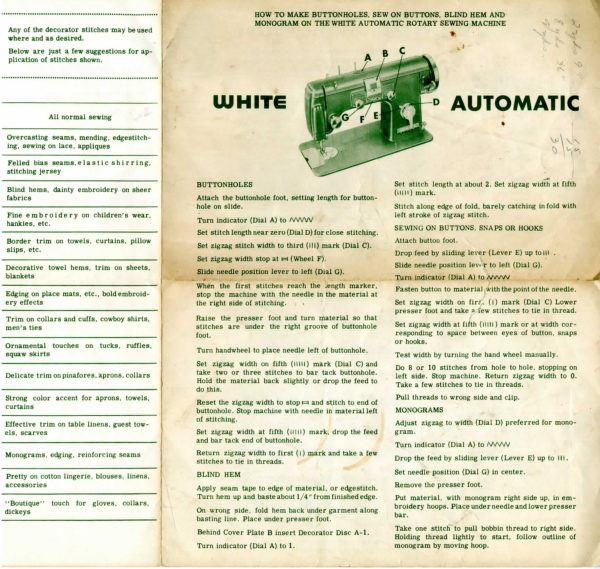
WhitePDF
White Rotary Automatic Series 666 Decorative Stitches
Reference guide
2 pages · EnglishRead →
WhitePDF
White Rotary Electric 41 & 45
User manual
16 pages · EnglishRead →
WhitePDF
White Rotary Electric — Book 12
User manual
18 pages · EnglishRead →
WhitePDF
White Rotary Electric — Book 13 (1937)
User manual
14 pages · EnglishRead →
WhitePDF
White Rotary — Book 10
User manual
14 pages · EnglishRead →
WhitePDF
White Rotary — Book 11
User manual
28 pages · EnglishRead →
WhitePDF
White — Book 6
User manual
16 pages · EnglishRead →
From the ISMACS International. Original publisher and archive notices are retained.
Check the model and edition against your equipment.
PDF verified 2026-10-11.