Sewing machines
White Rotary Electric — Book 13 (1937) — User manual
User manual for White Rotary Electric — Book 13 (1937). 14 pages in English. Read the original PDF, download or print a copy without registration.
14 pagesEnglish6.6 MB PDF
Loading your manual…Open PDF directly
Document details
- Brand
- White
- Model / document
- White Rotary Electric — Book 13 (1937)
- Document type
- User manual
- Language
- English
- Pages
- 14
- File size
- 6.6 MB
- Category
- Sewing machines
- Document date
- Not specified in catalog
Search available document text
Find a term, then jump to its page in the original PDF. Image-only pages may not be searchable; check the PDF for exact wording and diagrams.
Page 2 · Read text
To Sel .Yeedle
     Raise  the  needle-bar  to  Its  highest  polnt;  loosen  the
 thumb-screTh' nnd pres8  It to  tlie lefL Lo pei'niit the shank of
 the libLDLE to  i).'Iss up betii'eon th- ,Iiinip and needle-bur as
 far as  it  sl'ill go-flut side  to th& RTCIIT-the  NF:F:I)LE bciing
 flattened on one side so it Thlll set itself pLJrfectls'p tjien fasLen
 eL'urely by ti&.htenin¥ thunib-screiv.
    To avoid loosening  of the ncedle,  aliN"Iiy.8  iJ4c a  SL'reis'.
 (Jrii'er, the  nL'e(IIL)  SL'I'eii' l)eing  8luttLiII fnr thiit  ijiirijose.
    The needle, 11,hen descenilingl should pass CENTRAL in the
 needle hole from FRONT TO REAR, but close to thc riKht Bide of
 the hole.


                      [T.ge Onl%, Thi4 Needle


     -4n  illubtrati()n  BliowinL'  the  exaLL  IL'ii¥Lh   i)f  the   filiit
S1141nk l£ot<ir!' Noe(I IL,, tll Ul>L' jll thi.s IiiiiclijiiLI    'I'a Iif4o A IniiKer
or *>hortLir nee(Ile  MTIII  L'iiuoe  troul)le  :Inil  iiiJiii"L  tlie niiichine.
     IN'hen ordering  needles,  att&1chiiientb  oi, niuLhine  parL.-
do not fail to Kive thc number of the n121Lliiiie N%'hich  s'()u will
find stamped on the bed plate noar bn.gc of the arni.


      Du nol  allnii"  aEI'iils  ()r  IinLiuIII(11'17.L'(I rL'pJirmen  ti)
    tITinipc'r li.ilh vour machine.  Il'hen un), roi)iiirs are needed
    i)r  instriietinns w.anted  in  c()Iiiioc'tivn  w'ith  thi.s sewing
    niucliiiie.  con.4iilt  i)r  M'rite  tlic  cnnccirii  I'ruiii  ii'h(>iii  yoii
    iJurL'IIiisL.d thls machiiie fvr  dirL'Lti()ns.
View original page 2Page 3 · Read text
Size of Needles and Thread

 Size of                                    Cotton     SiIk               Class 0£ Work to SewNeedle8                                 Thread  Thread

           Very  Thin  Muslins,  Cam-   150-300    000   00            bric3, Linens, ete.

           Very Flne  Calicoe8,  Linens,                                             90-160     00
           Shirtingsi Fine Silk Goods, etc.

             ShirtinKs, SheetinE8, Bleached
           Calicoes, Muslins, Silk General    GO-QO
          Domestic Good8 and Ali Classes
           of General Work.

             All kind8 of IIeav   Cnllcoe8,
            ljight  Woolen  Goo      eavy
            Sllk, Seaming, Stltchlngg etc.


            Tickings, W o o l e n GoodB,
          Trousers, Boy8, Clothing• Cor-    30-40
            8ets, Cloaks, Mantles, etc.

        H e a v y Woolens,  Tickings,                                                       To Remove Bobbin Case From Shutlle          Bags, Heavy  Coats,  Trousers,    20-30
             etc.  Heavy Clothing Generally.                             Raise the take-up to its highest point.  With the thumb
                                                            and second finger of left hand cl&qp bobbin ease as 8hown In
                                                                         Fig.  2, then  lift lateh S  (see Fig. 6) with the third  finger,
                                                       when bobbin ease may be readily withdrawn from shuttle P
   Never run Machine wlth needle Ihreaded wilh-        (see Fig. 5).
oul goods under presser-fool.  Run Illachine so that                 To Thread Bobbln Case
                                                                      Place bobbin in case 80 that thread will come from bobbintop of hand wheel moves from you.                                                                 on same side a8 hole B in bobbin ca8e; pas8 thread through
                                                                                Slot A  to hole B, thence acr088 opening  drawing  it down
                                                              under  lip C. then  pull  it up  until threa  passes out under
                                                                       ten8ion 8pring D.
                                                           The ten8ion on bobbin case Bhould be the 8ame a8 the
                                                             upper t4n8ion.
View original page 3Page 5 · Read text
To Replace Shuttle
    Turn the machine In the dlreetlon for sewing until the                                     FRICTION NUT
point of the needle just enters the needle plate hole; take the
81iuttle by the center pin W with the left hand and place it in
the race. so that the point of shuttle will be from you and
over arrow on thread cast off. so that the holes in the shuttle
will drop onto driving pin8 in race, then replace the shuttle
race cover.

   Do N(yr FORCE the Shuttle into race.   It will enter readily
when in proper position.
    Should the machine at any time act badly in 8ewing or
running.  it Ivould be well to remove shuttle and clean  it and                                       BOBBIN
the race. whiLh is but a moment'8 work.                                                 WINDER
    To replace (he bobbln case,  It need not be held as when                                     PULLEY
removing. but Bimply 81ip  it on the pin in Bhuttle, with the
ten8lon projecting upward, and push it into Shuttle as far a8                                    LEVER D
it wlll go, when the spring latch will pa88 over and retatn  it
In that P081tion.                                                                            STITCH REGULATOR
    The thread should be allowed to project about two inchoB
frorn bobbin ease ten8ion.
                                                                                                'I'o Wind the Ilobbin (L4 lectric Thlachine)
                                                                         Place the bobbin on bobbin winder spindle and pu25h  tu
                                                                          the right as far a8  It will go.   14old the hand wheel flrmly
                                                             and turn the knurled clutch releas8 counter-clockivise, per-
      NLVER RLTN 1112ICHINE WITII NfEDI.E                   niitting wheel to run free.  Place spool of thread  (Jn Bobbin
                                                                               Il'inder Spi)ol  Pin.  Take  en(1 of thread  in  fingei's of  riElIt        TIIRFJill)rt) IVITIIOUT 14A VING TrIA-                                                              hand and huok  it under Guide A from riKhL to  IL.ft.   hTLbXt,
      TERIAL ITNDER TIIE  I'RESSLR-I,"OOT.                  lead thread doivnwurd bL.Lween Ten!lun DISLS  ri. IinLI J)ut  eri(1
                                                                       of thread through hole in Bnbbin  C., letting abnut two inche.s
                                                                           of threud i)rojL'cL thri)uKh holL.  Next,  i)ull I!vL3r D upivurd,
                                                                      eng¢iEing the Bubbin lTr"in(ler Pulley with hand wheel.  Next,
                                                                          hold the end nf thread extendinK thi'nuEh hole  C. with the left
                                                                   hand, run machine and Lomplete Lhe winding 0£ bobbin.
       For smooth operation and good results  it  18 neces-             The  bobbin winder  will  automRticallv  di.sengage  itself                                                         vhen the bobbin  is  full.  Reinove the bui)bin fruin Spindle,   sary to U8e high ¥rade oil.   Th"hite SewlnE hlAchine Oil                                                                       cut off the end of the  threc2cI at hole C, Rn(I plaee bnl)l)in  in    18 recommended for u8e on IVhite Sewlng ,Ilachines.                                                            bnbhin Cl¢ se. Tighten fricti()n nut, turning the top from you
                                                                      or clockwise.
View original page 5Page 6 · Read text
To Ivind the Bobbin (Treadle Illachine)                    To Change the Length of Slilch
     Follow same instructions as for Electric Machine, except"            The regulator is located at the right end of machine on
to engage bobbin Th'inder pulley with hand wheel. the pulley          the front side of arni•
itself must be lifted up, rather than lever D; as treadle ma-
                                                               To 8korten Btitch move the lever down. chine is not equipped with thL2t lever.
                                                               To lengthen stitch move lever up.  No.  l indicate8 the
              Directions  or Threading                            shortest, and No. 7 the longest  titch.
   Ivitb  talie-up  Ici:er 5
At its Iiigknest point place
8pooI  on  spool  pin   l.                                           To Regrjalè  tSie Tension
 'I' I) r o 11 g li o 11 t eiitire
                                                               The regulator  13 loc£tled  OTr the front of mochine abovetlii'cniljiicv o p c I"a t i n n
niuiiitiiiii  u   sli(Ylit   tcii-                                                                           the needle.  To loosen ten8ibn turn pointer upward toivard
i()11  011  i.1irLlI(I Ivith  tlie
  'jfplIt Iiuiicl. ts cit, Ii'itli                                                          N'o. I: to tighten turn pojiitpr doivnward toward No. 8. By thi8
ILI't   Iinii(I  puss  tliread
Iiiiil(!I' l)()Ili Iionks of w r8                              means the 8ame ten8ion..can"alway8 bo duplicated, thus obvi-
Iriijiletlii'eiid (ioii'iiii'ui'cl aiid tsj ¢0                                    ating the nece3slty 0£ ex    i¥nenLal trials. I£ a tight tenslon I
l)IlK%i 111)(l(:I' t(!n8i()11 i)Iiit c                                              desired,both upper and utr8er tliread8 must nece88arily be tight.
 Ii()()1.  3   fi'()In   fi'niit    t.n                                                                                          If the upper thread 13 tlght and the lower thread1008e, the upper
baL.l<. h'eil, i)Iill tlirL'lI(l < p4
111)Ii'ard iiito ali.11 l iii I'.y                                           thread  wlll be (Irawn  to  the  .top, thu8:
princT 4.  ,1'eit, L()Ilt,iiiue                                                                                       If the loiver thrciid  18 too tiKht. it will be drnivn straiKht onu y)Ii'ai'(I, Iiook tl I I'L'UCI
(IipivArcl  nint.inn)   iiito                                               the bottom of goods, thus:               When tensions
t.Hl%e~Iip (.] i i) si)ririk J.
 .,%'eJ,t, i)Iil l Lli I'eu(I d()Ii'ii-                                            are properly adjusted, the stltching on  mllterials  will look
Ii'urd   un(]   Iiook   into                                              the same on both side3, thu8:
n e e (I l e Clamp tlireacl
guide  6  from  back  to
fi'oiit.  Il'eit, run tliread
tliroiigli   tlie  eye  of                                             The Tension Rele<2ser
needle 7  from  left  to
                                                              The tension releaser is operated by the pres8er bur lifter.I'igli t, pill l ing al)(Iiit til'o
iii(:IILI,% nf tlii'ea(l Lliroiikli                                   By means 0£ IL  all tension  18 taken  off the upper thread
tlie nee,dle e)'e.                                             when the pre3ser-foot 18 raised. and the work can be taken
                                                            FIK. 9                     out without pulling the thread down by hand.
View original page 6Page 7 · Read text
Particular Notlce                         Explanation  of  Difficulties That Sometimes Occur
                                                                  With Beginners    The ten8ion cannot be regulated when  t,he  lifter  28  Ilp.
beca1188 the Rcleaser is oper(Lted by tlie pi'e886r bar lif ter.                                                                                 If  the upper thread break8,  it may be Caused by the
                                                                        needle not being properly Bet, or the machine not threaded
                                                                             correctlyi or the upper ten3ion too tight, or the thread uneven
             To Commence IVork                         and the needle tOO 8mall for  it, or the needle eye tOO 8harp•
                                                                      or the pre88er-foot attached to the machine so that the needle
     In threading the needle and bobbin case respectively• YOU         rubs it in pa88ing.
8hould leave an end of thread about two inches in length to                                                                                    If  thé under thread  bret7k8,  It may be caused by the
each.  Hold the end of the upper thread loosely in the left          bobbin case being improperly threaded, or too much tensionhund, und wiLh the right hand revolve the hand wheel until                                                               upon  it, or by the bobbin being wound too full 80 that thethe nccdle passes to its lowest point and returns, and, as the
                                                                     thread 8lip8 over the end8 of the bobbin In the bobbln case.
needlo uscends  It will draw up the lower or 8huttle thread
and the miichino 18 ready for sewing.                                         If the needle br6ak8,  it  is more than  likely cllused by
                                                                        pulling the goods to or from you in such a manner thut the
                                                                        needle  strAkes the throat  plnte.  The needle may• however,
                                                                  break in tryinK to sew extraordinary heavy seams when the
              To Remove Work                             pressure on the pre88er-foot is not heavy enough.
    Stop the machine wlth the take-up at Its highe8t point;                 I'o creaLe more pressure upon the good8 turn the presser-
raise the presser foot with the lifter which releases tension         bar cap on top of the presser-bar to the right.  to decrease
on the upper thread; then tAke hold of your work with your          the pressure turn it to the lefL
left hand and pull it directly from you, keeplng the top thread                If it make8 loop stitehes, It 13 most sure to be caused by
in the slot of the presser-foot, which wlll prevent bending the           too loose tension both top and bottom.
needle.  Now raise the work and drRW the threads Into the
thread Cutter on the presser-bar and pull downwArd, which                If  tlie machine 8k2p8 8titche8, the needle 18 either bont or
Ivill cut the threads  the proper lenEth  to commence work          nut in right po81tion.
again.                                                                        If  the  8tttche8 are not even,  it may be caused by  the
                                                                         presser-foot not re8ting evenly upon the fabrlc sewed, or by
                                                                          the stitch beinE too short, or by pulling the cloth or by using
                                                                            too fine a needle with too coar8e or uneven thread.
              To Cle<2n Illachine
     If (he muchine  is dirty or gummed up with poor oil, oil                If the machine should be run without sewing nnd thread                                                                      gel 4 in the 8huttle race, making the fflaehine run Iic'avy, takethoroughly (Page  2,'4), using Kerosene  (cnal  oil).  RUTr the                                                                 out bobbin ease and run the machine in the wrong direction;machine for a short time, wipe dry and oll wlth Eood sewinK                                                                                                     It will cut the thread out.  Or remove Shuttle and clean racemRchine  oil.                                                               and driving pin8.

                             10                                                                                  11
View original page 7Page 8 · Read text
The Allachmenls                        With  the  right  side  of
                                                                      material down proceed  to    Most of the attachments used with  this machine must
be attached to tho presser-bar in place of the regular presser-       make the narrow hem as
fooL  To remove presser-foot from machine, rai8e the take-up       previou81y  explained.
 to  its highe3t point, loosen knurled thumb-screw on presser-        Simply insert the edge of
bar.  M'hen replacing presser-foot or putting on any attach-                                                                          the lace (right Side down)
ment be certhin it Is pushed bAck onto presser~bar Rs far as
                                                                                   in the Slot leading  to the
it  will  go.  Always be sure  thllt knurled thumb-screw  is
tightened securely.                                                    needle hole, and guide the
                                                                              lace with the right hand.
                                                                     while  feedinE  material
                                                                             into  the  scroll  with  the
             The Narroiv Hemmer                                 left hand.

                                                              The French upplication of lace with  invisible 8titching
                                                                              also require8 the use of the nurrow hemmer. Place lace under
                                                       hemmer with edge of lace against the material being turned
                                                                              into the hem, and proceed as previously explained.  Thus the
                                                                   edge of the lace will be enclosed in the turned hem, all in one
                                                                              Stitching.   I'hen press  tlie hLim buck on wrong side of ma-
                                                                                  terial and no stitching will be visible on right Side.

                                                                                                                                                                                                                                                                                       i ellin&
    Remove  pres8Lir.foot and  attach  the narrow hemmer.
Fold over onch-eighth inch of material for a few inehe8 along                                A fell  is made with the                                                                                           narrow  heTnnier  a8  illus-the cdge, then insert between scrolls in hemmer (narrow fold                                                                                                                truted here. Place the twoof matoriul on  top)  and draw back  untll Starting end i                                                pieces of materilll together
under needle.  Lower presser-foot and begin to 8ew, guiding                                              (right sides  in)  with the
material with  left hand, so a uniforn] amount of muterial                                                        ,dge of  the bottom  piece                                                                                       projecting about  one~keep8 feeding into scroll.  Too much material feedlng in will                                                                                                          eighth of an  inch beyond
result in a wide and uneven hem   too little will prevent edge                                               the  edge  of  the  upper
from turning under, leaving a raw edge.                                                                            piece.  In thi8 Posltion sew
                                                                                                              the  two  pieces  together,
                                                                                                               stitching  about   one-six-
                                                                                                              tecnth of an inch from the
  Hemmlng and Sewlng on Lace, One Operation                                           edEe of the upper piece of
                                                                                                                                       niuLLbrlal.  Then open  the
    The narrow hemmer  is  slotted at the needle  hole, for                                      work and put  it back on
making a  fine hem And sewing on  lace at the Bame  time.                                        machine  right  side down,

                                12                                                                         13
View original page 8Page 9 · Read text
with the raw edge8 of material up.  Fold down the wider                  The Fli'frstilch Ruffler
edge towurd the left and over the narrower edge; then feed
it into tho 8eroll of the narrow hernmer a8 8hown.

                Wide Hemming
    The aBsortment of wide henimers is furnished for heavier
work and for making wider hems, and they are used the same
way aB the Narrow Hemmer.
      If the hem  is started by folding it over for a 8hort dis-
tance along the edge before feeding into hemmer, no difficulty
should be encountered.
     If line of stitching  18  t()0 near the stitched edge of hem
move the hemmer to Lhe right by merely pushing  it 81ightly,
If the stitching is too far from the stitched edge of the hem,
move the hemmer toward the left.

                                                                                                            Letter• d!l!nAte the PArt8 of  RuffleT.
                      Quilting                                                                                                                                     Tr Igureq Sndicale Lhe plAeement 0£ mAteriAI8.
                                                                           A_fioot which  18 attached to Pre88er-Bar.
                                  Loosen screw in thread         11-Fork Arni.  The SeLtiun  pliicvd aJLrld• the needle clamp •erow.
                                    cutter and pa88 the quilter        C-AdJuJtln%D-Five-stltch Screw.Lever. toU8odreKulllLofor iettlnsrtho fullne!A flvo•Jtltehof plaltsplalt. And %AtherB.
                                through  hole  in  presser-          -Lever.   A<JJusL&  for  plalts  or gaiheri  In xroupi  by throwlng  Ruffler
                                     bar,  adjust  the  quilter       F-SeamIntoGulde.neutrol.
                                  guide td the right of the        G-SlldlnK Gulde.  UBed to vary •lze of headlnK•.                                                                    H-Piping Guide.                                    needle according to the de-                 I   FAlge Gulde.  Uned  tn determlne a 0]!e •dK•  blltoh on  mAt•rlAI wh•n
                                      8ired space betiveen 3titch-                    ruffle  l• entered from tho rlKhl.
                                                                       J-Screw.  Uoed to set edKo guLde,
                                        ingg and  high enough  to        K-AdJu•t&ble headlnK Kuld•.
                                   allow  the  goods  to  pass       M-Llp whieh •eparate• Boum  KuldoJ.
                                    freely under  it, and then       N-BlueLlne  I   IJsprlnKunderoverthe adJuAllnKruffler andBcrew.IndleRte• the poaltfon  for Lh• ¥Arnient or
                                   fa8tsn the quilter securely                band lo whleh  rufflo  IA Bewed Klvlnff A %"  ieLm.
                                 with thread cutter screw.          Llno 2  mAterlaJBetween wlththo blueA %" blAde8•0Arn.whore thq feed blad• wlll Kather or plalt
                                                                               Llne 8-The upper  pl@ee  of mAtorlLI  ujed when  ruffl•  l•  •QWfAI between
     In 8tart2ng  to quilt use the outer edge of the cloth for         Llne 4  twoGul(lepioeesfor plplnKof materlAI.•lrSp.
the first guide, or else crease the cloth on the right and  let         Llne S-For edKe•tltehfnr materlal to ruffle thnt  l• entered from TlgbL
the quilter guide follow the crease;  quilt the rcmllinder by
keeping the guide in a line and over the last row 0£ stitching.                               Ruffling
    NOTICE:  Large quilts Should be made in squares or 8ec-          Remove  the  presser-foot from  machine  by  loosening
 tions and then sewed together.  In quilting square8 or dia-       knurled thumb-nut on presser-bar.  Place ruffler foot A  in
monds the seams Should be on an equal bias.                        positlon on the attachment holder and at the Same time Set

                                   14                                                                        15
View original page 9Page 10 · Read text
the fork arm B astride of the needle clamp pushing ruffler                Illaking Gathers or Plaits in Groups
 £rom you a3 far a8  It will go and tighten thumb screw se-
 curely.  See  that needle doe8 not  8trike attschmenL  The              If you find  it desirable, when making garments to have
 goods to be ruffled rnu8t be placed between the two blue blade       gathers or plaits in groups, especially where the gathers are
 and then in gauge G. Gauge G should be adjusted to the riEht       used at the side with a plaln Space or surface between. the or left to get the desired di8tanee from the edgeg the goods                                                          work can be done by pushinK ndjustment E forwurd or from wlll  uide itself.  To make a fine ruffle, have arroiv on stitch
 reKu ating lever on 8ewing machine between l and £ and turn        you. I'he ruffler will then sew plain until the adjustment
 adjustin  thumb-screw C up until the end of screw 18  15 of           18 again  pulled toward  the operator for making  plaits  in
 an inch telow the blue spring N.  To make a heavy  ruffle,       groups.  You  will, no doubt, find  it nece5sury to mark your lenKthen the 8titch to between £ and S  (Bee Stitch reKulAts)r),
 and turn adjusting thumb-Bcrew C downward until the de-       material  in order to measure for even spaces between  the
8irpd fullness  is obtllined.  Adjusting lever D should be down.       groups of gathers or plaits.  Your ruffler should be oiled Rt
                                                                        place indicated.
              To Ruffle on Band                                                     To Adjutiil Ruffler Back for Regular Ruffling
    To ruffle on band, place under Iwth springs next to feed
                                                              Turn Serew C to left until end of Bcrew 18  ed of an inchand over lip M.  Place goods  ts) be ruffled between the springs
and in gauge P.   If a facing 18 required, place facing above          bel()Iv the blue spring IV.  Push lever D down.  Pull adjust-
 both 8pring8 and under foot.                                           nient E toivnrd you und move stitch regulatinE lever on arni
                                                                        of sewing machine to between l and £.
           To Ruffle With a Heading                                  Shirring with Iluffler
    To  ruffle with a heading• place the goods  to be  ruffled                                                                                                                                                             i irst remove hand hole
between  the springs with heading  to the right and adjust                                              cover,  insert  ear YY  ofgauge K for desired heading.                                                                                                         shiTring plate into gauge
                                                                                               screw hole in needle plate,
            To Pipe or Edge-stiteh                                                           and,  holding  down  shir-                                                                                                     ring  plate,  replace  hand
    To pipe or edge-8tltch a  ruffle, the  iping  28 placed  in                                             hole cover over ear XX on
the ruffler through hole H, and edge to   e piped  13 creased                                           shirring plate.
and inserted in gauge  l.  If stitching comes too far from the                                           Before puLt?ng on  ruf-
edge, loosen 3crew J and adjust gauge H to the lefL  Tight£n                                                          flcr,   loosen  screw   that
screw J thoroughly !ter adjusting  is don&  The ruffle to be                                           hold8 the plate supporting
  iped is placed at the right of the blades and in guide G to                                             the lower blue blade and
 eep ruffle heading even.                                                                      remove   thi8   plate  and
                                                                                                    lower  blue   blade,  then
                                                                                                          place  ruffler on  machine
                       Plaiting                                 as directed, being certain that blue ruffling plate 18 on top of
                                                                   surface No.  l of Bhirring plate.  Important that ruffler be    To adjust for plaitingi turn adjusting screw C down a6                                                                    attached firnily by knurled thumb screw.far as it will go; pull adjusting lever D toward you.  Insert
the cloth between the blue 6  rinES, the Tuffler will then make            Place the material to be Shirred under blue blade of ruf-
one plalt at every fif th 8titcK. The Space between plaits can           fler, but over the entire shirring plate and into guides 2, 3 or
be regulated by adju8ting the Stitch on the machine, a longer        4 as may be desired.  (Note) When shirring is Completed put
stitch make8 a wider 8pace between the plaits and a Bhorter        the lower blue blade back onto ruffler before attempting regu-
8titch bring8 the plaits cloqer together.                                  lar ruffling or plaitiT)g.

                                10                                                                                17
View original page 10Page 11 · Read text
Directions for U&iing the Fool Gatherer               When Sewing lace8 or 80ft materlal8 together, it 16 better
    Remove  the  pre38er-foot  and  replace   Th'ith  the  Foot          to hold the edges Slightly overlapped.  This will prevent the
Gatherer.                                                                   lace from feeding away from guide.
                                                      When  the  attaL'hment  18  properly  adjusted.  the most
                                                                     inexperienced operator may Bew yards  of  lace or material
                                                                     tngether with no difficulty.

                                                                        Tucking
                                                             The number8 2 to 6 inclusive stamped on the back edge
                                                                              of the sliding guide represent the width of tuck in eighths of
                                                               an  inch.  After folding the material for the  first tuek, put
                                                                          the folded edge into the guide slot Ivhich is ne.2rest the needle.
                                                    When the left edge of the  fi'iction spring H coincides with
                                                                        the number 2 on the Scale a  IA" tuck results.
                                                                              In  like manner,  set the guide at 3 for a %" tuck.
                                                                                                  set the guide at 4 for a %" tuck.
                                                                                                     set the guide at 5 for a %"  tuL,k.                  I'o Guther, l)uff or Shirr                                                                                                     set the guide at 6 for a %" tuck.     Place the goods under the foot the s.Ime as In ordinary
sewing.  For fine gather use a ghort 8titch.  To increuse the           For tuck8 narrower than %" move the guide G as farfullne88, lengthen  the  pjtitch.  For greater fullnes8 tighten    s desired tn the left.
 top tenslon,
  Coml)inalion FdLre.SliLcher. Tuckin! CJUi(le (ind
                   Top-Braider
                   The  Edge-stitchin!  Attachment    is
                    fastened  to  the  muchine  in  the same
                    nianner a8 the Pre88er-Foot.  There are
                          five different  slots, which are shown in
                     the  illustration,  serving  as  guides  for
                  sewing  together  laco8,  insertions,  eni-
         •4•v               broideries, sewinK  in  position  folded or
                hemmed  edges,  bias-folded  muterial  or
                     piping, etc.
       How to Adjust the Edge-stilcher
    To adjust, move the lug A to the right or left until the
desired adjustment 18 obtained.  When sewing two pieces 0£                               Brai(ling
lace together,  it  is very necessar   that the attachment  is          Move the gulde G  to the right untll the braiding guide
adJu8ted to Stitch exactly on the e ge, so that the edges will         hole K  18 exactly in line with the needle hole of the attach-not fold over when laundered.

                               18                                                                         ID
View original page 11Page 12 · Read text
ment.  The design to be braided should be plainly marked or
Stamped on the top or right side of the fabric.   Start the
soutache braid into hole K and stitch along designi being sure
that the soutache braid is feeding freely into hole K without
twisting.  To turn a corner, stop the machine with tILe needle
down  th1"o!llh  the  b?"a2d  in the exact eorner of the design.
raise the presser-bar ju8t e!0140! to permit the turning of the
fabric  in  the  desired  direction,  lower  the  pres8er-bar and
proceed as before.


                                                                          Place the gauge upon the scissors, as shown:  slip the
                                                                   edge of the cloth in the gauge and proceed to cut the band.
                                                            The tape for the binder should always be cut on the bias,
                                                                             also the piping which is used with the ruffler.


                                                                            Binding


              The Scissors Gauge
    For cutting band8 of variou8 width8, either straight or
 bias.  The 81iding Scale  is adjustable for the widths 0£ band
 desired.
                                        IIA  Inch  indicate8  the
                                 proper  width  for a  bias

                                          lold. which is to be IA illch
                Fig. 32                 wide when  finished.
                                                             Remove the pre8ser-foot and 8ub8tituto the binder.  Cut  One inch indicates the width for cutting bias baud3 which                                                                          the binding 15/16 inch wide (on the bill8 if convenient). Pass
are used with the binder.
                                                                         the  binding through  the  scrolls  of  bindcr and  under  the
  One-half inch  18 for corded or plain piping.  The piping is          needle hole in the attachment.  Place the edKe of the good3
eut bias and folded double to Use with the n,.ffler.                         to be bound between the scrolls of the binder. drop presser-


                                                                                                                    21
View original page 12Page 13 · Read text
foot  lifter, guide the cloth with the  left hand, and  let the                  Keep Machine Well Oiled
binding guide easily through the fingers of the right hand.               011 in all the places indicatsd below.  To  oil the under
To change the  stitchingi near or far from the edge, move          slde of machlne, turn the machine back on its hinges.
binder lug A to right or left as desired.

             Attaching Two Bindings                                       OIL                                       oit
                                                                                                                           OIL             OIL
            Contrasting Colors-One Operation
                                                                                                     OIL
    There are five 810ts of various widths in the T]!ht side
of the scroll of the binder. These correspond in width to the
five sizes of folded bias tape Th'hich are obtainable In most any
dry goods or department store.  Be Sure that the binding
used  is inserted in the slot of corresponding width.  Adjust
the binder to  left or right with lug A  to brlng the  line of
stitching the correct distance from the edge of the bindinK.                                                 OIL
It is well to make sure of this adjusLment (by making a pre-
lirninary sample)  before proceeding with the article which                                                                         OIL
you have to sew.
    Tivo tapes may be used at the 8ame time, the wider In~
side of the narrower.  The two are thus 8eivn to the edge of
the fRbrie by the one line of stitching, with the result that
the edge of the wider tape appears as a piping in relatlon to
the narnw  i)r outside tape.


                                                                                                OIL


                                                                                               01


                                                                                                                                                           OIL
       For smooth upL)ration and good results  It  is neces-
   sary to use high kTrnde oil.   Il'hite Sewing Trlachine Oil
     18 recommended for use on your machine.
                                                                                                         IL


                            22
                                                                                                      23
View original page 13Page 14 · Read text
ELECTRICAL EQUIPMENT
                    Conneclions
    Be sure the motor pulley is adjusted so it centers on the
h&nd whL)el for proper drive;  next, see that the insulating
bushing on cord leading from the rheostat on the inside of
the cabinet  is properly pl.2ced  in the hole in the corner of
the bed of the machine (.r4ee Illustration); next, connect the
three-contact connector pluK to motor terminal as shoivn  in
illustration; next, unwin(l the long wall plug cord from the
storage reel and ennnect it to llny electrical outlet.


                                                              TEAMINAkBLQCff                    ARK SEWINGMACHTNE CO.
                                                                OWPIECrO*                               217 N. Broadway Phone 5-2332
                     INs!4T1!r                             PLUG
                     BUSHING                                                    WICHITA, KANSAS


                    Lubrlcatlon
    Two cu   (one at each end of the motor shaft) provlde
 for motor lu rication. Un8crew the caps and fill with va8eline
occa8ionally. depending upon the use of the machine.

                      Control
    The deslred control 18 obtained by the amount of pressure
on  the knee  lever.   Increased  pressure on  the knee  lever
increa8e8  the speed of the machine.  The same method  of
controlling the Speed applies in the case of Portable Electric8
where the foot pedal Is the mean8 of Speed control.

                             24
View original page 14Related documents and language editions
WhitePDF
White Art of Sewing and Dress Creation
Reference guide
108 pages · EnglishRead →
WhitePDF
White Five-Stitch Attachment — Book 12
User manual
18 pages · EnglishRead →
WhitePDF
White Rotary Automatic Series 666
User manual
23 pages · EnglishRead →
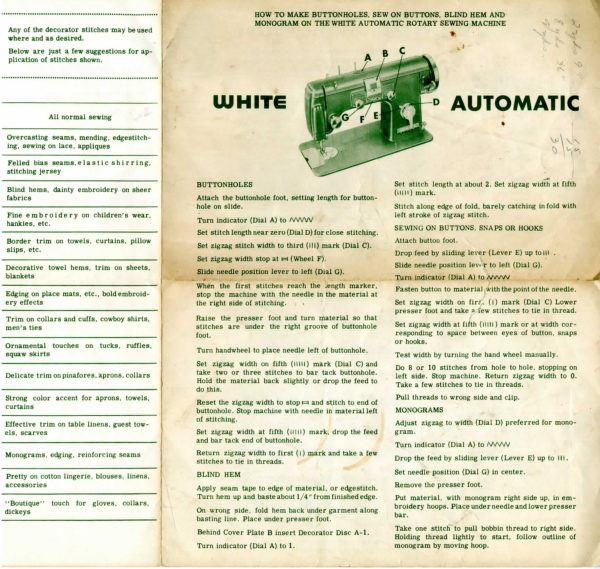
WhitePDF
White Rotary Automatic Series 666 Decorative Stitches
Reference guide
2 pages · EnglishRead →
WhitePDF
White Rotary Electric 41 & 45
User manual
16 pages · EnglishRead →
WhitePDF
White Rotary Electric — Book 12
User manual
18 pages · EnglishRead →
WhitePDF
White Rotary — Book 10
User manual
14 pages · EnglishRead →
WhitePDF
White Rotary — Book 11
User manual
28 pages · EnglishRead →
WhitePDF
White Sewing Machine and Its Attachments
User manual
32 pages · EnglishRead →
WhitePDF
White — Book 6
User manual
16 pages · EnglishRead →
From the ISMACS International. Original publisher and archive notices are retained.
Check the model and edition against your equipment.
PDF verified 2026-10-11.