Film cameras
Leica R4 MOD P User manual
User manual for Leica R4 MOD P. 48 pages in German. Read the original PDF, download or print a copy without registration.
48 pagesGerman4.2 MB PDF

Loading your manual…Open PDF directly
Document details
- Brand
- Leica
- Model / document
- Leica R4 MOD P
- Document type
- User manual
- Language
- German
- Pages
- 48
- File size
- 4.2 MB
- Category
- Film cameras
- Document date
- Not specified in catalog
Search available document text
Find a term, then jump to its page in the original PDF. Image-only pages may not be searchable; check the PDF for exact wording and diagrams.
Page 3 · Read text
Wewishyou pleasantand successful pho-  ERNSTLEITZWETZLARGMBH.,
tographywith your new LEICA.          TechnicalServiceDepartment,
                                    Postfach2027,
However,the servicefrom LEITZis not yet   D-6330Wetzlar,
through.The followingare alsoavailable: WestGermany
LEITZ I nformation Service              Outsideof Germany,the localLeitzagency
Any questionon 35 mm photography,pro-   can be contacted.
jection,enlargingand binocularscan be
answered by telephoneor post by the   LEICASchool
LeitzInformationService.             The LEICASchoolis anotherpart otLE|TZ
Mondaysto Fridays,I - 12.00and13- 16.00  service.lt wasfoundedto meetthe wishes
on (O6441)292436.                       of manykeenphotographersfor thorough
                                                                       f urthertrainingin photography,projection
ERNSTLEITZWETZLARGMBH.,        and enlarging.
InformationService,               .         The coursesofferan extensiveprogramme                         oPostfach 2020,                      and providemanypracticalsuggestionsas
D-6330Wetzlar,                        ,.. !.,.   well as a great stimulus.                                                                                    'WestGermany                           ."-
                                                                                                                            t J    Furtherdetailsand registrationforms are
                                       availablefrom:
GustomerService                ERNSTLEITZWETZLARGMBH.,
Our TechnicalServiceDepartmentis ready  LEICASchool,
to undertakemaintenanceof your LEICA  Postfach2020,
R 4 s MOD.P or any repairsthat may be-   D-6330Wetzlar,
come necessary.                  WestGermany


                            www.orphancameras.com
View original page 3Page 4 · Read text
Contents                           Page    Uniform groundglass screen with grid division  3 1
Briefdescription                         4     Clear glass plate with crosslines             3 1
Attachingthe carryingstrap                 6     Correction lenses                       32
fnsertingthe lens                         7    Eyecup                              32
Removingthe lens                        7    Eyepiece blanking                      33
Insertingand testingthe batteries            8     Multiple exposures                     33
Rapidtransportlever                    10    Flash synchronisation                   34
Settingthe film speed                   10    Automatic switch-over to "X"               35
lnsertingthe film                       11     Depth-of-field lever                     36
Removingthe film                      14     Depth-of-field scale                     36
Switchingon the exposuresystem          14     Self-timer                            37
The alternativeexposuremeasuringmethods  15    Lens hoods                          37
LEITZlargefieldintegratingmeasurement    16    Automatic spring-back diaph ragm           38
LEITZselectivemeasurement             16    Design of the LEICA R lenses              38
Exposurecorrections                   17    Holding the camera correctly              39
Sensitivityof the exposuremeter           18     Filters                               40
Measuringwith workingaperture           18    The use of filters                       40
Insufficientlightfor measurement         18    The use of existing LEICA R lenses
Long-timerange                     I'r ..,'. , .,   19    and accessories                                              4',l
Selectingthe programs  ". -              20   LEICA M lenses on the LEICA R 4 s MOD. P    42
Shutterspeedring                     21    Care of the LEICA R 4 s MOD. P             42
Automaticshutterspeedcontrolwith LEITZ         Cases                               43
fargefieldintegratingmeasurement         22   MOTOR-WINDERR 4, MOTOR-DRIVER 4      44
Automaticshutterspeedcontrolwith            RC LEICA R electronic control unit          45
LEITZselectivemeasurement             24   D B L E | C A R 4 D a t a b a c k                 45
Manualsettingwith LEITZselective                 Interchangeablelenses                  46
measurement                         26    Enlargers                            47
The viewfinderas a compositionand                   Projectors                           47
controlcentre                         28    Binoculars                           47
Focusingwiththe universalfocusingscreen   30    Camera spare parts                     47
Interchangeablefocusingscreens          31    Focusing screens                       47
Uniformgroundglassscreen,                             Suitability for use in the tropics             47
micro-prismscreen                     31
View original page 4
Page 5 · Read text
Brief description
1 Automaticframe counter
2 Controlwindow for film transport                10 LED (LightEmmitingDiode)for self-timer
3 Leverfor rapid shutter wind and film transport      1 1 Lockingbutton for exposurecorrection(override)
4 Releasebutton with thread for cable release       12 Overridesetting lever
5 Shutter speed ring                           13 Locking button for ISO (ASA/DIN)setting of the
6 Programselector                                exposuremeter,batterytest knob (C),
7 Viewingwindow for the set program              LED for battery test
8 Accessory shoe with centre and control contact    14 Foldingrewindcrank
I  Does not apply to LEICAR 4 s                   15 Film-speedsettingring
                            www.orphancameras.com
View original page 5Page 6 · Read text
16 Scale for exposurecorrection                 25  Eyelet for carrying strap'17    Electronicself-timer                        26 Viewingwindow for insertedfilm
18 Bayonetlock                               27 Eyepieceblank
19 Depth-ofjield lever                         28 Viewfindereyepiece,correction lenses
20 Red dot markingfor lens change                   can be inserted
21 Distancesetting ring                         29 Cap for battery compartment
22  Depth-of-fieldscale                         30 A1/4 tripod thread
23 Aperturepreselectionring                    31 Rewind releaseand double-exposurebutton
24 Flash contact                              32 Motor winder connector
View original page 6
Page 7 · Read text
Attaching the carrying strap
Attach the carrying strap to the eyelets
(25).
Removethe metalhooksf romthe carrying
strap and hook them into the eyeletson
the camera.
Attention: Make sure that the carrying
strap is inserted to the second part of the
metal hooks completely before you push
the securing loops over them (see pic-
tures above).


                            www.orphancameras.com
View original page 7Page 8 · Read text
Insertingthe lens                    Removingthe lens
Only lenseswith controlcam for Leica R   Grip the lens by the fixed ring (22).
camerasmaybe attachedto the LeicaR 4 s   Depress the bayonet lock (18) on the
MOD.P otherwisedamageto the camera  camera.Turn the lens anticlockwiseand
will result.                         removeit.
Independentlyof the distanceand aper-   Withthe cameraloadedchangelensesin
ture setting the LEICA R lenses are   the shadowof your body,since light may
exchangedas follows:                  enter through the shutter when openly
Grip the lens by the fixed ring (22).Make  exposedto direct sunlight.
the red dot (20)on the lensmountfacethe
bayonetlock (18) on the camera body.
Insertthe lensin this position.Aftera slight
clockwiseturn the lens clicks into posi-
tion.
View original page 8
Page 9 · Read text
Inserting and testing the batteries          starttakingphotographs,especiallywhen
The LEICAR 4 s MOD. P requireselectrical   you have not used the camerafora pro-
power for exposure measurement and   longedperiod.Pressthe batterytest knob
shutter control.This is supplied by 2 1.55   (13),marked"C" on top leftof the camera.
or 1.5v silver oxide button cells, or a   TheLEDlightsup in redwhenthe batteries
Lithium battery 3 Volt. To insert the batte-   are in workingorder.Thebatterytestknob
ries unscrew with a coin and remove the   should remain pressedfor about 5 se-
cap (29) on the underside of the camera   conds.A noticeablereductionin the light
body. Removefilms of oxide from the bat-    intensityof the LEDduringthe 5 sec.indi-
teries with a clean cloth and insert the bat-   catesthe imminentexhaustionof the bat-
teries in the cap accordingto the insertion   teries,which shouldbe replaced.
symbols.Screw the cap and batteries into   Depressingbattery test button (13) will
the baseplate of the camera.             switchon the cameraand the LEDsin the
Check the state of the batteriesbefore you   viewfinderwill light up.


                            www.orphancameras.com
View original page 9Page 10 · Read text
lmpoftant                               Tips for battery care and use:
When the MOTOR-WINDERR 4  or   Store batteriesin a cool and dry place.
MOTOR-DRIVER 4 is attached,the batte-  Do not use new and used batteriesto-
ries are testedwhen the batterytest knob   gether.
andthe exposuresystemis simultaneous- The batteriescannot be recharged.
ly switchedon, for instanceby meansof  Do not throw used batteriesinto the fire.
pressingthe locking button on the pro-  Do not mix differentbatteriesfrom differ-
gram selector (see "Switching on the   ent manufacturers.
exposuresystem",page 14).            Discardedbatteriesshouldbe returnedto
                                      the camerashop.


Silver-oxide button cells
Suitablefor the LEICAR 4 s MOD.P
UCAR         EPX76
UCAR          S 7 6 E
UCAR           No.357
Mallory          1 0 L 1 4
Mallory       M S 7 6 H
Varta          V 7 6 P X
Varta          V 7 6 H S
Varta            No. 541
Eveready       S 7 6 E
National       G 1 3                 Attention:
Ray-o-vac      R S 7 6 G          Remove batteries if the Gamera is not
Maxell         S R 4 4 F            being used for a long time.
View original page 10Page 11 · Read text
Rapid transport lever                     Setting the film speed
Therapidtransportlever(3)transportsthe   To set the exposuremeterfor the speedof
film,winds the shutter,and operatesthe   the film in the camerapressthe locking
filmcounter(1).                        button(13) andat the sametimerotatethe
When the lever is turned out (standby  setting ring (15) until the desired film
position)the thumbcan be movedbehind  speedis displayedin the viewingwindows
it and thereby securely support the   (DlNat the front,ASA at the rear).
camera.                         The adjustmentrangeextendsfrom ISO
When the MOTOR-WINDERR 4  or   12/12"(ASA12/12DIN)to ISO3200/36o
MOTOR-DRIVER 4 is attached, consult  (ASA 3200/36 DIN). ISO is the inter-
instructionsfor the MOTOR-WINDERor   nationalscale unit for film speed.
MOTOR-DRIVErespectively.
The€symbol indicatesthe film plane.


                                 1 0
                            www.orphancameras.com
View original page 11Page 12 · Read text
ry


Insertingthe film
Pullup the rewindcrank (14)to openthe
cameraback*.Aftersomespringforcehas
been overcomethe cameraback opens
automatically.The film counterreturnsto
"S" (start).
Windthe shutterwith the rapidtransport
leverand releaseit.
To save time during film loading,it is
recommendedto set the speeddialto "X",
thus settinga short shutter speed inde-
pendentof the exposureautomation.

.: The operation is identical with the Databack DB LEICA R 4
attached.
                                 11
View original page 12Page 13 · Read text
Pick up the film cartridgeas illustrated  Transportthe film throughone framewith
above.The emulsionside points to the   the rapidtransportleverso that it will be
viewer.Pushthe end of the film obliquely  tautin the filmguideandthe filmcartridge
from above into one of the slots of the   mouthis not proud.
take-upspool.Ensurethat the end of the
film is fullygrippedby at leastone lug and
protrudesunderthe next lug.
Fullypull up the rewindcrank and insert
the film cartridge in the empty  f ilm
cartridge chamber. Now Push in the
rewindcrank.Theedgeof the film mustbe   lmportant.
parallelto the filmguideandthe sprockets  Loadthe film in the shade of one's body; it
of the transportdrum must engagein the    is possible for  light to enter the film
perforationholes of the film when the   cartridge when exposed directly to sun-
rapidtransportleveris operated.            light.
                           12                            www.orphancameras.com
View original page 13Page 14 · Read text
Closethe cameraby snappingthe camera  Thefilm hasbeencorrectlyinsertedand is
back shut.Releasethe shutter.Transport  transportedwhen a brightfield becomes
the film through one frame and again   visiblein the controlwindow(2) in frontof
releasethe shutter. Transportthe film   the rapid transport lever; it advances
once again.The camerais now readyfor   towardsthe front edgeof the windowwith
operation.Thefilmcounter(1) pointsat 1.   each exposure.
It countsforwardto "36". For the various    It is alsopossibleto observethe rewinding
lengthsof filmthe numbers"20","24",and  process(page14) in the controlwindow
"36" are markedin red.                     (2);tne whitefield becomessmallerand
                                    then disappearsjust before the film is
                                   withdrawnfrom the take-upspool.
Do not forget:
lf the speeddialwas setto "X" while load-
ing the film, it must now be re-set.
View original page 14Page 15 · Read text
Rewindingand taking out the film         Switchingon the exposuresystem
Whenthef ilm hasbeenexposedto the last  The exposuresystemof the LEICAR 4 s
frame the rapid transport lever can no  MOD.P is switchedon with slightpressure
longer be operated.Before the film is    of the releasebutton(4) or pressureof the
removed from the camera it must be   locking button on the programselector
rewound into its cartridge. Press the    (6). The LED displaysin the viewfinder
rewindreleasebutton (31) on the under-   lightup.
side of the camera body, turn out the
rewind crank and rotate it clockwise (in
the directionof the arrow)untilthe film is
pulledout of the take-upspoolafterslight
resistancehas beenovercome.Openthe
camera body by pulling up the rewind
crank and take out the film cartridge.

                                 1 4
                            www.orphancameras.com
View original page 15Page 16 · Read text
The  alternative exposure measuring  The exposureis measuredthrough the
methods                                 lens.With the LEICAR lenseswith fully
The LEICAR 4 s MOD.P has an exposure  automatic preset diaphragm measure-
measuringsystem with alternativemea-  ment is carried out at full aperture.The
suringmethods:                    symbol  of  the  measuring method
I  LEITZlargefieldintegrating          employedis displayedin the viewingwin-
  measurement                 dow (7) nextto the programselectorand
O LEITZselectivemeasurement           in the bottomleft-handcornerof the view-
These exposuremeasurementmethods   finder as a program.The exposure is
are combinedwith the automaticshutter  measuredby a siliconphotodiodehoused
speedcontrol.                              in the bottompartof the camerawhereit is
For manualsettingsof exposuretime and   protectedagainststray light.
lensaperturethe Leitzselectivemeasure-
mentis used.
View original page 16
Page 17 · Read text
af;ITZ largefield i ntegrating             LEITZ selective measurement
measurement                         This method is used whenever great
Most photographic subiects are com-   brightnessdifferencesoccur in the entire
posed of detailsof variedbrightness.The   subject and a certain detail is to be ex-
reflectionof such ordinarysubjects cor-   posed accurately.
respondsto that of a mean grey value of   Since the measuringfield in the view-
18%,for which every exposuremeter is   finder is outlined by the large central
calibrated.                                 circle, the important image detail is
As a rule the detailsof variedbrightness  measuredexactly.The measuringfield is
are equally distributedthroughout the   the samesizefor all lensesand all focus-
entirefield.Herethe programwith large-   ing screens and, therefore, becomes
field integratingmeasurement$  (see   clearlyvisiblein the vievufinder.
p.221shouldbe chosen.             The programs with selective measure-
                                 ment are called@ and(D (see pp.24 and
                                              26).

                                 1 6                             www.orphancameras.com
View original page 17Page 18 · Read text
Examplefor corrections
                                                  "*": With very bright subjects,such as
                                  snowscapes,or the beach,the exposure
                                     meter,owing to the greaterreflectionof
                                      the light, will indicatea shutter speed
                                   which is too high and thereforeproduces
                                   underexposure.The shutter speed must
                                  be reduced,for instancefrom1/125to 1/60
                                       sec. with the "+1" correction.
                                                    "-": With very dark subjectswhich reflect
                                                      littlelightthe exposuremeterwillindicate
                                    a shutter speed which is too slow and
                                       therefore produces overexposure.The
                                        shutter speed must be increased,for
Exposure correction (override)           instancefrom1/15to 1/30sec.withthe "-1"
Exposuremetersarecalibratedfora mean   correction.
grey value correspondingto the bright-   Pressthe lockingbutton (11)and set the
nessof an ordinaryphotographicsubject.   scale(12)to the desiredvalue.The locking
lf the subjectof which a readingis taken   buttoncan be arrestedby pressingin and
does not meet these requirements,a   turningto the left.The "0" settingis given
suitable exposure correction must be   when the lever(12)is completelyinside
applied.Exposurecorrectionsare used   the cornerof the camera.Exposurevalues
particularly with  largefield integrating  to +/-2 stops in 1/3 stop intervalscan be
measurements.                          set.At the endvaluesof the ISO(ASA/DIN)
With selectivemeasurement,a represen-   scale, exposurecorrectionscan be set
tativedetail of averagegrey valuecan be   onlywithinlimitations.
selectedfromthe entiresubjectfor a read-  When the camera is switched on, the
ing through the smallerand precisely  symbolp willblinkin the bottomleft-hand
definedmeasuringfield.                 cornerof the vieMinderwhena correction
                                  has been set.
                                 1 7
View original page 18Page 19 · Read text
Sensitivity of the exposure meter
The measuring range with integrating
measurementis O.25 cd/mz to 63 000
cd/mzatt/1.4.|nexposurevalues(EV):at
ISO10O/21of rom + 1 to + 19, or t/1 .4/1 sec
lo t/22/tAooosec. The measuringrange
with selectivemeasurementis 1 cd/mzto
63 000 cd/mzat t/1.4.In exposurevalues       @(EV):at ISO 100/21ofrom +3 to +19, or
tl1.4/1/qsec to l/22/1Aooosec.


Measurementwith the working aperture   Valuesbelow the measuringrange
The 35 mm PA-CURTAGON-Rl/4, the   The measuringrangeof the cameraused
long-focal-lengthlensesfrom400 mm,the   for correct exposuresis linear.When in
focusingbellows-R,the extender-R2xlor   very poor light this rangeis not reached,
the LEICAFLEXSL/SL 2 and the 3-part   these conditionsno longerapply and an
ring combination have no automatic  accurate exposure can no longer be
diaphragmor no couplingfor it. Herethe   determined.The measuringvalues indi-
exposuremust be measuredthroughthe   cated in the viewfinderwill leadto wrong
lensapertureused,i.e.throughthe work-   results.A warningsignalis thereforegiven
ing aperture.Here the lens aperture is   by a constantlightingup of the override
adjustedto regulatethe amountof light  symbolp.
reachingthe measuringcell of the LEICA  In the transitionalrangethe symbolmight
R 4 s M O D . P .                            blink.


                                 1 8
                             www.orphancameras.com
View original page 19Page 20 · Read text
Long-time range                    Becauseas a rule high-speedfilms and
Theworkingrangeof the exposuremeter   high-speedlensesare used in poor light-
of the LEICAR 4 s MOD.P dependson the   ingconditionsthis willhardlyimposelimi-
measuringsensitivityof the photo diode,   tations.Even when the lens is stopped
the film speedsetting,and the speed of   down 3 stops (with ISO 100/210)the
the lens.The highestshutterspeedmea-   shutterspeedwillstillbe determinedauto-
sured or determinedis 1/1000sec, the   matically(althoughitwillnotbe indicated).
slowestabout B sec. Minor deviationsin   Needlessto say measurementscan also
the automaticlong-timerangefrom about   be carriedout at full aperture,the shutter
2 sec and longercan be ignoredin prac-   speed measuredconvertedfor a different
tice.In the viewfinderthe shutterspeeds  aperturevalue,and the exposuremadeat
from 1/1000sec to "1 sec or longer"are   the "8" setting.
displayed.In addition an indicationls   Forslowfilmsthe followingvaluesare pro-
given by the override symbol p when   duced in the same conditions:
the measuringrangeis not beingreached,  ISO50/18o:2 sec
i.e.if a correctexposureis impossible.         l S O 2 5 / 1 5 0 : 4 s e c
                              ISO12/120:8 sec
                                 Herethe indicationis "1 sec and longer".
                                            In practice this is of hardly any signi-
When the f/1.4 lens is used the slowest   ficance,becauseas a rule longtimeexpo-
shutter speed to be measuredor deter-   suresare madefroma tripod.Whetherthe
minedis:                                   film is exposedtor 2,3, 4, or 8 secondsis
ISO800/30o: 1/8 sec                     practically i mmaterial.
ISO400/27o:1/4  sec
fSO 200/240:  1/2 sec
l S O 1 0 0 / 2 1 0 : 1 s e c


                                 1 9
View original page 20Page 21 · Read text
The programselectormust engagein the
                                   chosen position. lt can be reset only after
                                         the locking button has been pressed.


Choiceof programs                 The followingprogramscan be chosen:
The programsare set by pressureof the                                                           tr   automaticshutterspeedcontrolwithlockingbuttonandsimultaneousslidingof                                     LEITZlargefield integratingthe programselector(6).Whenchanging                                   measurement
from$to@, the lockingbuttonshouldbereleasedon readingO anOthen re-press- O  automaticshutterspeedcontrolwith                                      LEITZselective measuremented.Thisensuresthatbnecan changeover
fromI  to @ and vice versawithoutacci- @  manualsetting of shutter speed and
dentallyengagingthe manualexposure      lens aperture with LEITZ selective
mode(D. n. the lockingbuttonis being     measurement
pressedthe camerais switchedon. The
chosenprogramis displayedin the bottom
left-handcornerof the viewfinderwindow.
In addition,the programsettingcan be
readat any time in the viewingwindow(7)
nextto the shutterspeedring.
                            20                             www.orphancameras.com
View original page 21Page 22 · Read text
Shutterspeed ring
With the @ Orogramthe shutterspeeds
are set wlth the shutterspeed ring (5). lt
engagesat all the indicatedvalues.The
setspeedis the one nextto the modeindi-
cator.The shutterspeedsfrom 1/1000 to
1 sec are determinedelectronically.Inter-
mediatevaluescannotbe set.
In the I  and @ programsthe shutter
speed ring may be set for any desired
vafue except"X","100"and"8".Allshutter
speeds between 1/1000 and 8 sec are
determinedcontinuouslyand displayed
on the rightin the viewfinderwindowup to
1 sec by LEDs.lf 2 diodeslight up simul-   "8" and "100"(: 1/100SeC)Canbe uSed
taneously,the valuesproducedare inter-   withoutbatteries.
mediate.                              At "X", "B" and "100" the exposureis not
The use of electronicflash units requires  measuredevenwhen the buttoncellsare
the "X" setting.At "8" the shutterremains   inserted.Thisis indicatedin the viewfinder
openas longas the releasebuttonis being   by the lightingup of the uppertriangularpressed.                                 LED.
Slightlymoreresistanceisto be overcome
between"1" and "X" when comparedto
the other values,so as to avoidacciden-
tally leavingautomaticrange.


                                 2 1
View original page 22Related documents and language editions

LeicaPDF
LEICA R4 MOT
User manual
58 pages · EnglishRead →

LeicaPDF
Leica ACCESSORIES
User manual
29 pages · EnglishRead →
LeicaPDF
Leica R4 Motor Winder
User manual
15 pages · EnglishRead →
LeicaPDF
LEICA R4s MOD 2
User manual
49 pages · FrenchRead →
LeicaPDF
Leica R4
User manual
60 pages · FrenchRead →
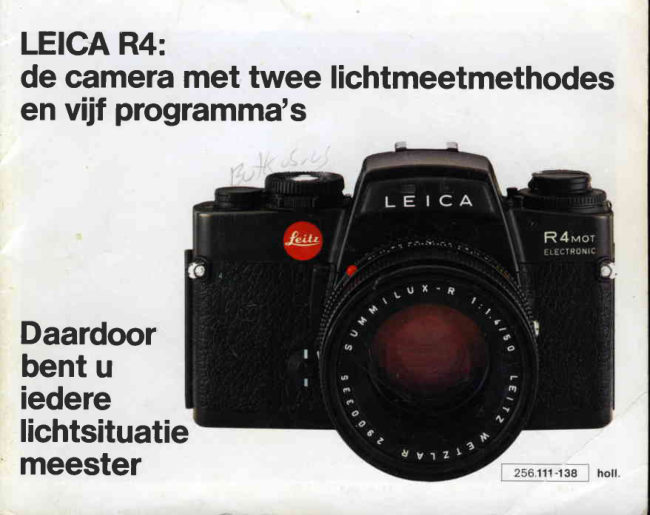
LeicaPDF
LEICA R4 de camera met twee lichtmeetmethodes en vijf programma's
User manual
20 pages · GermanRead →

LeicaPDF
Leica R4 ANLEITUNG
User manual
56 pages · GermanRead →

LeicaPDF
Leica R4 Die Kamera mit zwei Belichtungs - mebmethoden und funf Programmen
User manual
21 pages · GermanRead →

LeicaPDF
Leica R4 s MOD 2
User manual
48 pages · GermanRead →
LeicaPDF
Leica R4
User manual
58 pages · Not specifiedRead →
LeicaPDF
Leica R4 Spanish
User manual
60 pages · SpanishRead →
From the M. Butkus archive. Original publisher and archive notices are retained.
Check the model and edition against your equipment.
PDF verified 2026-10-10.