Film cameras
NIKON MD-1 User manual
User manual for NIKON MD-1. 24 pages in English. Read the original PDF, download or print a copy without registration.
24 pagesEnglish2.1 MB PDF

Loading your manual…Open PDF directly
Document details
- Brand
- Nikon
- Model / document
- NIKON MD-1
- Document type
- User manual
- Language
- English
- Pages
- 24
- File size
- 2.1 MB
- Category
- Film cameras
- Document date
- Not specified in catalog
Search available document text
Find a term, then jump to its page in the original PDF. Image-only pages may not be searchable; check the PDF for exact wording and diagrams.
Page 3 · Read text
OIC key socket


Shutter speed table

 Firing speedselector
knob


O/C lever
Rewindlever
lock-release
Rewind lever

r'R"      slide button

Framenumber preset
wheel


Frame counter


              www.orphancameras.com
View original page 3Page 4 · Read text
SC knob


  Triggerbutton

  Lockingscrew


     Drive shaft

Three-pinsocket


   Powersocket
View original page 4Page 6 · Read text
The motor drive MD-1 adds o whole new dimen-
                       sion to 35mm system photography. Designed to
                                      fit any Nikon F2 or Nikon F2 Photomic camera
                      without  factory adjustment, the M D-l winds the
                          film ond cocks the shutter automaticolly each
                      time you press the shutter release. lt can be set
                          for completely automatic sequence shooting at
                   speeds up  to  five frames per second, ond  it
                     rewinds o 36-exposure roll  of  film  in about
                   seven seconds. It can also be operated by remote
                        control using cables, timers or radio.
                  To get the best results from your motor  drive,
                    reod  these instructions  corefully  before you
                     ottempt  to  use the  unit.  Keep  this booklet
                   handy  for  reference  until  you  ore thoroughly
                    acquainted with the motor drive. A few minutes
                         of preparation  will help you  avoid costly mis-
                       takes.


.. .,',,..**.t.          ..,*.,-W*;*&i!A*   n                                                 ;i,*$e**e            t'i;i;i:ii*&idt3;ri&*
View original page 6Page 7 · Read text
The motor drive MD-l  is designedto work perfectly
with any Nikon F2 or Nikon F2 Photomiccamera.There
is no need for factory adjustmentto match cameraand
motor drive.
Unscrewthe O/C key with a coin or similar obiect. Set
the cameraon the motor drive and tighten the knurled
locking knob until the cameraand motor drive fit to-
gethersnugly.This links the motor drive couplingand
the shutter releasecouplingon the camerawith the drive
shaft and the shutter releaseplunger of the motor drive.
A threaded hole is provided on the back of the motor
drive grip for storingthe O/C key.

Note: Io reploce the O/C key, positlon lt in the openlng in such
a woy thot the coupllng pin on the OIC key drops into the slot,
Then turn the key until the orrow lines up with "C" ond screw it
tlght,


                             www.orphancameras.com
View original page 7Page 9 · Read text
;;l:y',:*,                  f$iljr*#ri,L                                                  lo J                                         lf;f                            iiS'XF"i illi'i,,'Frifl
figf''i U.iteries availableanywhrrc to
drive.Penlightbatteriesfit into two Ar
unitsMS-1suppliedwith the unit.

                                                                                                                 of
tnstalling the Batteries                            ..ttttG-Q{R80il  pEru^ Rr rr
To installthe penlightbatteries,first releasethe clip  A[xA'-p'l".il:]'ru1l.ttrorr.rhebarreryhorderandopenrhecover.Thenprur.ril                                                                                                                 --.':'batteriesin each holder, makingsure that the positir.tg_lAfT.                                                                                     cg-;  ROff       ,o]
il,1J:fl:T:l,ff}f/'TTill[H,'[..,ij6"Jff:Y5ol?LLs*U*lfs   rrrr_r                                 r's
and turningit in the directionof the arrow.Slip the two
batteryholdersinto the hettery pack and snapit shut.     Table2 indicatesthe approximatenumber of 36-expo
                                                  sure rolls of film up to which the rated firing speedis


                             www.orphancameras.com
View original page 9Page 10 · Read text
guaranteed.The inevitableslowingdown of the ratethat   side of battery pack and watch the indicator needle.lf  it
resultsfrom batterv drain is still within the permissible swings into the green region or beyond, the batteriesare
range.                                                                         ( T a b t e2 )    still good. lf not, replaceall the batteries.
 Zinc-carbonpenlight batteries                   u p t o l 0 r o l l s  Attaching to the Motor Drive
Alkaline-manganesepenlightbatteries         up to 20 rolls                                           The cordlessbatterypackfits onto the motor drive itself,
                                           makingcamera,motor driveand power supplyone con-
For the most reliable service, replace the NC battery  venientunit. Placethe motor drive on the pack and
units with new ones shortly before the 100th recharge.   tightenthe lockingscrewon the bottom of the pack with
Remember that battery performancedeterioratesin cold  a coin or similarobject until the motor drive baseplate
weather. Zinc-carbon batteries cease to function below  and the pack fit togethersnugly.
about OoC, alkaline batteries below -10"  and Ni-Cd
batteriesbelow -20"
Checking the Batteries
A  built-in battery checker lets you check battery con-
dition. Pressthe checker button on the lower right-hand


                                            J,
View original page 10Page 11 · Read text
Film loadingis done in the normal way. However,always
be sure to mount the motor drive on the camerabefore
you load the film. Otherwise,light will enterthe camera
and fog the film when the O/C key is removed.Fold out
the O/C leverand turn it to the left. The hingedcamera
back will springopen. For detailson film loadingsee
your camera'sinstructionmanual.
After the loadingis completed,depressthe locking button
on the rewindslideand pushthe slideup until the frame
counter returns to "S". Then make three "blank" ex'
posuresto disposeof the portion of the film exposed
during loading,using the film-advancelever and the
shutter-releasebutton on the camera.Be careful not to
reversethe above proceduresince it will result in inad-
vertentdoubleexposureson the first frame of film.


                             www.orphancameras.com1 0
View original page 11Page 12 · Read text
You can use the motor drive for either single-frameor
continuousshooting at up to five frames per second.
The SC knob on the grip has settingsfor either single-
frame or continuousfiring, plus the "L" triggerlock set-
ting to prevent accidentalexposures.The firing speed
selectorknob controls the speedof sequencefiring. Be-
fore using the motor drive, you should set the frame
counter to correspondto the number of exposuresof
the film loadedin the camera(or to a smallernumberif
you want the motor drive to stop beforethe entirefilm
is exposed).This adjuststhe power cut-off mechanism
which preventsthe film from being advancedbeyond
the limit of its length.lt alsoallowsyou to presetthe
motor drive to  stop after any number of  frames.


                                             1 1
View original page 12Page 13 · Read text
To setthe counter,first make surethat the frame counter
                                                            is at "S". Then pressand turn the wheel beneaththe
                                            counter window until the desirednumber of framesap-
                                          pearsoppositethe white arrow. The numbers20and 36
                                             are colored red to correspondto the number of the
                                         framesin standardrolls of film.
                                                                                   lf you desireto reset the counter to control a known
                                       sequenceduration (or for other purposes)after you have
                                              orrcesetit at the particularnumber,first depressthe lock-
                                               ing button on the rewind slideand push it up until the
                                          frame counter springsback to "S". Next, coverthe lens
                                               with a cap and make one "blank" exposureto prevent
                                              inadvertentdouble exposureon the startingframe.Then,
                                                set the frame counter to the desirednumberof frames.
                                      Wind the leveronce againand the unit is now readyfor
                                              shooting.
                                     Be careful not to overestimatethe number of frames
                                          remainingon a roll of film, sincethis may resultin the
                                          motor pulling the film off the supplyspoolor damaging
                                                                its perforatededges.
Frame Counter                          The frame counter on top of the cameracontinuesto
The frame counter on the back of the motor drive  operateeven when the motor drive is attached.lf you
showsthe number of unexposedframesremaining use the counter on the motor drive to control sequence
on a roll of film. When the counter reacheszero, duration,check the one on the camerato find out how
the motor stops automatically to prevent damage many exposuresyou haveleft.
to the film. This featurealso allows you to preset
the exact numberof framesfor continuousfiring
in bursts.                         www.orphancameras.com1 2
View original page 13Page 14 · Read text
Single-Frame Operation
     Lift up the milledSC knob and turn it until "S" is op-
    positethe white dot. Then selectany shutterspeedfrom
   112000secondto B. The firing speedselectorknob hasil   no influenceon the operationof the motor drive. To
   make an exposure,simply pressthe trigger button ons the grip. As soon as the button is released,the motor
    drive automaticallywinds the film and cocks the shut-
    terfor the next exposure.When using shutter speeds
    slower than 1/60 second,be sure to keep the trigger
    button depressedlong enough for the shutter to com-
    plete the exposure.Otherwise,exposuretime may be
   shortenedunintentionally.
    Note:   l,lhen you  test   f ire  on unloaded  motorized  comero
    powered by fresh NC botteries or by the ACIDC Converter MA-2,
    the motor drive moy fire in bursts even with the SC knob set for
     sinqle frame operation.  This will stop os soon as film  is looded in
     the comero.
II
View original page 14Page 15 · Read text
Continuous Shooting
                 Firing speedis controlled by the firing speedselector
             knob on the backof the motor drive.lt hasfive settings:
           H (high),M3, M2 and Ml (medium)and L (low). Inter-
              mediate speedsmay also be used by setting the knob
              betweenthe click-stoppedsettings-At the H setting,the  ,
                mirror of the cameramust be lockedup.
             The table below indicatesthe number of frames per
             secondwhich the unit will exposeat each setting.How-
                ever, speedalso variesdependingon the power source
               used.The table alsoshowsthe firing speedsfor different
             power sources.At  the H  setting using NC battery
                 units MN-l, for example,firing speed.is five framesper
              second.

                          -\                           FiringSpeed
                       Ntttlng-\---,,_        H   M3M2 M1 L                Power
                Source
                Alkaline-Manganese
                 PenlightBatteries
             (1sv)                4    3.5 3  2   1                                  frames/sec.
                 Zinc-CarbonPenlight
                 Batteries(15V)
            NC BatteryUnit
              MN-l (1sV)            5    4.3 3.82.5 1 . 3
             AC/DC ConverterMA-2
www.orphancameras.com
View original page 15Page 16 · Read text
The range of usableshutter speedsdependson which
firing speedyou select.The numbersin greennext to the
 firing speedsettingsindicatethe lowestspeedwhich can
be used at each setting. For example,with the firing
speedselectorknob turned to M2, you can selectany
shutterspeedfrom 1 160to 1 12000second.Speedsslower
than thoseindicatedshouldnot be used.
Whenthe selectorknob is set for an intermediatespeed
betweenthe markedsettings,consultthe rangeof usable
shutter speedsfor the next highestsetting to find the
correctshutterspeed.
Setthe SC knobat "C" and lift up the milledfiringspeed
selectorknob and turn it until the blackline is opposite
the desiredframingspeed.lf you wish to fire at "H", re-
memberalsoto lock up the mirror. As long as the trigger
buttonis helddown,the motordrivewill continueto fire
automatically.Releasingthe button stops the motor
drive after it has advancedthe film one frame and
cockedthe shutterfor the next exposure.Duringopera-
tion, the firing speedselectorknob can be changedto
any setting.You can alsofire singleshotsat the "C" set-
ting if the finger is removedquickly from the trigger
button after each exposure.The usableshutter speed
rangesare the same as thosefor continuousshooting.

Note: Ihe comero's monuol film-odvonce lever and shutter release
buittn  continue  to function even with the motor drive mounted
on the cottiere.
                                                           1 5
View original page 16Page 17 · Read text
Beforeunloading,rewind the film either manuallyor
with the motor driveas follows: Pressthe lockingbutton
on the rewindslideand pushthe slideupwardas far as it
will go to releasethe film advance.The frame counter
shouldreturn to "S", otherwisethe motor will not start
to rewind.
Pressthe lockingbutton locatedto the left of the rewind
lever. Hold the button down and turn the leverto the
right until it stopswith a click. The motor will rewind
the film in about sevenseconds(for a 36-exposureroll).
Checkthe rewind knob on the camerato makesurethat
the film is actuallybeingrewound.Whenthe film leaves
the take-upspool,the motor speedsup and makesa high-
pitchedsound.To return the rewind leverto its original
position,simplyturn it to the left.
To rewind the film manually,pressthe small button on
the rewind slide, push the slide up as far as it will go.
Rotate the rewind crank in the direction of the arrow
.iust as you would to rewind the film with no motor
driveattached.
Open the cameraback, pull the rewind knob up and the
film cartridgewill drop out.
For further detailson unloading,consultthe instruction
manualsuppliedwith your camera.
Note: Motorized  rewinding  is not possible with some cossettes,
since they have no key to engoge the rewind shoft of the motor
drive. The Nikon  reloodoble film  cossette AM-1, avoiloble os an
optionol  occessory, is keyed  to connect  with  the rewind  shoft.
                             www.orphancameras.com1 6
View original page 17Page 18 · Read text
The motor drivecan be operatedwith an externalpower  AC/DC Converter MA-2
source in place of the cordlessbattery pack MB-l. A   The accessoryAC/DC converterMA-2 lets you operate
stablecurrentof 0.4A at 15V must be suppliedas high  the motor drive from any standardhousecurrent from
ripple voltagescan damagethe motor drive circuitry.  100-240V AC. The optional connectingcord MC-2 is
To connectthe motor drive to an externalpower source, usedto connectthe motor drive to the AC/DC converte
plug one end of a suitablecord into the 3-pinsocketon  The connectoris providedwith a lockingscrewfor extra
the motor driveand the other end into the powersupply.  safety.
The diagramat right may be usefulin establishinga pow-
er circuit.
View original page 18
Page 19 · Read text
The motor drivecan be controlledremotelyby meansof
the Nikon remotecontrol accessories.
Grip Head and SC Remote Cord MC-l
The grip headcontainingthe SC knob and triggerbutton
canbe detachedfrom the motor driveand usedto trigger
the unit by remote control. An accessory3-meter
(10 feet) SC cord MC-l is usedfor this purpose.First
pressthe releasebuttons on either side of the grip head
and lift to remove.Then connectthe 4-pin plug on the
SC cord to the socketon the motor drive wherethe grip
head normally fits. The grip head shouldfit the other
end of the cord.


                              www.orphancameras.com1 8
View original page 19Page 20 · Read text
Remote Cord MC-4                                replacingthe triggerbutton. The cablecan be extended
  The motor drivecan also be triggeredremotelyby means  to any length, so long as circuit resistancedoes not
   of the accessoryMC-4 cord. One end fits the socket on  exceed100 ohms. However,for long-distanceoperation,
   the motor drive, and the other has red and black plugs  radio control offers greaterconvenience.
   for connecting the motor drive with a remote switch, PistolGrip Model2 andMC-3Cord
   timer, or wirelessreceiver.The connector is provided The pistolgrip providescomfortablesupportfor fingertip'   with a locking screwfor extra safety.                   operation for the motorized Nikon F2 and Nikon F2
   lnsert the connectoron the MC-4 cord into the motor  Photomic.lt attachesto the tripod socketon the camera
   drivesocket.Usinga length of cableand an on-off switch,  or on long lenses.The accessorycoiled cord MC-3
  you can establisha triggeringcircuit with the switch  connectsthe triggerof the pistol grip to the motor drive.


                                                       1 9
View original page 20Page 21 · Read text
Two or more camerasmay be fired in unison,eitherin
single frame or continuousoperation.Connect each
camerawith a motor drive, cordlessbattery pack and
MC-4remotecord.Then connectthe red and blackplugs
on the remote cords to a singleswitch to trigger the
motor drivestogetheras shown in the illustrationat
right.


                              www.orphancameras.com
View original page 21Page 22 · Read text
You can triggerthe motor drivefor time-lapseor delayed                                                                                                    \       FiringSpeedexposuresby connectingan intervalometeror similar                                                              \Setting         H  M3 M2 M1  L devicein the triggercircuit in placeof the on-off switch.                                           Power S<iurcE-------.- In this casethere will be slighttime delay between.the
                                    NC & AC/DC        0.23(sec.0.26 0.3  0.4  0.8moment the trigger circuit is closedand the shutter is
 released.                                          Penlight             0.26 0.3  0.35 0.6  1 . 1
     Mirror lockedup 30 - 50 ms
     Mirror operating50 - 70 ms                      At the H settingthe mirror must be locked up. Shutter
                                             speedsslowerthan the onesindicatedon the backof the
Note: The range of time delay  slightly  vories depending on the   motor driveare unusable.
power source ond voltage.                              With the SC knob set at S,the triggercircuit is opened
                                             andclosedas shownbelow.The motor drive will beginto
The illustrationsbelow show how to obtain correct                                         make exposuresat a predeterminedinterval.Any shutter
timinginterval.                                             speedcan be used,regardlessof the positionof the firing
Whenthe SC knob is in the C position,the on-off switch  speedselectorknob.
opens and closes the trigger circuit as shown below.
                                                                                                I=time      of closing the trig-
                                   I=    time of closing the                                            ger circuit
                                          trigger circuit                                              t1=time for completion of
                                      (0.05 sec.St S0.1 0 sec.)                                    exposure sequence
                                 T=desired interval
                                                                                             t2=O.25 sec. (lncreases.as
                                                                                                          battery  voltage decreases)
                                                    minimum interval

                                                 For exposureslongerthan on€ second,usethe B setting.
The minimum possibletime interval dependson the   At this setting,exposuretime is almostequalto the time
position of the firing speed selector knob. The table   requiredto closethe triggercircuit (t1).
belowgivesthe minimum intervalfor eachsetting.
                                              21
View original page 22Page 23 · Read text
SC RemoteCord MC-l                      NC Battery Unit MN-l
Connects the motor drive to the grip head when the  Each unit suppliesa 7.5Y output when fully charged.
latteris removedfor remotecontrol. Length:3m (10 feet). Two are requiredto power the motor drive.
ConnectingCord MC2                              Quick ChargerMH-l
Connectsthe motor drive to the AC/DC converterMA-2.  RechargesNC batteryunit MN-l in three hours.
Length:3m (10 feet)                           AC/DC Converter MA-2
Coiled Cord for Pistol Grip MC-3                   Adapts the motor drive to any standardhousecurrent.
Connectsthe triggerof the pistol grip to the motor drive.
RemoteCord MC-4
Connectsthe motor drive to a remote switch, timer or
radiocontrol unit.


                             www.orphancameras.com
View original page 23Page 24 · Read text
Can be used with any Nikon F2 or F2 Photomic    Automatic motorizedrewindingin about 7 seconds.
camerawithout factory adjustment                Manualrewindingalsopossible
Choiceof single-frameoperationor continuousfiring    Cordlessbattery pack holds 10 AA penlite batteries
at speedsfrom 1 to 5 framesper second                 or two NC battery units. MD-1 can also be power-                                                                ,:.
                                             ed by AC current or other DC power sourceswithin
Can be usedat any shutter speedfor single-frameop-                           'l12000                10-15V range.eration, speedsfrom 114 to       second for con-
tinuous firing. Slowestusableshutter speedfor each   .   Built-in relay for remote control by wire or radio
settingindicatedon the back of the unit.
                                                  Safety lock on the grip head preventsaccidentalex-
Automatic-resettingsubtractive type frame counter    posure
graduatedfrom S to 40. Also usedto presetthe num-
ber of exposuresfor continuousfiring in bursts.The    Dimensionsapprox.147 x 110 x 77mm
motor stops automaticallywhen the preset number                                              Weightapprox. 47Ogof frames has been exposed


                                                 2 3
View original page 24Related documents and language editions

NikonPDF
Nikon EL 2 AutoWinder AW-1
User manual
11 pages · EnglishRead →

NikonPDF
Nikon MD-11
User manual
19 pages · EnglishRead →
NikonPDF
Nikon MD-12
User manual
19 pages · EnglishRead →

NikonPDF
Nikon MD-14
User manual
16 pages · EnglishRead →

NikonPDF
Nikon MD-15
User manual
23 pages · EnglishRead →

NikonPDF
Nikon MD-3
User manual
25 pages · EnglishRead →
NikonPDF
Nikon MF-1
User manual
21 pages · EnglishRead →

NikonPDF
Nikon Motor Drive F-36
User manual
21 pages · EnglishRead →

NikonPDF
Nikon Motor Drive F-36 - another
User manual
24 pages · EnglishRead →
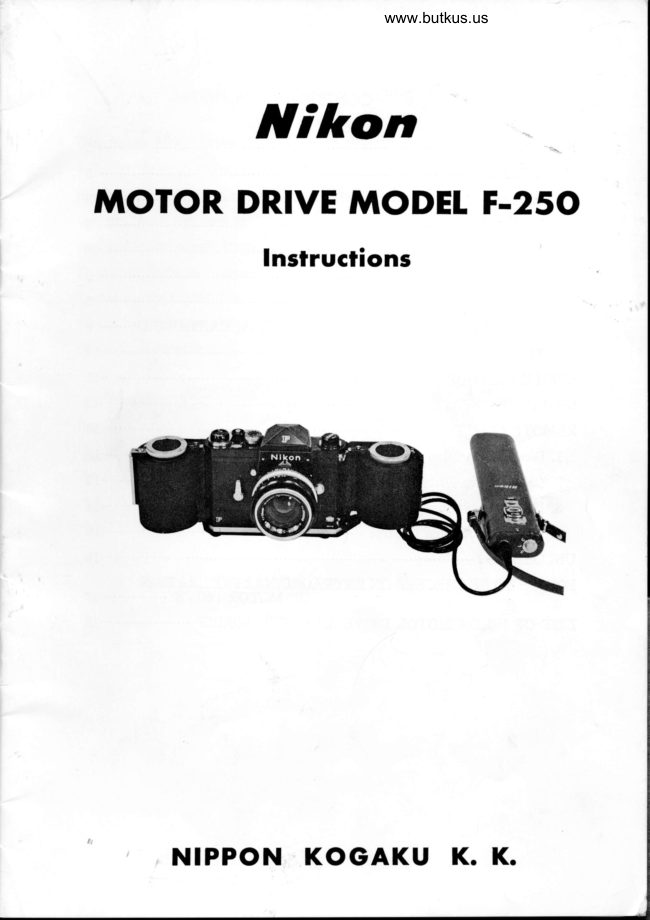
NikonPDF
Nikon Motor Drive Model F-250
User manual
22 pages · EnglishRead →
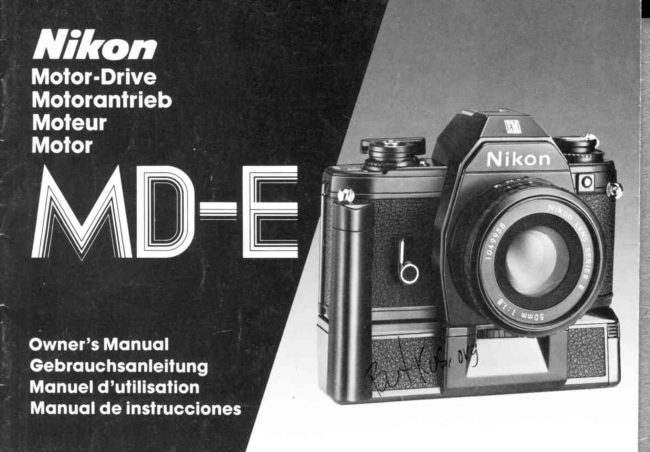
NikonPDF
Nikon MD-E
User manual
18 pages · German, SpanishRead →
NikonPDF
Nikon MD-2
User manual
32 pages · Not specifiedRead →
From the M. Butkus archive. Original publisher and archive notices are retained.
Check the model and edition against your equipment.
PDF verified 2026-10-10.