Film cameras
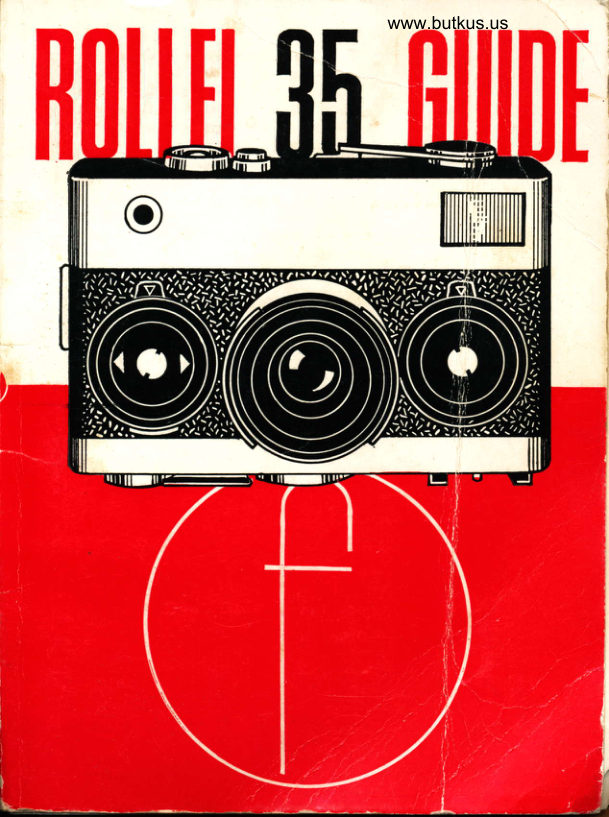
Rollei 35 Guide Book Reference guide
Reference guide for Rollei 35 Guide Book. 73 pages in English. Read the original PDF, download or print a copy without registration.
73 pagesEnglish4.9 MB PDF
Loading your manual…Open PDF directly
Document details
- Brand
- Rollei
- Model / document
- Rollei 35 Guide Book
- Document type
- Reference guide
- Language
- English
- Pages
- 73
- File size
- 4.9 MB
- Category
- Film cameras
- Document date
- Not specified in catalog
Search available document text
Find a term, then jump to its page in the original PDF. Image-only pages may not be searchable; check the PDF for exact wording and diagrams.
Page 3 · Read text
www.butkus.us
                                                        Page
  Depth of Field with Rollei          Parallax Compensation  in
     35                      70     Close-ups            7l
   Focusing with Close-up            Shutter Speeds to Arrest      I-enses                  70    Movement            7l
   Subject Size and Depth of
     Field with Close-up
     Lenses


somc itcms.of cquipmcnt or ccrtain metcrials mcntioned in this book mry not belreely availa.ble in evcry-country.  lmpor.t- and marketing conditions vary widcly and.re outside the control of the photographic retailer.
          @ Focal Press Ltd. 1969
          Library of Congress Catalog Card No. 73-97259
              Printcd in Great
                           Rocbester,                                  Britain  -b-yKent,Staplescstablishmentprintcrs Ltd,, at their
View original page 3Page 4 · Read text
Venmo @mike-butkus-camera  Ph. 2083
PayPal Name  Lynn@butkus.org      www.PayPal.me/lynnbutkus
View original page 4
Page 5 · Read text
THB ROLLEI 35 CAMERA
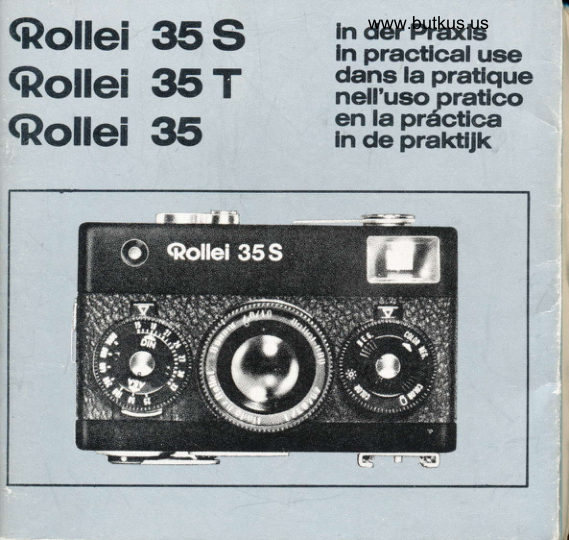
           The Rollei 35 is the smallest camera for the full 35 mm.
           negative frame, the body being only 1[ in. deep, 3$ in. long
         and 2$ in. high, and weighs a mere 13f, ounces. As it is so
            small, you can carry it with you all the time. It fits into a
          handbag or pocket. In spite of its diminutive dimensions,  it
          is precision made, ingeniously designed, of substantial
          performance and extremely wide application.
           The Rollei 35 uses standard 35 mm. film, a single load in a
          standard cassette taking up to 36 exposures lxl|  in. (24x36
         mm.).The film can be loaded and unloaded in daylight.
          The body is a precision alloy casting with black plastic
           covering and the metal parts are satin chrome finished. In an
            alternative version, the metal parts are black anodized. An
           accessory shoe is built into the camera base with central
            flash outlet and a tripod bush is in the centre of the base-
             plate.
          The shutter is a Compur with speeds from * to l/500th
          second and B for time exposures, and is flash synchronized.
             It is a specially designed version of this famous shutter
          because the standard type could not be accommodated
         without making the camera much larger. Its operating
          elements are no longer arranged around the lens but built
           into the front panel of the camera. This also made it possible
           to keep the retractable lens barrel slim and to bring the film
         chambers closer together. The shutter release is in the top
           plate of the camera and has in its centre a thread to accept
         a cable release.
          The film is transported by a sprocket wheel on to a per-
          manently fixed take-up spool. The film is held in position by
       a hinged-on pressure plate in such a way that only the
           sections outside the picture area touch the guide rails on
          the film aperture, thus avoiding scratching of the film. A
          quick transport lever advances the film and film counter
         and tensions the shutter in a single movement.
          The film counter is in the centre of the base plate and is
         geared to the film transport. It is self-setting, returning

\^r
View original page 5Page 7 · Read text
.U

airtomatically to zero on opening the camera back. It
indicates the number of frames exposed. An interlock
mechanism automatically prevents double exposures or
blank frames. Rewinding the film is simplified by a fold-
over crank rewind handle.
 A semi-automatic exposure meter is built into the Rollei
35. It is a precision ultra compact cadmium sulphide (CdS)
meter by Gossen, matched to the camera. It is coupled to
both the shutter speed and aperture setting, so that either
can be pre-selected. A cut-out window is in the camera top
plate in which to align the needle with a pointer by turning
either the shutter speed or the aperture setting disc. A
mercury cell inside the camera body feeds current to the
meter. Film speeds from ASA 25 to 1600 or 15 to 33 DIN
coupled to the meter are set in the centre of _the aperture
disc. A film type reminder is in the centre of the shutter
speed disc. -  The brightline viewfi.nder shows the subject to be photo-
graphed.-  The lens built into the Rollei 35 is the Zeiss Tessar
40 mm.           3.5. The Zeiss Tessar is a 4 element, 3 component         flens of dutstandingly good defi.nition, excellent contrast and
colour correction. It can be stopped down to f 22, The
40 mm. focal length gives a 57" field of view. The Tessar
covers the whole image fi.eld evenly and in common with
most other lenses, it obtains its maximum edge to edge
definition atf 8. The lens is mounted in a retractable barrel
which pushei back into the camera body. The lens can only
be retrbcted however, after, the shutter has been tensioned
by operating the lens transport lever. The lens lock on the
camera top also has to be depressed.
  Focusing is by turning tlr,e front lens mount, which is
adjustable, from infinity down to 3 ft. A depth of field
scale is engraved opposite the distances. The extensive
depth of field obtained with the short focal length-of 40 mm.
makes a rangefinder unnecessary. One can, in fqct, when
                                                    use ashooting at tfe average working aperture of f 8 tof ll,
snapshol setting: at 20 ft. everything from l0 ft. to infinity
                             6
View original page 7Page 8 · Read text
www.butkus.us
 is sharply reproduced and at 6 ft. everything from 4| to 9 ft.
 is sharp.
  On the Rollei 35 you see all controls and setting-dis-
        apertu-re, sfurrrtter speed and meter-at a glance by1"1"-9,
holding  it in front of you. You only need to raise it to your
eye and shoot.
  Accessories for the Rollei 35 include a soft black leather
pouch with wrist strap, lens caps, filters and lens hood.
_ T-*.o .ippler versions of the Rollei 35 are in preparation:
Rollei 35B with a selenium exposure meter and nbilei :SC
without, exposure meter. Both use the 40 mm. /3.5 ZeissTri_ota_r^lens in a special leaf shutter with speeds fiom l/30th
to l/500th secondand a B setting.
View original page 8Page 9 · Read text
J4' ! "HANDLING                -    .    '                 THE ROLLEI 35'
          The Rollei 35 camera like the majority of 35 mm. minia-
         ture cameras, uses standard perforated miniature f.lm,
         35 mm. wide. It is available in various packings (see also
        page 22), the most convenient being standard daylight
            cassettes. These are light-tight containers with a ready cut
         and trimmed length of fllm for 36 or 20 exposures (or 12
          exposures for some colour negative films).
         The cassette can be loaded into the camera in daylight
         but you should avoid loading or unloading in brilliant
            sunlight. Choose a shady spot or shield the camera with
         your body if nothing better is available.

        Loading
          1. Remove camera back. Before removing back make sure
             that the rewind lever beside the eyepiece of the view-
               finder is turned downwards. Unlock the camera back by
            pushing the back lock plate outwards by its protruding
            knob. Now you can pull off the camera back.
          2. Insert the fiIn cassette by first swinging out the pressure
              plate and inserting the cassette into the cassette chamber
            with the protruding f.lm end pointing to the take-up
              spool. The protruding centre spool top of the cassette
                   fits into the hollow of the cassette chamber top.
          3. Fix fln to take-up spool. Pull out sufficient film until
           both perforations engage the sprocket teeth of the
             sprocket wheel. Insert about one inch of the film end
              into one of the slots of the take-up spool and turn the
            take-up spool by its serrated lower flange as far as it
              will go in the direction of the engraved arrows. The
              film will wind itself inside out on to the take-up spool.
            Swing back the pressure plate.
         4. Close camera back by inserting it from below into the
             grooves on the camera body and sliding  it up. Lock the
h
View original page 9Page 10 · Read text
www.butkus.us
                         I                                    irr-'i      '!-1   :j             :                 LOADING


       To load rhe Rollei 35, first release the back lock and remove the camera back by sliding  it downwards.
         Insert the c.ssette of film, open the pressure plate and feed the film leader across to Che tak€-uP
         tpool. Fold down the pressurd plate, ensuring that the film perforations  rre engaged by both sprocket
        *heels. Replace camera back by sliding into position and re-engage the lock. Operate the tr.nsPort
         lever until'No.  I shows in thehlm co-unter windo*. Set film speld and type of film in use on their
          res pectiYe  discs.

rf
View original page 10Page 11 · Read text
-   lock plate.    9?"k- into ?osition by pushing back the
    Check that the camera back is firmly secured to the body.
 5. Advance the filT fol first exposure by flrst pulling out thi    lens as far as it will go and turniirg it tb ttre-right to
    gngage, then, release and transport with the transport
    lever until the exposure countlr in the camera base
    points to No. l.
     While transporting the film it is advisable at the start
    to check that the rewind spindle in the base of the camera
    rotates; this is evidence that the f.lm has been loaded
     corre-ctly and is moving from the cassette to the take-up
    spool.
 6. Set the film speerl. The speed of the film in ASA or DIN
    rating as- given on the film packing has to be set on the
    centre of the aperture disc on the-left-hand side on the
   camera            front               by turning                            the ASA                                   or                           DIN                                        arrow by' one              proiruding    of the two                      [nobs                                to the                                         film                               speed.
7.          fitrn type indicator to remind yourself of the type of   Fgt   film you have in the camera. Tirrn the centre ir? tne
    shutter speed disc until the engraved arrow head points  to either-Colour daylight, Colour artificial -light,
   Colour negative or Black-and-white film.
 Unload,ing
  When the whole film has been exposed the film counter
indicate-s No. 36, 20 or 12, according to the length of film
used. The transport lever cannot be turned any firther and
indicates that all the film has been used up. Do not force
the winding lever or you will tear the film out of the cassette.
1. Set for rewinding by turning the rewind lever beside the
   viewfinder eyepiece to the R position.
2. Rewind the film by folding over the rewind crank and
   turning it in the direction of the engraved arrow until
  you eventually feel the resistance to rewinding the film
   disappear. Now fold the rewind crank up again and
View original page 11Page 12 · Read text
www.butkus.us
                                    UNLOADING


To unload the Rollei 35, first set the camerl for rcwinding by pushing the sprocket  release lever to
the richt and uowards.'Fold  out the rewind crank end rewind the film. When the film ir rcwound,
releasE the baci< lock and pull the camera beck downwrrds. Opcn thc prcssure plate' if necetslry,
rnd remove the cassette.
                                     lt
View original page 12Page 13 · Read text
return the rewind lever to its normal position-    against the        viewfinder eyepiece.
 ;3,   Open camera back, as for loading and
-4.      Remove the cassette. Then close the camera back or
        reload with a new film.
    5. Retract lens. If you are not using the camera again
        immediately, operate the film transport lever to teniion
       the shutter, press the lens lock on the camera top,
        twist the lens barrel towards the aperture setting diai
       and push it back into the camera body.
    Holding the Cam,era
   FOR HORIZONTAL PHOTOGRAPHS hold the   camera horizontally                                                       - against your nose while looking
    through the finder with one eye. Keep both elbows close to
t:f   the body. Press the right thirmb against the back of the
$:   camera, let the right index finger rest on the release while
    the right middle                    4gg.{, bent iownwards, presses against    the camera front. The left hand grips the cimera body on
      its left side.
    FOR VERTICAL PHOTOGRAPHS  rest the camera
     ypJrght {gqin-st forehead and nose, gripping its top with the
     left hand,_ left thumb against the camira-back. The right
   hand holds the camera from below, right thumb on ihe
     release, the camera resting in the palm of the right hand.
     To release the shutter, press ttie release witfthe ball of
               (or thumb). Use finger pressure only and keep      llre $nge.r    tne nand and lts grlp on the camera steady. The actual
    pressing down must be done slowly and smo6thly.
      For slow exposures in the hand it is advisable io rest the
    elbows or at least to lean the body against some support in
    order to avoid camera shake. In this way ll15,l/8 an^d even
       j[ sec. can be risked without camera strite. Suin a suDDort
     is also desirable for faster exposures. A slightly unst6ady
    hold may easily lead to blurred pictures.
View original page 13Page 14 · Read text
www.butkus.us
                                        HOLDING

                                       For horizontal shots hold
                               the camera with  the
                                thumbs against the back
                                end the fingers gripping
                               th6  front. The  right
                                     index finger falls natur-
                                            ally on the shulter  re-
                                           lease. while the thumb
                                    operates the transPort
Press the elbows close to thc body,     lever.


                                 For verticel shots turn
always stand with your legs well   the camera through 9(P
                 apart,                      in either direction. With
                              the right hand at the
                                  bottom, the thumb can
                                be conveniently used to
                                    operate the shutter re-
                                               lease.


and hold quite still while you release
                        The wnst strap pulls
                                    through an outlet in the
                                pouch and slides along
                                   the wrist to enable the
                                pouch to be taken off
                                      the camera.

 Whenever possible,3upport your body against something  solid,
 such as a tree or wall, ot prop your arms on a fence, railing, or
 even on your knees when sitting on the ground. This is specially
 impo?tant with slow snapshot exposures where the camera
 must be absolutely steady. Use a cable release for time exposures
 from a tripod.


   'ffi       ,,111t11, ;  :,,  :,,,,;,y:,,.

   li'ffi|t'i.tttt..ti'.t:l''ltiii'
View original page 14Page 15 · Read text
sF

     The use of a tripod is necessary when taking time ex-
    posures and it is also recommended for speeds from 1i30th
    to $ sec. For upright photographs from the tripod, use a
    ball-and-socket head to allow changing from horizontal to
     vertical position.

    Carrying
     For convenience and protection, the camera should
    always be carried in its pouch case. The case strap is fixed
     to the camera body and goes through an outlet in the pouch
    to your wrist.
      For use you need only open the zip of the case and slide
      it along the strap towards your wrist to have the camera
    ready for use.

    Shooting
       Practise the following operations fust with an empty
    camera until you can do them almost automatically.
    1. Transport fflm by operating the transport lever; this can
      be done in one swing as far as the lever will go or in two
       or more shorter swings until it locks. If the lens is re-
        tracted, this will have already been done.
    2. hll out lens by pulling the mount on the two serrated       grips forward as far as it wil go and turn it towards
        the, shutter speed dial until you feel it engage and it
       cannot be pushedback.
    3. Set the distance by turning the lens mount by its lower
       edge until the distance in feet is opposite the index mark
      on top of the lens mount.
        The same scale underneath the lens rim carries the dis-
fi      tance scale in meters. See also Depth of Field and Zone
       Focusing on pages 48, 50.
    4. Pre'set shutter speed. Choose a shutter speed and set
         it on the shutter speed disc on the camera front. The
View original page 15Page 16 · Read text
www.butkus.us
                                     SHOOTING


                                                         g,::::-\-7'4     I @irui*++eiilV    \-      @@
.iil7iD    ]ffi'*j#


Too: The first ooeration  in shootins with the Rollei 35 is to transPort the film by pushing thc lever
on the left of tlie camera top as fai forward as it will go and letting  it swing back. lf the lens is re-tracted, this operation has ilready been carried out, in which cse, pull-the.leffi out lnd turn  it
towardi the shirtter speed dial until  it clicks into position and cannot be pushed back. Set the distence
of your subiect on the focusing scale.

A,liddfe: Check that the correct film speed has been set on the film speed dial tnd sct che shutter
soeed required. Adiust the aDerture control until the pointers in the exposura meter window
cbincide.   if they cennot be mad-e to coincide, change the shutter speed. Sight the subiect in the view-
finder and press the shutter release.

&ttornr  tf not takinr further pictures, operats the transport lever, press the lens lock on the cemere
top, twist the lenslarrel roiards the iperture setting diel and push it back into the camen body.
View original page 16Page 17 · Read text
.qF

      most generally useful shutter speed for outdoor work in
     good light is lll25 sec., in poor light ll60sec. For
ft,    time exposures refer to page 44.
   5. Ling up meter. To select the correct aperture to use
      under the prevailing light condition poinf the camera to
           sgbjgc! to be photographed and turn the aperture  .    tle  .   wheel while at the same time depressing the chrome
      locking bar on the base of the wlieel to bring the red
      matching pointer in the exposure meter window in
       line with the white exposure meter needle. See also
      pagg 45, Usigg an Exposure Meter. If the pointer cannot
     be brought into line with the needle, the shutter speed
       pre-sele_cted is either too slow or too fast for the light
       available and has to be adjusted.
       The right edge of the red area in the left corner of the
      meter window indicates the start of the measuring range
       of the meter.
        _ If you wish to shoot at a certain aperture, you can set
      the aperture required and turn the ihutter speed wheel
       to match the pointer to the needle in the meter. See also
      Exposure page4l.
   6. Si-ght subject through vierrfinder. The brightline frame
     which you see when looking ttrrough the viewfinder
       outlines the field which is reproduced on the fi.lm.
   7. Release. To release the shutter press the body release
       gently. Speeds from l/30 to l/500 sec. are'instantaneous'
     and can be taken with the camera held in the hand. It
       is advisable to use the slower speeds including l/30 sec.
      as                    - sparingly as possible as there is some danger of      jerking. the camera, and even a slight jerk, enlarged
       six or eight times, results in unsatisfactorydefinition.-
  Chmging the Banety
   - The CdS exposure meter is powered by a Mallory PXl3   battery. The average life of such a battery is 18 months to
   two years. It is advisable to change the battery after about
                             t6
                                                       t
View original page 17Page 18 · Read text
www.butkus.us
                                          ACCESSORTES

To change thc battery, unscrew the
battery compartment cover with a
coin, take out old battery and
replace with new one with plus sign
towards you, and replace cover,        i0*


Filters and close-up lenses screw
directly into the front of the lens
mount.


The lens hood is a push-on attach-
ment to fit the outer rim of the front
of the lens mount.


Thc wrist strap slides into a socket
at the side of the camera.  lt oasses
throuSh an outlet in the carrying
pouch.
View original page 18Page 19 · Read text
TF
one year or when the meter needle does not deflect any
more. The voltage drop is sudden, so that there is no danger
 of inaccuracy olmetefreading while the needle still deflects.
 If the camera is not used for a long time it is advisable to
remove the battery. If the camera should be used in very
low temperatures (below        (14'F) replace the batteryby a PX 625.         -10'C -To      change the battery, oP€tr the camera, unscrew the
nickelled recess plate in the top of the cassette chamber
with a coin. Remove the battery and replace by a new one
 in such a way that the *  sign on the battery is visible. Then
replace the screw cap and retighten with a coin.
 Cutrtng a Partly-erpowd FiIm
   If a film which is only partly exposed has to be processed,
advance the film for the next exposure. Then take the
camera into a darkroom-or work in complete darkness.
Open up the camera back, and lift the cassette out of its
cfambei. With a pair of scissors cut through the frame
which lies in the fi-lm aperture. Put the cassette down and
carefully withdraw the exposed film from the take-up spool
and either put it in a light-tight container or load it im-
mediately into your developing tank. Now you can retrim
the remainder of the film (see page 24), fix it again on the
take-up spool, and close the camera. It is ready for the
next exposure. The counter restarts from zero     you                                          -andhave to-allow for four frames lost (the amount of film lost
through cutting and reloading).
  The reinserting can be done in daylight. In this case a
total of about five frames are lost, for after inserting and
closing the blind exposures have to be made to wind on the
film length which was exposed to daylight.

Chan ging P ar tly-e x p o s ed F ilm s
  To replace a partly-exposed  film by another one, as when
you want to take a few colour photographs in between
some black-and-white shots, proceed as follows:
                              18
View original page 19Page 20 · Read text
www.butkus.us
1. Check the number of exposed frames on the fi.lm counter.
2. Rewind the film but stop immediately you feel a slight
   increase in resistance. This comes from pulling the fi.lm
   end from the take-up spool. If the film is to be reloaded,
  you must not pull the whole film into the cassette,
   otherwise the film end would have to be extracted by
   opening the cassette in the darkroom for subsequent
   reinsertion into the camera.
3. Unload the rewound film and write down the number of
   exposures taken on the beginning of the film leader.
  Now you can load the camera with any other type of
    film.
4. Reload the camera. 'When reloading, load the partly
   exposed film in the usual way but cover the lens with
   the lens cap or some similar opaque object. Press the
   release and advance the film for the initial blind ex-
   posures and-with the lens still covered-go on pressing
   the release and turning the transport lever to move on
   the frames already exposed. Advance the fi.lm in this way
   until the f.lm counter has reached the number of the
   frame you noted before. To be on the safe side, it is
   advisable to allow one more frame to pass.
    The rest of the film can now be exposed in the usual
   way.


                            t9
View original page 20Page 21 · Read text
ry
        FILM AND FILTERS
  There are two kinds of fi.lm available for the Rollei 35
 cameras: black-and-white and colour.
 Black-and.whitc Film
   This produces a negative in which the colours and bright-
 ness range of the subject are translated into black and white.
From it, prints or enlargements on paper or black-and-
white transparencies can be made.
  The black-and-white film used normally is panchromatic;
that means that it is sensitive to all colours. There is a choice
of several types differing mainly in sensitivity as well as
certain other characteristics.
  SLOW FILMS are of low sensitivity, requiring compara-
tively great exposure. Their main advantage is the extremely
fi,ne grain, permitting a high degree of enlargement without
its granular structure becoming unpleasantly visible. Such
films also yield images of the greatest sharpness. On the
other hand, these slow films are not very suitable for coping
with fast movement in poor light. Such f.lms are rated at
40-80 ASA or 17-20 DIN.
 MEDIUM SPEED FILMS still yield a reasonably fine
grain with good gradation. They are the most suitable
material for all-round photography, other than in very low
light. These films are rated at 100-160 ASA or 2I-23 DIN.
  FAST FILMS with somewhat coarser grain (still accept-
able for reasonable degrees of enlargement)  will cope with
most light conditions. This is the right film for the photo-
grapher who wants to be prepared for the unusual, to arrest
fast movement with high shutter speeds, as well as shots in
poor light. The speeds are 200-400 ASA or 24-27 DIN.
 ULTRA FAST FILMS are primarily intended for high-
speed sports shots in dull weather, interior snapshots in poor
light, night photography and ill-lit stage pictures. These
films are specialist types for conditions where normal
materials are totally inadequate. The high speed is achieved
                        20
View original page 21Page 22 · Read text
www.butkus.us        FILM SPEED, CONTRAST, cRAtN, RESOLVTNG POWER


Gene-rally spcaking-,.low.speed  toes with grcit.st contralt, finest grain and highest revolving power.
The film speed (left) points to the correCponding contrast. grainlnd resolvins oower in t6d three
bars. The contrast bar shows (from top to bottom)ihow low contrast becomes meilium and then hirh
as speed-decreases. The grain bar shows the corresponding  transition from coarse to fine erain aid
the resolution bar demonstrates the superior resolving power (more lines) of the slower-film. Thc
type of subject to which each type of film is best suited  ii showri on the right.
                                2l
View original page 22Page 23 · Read text
qIF

at some cost in defi.nition and graininess. Speed ratings range
from 500-1,300 ASA or 28-32 DIN.
  The above speed figures are based on the latest ASA
Standard for film speeds (and on the BS and DIN Standards
under revision). These figures, when used on the exposure
meter, give minimum correct exposures, to make the most
of the versatility of the film and of the image quality. They
are also the f.gures quoted by most f.lm manufacturers.
Sometimes fllms are, however, still rated according to
earlier standards which, in effect, incorporated a generous
safety factor against underexposure-by the simple process
of overexposing films about 100 per cent (well within the
exposure latitude of most black-and-white films). So you may-
cohe across films apparently only half as fast as others of
similar type, because of this difference in rating. The tables          -68on pagei   and 69 indicate the current film speeds to. be
useil with the exposure meter, even if the film packing gives
a lower rating.
  This applies to black-and-white negative materials only;
speed rating methods have not changed for colour films. -  There is a wide range of different makes of films in all
speeds on the market. Their characteristics, apart fromspeedt
                                           qay that allv-ary slightly from make to make. It is safe !oweli-known brands are reliable and good. The best film is
the one you are used to. Professional photographers and
advanced amateurs may find one or the other characteristic
of a particular make, i.e., its gradation, granular structure,
acutahce, etc., of particular value for specific jobs.

Other Film Packings
  In addition to standard cassettes (see page 8) 35 mm.
black-and-white fi.lm is also available in various loose
packings for loading into cassettes. This is a much cheaper
way of using film, as you do not have to buy a new cassette
every time with the fi.Im. The following packings are avail-
able:
 DARKROOM REFILLS are lengths cut and trimmed to
                        22
View original page 23Related documents and language editions
RolleiPDF
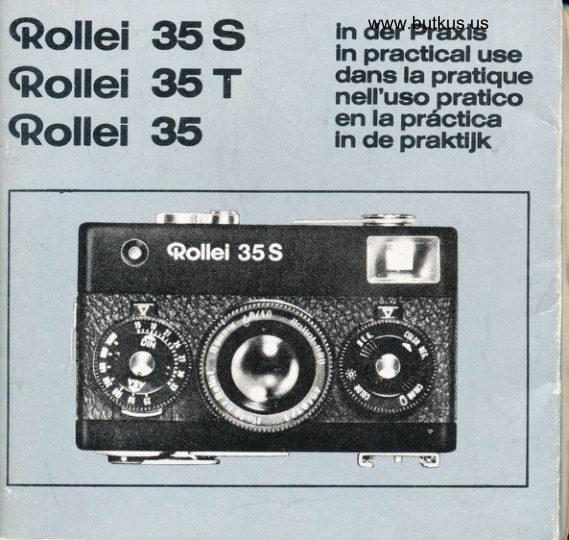
Rollei 35 - Rollei 35 T - Rollei 35 S gebruiksaanwijzing
User manual
27 pages · DutchRead →
RolleiPDF
ROLLEI 35
User manual
14 pages · EnglishRead →
RolleiPDF
Rollei 35
User manual
20 pages · EnglishRead →
RolleiPDF
Rollei 35
User manual
24 pages · EnglishRead →
RolleiPDF
Rollei 35 - Rollei 35 T - Rollei 35 S
User manual
26 pages · FrenchRead →
RolleiPDF
Rollei 35 - Rollei 35 T - Rollei 35 S
User manual
24 pages · GermanRead →
RolleiPDF
Rollei 35 / Rollei 35 T / Rollei 35 S Direct
User manual
26 pages · GermanRead →
RolleiPDF
Rollei 35 - Rollei 35 T - Rollei 35 S
User manual
26 pages · SpanishRead →
From the M. Butkus archive. Original publisher and archive notices are retained.
Check the model and edition against your equipment.
PDF verified 2026-10-10.