Film cameras
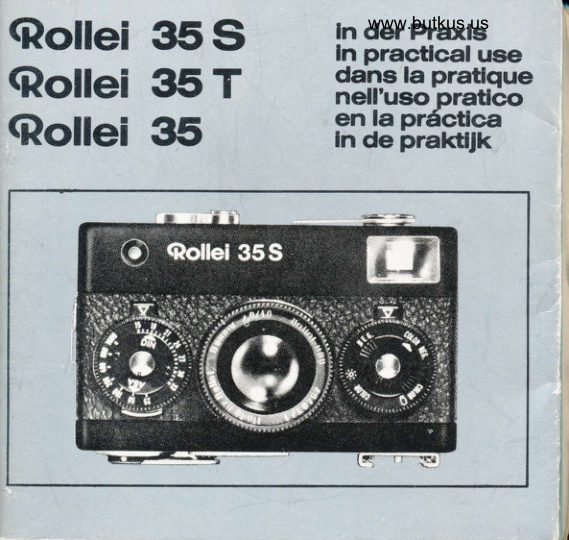
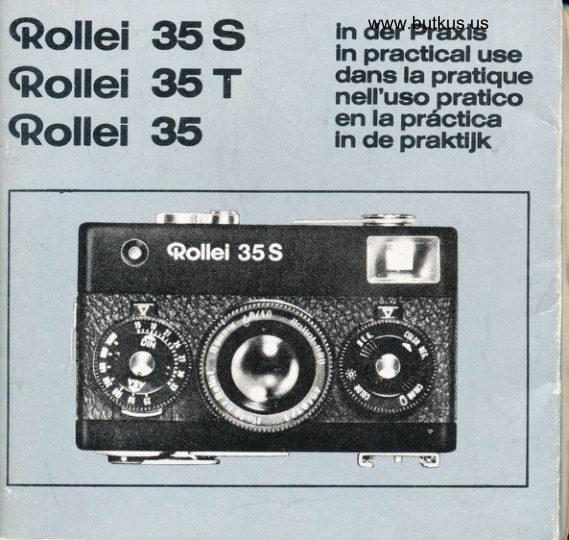
Rollei 35 / Rollei 35 T / Rollei 35 S Direct User manual
User manual for Rollei 35 / Rollei 35 T / Rollei 35 S Direct. 26 pages in German. Read the original PDF, download or print a copy without registration.
26 pagesGerman1.5 MB PDF
Loading your manual…Open PDF directly
Document details
- Brand
- Rollei
- Model / document
- Rollei 35 / Rollei 35 T / Rollei 35 S Direct
- Document type
- User manual
- Language
- German
- Pages
- 26
- File size
- 1.5 MB
- Category
- Film cameras
- Document date
- Not specified in catalog
Search available document text
Find a term, then jump to its page in the original PDF. Image-only pages may not be searchable; check the PDF for exact wording and diagrams.
Page 1 · Read text
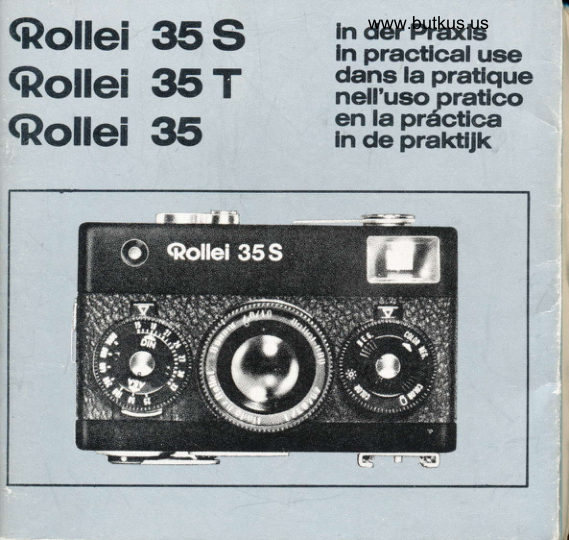
In derwww.butkus.usPraxlsQollei 35S         In practlcal use
                      dans la praUqueQollei 357        nell'uso pratlco
                                   praktfikQollei 35         enIn dela pr6ctlca
View original page 1Page 5 · Read text
www.butkus.us

 17 Matching pointer                     2il Tripod socketr/r"
 18 Release button with cable        24 Rewind crank
     release socket                  25'Scqew cap for battery
 19 CdS cell                             compartment
 20 Accessory shoe with center         26'Film pressure plate
     contact                              27' Sprocket shaft for film advance
 21 Back lock                          28'Slot of take-up spool
 22 Distance setting ring                29' Milled wheel
                           3O Rewind axle


When reading, please open                       ' + illustrations on the following
the first cover leaf                      pages
View original page 5Page 8 · Read text
www.butkus.us

Inserting the film
Swing open the pressure plate 26.
Push in the cartridge and pull out the
film leader until both perforated ed-
ges engage the sprocket shaft 27.
Then swing the pressure plate 26
over the  f ilm and hold  it down.
Push the  f ilm leader fully through the
slot 28 and wind it up on the take-up
spool by turning the milled wheel 29
in the direction of the arrow as long
as it can be turned.
Push the camera back 11 in place
and lock  it.
Push the camera back 11 in place
until its stop and lock  it with lock 21.
View original page 8
Page 10 · Read text
www.butkus.us

Shootlng
Set the controls by.pressing the in-
dex fingers against the lower edge
of the setting dials. This also relea-
ses the aperture dial 5 by pressing      FFF==on the ledge 6 underneath.
All settings are read off against the                         rtriangular index mark at the top.
 Pre-select the exposure time
Turn the shutter speed dial 1 to en-
gage the selectbd exposure time op-
posite the index mark. For instant-
aneous exposures *  hint@, page33. For time exposures -  page 34.      K   l-1t6=
Line up the matching pointer
The measuring range starts where
the meter needle 16 becomes visible          the camera held in this way:
outside the red area.                  Turn the aperture dial 5 to bring the
For reliable readings point the came-     red matching pointer 17 into line with
ra accurately at the subject, so that    the meter needle 16. lf neccessary
the exposure meter takes in the cor-     select a longer or shorter exoosure
rect field of view. For shots out of     time.
doors with large sky areas point the    The shutter speed and aperture are
camera slightly downwards rather    now set for correct exposure. For
than upwards.                               pre-selecting apertures see hint @.


                                                                                   27
View original page 10Page 11 · Read text
Scttlng the dbtance                        Aller shooling                       f,Turn the setting ring 22 to set the                                            Hi  To get the camera ready for the nextrequired distance to the A index      shot, pull the winding lever 14 out as
                                                 go with your thumb.                                                                                                 it will                                                 lar as                hintmark              @.     -  also                                                                  the num-                                              frame                                              counterl0shows                      carries distan-    The                   ring          scale    sameThe
ces in metres also.                    ber of the next shot.  lf the winding
                                          lever 14 is locked, this signif ies that
Releasing                          the camera is ready for shooting.
                                                                          bYSight the subject in the finder 13: The    Now you can release the lens 4
brilliant frame shows the view taken      pressing the button 15, and then turn
in. Press the shutter release button      to the left and oush back into the bo-
18. For longer exposure times: keeP      d'l  dy.the release button pressed down un-
 til the shutter action is finished.           {
The short boundary marks within the       #,
 brilliant frame show the limits of the field of view at near distances below  {
 5 feet (1.5 metres).
 For self-timer exposures see page30.
View original page 11Page 12 · Read text
www.butkus.us
ll
I I Unloadlng the fllm
|I |I  Afteron filmframelength36, loaded)20 or 12the(dependingfilm has
     to be rewound:
    Turn the lever 9 upwards. Unfold the
    crank 24 and turn in direction of ar-
    row until lhe resislance of pulling the
     film disappears.
   Fold in the crank again and turn
   down the lever 9.
   Move the lock 21 outwards and re-
   move the camera back 11. Take out
   the cartridge and preferably have
    processed as soon as possible.
   Never change a film in direct sun-
     light. Use, at least, the shadow of
    your own body.
View original page 12Page 13 · Read text
Practical hints
   @ Shooting with the lens hood
     The lens mount will take the srew-in
       folding lens hood to protect the lens
      against direct rays from the sun, as
       well as against splashes of water and
      drops of rain. lt ensures oPtimumI     brilliance and sharpness for Your
       shots. Always u.se  it whenever possi-
      ble+hint@also.
   @ Self-limer exPosures
      Separate self-timers can be used,
       provided that the travel of the release
       plunger on the self-timer can be pre-
        cisely matched to the travel of the re-
       lease button 18.
       Self-timers with too long a release
       plunger travel or too hard a release
      movement may damage the camera.
   @ Exposures with cable release
      Use the camera on a triPod or firm
       support, screw the cable release  in-
       to the release knob 18. Time expo-
       Sures + page 34.
View original page 13Page 14 · Read text
www.butkus.us
@ Exposures wlth filters                     Fllters lor blad<-and-whlle shots: Me-
The thread of the lens 4 or the lens    dium yellow filter (exposure correc-
hood mount takes a screw-in lilter.      tion        This makes the sky re-                                         -1.5).darker, clouds more brilliantFilters mostly require an exposure     produce
correction. lts value is engraved on    and improves modelling in snow sha-
the filter mount. This indicates the     dows.
number of stops by which the aper-    Orange filter (exposure correction
                     (towards                               lowerture has to be            opened
f/numbers)                           time              the exposure                                           in-    -1.5type used).to -3,Thisaccordingdarkens tobluetheskiesfilm           or
creased.                              to give heavy thunderstorm elfects
For example if the measured aper-    and lightens yellows and reds.
ture is  f/'l 1, and the filter correction
value   1.5 (i. e. 1rl2 aperture stops),      Filters lor colour shots: Filter UV and
use an      - aperture setting between  f/8     colour conversion  filter R 1.5 (these
and f/5.6.                                   require no exposure correction). They
lf you want to correct by increasing     subdue blue ca$ts which can arise
the exposure time, moving the shut-    on cloudless days through the pre-
ter speed dial from one value to the    dominant blue skylight, especially in
next corresponds to a full exposure      distant views. With some reversal co-
step correction. Half steps can only     lour films a warmer overall render-
be allowed for by intermediate aper-      ing may be desirable. In that case the
ture settings.                    R  '1 .5 filter may be used for all shots.
View original page 14Page 16 · Read text
www.butkus.us

@ Selecting the best shutter speed
The figures 2 to 500 on the shutter
speed dial 1 indicate fractions of a                                                              1/5OO 3cc                                                 lilsecond. The speed dial engages at
each setting; never set intermediate
values. lmage sharpness depends,                                                                                                                          lti
among other things, on the use of a
sufficiently fast shutter speed. There-


With moving sublects: Use short ex-
posure times to avoid movement
blur. As a general guide: Motor ra-
ces, tennis     llsoo second. Horse ra-            -ces, cross          country runners       t/5oo                                -                                 cyc-second. Running children and
lists     r/rso to r/rus S€cofid. Walking
figures,-  standing people        lo llcosecond.                 -1/tzs
View original page 16
Page 17 · Read text
In general: Movement at close range  @ Pre-selecling aperlures
and across the viewing direction     According to the type of subject you
needs faster shutter speeds, move-    can line up the matching pointer 17
ment from greater distances and ap-     with the meter needle by turning ei-
proaching or receding from the ca-      ther the aperture dial 5 or the shutter
mera allows slower shutter speeds.       soeed dial 1.
Longtime exposures                   With moving subjects pre-select the
The "8" setting on the shutter speed     exoosure time to make sure of a suit-
dial provides time exposures of any     ably fast shutter speed. Then match
required length. Keep the release    up the pointer by turning the aper-
button depressed lor the required ex-      ture dial.
posure time. The shutter closes when          ll on the other hand depth of field is
you let go again.                   more important -  Page 35, deter-With longtime exposures you can al-    mine the required aperture and pre-
so take shots in very poor light which      select this. Now match up the Poin-
is too weak for an exposure meter     ter 17 by turning the shutter speed
reading. As a special case, if you     dial 1.  lf necessary comPlete the
arrive at the "B" setting by lining up    exact matching with the aperture
the matching pointer 17, the correct     dial 5 to get a speed value in click-
exposure time is 1 second (double     stop position.
the next exposure setting).                  In every case the camera must Point
                                          the subject while you line uP the                                         at                         placeFor    long         time             exposures:                                  the   $4.                                               pointer.camera       on                        a tripod         a firm                 support or                                                                                                                  :iand use a cable release with time
lock -  page 30.


34
                                                  fl
View original page 17Page 18 · Read text
www.butkus.us
@ Depth ol field (table on page 43) x
The image of a subject is sufficiently
sharp over a range of distances in
front of and behind the focused dis-
tance. This depth of field zone is
shown on the depth of field scale 3:
Look up the marks of the aperture  in
use to each side of the focusing in-
dex. The figures on the distance ring
22 opposite these marks then indi-
cate the sharply covered subject
range.
Depth of field is particularly desira-
ble for candid snapshots, sports pho-    For distant views with near fore-tggraphy with rapidly changing sub-                                   grounds set the infinity marking mject distances, and for scenes exten-                                         opposite the aperture in use on scaleding in depth. For this reason the                                               3. That extends the depth of field tomost useful snapshot settings of 6                                 the nearest possible point in theand 20 feet are marked in red on the                                          foreground.distance ring 22. At a medium aper-
ture (f/8 to f/l 1) these settings pro-
vide extended focusing ranges:
at 6 feet from about 4llz to 9leet;
at 20 feet from aboul 10 feet to infini-
ty *.
View original page 18
Page 19 · Read text
@ Correct exposure                   Normal subjects: the view is lit from
As a basic rule, always point the ca-     the front or at an angle from the side.
rnera while taking exposure readings    There are no heavy shadows, and
exactly in the direction of the sub-     dark and bright areas are balanced.
ject. Inadvertent tilting of the camera     (This uniform   f ront lighting also
   for example into the sky while ta-     yields the most saturated colours in-king landscape views   can falsify      colour shots).                         -the reading and in this                    case lead to     Result: The measured exposure  is
under-exposu  re.                          correct for the whole field of view.
The exposure meter evaluates the
average brightness of the measured   A special case: The main subject
subject field. With sublects of ave-     contrasts strongly in  brightness
rage contrast  it automatically indi-     against the background. For exam-
cates the correct exposure. But even     ple, with a portrait ol a suntanned
with shots of considerable brightness     face against bqight clouds an avera-
range you' can take the readings in    ge reading would give too much im-
such a way as to ensure correct ex-     portance to the sky. Yet it is the head
posure for the main subject.             which matters for the exoosure.
                                The right way: Take a close-up rea-
                                      ding with the camera near the sub-
                                            ject until the main object completely
                                                           fills the finder. After setting the ex-
                                    posure go back for shooting to the
                                         previous viewpoint.
View original page 19Page 20 · Read text
$       www.butkus.usSubstilule reading:  lf a  close-up
reading is not possible, point the ca-
mera at astrbstitute objectof average
contrast and under the same light-
ing. Use the setting obtained for the
exposure.
                                                 ;Against the light: When sfrooting
against the light open the lens aper-
ture by one stop (next lower f/num-
l3l)        subjects to oe taxen on t
reversal"o'our.colour film avoid very great
brightness differences. A close-up
reading of the shadow areas usually
leads to excessive exposure for the
sunlit image portions, which then
appear too light and burnt out when
you project the slide. An average
brightness reading (as with normal
subjects) here again yields pictures
which correspond most closely to the
natural colour impression.
View original page 20Page 21 · Read text
,d
                                                      loaded?                                           camera                                                          ls the       lransport                 @@ Film
                                                                  atter a long inter-                                                    not sure                                           are        operate the winding lever14  '$You                                                                    lf you    can
either in one full swing or in several  ,.   val, unfold the rewind crank 24 and
short swings until  it locks.       #   try turning it gently in the direction
                                              of the arrow.  lf you meet a resistance
@ Changlng the batterY               you know that there is a film in the
The cadmium sulphide exposure me-    camera. lf the camera i3 emPtY, the
ter 19 is powered by a Mallory batte-     crank24 turns freelY.
ry PX 625.
According to the manufacturer,  the  @ Carrying slraP and carrYing case
durability of the battery is 12 lo 24    The carrying strap is fixed'to the fit-
months, provided that the unused      ting 12 at the side. Push the protru-
camera is kept in the case  i. e. in the     ding retaining spring against the-ca-
dark. The voltage drop occurs sud-    mera Oody with the button on'the
denly. Symptom: the meter needle 16     strap and push the button home.
does not deflect any more. Recom-   To remove, push down the sPring
mended precautions: Change.batte-      leaves with a fingernail and slide off
ry annually, and remove it if the ca-     the button.
mera is not used over an extended     With the strap the camera can hang
period, always remove an exhausted     from the wrist even inside its carry-
 battery *  page 24.                      ing case. Open the ziP fastener of
                                     the case and push back the latter.
                                        During shooting  it simply hangs from
                                          the strap.
                                                            *
View original page 21Page 22 · Read text
www.butkus.us

@ Taking care of the camera
Protect the camera against hard
knocks and do not drop it.Asasafety
measure wrap the strap around your
 wrist.
Protect the camera against moisture, I
dust, wind-blown sand at the seaside  il                            iK(ffiand continuous exposure to sunlight.
This applies especially when the ca-
mera is opened while changing films.
Keep the film pressure plate26clean, {
and occasionally polish it with a tea-  il
ther cloth. For cleaning the inside of  f,
the body use a soft brush.      S   lf the lens surface mists over in the
A soft sable brush is also the best     winter when taking the camera from
means for cleaning the lens 4. The     the cold air outside into the warm air
lens surfaces are sufficiently reces-  ff  of a room, wait a few minutes until
sed to avoid accidental finger marks.     the deposit of moisture has evapora-
To clean filters, first dust them with     ted on its own.
a soft brush and then polish with lens    And if at any time you have a special
tissue.                                    technical query    at home or on                                 your travels abroad-       remember                                                                       -                                                                      Service                                                                                                                                       51.F'  that the international Rollei
                                                      E    is always at your disposal for advice
                                   and information.
View original page 22Page 23 · Read text
Handllng faults and remedles
Fault                        Possible cause
Meter needle does not       Preselected exposure time outside setting range
respond                      Batterv exhausted, not inserted or wrongly in
Shutter does not release      Rapid winding lever only partly tensioned
Picture unexposed or        Shutter speed too fast for flash bulbs
partly exposed
  icture under- or          Wrong exposure measurement
overexposed
Whole film under-'or       Wrong film speed setting
overexoosed
Whole film unexposed         Film has not advanced due to           ng or because torn
lmage partly or              Subject movement: exposure time too long for moving
completely unsharP            su blect
                        C"re-. st*ke: exposure time too long for hand-held shot
                         lmage inaccuratelY fosused
Rewind knob does not turn     Film wrongly loaded
                               Film torn
Heavy resistance against     Excessive exPloitation         length,
film advance
 Bright pictures areas            Ligtrt contrast excessive for colour film: particularly with
washed-out and almost        ag-ainst-the-light  shots, market and street scenes under high
 colourless, dark Picture       sun. beach and mountain scenes at midday
 areas almost black and
 without dlscernable detai
View original page 23Page 24 · Read text
www.butkus.us

 Remedy                                                                Notes
 Select shorter or longer exposure time                           See page 27
                                          t the battery                                  See
 Fully pull out rapid winding lever                               See page 38
      tter sPeed r/ro s€Coid or longer                              See oaoe 32

  easure        ss of main subiect.
 See clos$-up or substitute readings, page 36 and 37
      lm speed correctly. See ASA value on film packing                                                                     Itrl

 Correctly load film, advance smoothly but not too fast                See page 25      iili
                                                                    and 28
Use faster shutter speed                                     See page 33

Support camera or use a tripod                                   See page 33
 ocus exactly
Correctly load film, leader into outer slot                         See page 25      in"r@                                           trim new leaderand rethread
Avoid any force, rewind film somewhat, then finish leuer itrokE. lfJilm is torn out
9941qs", open backin tolgL!g[!!"!t ontv, rewind fitm by hand and wrap up light-proof
change viewpoint or direction: give preference to morning or afternoon sun which is
more suitable for photographing, see peges 36 and 37 also


                                                                                                                                                                                                                                                                                                                          lllr
View original page 24Page 25 · Read text
tIfl$
                                                      35)Facts and flgures (' = Rollei 35 T and Rollei
Type'.24 x 36 mm comPact view fin-    Lens: Rollei HFT@ Sonnar 40 mm
der camera with manual Pointer, me-       t12.8, tiller thread E 30,5 x 0,5 (Tessar
ter'needle exposure control.             40 mm f/3.5, filter thread E 24 x 0.5-)'
Speclflcatlon: Collapsible lens, bet-    made by Rollei under license from
ween-fens shutter tlz la llsoo sec and     Carl Zeiss, Oberkochen, West Ger-
B, double exposure and blank frame'    many; collapsible with shutter ten-
lock, exposure metering system cou-     sioned. Five (four*) elements, four
                                                                                         2.8pled to aperture ahd shutter speed'   componenls, aperture range
settings, film sp,eed range 25-1600      (3.5.) to 22, manual focusing to 3 ttl
ASA/15. 33 DlN, indicator dial for      0.9 m.
film type loaded, zelf-zeroing lrame      Dimilnsions: APProx. 97 x 60 x 32 mm,
counter, X-center contact for llash       3'lre x Zrls x ltlt in (97 x 60 x 30 mm'
guns, cable release socket, fitting lor      3tltcx23lt x 13/rc in").
carrying strap.                           Weight: approx. 320g'1 15lrtoz (325g1
Exposure meter: Pointer/meter need-       111 I re oz*1.
 le aligning system with CdS-cell,  di-     Accessories: Carrying strap' carry-
rected metering to subject fore-     ing case, evereadY case, lens caP'
ground, measuring range with 100     folding lens hood with E 30,5 x 0,5
 ASA/21 DIN film 16-16,000 cd/m2,     (E 24 x 0,5*) thrOad; medium Yellow'
 17.9-17.900 cd/sq.yd.; power supply     orange, UV, R 1.5 filter with E 30'5 x
 by button cell 1.35 V.                     0,5 (E 24 x 0,5*) thread.
 Flnder system: Optical view finder     Technical modif ications and inclu-
 0.6 x, bright-line frame with parallax      sion of accessories  reserved.
 marks, showing surrounding subject
  f ield.                                    Reoistered trade mark: Rollei HFT@
View original page 25Related documents and language editions
RolleiPDF
Rollei 35 - Rollei 35 T - Rollei 35 S gebruiksaanwijzing
User manual
27 pages · DutchRead →
RolleiPDF
ROLLEI 35
User manual
14 pages · EnglishRead →
RolleiPDF
Rollei 35
User manual
20 pages · EnglishRead →
RolleiPDF
Rollei 35
User manual
24 pages · EnglishRead →
RolleiPDF
Rollei 35 Guide Book
Reference guide
73 pages · EnglishRead →
RolleiPDF
Rollei 35 - Rollei 35 T - Rollei 35 S
User manual
26 pages · FrenchRead →
RolleiPDF
Rollei 35 - Rollei 35 T - Rollei 35 S
User manual
24 pages · GermanRead →
RolleiPDF
Rollei 35 - Rollei 35 T - Rollei 35 S
User manual
26 pages · SpanishRead →
From the M. Butkus archive. Original publisher and archive notices are retained.
Check the model and edition against your equipment.
PDF verified 2026-10-10.