Film cameras
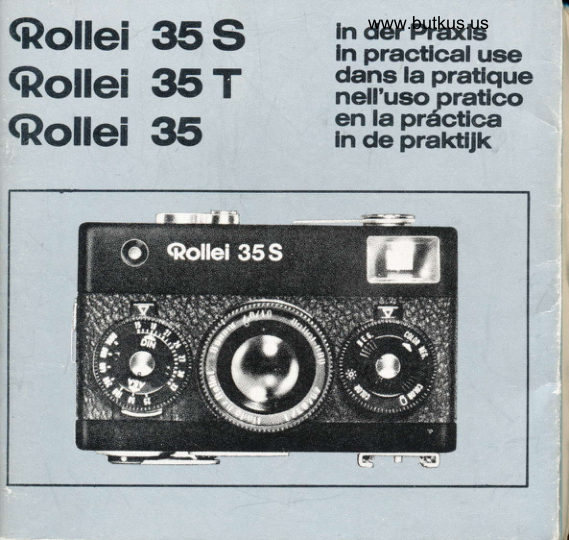
Rollei 35 User manual
User manual for Rollei 35. 20 pages in English. Read the original PDF, download or print a copy without registration.
20 pagesEnglish1.4 MB PDF
Loading your manual…Open PDF directly
Document details
- Brand
- Rollei
- Model / document
- Rollei 35
- Document type
- User manual
- Language
- English
- Pages
- 20
- File size
- 1.4 MB
- Category
- Film cameras
- Document date
- Not specified in catalog
Search available document text
Find a term, then jump to its page in the original PDF. Image-only pages may not be searchable; check the PDF for exact wording and diagrams.
Page 2 · Read text
The Rollei 35


 The Rollei 35 is a special camera - the camera for you. It is designed for your pleasure!

 That is why we have designed this camera to be so compact and handy - you can always carry it in your
 pocket. We have fitted it with a cadmium supplied exposure meter system for quick and reliable
 shooting. And with the 40 mm Carl Zeiss Tessar f/3.5 we not only selected a world famous lens, but also
 the ideal focal length for you: with the 57° angle of view you take in a more generous field of view than with
 a normal miniature camera lens. To let you get on with picture taking straight away, here is a brief
 instruction summary. So just read up to page 11 - and you can start shooting.
 With best wishes for good shooting and fresh fun every day with your Rollei 35 - from
  Rollei-Werke Franke & Heidecke


Quick Guide to Important Points


                              Page

 The Rollei 35                   5
  Get to Know the Rollei 35          7
  Loading the Camera              9
  Shooting                        11
  Unloading the Film              13
  Practical Notes:                 13
  j) Film Transport
  2  Is the Camera Loaded?         13
  3  Setting the Film Type         13
     Indicator
  4  Selecting the Shutter Speed     15
  5  Time Exposures              15
  6  Depth of Field                15
  7  Pre-selecting Apertures        17
  8  Correct Exposure             17
  9  Changing the Battery          19
  10 Flash Shots                  19
  11 Exposures with Filters         21
  12 Shooting with the Lens Hood   21
  13 The Wrist Strap and Leather    23
    Case
 13 Taking Care of the Rollei 35   23
       This manual was created by M.      3
      Butkus, www.butkus.org/chinon
View original page 2Page 3 · Read text
Sie lernen die Rollei 35 kennen
This manual scanned my M. Butkus
www.butkus.org/chinon
View original page 3
Page 4 · Read text
Vor der Aufnahme
Sie ziehen das Objektiv heraus and drehen es bis zum Anschlag (1): jetzt rastet es ein, jetzt konnen Sie
auslosen.
Denn der Ausloser (2) ist gesperrt, solange sich das Objektiv nicht in Aufnahmestellung befindet. Das ist
praktisch. Sie verlieren kein Bild durch einen vorzeitigen Schufg.

Von Aufnahme zu Aufnahme
Sie losen aus (2). Mit dem nachsten Griff fuhren Sie den Spannhebel (Filmtransport) bis zum Anschlag
(3). So ist die Rollei 35 sofort wieder schulibereit.

Doppelbelichtungen, Leerfelder and Bilduberschneidungen sind ausgeschlossen.

 Nach der Aufnahme
 Sie spannen nochmals (4) - schon im Gedanken an die spatere Aufnahme.
 Bis Sie gespannt haben, bleibt auch das Objektiv verriegelt. Erst dann gibt der Druck auf den
 Sperrknopf (5) das Objektiv frei: es laf3t sich zuruckdrehen and einschieben (6). Die Kamera pa&
 wieder flash in die Tasche.
View original page 4
Page 5 · Read text
Before Shooting
 Pull out the lens and turn it as far as it will go towards the stop (1) until it engages. Now you can shoot.
 The shutter release button (2) is locked as long as the lens is not in shooting position. This handy safety
 measure stops you from wasting pictures by premature exposure.

 From Shot to Shot
Press the release (2). Then fully pull out the winding lever (film transport) as far as it will go (3). So the Rollei
35 is immediately ready to shoot again.

Double exposures, blank frames and overlapping frames are impossible.

After Each Shot
Tension again (4) to be ready for the next shot.

Until you have tensioned, the lens remains locked. Only then can you unlock it by pressing the button (5); now
you can turn it back and push it into the body (6). And the camera is slim again for your pocket.
This manual taken from www.butkus.org/chinon


 Das Laden der Kamera

 Film einlegen
 Hebel (1) nach unten stcllen.
 Ruckwand entriegeln (2) and abziehen. Platte (3) abklappen.
 Patrone (4) einschicben and Film so welt herausziehen, bis beide Perforationsrander von den Zahnen (5) gefa1
 t sind. Danach Platte (3) auf den Film klappen and angedruckt halten. Filmanfang tief durch den Schlitz (6)
 stecken and

 zum Aufspulen die Randscheibe (7) in Pfeilrichtung so lange drehen, bis sic rich nicht mehr drehen Mt.
 Ruckwand - Riegel am Anschlag (2)! - aufschieben and verricgeln. Den festen Sitz der Ruckwand prufen.
 DIN-(ASA-)Wert einstellen
View original page 5
Page 6 · Read text
Wichtig fur richtige Belichtungsmessung: Schwarze Scheibe (8) an den Kerben drehen and Index auf den DIN-
(ASA-)Wert der Filmpackung stellen.
 Filmtransport auf Bild 1
 Objektiv (9) herausziehen and bis zum Finrasten an den Anschlag drehen. So oft auslosen (10) and bis zum
 Anschlag spannen (11), bis nach dem Spannen der Bildzahler (12) auf Nr. 1 steht. Die Rollei 35 ist
 aufnahmebereit.


 Loading the Camera

 Inserting the Film
 Turn down the lever (1).
 Unlock the back (2) and pull it off.
 Swing open the pressure plate (3).
 Push in the cartridge (4) and pull out the film until both perforated edges engage the sprocket teeth (5). Then
 swing the pressure plate (3) over the film and hold it down.
 Push the film leader fully trough the slot (6) and wind it up on the take-up-spool by turning the flange (7) in
 the direction of the arrow as long as it can be turned.

 Swing the latch open to its stop (2), push the camera back in place and lock it. Check that the back is firmly
 secured.
View original page 6
Page 7 · Read text
Setting the Film Speed
To ensure correct exposure readings turn the black disc (8) by its milled rim to set the index to the ASA or DIN
rating shown on the film packing.


Advancing the Film to Frame No. 1
Pull out the lens (9) and turn it as far as it will go to engage.
Alternately release (10) and tension by pulling the lever to its stop (11) until after tensioning the exposure
counter (12) indicates No. 1. Now the Rollei 35 is ready to shoot.
View original page 7
Page 8 · Read text
Die Aufnahme

 Beim Einstellen bedienen die Zeigcfinger die Skalen am unteren Rand. Das Blendenrad entsperrt sick bei
 diesem Griff durch den Druck auf die Taste.
 Samtliche Einstellwerte sind am Index (Dreieck) von oben her abzulesen.

  1. Entfernung einstellen
 Objektivring an der Unterkante drehcn (1) and Entfernung auf den Index einstellen. Tip ®. Die gleiche
 Skala ist an der Unterseite der Objektivfassung auch mit Fuf3-Einteilung vorhanden.

  2. Belichtungszeit vorwahlen
 Zeitrad drehen (2) and Belichtungszeit am Index einrasten.
 Momentbelichtung: Tip ®.
 Zeitbelichtung: Tip ©.

 Der Bildzahler zeigt die nachste Aufnahme an. Der gesperrte Spannhebel ist ein Zeichen dafur, daft die Kamera
 auslosebereit ist. Das Objektiv kann jetzt durch Druck auf den Knopf (7) entriegelt and nach dem Zuruckdrehen
 eingeschoben werden.

3. Belichtungszeiger nachfiihren
Der Meflbereich beginnt bei Sichtbarwerden des Mef3zeigers auflerhalb der roten Abdeckung. Zur
einwandfreien Messung: Kamera genau auf das Aufnahmeobjekt richten, damit auch der Belichtungsmesser den
Motivausschnitt richtig erfafit. Bci Aufnahmen unter freiem Himmel lieber etwas zu tief als zu hoch zielen.
In dieser Haltung: Blendenrad (3) drehen and den roten Nachfuhrzeiger (4) auf den Belichtungszeiger
einstellen. Falls erforderlich, langere oder kiirzere Zeit wahlen. Damit sind Zen: and Blende auf richtige
Belichtung eingestellt. Zum Ablesen der Werte kann die Kamera jetzt aus der Schuflrichtung genommen
werden.
Blendenvorwahl: Tip (D.

4. Auslosen
Sucher vor das Auge bringen, Motiv im Leuchtrahmen anvisieren and Ausloser (5) drucken.

Nach der Aufnahme
Um die Kamera wieder schufibereit zu machen: Spannhebel (6) mit dem Daumen bis zum Anschlag fuhren. (Tip
1~.)
View original page 8
Page 9 · Read text
Shooting
 Set the controls by pressing the index finger against the lower edge of the setting wheels or rings. This also
 releases the aperture wheel by pressing on the ledge underneath. All settings are read off against the triangular
 index mark at the top.
 1. Set the Distance
 Turn the lens mount by its lower edge (1) to set the required distance to the index mark. See also Note ®.
 The same scale underneath the lens rim carries distances in meters.

 2. Pre-select the Exposure Time
 Turn the shutter speed wheel (2) to engage the selected exposure time opposite the index mark. For
 instantaneous exposures see Note ®. For time exposures see Note (3). The measuring range starts where the
 meter needle becomes visible outside the red area.
 3. Line up the Matching Pointer
 For reliable readings point the camera accurately at the subject, so that the exposure meter


 takes in the correct field of view. For shots oil of doors with large sky areas point the carver, slightly
 downwards rather than upwards. With the camera held in this way: Turn the aperture wheel (3) to bring the
 red matching pointer (4) into line with the exposure mete needle. If necessary select a longer or shorter exposure
 time.
 The shutter speed and aperture arc now se for correct exposure. To check the settings you can lower the
 camera from its shooting position For pre-selecting apertures see Note Q7 .


 4. Releasing
 Hold the eye behind the finder eyepiece, sigh the subject in the brilliant frame and press the shutter release
 button (5).
To get the camera ready for the next shot pull the winding lever (6) out as far as it will go with your thumb. (See
Note (D.) The exposure counter shows the number of the next shot. If the winding lever is locked, this signifies
that the camera is ready for shooting Now you can release the lens by pressing the button (7), and turn and push it
back into the body.
View original page 9
Page 10 · Read text
Die Entnahme des Films


Nach der letzten Aufnahme (36., 20. oder 12. Aufnahme, je nach Filmlange) wird der belichtete Film in die
Patrone zuruckgespult: Hebel (1) nach oben stellen.
Kurbel (2) herausklappen and in Pfeilrichtung drehen, his der Widerstand des Filmzugs verschwunden ist.
                           Kurbel einklappen, Hebel (1) nach unten stellen.

Ruckwand entriegeln and abnehmen, Patrone herausnehmen and moglichst in der Originalverpackung
lichtsicher aufbewahren. Farbfilm baldigst zur Entwicklung geben.

Das Laden and Entladen der Kamera mindestens im eigenen Korperschatten, nie in greller Sonne durchfuhren.


 Tips fur die Praxis


 1Q Filmtransport
 Der Spannhebel kann in zugigem Schwung oder auch in zwei Teilschwenkungen zum Anschlag gefuhrt werden -
 wie es Ihnen bequemer ist.

O2 Ist die Kamera geladen?
 Entsteht nach langerer Pause these Frage: Ruckspulkurbel herausklappen and in Pfeilrichtung sanft zu drehen
 versuchen. Fin auftretender Widerstand zeigt an, da11 ein Film eingelegt ist. Bei ungeladener Kamera laf3t rich
 die Kurbel frei drehen.

 03 Filmmerkscheibe einstellen
 Damit Sie jederzeit wissen, mit welcher Filmsorte die Rollei 35 geladen ist: Schwarze Scheibe an den Kerben
 drehen and Index auf die benutzte Filmsorte stellen (Schwarz-weifl-Negativfilm, Color-Negativfilm, Color-
 Kunstlichtfilm, Color-Tageslichtfilm).
View original page 10Page 11 · Read text
Unloading the Film

 After the last picture (depending on the film length frame 36, 20 or 12) the film has to be rewound:
 Turn the lever (1) upwards.
 Unfold the crank (2) and turn in the direction of the arrow until the resistance of pulling the film disappears.
 Fold up the crank again and turn down the lever (1).


Unlock and remove the camera back, take out the cartridge and preferably repack it light tight in its original
packing. Get color films processed as soon as possible.


Never change film in direct sunlight! Utilize, at least, the shadow of your own body!

Practical Notes
•  Film Transport
You can operate the transport lever either it one swing or in two short swings until it locks - whichever you
prefer.

•  Is the Camera Loaded?
If you are not sure after a long interval, unfold the rewind crank and try turning it gently in the direction of
the arrow. If you meet a resistance you know that there is a film it the camera. If the camera is empty, the
crank turns freely.

•  Setting the Film Type Indicator
To keep a check on the type of film you have in the Rollei 35 turn the black disc by it notches and set
the pointer to the film type in use (black and white negative, color negative film. artificial light color film.
daylight type color film.)


 Wahl der Belichtungszeit
 Die einrastendcn Ziffern 2 bis 500 der Zeitskala bezeichnen Sekundenbruchteile. Zwischenwerte sind nicht
 benutzbar. Die Wahl der ausreichend kurzen Belichtungszeit ist mitbestimmend fur die Scharfe des Bildes.
View original page 11
Page 12 · Read text
1. Forderung: Aus freier Hand kurz belichten, um die Aufnahme nicht zu ,verwackeln". Hierfur ist 1/30 sec
die statthafte langste Zeit. Sicherer and meistbenutzt: 1/60 and 1/125 sec. 2. Forderung: Bei bewegten Szenen
um so kurzer belichten, je schneller das Objekt sich bewegt, um „Bewegungsunscharfe" zu vermeiden. Als
Anhalt: Sport 1/500, laufende Kinder 1/250, flottes Fu1 gangertempo 1/125, Spazierganger 1/60 oder - aus
einiger Entfernung - 1/30 sec. Denn allgemein gilt die Regel: Die Sicherheit der scharfen Bewegungswiedergabe
wachst mit zunehmendem Aufnahmeabstand. Auf3erdem verringert sich die Gefahr der Bewegungsunscharfe,
wenn das bewegte Objekt von vorn (statt von der Seite) fotografiert wird.

0 Zeitbelichtung
 Die Einstellung „B" am Zeitrad gilt fur Zeitbelichtungen von beliebiger Dauer. Der Ausloser wird fur die
 Dauer der Belichtung niedergedruckt. Erst beim Loslassen schlieflt sich der Verschlufl.
 Dutch Zeitbelichtung sind auch Aufnahmen bei schwachem Licht moglich, bei dem der Belichtungsmesser nicht
 mehr anspricht. Sonderfall: Ergibt sich die Stellung „B" durch Nachfuhren des Belichtungszeigers, so gilt in
 diesem Fall die Belichtungszeit I sec (= Verdoppelung des voraufgehenden Zeitwertes). Bei ]anger
 Zeitbelichtung empfehlen sich ein Drahtausloser mit Feststellvorrichtung, feste Auflage der Kamera oder
 Stativbenutzung.

® Scharfentiefe
 Auch  in  einem  gewissen  Bereich  vor  and  hinter  der  cingestellten  Entfernung  wird  das  Motiv  in
 ausreichenderBildscharfe wiedergegeben. Diese

Zone der „Scharfentiefe" ist auf der Entfernungsskala angezeigt:
Suchen Sie beiderseits des Index die Marke der benutzten Blende auf. Die daruberstehenden Werte der
Entfernungsskala nennen den scharf erfaften Aufnahmcbcreich. Die Scharfentiefe ist besonders erwunscht bei
uberraschenden Schnappschussen, bei Sportszenen mit standig wechselnder Entfernung and bei tief gestaffelten
Motiven. Auf der Entfernungsskala sind die gebrauchlichsten Schnappschuileinstellungen auf 2 m and 6 m rot
markiert. Schon bei mittleren Blenden (8 bis 11) erfassen Sic damit einen ausgedehnten Aufnahmebereich:
bei 2 m etwa von 1,5 m bis 3 m, bei 6 m etwa von 3 m bis -.


 ® Selecting the Shutter Speed
 The figures 2 to 500 on the shutter speed scale indicate fractions of a second. The speed ring engages at each
 setting; you cannot set intermediate values. Select a sufficiently fast shutter speed for sharper pictures:
 Firstly, use fast speeds for hand-held shots to avoid camera shake. Here 1/30 second is the longest permissible
 time; 1/60 or 1/125 second is safer and more frequently used.

Secondly, use faster shutter speeds for fast moving subjects to avoid movement blur. Thus sports shots need
1/500 second, running children 1/250, fast walking pedestrians 1/125, ambling people 1/60 or - if farther away -
1/30 second.
View original page 12
Page 13 · Read text
As a rule, the farther away the moving subject, the sharper it will appear. The risk of movement blur is also
 reduced by shooting in the direction of the movement (rather than across it).

 05 Time Exposures
 The B setting on the shutter speed wheel provides time exposures of any required length. Keep the release button
 depressed for the required exposure time. The shutter closes when you let go again.
 With time exposures you can also take shots in very poor light which is too weak for an exposure meter
reading. As a special case, if you arrive at the B setting by lining up the matching pointer, the correct exposure
time 1 second (double the next exposure setting). For long time exposures place the camera on firm support or a
tripod and use a cable release with time lock.


 ® Depth of Field
 The image of a subject is sufficiently sharp over a range of distances in front of and behind the focused distance.
 This depth of field zone shown on the distance scale: Look up the index line of the aperture in us to each side of
 the focusing index. The distant figures on the focusing scale opposite these lines then indicate the sharply
 covered subject range.
 Depth of field is particularly desirable for can did snapshots, sports photography with rapidly changing subject
  distances, and for scenes ex tending in depth. For this reason the most use full snapshot settings of 6 and 20
 feet at marked in red on the distance scale. At a medium aperture (f/8 to f/11) these settings provide extended
 focusing ranges: at 6 feet from about 4'/s to 9 feet; at 20 feet from about 10 feet to infinity «.


 Scharfeinstellung bei Fernsichten mit Vordergrund:
 oc-Marke auf die Marke der benutzten Blende einstellen. So reicht die Scharfentiefe am weitesten in den
 Vordergrund.


 ® Blendenvorwahl
 Es hangt vom Motiv ab, ob Sie den Belichtungszeiger mit dem Blendenrad oder mit dem Zeitrad
 nachfuhren.
 Bei bewegten Objekten wird die Zeit vorgewahlt, urn sick die erforderliche kurze Belichtungszeit zu sichern.
 Nachgefuhrt wird mit der Blende.
View original page 13
Page 14 · Read text
Hat dagegen die Scharfentiefe den Vorrang, wird die erforderliche Blende ermittelt and vorgewahlt. Der
Zeiger wird  jetzt mit dem Zeitrad nachgefuhrt. (Um nach Vorschrift cinen einrastenden Zeitwert zu
erreichen, wird - falls erforderlich - das Nachfuhren mit dem Blendenrad beendet.)
in jedem Fall mull die Kamera beim Nachfuhren auf das Aufnahmeobjekt gerichtet sein.
 ® Richtig belichten
 Grundregel: Die Kamera mull beim Belichtungsmessen (1) genau in Aufnahmerichtung (2) auf das Objekt
 zielen, dem die Messung gilt. Ein unabsichtliches Verkanten - etwa bei Landschaftsaufnahmen gegen den
 Himmel - kann das Meliergebnis verfalschen and in diesem Fall zu Unterbelichtung fuhren.

 Der Belichtungsmesser bewertet die durchschnittliche Gesamthelligkcit des anvisierten Objcktfeldes. Bei
 Motiven mit normalen Kontrasten gibt er automatisch die richtige Belichtung an. Doch auch bei Aufnahmen
 mit starken Helligkeitsgegensatzen lallt sich die Messung so durchfuhren, dali die bildwichtigen Partien richtig
 belichtet sind.

 Normalfall: Das Objekt ist von vorn oder schrag von der Seite beleuchtet. Schwere Schatten fehlen. Hell
 and Dunkel sind im Gleichgewicht. (Diese gleichmallige Frontalausleuchtung liefert auch bei Farbaufnahmen
 die sattesten Farben.)
 Ergebnis: Die gemessene Belichtung stimmt fur das gesamte Bildfeld.

 Sonderfall: Zwischen Hauptmotiv and Hintergrund  besteht ein  starker  einseitigcr Helligkeitskontrast.
 Beispiel: Bei einem sonnengebraunten Portrat vor leuchtenden Wolken wurde die Gesamtmessung den
 Himmel uberbewerten. Belichtungswichtig ist jedoch der Kopf.
Abhilfe: Sie gehen jetzt zur Nahmessung mit der Kamera dicht an das Objekt heran (3), his das Hauptmotiv
den Sucher ausfullt. Nach Einstellen der Belichtung kehren Sie zur Aufnahme an den fruheren Standpunkt (4)
zuriick.


 For distant views with near foregrounds set the infinity marking c to the depth of field mark for the aperture
 in use. That extends the depth of field to the nearest possible point in the foreground.

    Pre-selecting Apertures
 According to the type of subject you can line up the matching pointer with the meter needle by turning either
 the aperture wheel or the shutter speed wheel.
 With moving subjects pre-select the exposure time to make sure of a suitably fast shutter speed. Then match up
 the pointers by turning the aperture wheel.
 If on the other hand depth of field is more important, determine the required aperture and pre-select this. Now
 match up the pointers by turning the shutter speed wheel. If necessary complete the exact matching with the
 aperture wheel. Selected speed have to be in click-stop position.
 In every case the camera must point at the subject while you line up the pointers.
View original page 14Page 15 · Read text
® Correct Exposure
 As a basic rule, always point the camera while taking exposure readings (1) exactly in the direction of the
 subject (2). Inadvertent tilting of the camera - for example into the sky while taking landscape views - can
 falsify the reading and in this case lead to under-exposure.

The exposure meter evaluates the average brightness of the measured subject field. With subjects of average
contrast it automatically indicates the correct exposure. But even with shots of considerable brightness range
you can take the readings in such a way as to ensure correct exposure for the main subject.


Normal subjects: the view is lit from the front or at an angle from the side. There are no heavy shadows,
and dark and bright areas are balanced. (This uniform front lighting also yields the most saturated colours in
colour shots.) Result: The measured exposure is correct for the whole field of view. A special case: The main
subject contrasts strongly in brightness against the background. For example, with a portrait of a suntanned face
against bright clouds an average reading would give too much importance to the sky. Yet it is the head which
matters for the exposure. The right way: Take a close-up reading with the camera near the subject (3) until the
main object completely fills the finder. After setting the exposure go back for shooting to the previous
viewpoint (4).


 Ersatzmessung: Ist eine Nahmessung nicht moglich, visieren Sie ein Ersatzobjekt mit normalen Kontrasten
 bei gleicher Beleuchtung an and verwenden these Einstellung zur Aufnahme. Gegenlicht: Bei
 Aufnahmen gegen das Licht empfiehlt es sich, die gemessene Blende um einen Wert zu offnen
 (nachstkleinere Blendenzahl).
 Bei  Farbmotiven,  die  Sie  auf  Farbumkehrfilm  fotografieren,  sind  starke  Helligkeitskontraste  nach
 Moglichkeit zu vermeiden. Bei Nahmessung der Schatten ergeben sick meist schon zu lange Belichtungszeiten
 fur die besonntcn Bildteile, die dann in der Projektion zu hell and farblos wirken. Die Messung der
 Gesamthelligkeit (Normalfall) liefert auch hier Bilder, die dem naturlichen Farbeneindruck am besten
 entsprechen.

 Q9 Batteriewechsel
 Der CdS-Belichtungsmesser ist durch kleine Bauweise ausgezeichnet and wird mit einer MalloryBatterie PX
 13 betrieben.
 Haltbarkeit der Batterie nach Angabe des Herstellers: 18 bis 24 Monate. Diese Lebensdauer setzt voraus, dalI
 die Kamera bei Nichtgebrauch

in der Tasche (im Dunkeln) aufbewahrt wird. (Der Spannungsverlust tritt plotzlich ein. Kennzeichen: Der
Belichtungsanzeiger  schlagt  nicht mehr  aus.) Empfohlene Sicherheitsmaflnahmen:  Batterie  alljahrlich
wechseln.
View original page 15
Page 16 · Read text
Batterie bei langer Nichtbenutzung aus der Kamera nehmen.
Verbrauchte Batterien auf jeden Fall entfernen. Batterie bei starker Kalte (Auskuhlung der Kamera unter
-10° C) gegen die Type PX 625 austauschen.
Auswechseln: Kamera offnen. Die geschlitzte Schraubkappe (1) mit einer Munze losen and abschrauben.
Frische Batterie in die Kamera einsetzen, so dalI das Zeichen + sichtbar bleibt (2). Schraubkappe anschrauben
and mit Munze festziehen.

 io Aufnahmen mit Blitzlicht
Im Steckschuh mit Mittenkontakt kann ein Blitzgerat eingeschoben werden (3). Blitzgerate ohne
Mittenkontakt erfordern ein Zwischenstuck mit seitlichem Kontakt zum Anschlieflen des Kabels.
Es sind Blitzlampen and Elektronenblitz verwendbar. Fur Farbaufnahmen diirfen nur blaue


Substitute readings: If a close-up reading is not possible, point the camera at a substitute object of average
contrast and under the same lighting. Use the setting obtained for the exposure.
Against the light: When shooting against the light open the lens aperture by one step (next lower f/number).
For colour subjects to be taken on reversal colour film avoid very great brightness differences. A close-up
reading of the shadow areas usually leads to excessive exposure for the sunlit image portions, which then appear
too light and burnt out when you project the slide. An average brightness reading (as in the normal case) here
again yields pictures which correspond most closely to the natural colour impression.

(9 Changing the Battery
The cadmium sulphide exposure meter is particularly compact and powered by a Mallory battery PX 13.
According to the manufacturer, the durability of the battery is 18 to 24 months, provided that the unused
camera is kept in the case (i. e.


 in the dark). (The voltage drop occurs sudden ly. Symptom: the exposure meter needle doe not deflect any
 more.)
 Recommended precautions: Change battery annually.
 Remove battery if the camera is not used over an extended period.
 Always remove and discard exhausted batteries. At very low temperatures (camera cooled t, below -10 ° C =
 + 14° F) change battery to type PX 625.
 To change the battery, first open the camera Unscrew the slotted screw cap (1) with a coin Insert the fresh
 battery into the camera, so that the plus sign + remains visible (2). Re place the screw cap and screw tight
 with coin.
 10. Flash Shots
 The accessory shoe with central flash outlet takes a flash gun (3).
View original page 16
Page 17 · Read text
Flash guns without central contact in the foot require an adapter with an outlet at the side to take the plug-
in flash cable. Flash bulbs and electronic flash can be used. For colour shots use only blue bulbs or
electronic flash.


Blitzlampen oder Elektronenblitz benutzt werden.
Bei Blitzlichtaufnahmen bleibt der Belichtungsmesser unbeachtet. Fur Belichtungszeit, Blende and
Aufnahmeabstand gelten die Anweisungen des Blitzlicht-Herstellers. Hierbei sind die Angaben fur X-Kontakt
zu benutzen. Die Schattenbildung verringert sich, wenn der Blitz uber dem Objektiv liegt and Sie die Kamera
entsprechend halten: Blitz links bei Hochformat, Blitz oben bei Querformat. Auch in diesen beiden Haltungen
laflt sick die Rollei 35 gut bedienen.


n Aufnahmen mit Filter
In das Gewinde der Objektfassung kann ein Filter eingeschraubt werden (1).
Filter erfordern eine Belichtungskorrektur. Auf der Fassung ist dieser Wert eingraviert. Er gibt die Stufen an,
um die entweder die Blende geoffnet (kleinere Blendenzahlen) oder die Belichtungszeit verlangert werden
mull.
Meist wird die Belichtung durch Aufblenden korrigiert. Beispiel: gemessene Blende 11, Korrekturwert -
1,5 (= Blendenstufen), benutzte Blende zwischen 8 and 5,6.

Wollen Sie die Korrektur durch Verlangern der Belichtungszeit ausfuhren, so bedeuten die einrastenden
Zeitstufen  jeweils  volle  Korrekturwerte.  Fin  halber Wert kann  nur  durch  eine  halbe  Blendenstufe
berucksichtigt werden.

Rollei-Filter fur Schwarzweifl-Aufnahmen: Rollei-Gelbfilter, mittel (Belichtungskorrektur -1,5). Es gibt
den Himmel dunkler, die Wolken leuchtendcr and die Schneeschatten plastischer wieder.
Rollei-Orangefilter (Belichtungskorrektur -1,5 bis -3, abhangig von der benutzten Filmsorte). Es vertieft das
Himmelblau bis zu Gewitterschwere and hellt Gelb and Rot auf.

Rollei-Filter fur Farb-Aufnahmen:
Rollei-Filter H 1 and Rollei-Farbkonversionsfilter R 1,5 (keine Belichtungskorrektur bei diesen Filtern)
dampfen den ,Blaustich", der an wolkenlosen Tagen durch das vorherrschende Blaulicht besonders bei
Fernsichten  auftreten  kann. Der Wunsch nach insgesamt warmerem Farbcharakter  rechtfertigt  bei
manchen Farbumkehrfilmen den standigen Gebrauch des
Filters R 1,5.
View original page 17
Page 18 · Read text
i2 Aufnahmen mit Sonnenblende
Am Aullenrand des Objektivs lallt sich die Rollei-Sonnenblende aufstecken (2), um das Objektiv vor
 direkt auftreffenden Sonnenstrahlen, aber auch vor Wasserspritzern and Regentropfen zu schutzen. Sie
 sichert den Aufnahmen die gewohnte Brillanz and Scharfe and ist besonders bei Aufnahmen gegen die Sonne
 stets zu empfehlen.


 For  flash  shots ignore  the exposure meter. Set the exposure  time, aperture and  subject  distance as
 recommended by the manufacturer of the flash unit. Use the settings indicated for Xcontact.
 Shadow areas are reduced if the flash gun is situated above the lens and you hold the camera accordingly: keep
 the flash to the left of the camera for upright shots, and on top for horizontal shots.

The Rollei 35 is easy to operate in both these positions.

 n Exposures with Filters
The thread of the lens mount takes a screw-in filter (1).
Filters require an exposure correction. Its value is engraved on the filter mount. This indicates the number of
steps by which the aperture has to be opened (towards lower f/numbers) or the exposure time increased.
Usually the exposure is corrected by opening the aperture. For example if the measured aperture is f/11,
and the filter correction value -1.5 (i. e. 1'/z aperture steps), use an aperture setting between f/8 and f/5.6. If
you want to correct by increasing the exposure time, moving the shutter speed wheel from one value to the next
corresponds to a full exposure step correction. Half steps can only be allowed for by intermediate aperture
settings.

Rollei filters for black-and-white shots:
Rollei medium yellow filter (exposure correction -1.5). This makes the sky reproduce

darker, clouds more brilliant and improve modelling in snow shadows. Rollei orange filter (exposure
correction -1.: to -3, according to the film type used). This darkens blue skies to give heavy thunderstorm
effects and lightens yellows and reds.


Rollei filters for colour shots:
Rollei filter H 1 and Rollei colour conversion filter R 1.5 (these require no exposure correction). They subdue
blue casts which can arise on cloudless days through the predominant blue skylight, especially in distant views.
With some reversal colour films a warmer overall rendering may be desirable. In that case the R 1.' filter
may be used for all shots.
View original page 18
Page 19 · Read text
i2 Shooting with the Lens Hood
The outer rim of the lens will take the push on Rollei lens hood (2) to protect the lens against direct rays from
the sun, as well a against splashes of water and drops of rain. I ensures optimum brilliance and sharpness for your
shots. Always use it when shooting into the sun..


This manual taken from www.butkus.org/chinon


 Tragschlaufe and Ledertasche
 Die Tragschlaufe wird am seitlichen Halter befestigt: Die vorstehenden Haltefedern mit dem Knopf der
 Schlaufe an die Kamera drucken and den Knopf einschieben.
Zum Losen: Federn mit dem Fingernagel niederdriicken and Knopf abziehen.
 Mit der Schlaufe kann die Kamera audi in der Ledertasche am Handgelenk getragen werden. Nadi Offnen des
 Reiflverschlusses wird die Taschc zuriickgeschoben. Sie hangt wahrend der Aufnahme an der Tragschlaufe.


 t4 Umgang mit der Rollei 35
 Die Rollei 35 ist fur den taglichen Gebrauch konstruiert and in alien Teilen sehr solide gebaut.
 Bewahren Sie jedoch die Kamera vor hartem Sto13 and Fall. Streifen Sie zur Vorsicht die Tragschlaufe iiber
 das Handgelenk. Schutzen Sic die Rollei 35 vor Nasse, fliegendem Staub, Seesand and dauernder
 Sonnenbestrahlung. Das gilt besonders fur die geoffnete

 Kamera beim Filmwechsel. Es empfiehlt sich, gelegentlich das Innere des Gehauses mit einem Pinsel zu
 saubern.
 Fin weicher Haarpinsel ist auch fur das Objektiv das mildeste Pflegemittel. Vor Fingerspuren sind die Linsen
 durch ihre tiefe Lage ohnehin geschutzt.
 Filter reinigen Sic am besten erst mit Pinsel and polieren mit einem entstaubten Rehleder oder einem
 sauberen Taschentuch nach.

Wenn  die  ausgekuhlten Linsen im Winter beim Obergang  ins Warme  beschlagen, warten  Sie  einige
Augenblicke, bis die Feuchtigkeit von selbst verdunstet ist.
Und wenn sick daheim oder auf Reisen sonst einmal technische Sonderfragen ergeben, erinnern Sic sich bitte
daran, daf3 der internationale Rollei-Service Ihnen uberall mit Rat and Auskunft zur Verfiigung steht.
View original page 19
Page 20 · Read text
The Wrist Strap and Leather Case
 The wrist strap is fixed to the fitting at the side. Push the protruding retaining spring against the camera
 body with the button on the strap and push the button home.
 To remove, push down the spring leaves with a fingernail and slide off the button. With the strap the camera
 can hang from the wrist even when it is in its leather case. Simply open the zip fastener of the case and push
 back the latter. During shooting it simply hangs from the strap.


  Taking Care of the Rollei 35
 The Rollei 35 is particularly solidly built for everyday use.
 However, protect the camera against hard knocks and don't drop it. As a safety measure wrap the wrist
  strap around your wrist.
 Protect the Rollei 35 against moisture, dust, wind-blown sand at the seaside and continuous exposure to
  sunlight. This applies especially when the camera is opened while changing films. From time to time
 clean the inside of the body with a soft brush.


A soft sable brush is also the best means for cleaning the lens. The lens surfaces are sufficiently recessed to
reduce the risk of accidental finger marks.
To clean filters, first dust them with a soft brush and then polish with a dust-free chamois leather or a clean
handkerchief. If the lens surface mists over in the winter when taking the camera from the cold air outside into
the warm air of a room, wait a few moments until the deposit of moisture ha evaporated on its own.
And if at any time you have a special technical query - at home or on your travels abroad - remember that the
international Rollei Service is always at your disposal for advice and information.
View original page 20
Related documents and language editions
RolleiPDF
Rollei 35 - Rollei 35 T - Rollei 35 S gebruiksaanwijzing
User manual
27 pages · DutchRead →
RolleiPDF
ROLLEI 35
User manual
14 pages · EnglishRead →
RolleiPDF
Rollei 35
User manual
24 pages · EnglishRead →
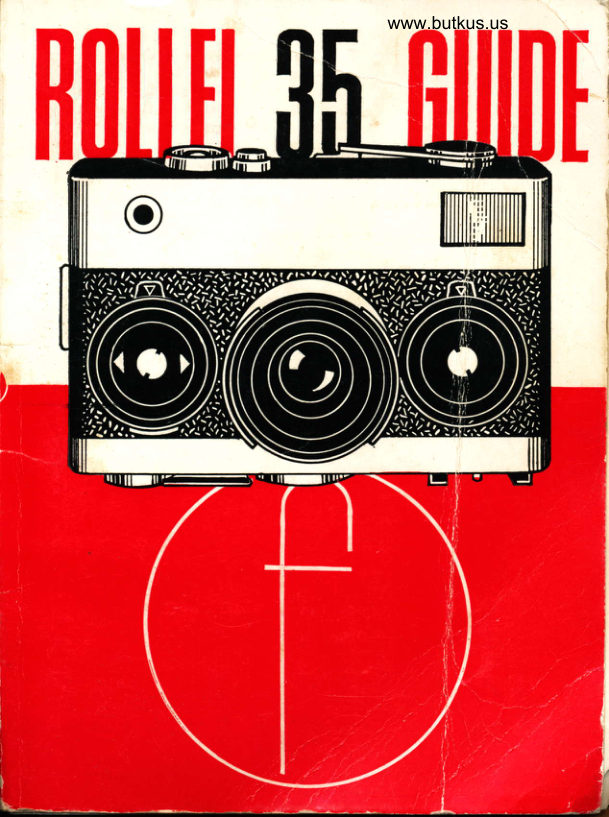
RolleiPDF
Rollei 35 Guide Book
Reference guide
73 pages · EnglishRead →
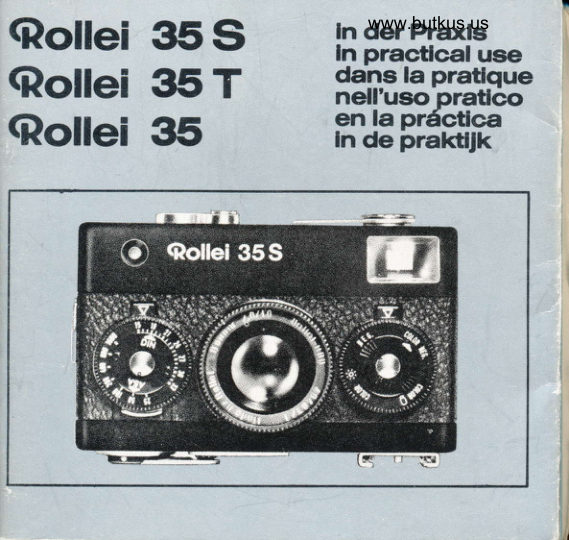
RolleiPDF
Rollei 35 - Rollei 35 T - Rollei 35 S
User manual
26 pages · FrenchRead →
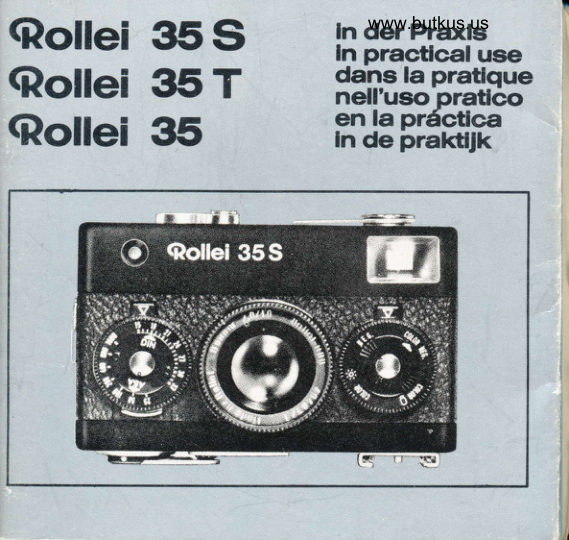
RolleiPDF
Rollei 35 - Rollei 35 T - Rollei 35 S
User manual
24 pages · GermanRead →
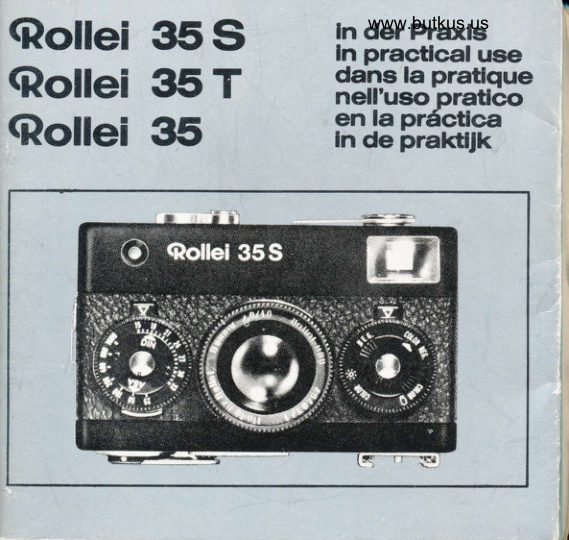
RolleiPDF
Rollei 35 / Rollei 35 T / Rollei 35 S Direct
User manual
26 pages · GermanRead →
RolleiPDF
Rollei 35 - Rollei 35 T - Rollei 35 S
User manual
26 pages · SpanishRead →
From the M. Butkus archive. Original publisher and archive notices are retained.
Check the model and edition against your equipment.
PDF verified 2026-10-10.