Camera accessories
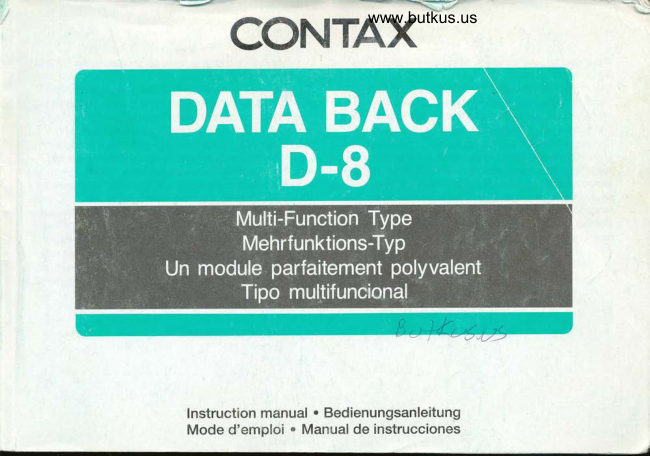
Contax Data-back D-8 User manual
User manual for Contax Data-back D-8. 39 pages in English. Read the original PDF, download or print a copy without registration.
39 pagesEnglish3.5 MB PDF
Loading your manual…Open PDF directly
Document details
- Brand
- Contax
- Model / document
- Contax Data-back D-8
- Document type
- User manual
- Language
- English
- Pages
- 39
- File size
- 3.5 MB
- Category
- Camera accessories
- Document date
- Not specified in catalog
Search available document text
Find a term, then jump to its page in the original PDF. Image-only pages may not be searchable; check the PDF for exact wording and diagrams.
Page 3 · Read text
\


Thank you for your purchase of the Contax Data Back        Wir danken lhnen, daB Sie slch fur die Contax Data Back
 D-8.                                               D-8 entschieden haben.
This multi-function data back is altached in place of the    D i ese Meh rf u n kti o n s- D ate n rti c kuran d wi rd an stel I e d e r
standard camera back of the Contax AX to print            standardmdBigen R1ckwand an der Contax AX befestigt.
exposure data at the time of shooting collectively on the      Sie verftigt hber eine "Sammeleinbelichtungs',-Funktion
 first two picture frames (or one picture frame) of your         zur Aufzeichnung von Belichtungsdaten im ersten und
film, as well as dates, time, exposure data at the time of     zweiten (oder nur dem ersten) NegativlDia sowie ijber
shooting, etc. between the picture frames. lt offers you       eine Funktion zur Einbelichtung von Belichtungsdaten
sophisticated features which are useful for recording        und Datum auf die Stege zwischen den Aufnahmen. Mit
exposure data, classification and arrangement of your        ihren zahlreichen  fortschritiliche Merkmalen tdBt sich die
photographs, etc. Also, it has an interval shooting           Datenriilwand bequem zur Kassifizierung und
function for controlling the camera operation.                 tibersichtlichen Organisierung dokumentarischer Fotos
Before using the data back D-8, please read this manual      in verschiedenen Anwendungsbereichen  einsetzen.
carefully through to use  it correctly.                     AuBerdem lst erne lnteruall-FunWion  ftir automatische
                                                  Aufnahmen  in vorgewdhlten Zeitabstdnden vorgesehen.
                                                                        Bitte lesen Sie diese Anleitung vor Inbetriebnahme
                                                    aufmerksam durch, damit Sie mit allen Funktionen lhrer
                                                       neuen Data Back D-8 vertraut werden.
View original page 3Page 8 · Read text
www.butkus.us


   <Battery Replacement>                         o The battery life is approximately 1.5 years, but differs                                                                         the shooting frequency and temperature at the       lf the maik " rr  " appears on the dlsplay panel, it is time         with
    to replace the batteries. Though you can still take               time of shooting.                                                                                   " tz  "    oictures after the mark " z   " turns on, the mark
     will blink or turn off  if the battery capacity has exceeded      When the batteries are taken out from the Data Back,
    the specified limit. The data back will no longer operate,         the data you have set, such as date, time, 6-digit fixed
   making data printing and interval shooting impossible.         number, and interval time, will be erased. Be sure to
    Reolace the batteries as soon as possible.                        reset them after loading new batteries'


t4
View original page 8Page 9 · Read text
<Battery Precautions>                              <Batteriehinweise>
      o Generally, battery performance  is reduced by cold       o Wenn die Batterien ldngere Zeit niedrigen
          temperatures. When shooting in cold weather,  it is           Temperaturen (unter 0') ausgesetzt werden, liiBt ihre
          advisable to keep the camera warm in a bag or an            Leistung nach. Bei Kdlte bewahren Sie die Kamera am
              outfit for protection against cold. The battery                 besten unter der Kleidung auf, solange Sie nicht
          performance reduced by low temperatures  will return           fotograf ieren. Die Batterieleistung normalisiert sich
           to normal when taking pictures at an ordinary                wieder nach Erwdrmung auf normale Temperaturen.
          temperature.                                  a Wenn die Batteriepole verschmutzt oder oxidiert sind'
      o Before loading the battery, wipe both poles clean with        kann es Kontaktschwierigkeiten geben. Wischen Sie
          a dry cloth because poor contact may result  if they are        die Pole vor dem Einlegen mit einem trockenen Tuch
           soiled with sweat or grease.                                     ab.
     o  lf you are going on a long trip, bring a new spare        a Nehmen Sie Ersatzbatterien mit, wenn Sie ldnger
            battery with you.                                         unterwegs sein werden.
                                                                            Batterien sind gefdhrlich und k6nnen explodieren.     a Do not throw used battery into fire or try to charge or        I
          disassemble them because  it is dangerous.                   Leere Batterien dtirfen nicht ins Feuer geworfen
      o The 3V lithium battery (CR2025) cannot be charged by        geladen, kurzgeschlossen oder auseinandergenommen
         any means.                                               weroen.
                                                                        Die 3-Volt-Lithium-Batterie  (CR2025) ist nicht wieder      o Battery should be kept away from children.           o
                                                                            aufladbar.
                                             a Halten Sie die Batterien auBer Reichweite von Kindern.


    16
\
View original page 9Page 10 · Read text
www.butkus.us


  1 Open the standard camera back    C) Insert the bottom part of the       a This Data Back has been fabricat-    tr  of the camera and. while      &  data back's attachment axle into       ed so precisely that it is automatF
    pushing down the camera back          the fixing hole in the camera and,             cally set when  it is attached to the
    release pin, tilt the camera back          while pushing down the release Pin,        camera.
     slightly outward and detach  it.                    fit the top of the axle into the fixing            In particular, be careful not to
                                            hole and remove your finger from        move the area marked "o",
                                             the release pin. The Data Back is           except when  it is necessary to do
                                            attached to the camera.                     so, and take care that is not
                                                                                                    soiled. Malfunction or trouble due
                                                                                                   to faulty contact may occur.


18
View original page 10Page 11 · Read text
i
      @'qq                   t"           i


                                                             Each time you press the "SELECT" button, the      First, set the correct date and time. Because this Data   Q    Back incorporates an auto-calendar, the date and time      e, setting position will blink in the order of year, month,
      will automatically change after you have set them. We       and day. Make your desired number blink by pressing  it.
      will explain by taking an example of setting the date and
    time to June 28, 1996, 15:45.             Q Set the correct number by pressing the "r." or "v"                                                                      \,  button.
   <1. Set the Date>                               o While you keep on pressing  it, the number will change
  1  Press the "MODE" button to display the                      continuously.    .e [yearlmonth/day] mode as shown in the illustration.
                                                                 Repeat the above steps 2 and 3 to set the year,    Each time pressing the "MODE" button, the date mode         fi      will change to the eight modes such as [yearlmonth/day],       lf  month, and day correctly. Then, press the "SET"
    [month/daylyear], [daylmonth/year],  [daylhour/minute],         button.
    and etc.
                                               When pressing the "SET" button, the number will stop
                                                                        blinking and light. Now, you have set the date.
20
View original page 11Page 12 · Read text
www.butkus.us


                                                                                                                                                                                                                                                                                                                             !;:;!li

                                                                                                                                                                        ti:

                                                                 Repeat the above steps 2 and 3 to set the hour and   <2. Set the Time>                                             I      't  Press the "MODE" button to display the            -3 minute correctlv. then oress the "SELECT" button to
  L  lday/hour/minutel as shown in the illustration.            makethesign[:]blink.
   o The time display is based.on the 24-hour system (0 -
     23 hour).                                             (  When the sign[  : ] blinks on [daylhour/minute] display,                                   d    it is for adjusting the second.       Each time pressing the "SELECT" button, the setting  O   4r         position will blink in the order of hour, minute, and  [ : ]     Press the "SET" button in accordance with a time signal.
      (for seconds). Make your desired position blink by                       It is oossible to set the time correctlv because the clock
    pressing  it.                                                          starts from "0 second".
   1l        Press the "r" or "v" button to set the correct                Finally, press the "SET" button. The display will stop    r)  number.                                                       blinking and light. The setting operation has now been   a While you keep on pressing  it, the number will change                                                               comoleted.
       continuously.

22
View original page 12Page 13 · Read text
T
     Datq Printing                Einbelichtungs-
      Functions                  Funktionen    ffinm
           There are two data printing modes: "collective                 Diese Datenrr.ickwand  verfijgt tiber zwei
              printing" function that prints exposure data at the             verschiedene Betriebsarten zum Einbelichten von
            time of shooting collectively on the first two                  Daten: Sammeleinbelichtung semtlicher
           frames (or on one frame) of the film, and                      Belichtungsdaten  in die ersten zwei Bilder (bzw.
            "between-the-frames  printing" function that                    nur das erste Bild) des Films sowie Einbelichtung
              prints the date (3 types), time, exposure data at              zwischen den Aufnahmen von Datum (3 Arten),
            the time of shooting, counter number + two                       Zeit, Belichtungsdaten zum Zeitpunkt der
             characters, and 6-digit fixed number + two                 Aufnahme, Bildnummer des Bildziihlwerks + zwei
            characters. Because both modes can be used               Zeichen sowie eine fest eingestellte Ostellige Zahl
             together,  it is possible to record exposure data              + zwei Zeichen. Da beide Betriebsarten
           by setting the collective printing and to print the            gemeinsam verwendet werden k6nnen, besteht
             date, time or counter number between the frames              die Moglichkeit, die Belichtungsdaten durch Wahl
           by setting the between-the-frames  printing mode             der Sammeleinbelichtungs-Funktion
           so that you can use this Data Back extensively                aufzuzeichnen, und Datum, Zeit oder Bildnummer
              for classification of photos, recording and                  des Bildziihlwerks durch Wahl der Funktion ftir
           arrangement of exposure data, and so on.                     Einbelichtung zwischen den Aufnahmen
                                                                             einzubelichten. Damit liiBt sich diese
                                                                Datenruckwand sehr praktisch zur Klassifizierung
                                                                von Aufnahmen, Aufzeichnung und Anordnung
                                                                von Belichtungsdaten usw. verwenden.

24
View original page 13Page 15 · Read text
First frame                                                                             1. Bild


                                       First frame and                                                                   1. und 2. Bild
                         Second frame or          "03"                                    oder 1. Bild f)
                                            first frame  (*)

       (.) lf the number of exposures  is 20 or less (including two frames              (.) Wenn ein Film 20 oder weniger Aufnahmen enthdlt (ein-
        for collective printing), collective printing is done on the first              schlieBlich der zwei  fiir Sammeleinbelichtung reservierten
       frame. There is no printing on the second frame.                             Bilder), erfolgt die Sammeleinbelichtung im 1. Bild. In einem
                                                                         solchen Fall werden keine Daten in das 2. Bild des Films
    <1. Setting Procedure>                                                 einbelichtet.
      'l  Before loading film in the camera' set the "collec-     I   tive printing switch" in the Data Back to ON.           <1. Einstellverfahren>                                   1  Vor Einlegen des Films in die Kamera den                                                                      I  Sammeleinbelichtungs-Schalter  auf ON   a Be sure to set the "collective printing switch" before
      loading film. lt is impossible to switch after the film has      einstellen.
     been loaded.                                           o Unbedingt darauf achten, den Sammeleinbelichtungs-
                                                                     Schalter einzustellen, bevor der Film eingelegt wird'
                                                 Wenn bereits Film in die Kamera eingelegt ist, kann der
                                                                     Schalter nicht verstellt werden.


28
View original page 15Page 16 · Read text
www.butkus.us

                                                          {} Load film and close the data back.                                                                          IJ
                                               When the camera's main switch lurns on and depress the
                                                                      shutter release, the film will start advancing and the
                                                           exposure counter will be set for shooting.
                                                     Now, you have completed the setting operation and are
                                                                 ready to take pictures.


   a Becausethis Data Back has been fabricated very
       precisely to accomodate the camera's autofocus
       functions, take enough care to handle it. In particular'
     do not touch the area marked "o" in the illustration
     when operating the "collective printing switch".


30
View original page 16Page 17 · Read text
After rewinding  is completed, make sure the collec-
                                                                      tive printing warning lamp goes out and the on the
                                                    camera exposure counter shoprs "00", then open the
                                                       Data Back and unload the film'


   <2.When Collective Printing is Effected>
    Collective printing is effected automatically just before
     film rewinding is completed. The collective printing
    warning lamp will blink during the printing operation.  (lt
     will take about twenty seconds with a 36-exposure film
   and normal temperature.)
    Exposure data for one frame will be printed in each line
    and, when collective printing is completed, the film will be
   rewound again.
    After rewinding is completed, the exposure counter on
    the camera will blink at "00".


32
View original page 17Page 18 · Read text
www.butkus.us

   o  lf you want to stop printing while the collective printing    o Um die Sammeleinbelichtung vorzeitig zu beenden, die
         is operating, turn the rewind lever of the camera in the        RUckspulentriegelung erneut drticken und gleichzeitig
       direction of the arrow (>) while pressing the rewind          den Ruckspulhebel der Kamera in Pfeilrichtung (>)
       lock release button again.                                   drehen. Danach wird die Sammeleinbelichtung
     The collective printing will stop and the camera will           abgebrochen, und der Film wird weiter zunickgespult.
        start rewinding the film again.                           r Vor wichtigen Aufnahmen, oder wenn eine Spezial-
   o When you are taking important shots or planning             Entwicklung des Films mit hoher oder geringer
       special processing such as high speed and low speed        Geschwindigkeit beabsichtigt wird, empfiehlt es sich,
      development,  it is recommended to make test              Probeaufnahmen zu machen, um die Kontrastschdrfe
      exposures to check the data density.                         der einbelichteten Daten zu UberprUfen.
   o During multiple exposure, the exposure data for        o Bei Mehrfachbelichtung handelt es sich bei den
       collective printing will be the data on the first exposure.        Belichtungsdaten  frir Sammeleinbelichtung um die
             lf you are using the between-the-frames  printing               lnformationen 0ber die erste Aufnahme. Wenn
       together, the contents on the first exposure in the               gleichzeitig die Funktion fiir Einbelichtung zwischen
      between-the-frames  printing mode will be printed.           den Aufnahmen aktiviert  ist, werden die Informationen
   o Because the response speed of the liquid crystal is              riber die erste Aufnahme in der Betriebsart
      slower at low temperatures, the time needed for               "Einbelichtung zwischen Aufnahmen" einbelichtet.
       collective printing may be longer to print data clearly       r Da die Ansprechgeschwindigkeit  der
      depending on the response speed.                               Fltissigkristallanzeige bei niedrigen Temperaturen
   o ln the case of thin film or film which tends to curl itself        abnimmt,  ist in der Sammeleinbelichtungs-Betriebsart
        in special form, the letters on collective printing may          eine ldngere Zeit zur Einbelichtung von Daten
       overlap.                                                               erforderlich, da die Kontrastschdrfe der Abzuge
                                                              Vorrang erhdlt.
                                           o Bei Verwendung von dunnem Film oder solchem, der
                                                                       eine Tendenz hat, sich in besonderer Form zu ringeln,
                                                           kann es bei Sammeleinbelichtung zu einem
                                                              Uberlappen einbelichteter Zeichen kommen.


34
View original page 18Page 19 · Read text
<l.Changing the Printing Mode>
                                                         Each time you press the "MODE" button, the printing
                                                 mode will change in the illustration. Set your desired
   You can choose one of the following eight modes: dates     mooe.
     (3 types), time, exposure data at the time of shooting,
    counter data + two characters, 6-digit fixed number +
   two characters, and no printing, and print these data
    between the frames.


36
View original page 19Page 20 · Read text
www.butkus.us


                                                                                                                                                    '.                                                                                                                                                           '.'.                                                                             '                                                                                                                                    . .'..'.:....:                                                ..   .. '   ...                                                       .                                                                   .' ".                                                                                                                 "'.


Acht verschiedene Betriebsarten stehen      Vous avez le choix entre les 8 modes          Usted podr6 elegir uno de los ocho
zur Einbelichtung von Daten zwischen          suivants: dates (3 types), heure,            modos siguientes: fechas (3 tipos), hora,
den Aufnahmen zur Verfijgung: Datum (3      paramdtres d'exposition au moment de la      datos exposici6n en el momento del
Arten), Zeit, Belichtungsdaten zum               prise de vue, dqnn6es du compteur + 2         disparo, datos de contador + dos
Zeitpunkt der Aufnahme, Bildnummer des      caractdres, nombre fixe de 6 chiffres + 2        caracteres, n0mero fijo de 6 dlgitos + dos
Bildzdhlwerks + zwei Zeichen, eine fest         caractdres, et pas d'impression.   ll est           caracteres, y sin impresi6n, e imprimir
eingesteflte 6stellige Zahl + zwei Zeichen       possible d'imprimer ces informations           estos datos entre los fotogramas.
sowie "Keine Einbelichtung".                   entre les images.
                                                                            <1. Gambio del modo de
<1. Umschaltung der                  <1. Changement du mode                impresi6n>
    Einbelichtungs-Betriebsart>            d'impression>                     Cadavez que presione el bot6n "MODE",
Bei jedem Dr0cken der MODE-Taste        A chaque pouss6e sur la touche "MODE",       el modo de imoresi6n cambiar6 como se
wechselt die Einbelichtungs-Betriebsart  in       le mode d'impression change comme sur      muestra en la ilustraci6n siguiente.
der in der Abbildung gezeigten Reihen-            I'illustration. Choisissez le mode souhait6.      Seleccione el modo deseado.
folge. Die gewiinschte Betriebsart
einstellen.
View original page 20Page 21 · Read text
O Date [yearlmonth/day]                            @Counter data (4-digit add-up counter + exposure
  @ Date [month/daylyear]                                     counter) + Two characters
   @Date [daylmontMyear]                               The 4-digit add-up counter can.start from a desired
   @Time [day/hour/minute]                                 numoer.
   @Exposure data on shooting                           The add-up counter will add up continuously even after
      (Exposure compensation value, shutter speed, f-           the film has been replaced. After replacing the film, the
     number, exposure mode)                                   counter will return to "00". Both counters will add up
      Exposure data on that frame at the time of shooting are      one by one on each exposure.
       printed by reading them automatically from the camera        This mode is convenient for identification and
       side.                                                    arrangement of the exposed film.
      Because the frame number and exposure data can be               It is also possible to set two characters. Use this mode
      recorded together, this mode is convenient for                  for recording initials, etc.
       retaining the exposure data for each frame.              o The counter will add up on each exposure even after
                                                                 changing to another printing mode once.     Exposure Mode Display                                              a The counter will not count up when there is no film in
                                                                       the camera.       ",{L"'(Av) "Tl,'"6rv; "P"(p) "i"l"(M)'x "(E$
                                            a During multiple exposure, "1" will be added at the
    o On "8" (bulb), "bulb" will be displayed  in the                 time of the first exoosure and the counter will not
          position of the shutter speed, and not in the position          count up on exposures after the second.
          of the exposure mode.                           ODesired 6-digit fixed number + Two characters
     o When there is no exposure data, when the camera is              It is possible to set a desired 6-digit fixed number and
         turned off, for example, the display appears as           two characters.
           illustrated in the figure.                               Use this mode for identification of the exposed film
                                                                       with a desired 6-digit fixed number, and for recording
         @                                                             initials with two characters.
             UU  UUUU   |JU U U           @No printing
                                                 When you do not want to print dates, data, etc. on your
                                                                             picture, set this mode.

38
View original page 21Page 22 · Read text
www.butkus.us


          lI55  '{J,{)(


   <Two-character Print>                               r When the character is set except "EE  ":
   "Two characters" can be set in the counter data printing        r  In all "between-the-frames  printing" modes, the
   mode and 6-digit fixed number printing mode.                same character will be printed in the same position.
                                              o When the printing mode is set to "exposure data    I When the character is set to " E E ":                     on shooting", in particular, caution is required
     o When the printing mode is set to "exposure data on         because characters will be printed in place of
         shooting", the "exposure mode will be printed.              "exposure mode". At that time, when you make
    o In other modes, there will be no print.                         characters blink with "SELECT" button and switch to
                                                                                                                " A A " with "r" or "v" button, the character
                                                                                printing will be canceled and the exposure mode will
                                                           be orinted.
                                            o No character will be printed in the collective printing
                                                           mooe.

42
View original page 22Page 25 · Read text
ii:j::::ii;iii';iliifr;ii,:,:;:ii';f;:i::;,j,:,::,,'    r,         ,,, '    ='*It; l;l'*.i1;,:..u'';"rr,l".llr***tot.t rtti*
    '         ,',                                                  )(         le55 \ J,{


                                                             Each time you press the "SELECT" button, the digits    <3. Setting the "Desired 6-digit Fixed Number +        f     Two Characters" Mode>                     4r will blink from the left side of the 6-digit fixed
        Press the "MODE" button to set the printing mode to     number. Make the desired digit blink.  1    I   "desired 6-diqit fixed number + two characters".


48
View original page 25Page 26 · Read text
www.butkus.us


                                                                 Repeat the above steps 2 and 3 and, after adjusting    {!  Adjust the desired number with the               Gt/t   rJ button.                                                                                  all characters. oress the "SET" button.
    Then, adjust the characters. Each time pressing the "t"
                                                                       pressing the "SET" button, the characters will stop    or "v" button, the characters will change in the following When
    order. Adjust the desired characters on display by              blinking and light. The setting operation has been
    pressing the button.                                        comoleted.

                                                 When a.character is set, the same character will be   L--Xa--- A +-> B +---> Z <--> O <----> 9 <---l   o            "v"          ,,a,'                  >               Billni l*Hime  position in all between-the-frames
   a When you keep on pressing the button, characters will
      change continuously.


50
View original page 26Page 28 · Read text
www.butkus.us

   o When dates or data have been recorded betweeen the    a Wenn Daten zwischen den Aufnahmen einbelichtet wur-
       frames, the data printing area may be cut off when            den, konnen diese innerhalb des ftir die Einbelichtung
        cutting the film for holder storage in the process of           vorgesehenen Bereichs abgeschnitten werden, wenn der
      development work. Also, when the boundary between         Film im Labor ftir die Unterbringung  in einem Halter
       the picture frames is not clear in the case of extremely         zerschnitten wird. Bei extrem unterbelichteten Aufnahmen
      underexposed pictures or night pictures, data between       und Nachtaufnahmen,  in denen die Grenze zwischen den
       the frames may be judged by mistaken as images             einzelnen Bildern undeutlich  ist, kann es auBerdem
        inside the picture frame and the picture area may be         vorkommen, daB die Einbelichtungsdaten versehentlich
       cut off.                                                                    als zum Bildbereich gehdrend betrachtet werden, so daB
      To avoid such trouble, give instruction for a longer roll           ein Teil des Bildbereichs abgeschnitten wird.
        at your photofinisher so that the film is not cut when      Um derartige Probleme zu vermeiden, empfiehlr es
       taking your exposed film for processing.                        sich daher, dem Filmlabor mitzuteilen, daB es sich um
   a When you are taking important shots or planning              eine ldngere Rolle handelt, wenn der belichtete Film zur
       special processing such as high speed and low speed        Entwicklung gebracht wird.
      development,  it is recommended to make test            r Vor wichtigen Aufnahmen, oder wenn eine Spezial-
      exposures to check the data density.                         Entwicklung des Films mit hoher oder geringer
    r At low temperatures, the response speed of the liquid         Geschwindigkeit beabsichtigt wird, empfiehlt es sich,
       crystal will be slower.  lf you want to print data cleady at      Probeaufnahmen zu machen, um die Kontrastschdrfe
      low temperatures, the following methods are                 der einbelichteten Daten zu uberprLifen.
      recommended.                              o Bei niedrigen Temperaturen spricht die FlLissigkristal-
     Oln the case of "counter data + two characters"              lanzeige langsamer an. Um sicherzustellen, daB die
        mode, set the drive mode to "S" and have a               Daten auch bei niedrigen Temperaturen klar lesbar ein-
         shooting interval of 2 seconds or more.                        belichtet werden, wie folgt vorgehen.
    @ In the case of "exposure data printing" mode, use        OBei Wahl der Einbelichtungs-Betriebsart
          collective printing.                                            "Bildzdhlwerkdaten + zwei Zeichen" die Kamera auf
                                                                          die Filmtransportart "S" und eine Intervall-Zeit von
                                                                mindestens 2 Sekunden einstellen.
                                                    @Bei Wahl der Einbelichtungs-Betriebsart
                                                                      "Belichtungsdaten zum Zeitpunkt der Aufnahme" die
                                                                   Sammeleinbelichtungs-Funktion verwenden.54
View original page 28Page 29 · Read text
I Interual Shooting           InterusII-AufnahmenIr  Function
I
        This Data Back incorporates an interval shooting              Diese Datenrrickwand  ist mit einer Intervall-
        function to shoot the set number of pictures                  Funktion ausgestattet, die es erm6glicht, vom
        automatically at the set interval, starting from the               eingestellten Zeitpunkt an automatisch eine
         set time.                                                 bestimmte Anzahl von Aufnahmen in festen
                                                                  Zeitabstdnden zu machen.
View original page 29Page 30 · Read text
www.butkus.us

r Setting on the camera                                                r Setting on the data back
Main Switch ........"ON"                                                                  (For details, refer to the text)
Focusing Mode...lt is recommended to set  it to "MF" and focus manually.          Interval time  ................
             o  lf you shoot on autofocus, be careful because the           Time interval at which oictures
                   camera ooerates as follow:                                     are taken repeatedly.
                 "SAF" :  lf it does not focus within approx. 2 seconds,
                        no picture is taken and the interval shooting  is                    lf the next interval time comes
                            stopped.                                                while the shutter is open,
                "CAF" : Focusing is done and the shutter trips even if             interval shooting after that is
                             the subject is not in sharp focus and the               stopped. When shooting on
                               picture is taken.                                      auto exposure, in particular,
Drive Mode  .........|t is recommended to shoot at "S".                               take care in setting the shutter
             a Pictures are taken frame by frame at ,,CL" and ,,CH,,,         speed and interval time.
                         too.
                     . Do not use " S2 " and " N)to ".
                                            lf the next interval time comes while the self-timer  is          Interval number
                       operating, interval shooting after that is stopped.            Number of interval shots
            o  lf you use " 8  " and data printing together, refer to           Interval shooting start time  ......
                     "Combination with camera,s multiple exposure', on          Time for start of shootino
                   page74.
Exposure Mode.....o Do not use "B".
                 r When shooting on auto exposure (Av, Tv, p), use the
                    eyepiece shutter to prevent light entering through
                      the viewfinder eyepiece from affecting the light
                      meterino.
View original page 30Related documents and language editions

ContaxPDF
Contax D-4
User manual
72 pages · EnglishRead →
ContaxPDF
Contax DATA-BACK-10
User manual
36 pages · EnglishRead →
ContaxPDF
Contax Data Back D-5
User manual
34 pages · EnglishRead →
ContaxPDF
Contax Data Back D-6
User manual
72 pages · EnglishRead →
ContaxPDF
Contax D-10
User manual
40 pages · GermanRead →
ContaxPDF
Contax Data Back D 5
User manual
38 pages · German, French, SpanishRead →
ContaxPDF
Contax Data Back D 8
User manual
49 pages · German, French, SpanishRead →
ContaxPDF
Contax Data Back D 9
User manual
78 pages · German, French, SpanishRead →
ContaxPDF
Contax Data-back D-9
User manual
107 pages · German, French, SpanishRead →
ContaxPDF
Contax Databack D 4 3
User manual
36 pages · German, French, SpanishRead →
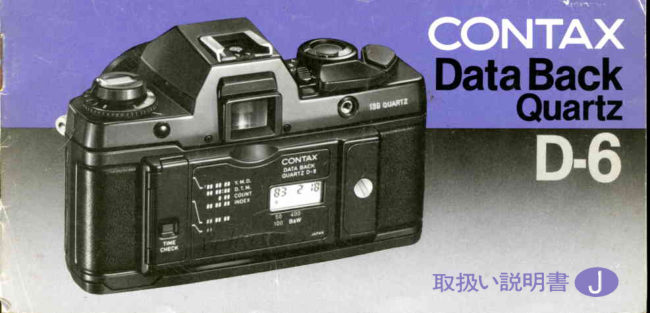
ContaxPDF
Contax Data Back D-6-J
User manual
25 pages · JapaneseRead →
From the M. Butkus archive. Original publisher and archive notices are retained.
Check the model and edition against your equipment.
PDF verified 2026-10-10.