Camera accessories
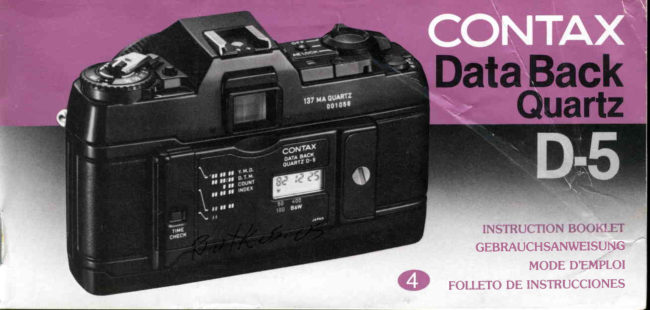
Contax Data Back D-5 User manual
User manual for Contax Data Back D-5. 34 pages in English. Read the original PDF, download or print a copy without registration.
34 pagesEnglish2.0 MB PDF
Loading your manual…Open PDF directly
Document details
- Brand
- Contax
- Model / document
- Contax Data Back D-5
- Document type
- User manual
- Language
- English
- Pages
- 34
- File size
- 2.0 MB
- Category
- Camera accessories
- Document date
- Not specified in catalog
Search available document text
Find a term, then jump to its page in the original PDF. Image-only pages may not be searchable; check the PDF for exact wording and diagrams.
Page 2 · Read text
Congratulationson purchasingthe Contax Data Back          Wir gratulierenlhnen zum Kauf der Contax Datenrtlckwand
Quartz D-5,featuring the latest in electronic technology.       Quartz D-5,die mit fortschrittlichsterElektronik
The Data Back Quartz D-5 is a digitalized,automatic data-      ausgestattetist. Die DatenrUckwandQuartz D-5 ist eine
recordingdevice,dedicated for use with the 137 MAJMD        digitale,automatischeDatenaufzeichnungsvorrichtung,die
Quartz, incorporatinga liquid-crystal-displayquartz clock.          frir die 137 MAJMDQuartz entworfen ist. und eine Quartz-
Its capabilities are not limited to the Year-Month-Day(YMD)    Uhr mit FlUssigkristallanzeigebeinhaltet.lhre Fdhigkeiten
and Day-Hour-Minute(DTM)modes but even include the        sind nicht auf die BetriebsartenJahr-Monat-Tag(YMD)und
count mode which couples to the shutter releaseand the      Tag-Stunde-Minute(DTM)begrenzt,sondern erstreckensich
index mode that allows the selection of any given six digit     auch auf Zdhlbetrieb,der mit dem VerschluBauslOser
figure, all modes capable of being imprinted onto film from     gekoppeltist, und lndexbetrieb,der die Wahl einer
a format using a seven-segmentliquid crystal output          beliebigensechsstelligenZahl gestattet.In allen
display. lts imprinting function even permits data              Betriebsartenk0nnen die Daten, deren Format von einer
imprinting coupled to the sequence shooting mode. Before     siebenteiligenFlUssigkristallanzeigeabgelesenwerden
usirrg the Data Back Quartz D-5,please be sure to             kann,auf den Film aufgezeichnetwerden.Die
familiarizeyourself with the contents of this instruction        Aufzeichnungsfunktiongestattet sogar mit
manual so you will be able to operate the data back           SerienaufnahmebetriebgekoppelteDateneinbelichtung.
properlyand enjoy long years of use.                      Bevor Sie nun die DatenrtickwandQuartz D-5 in Gebrauch
                                                nehmen,lesen Sie diese Anleitungaufmerksamdurch,
                                                      damit Sie in der Lage sind, sie richtig zu bedienen,um
                                                        jahrelangFreudean ihr zu haben.

                   www.butkus.us
View original page 2Page 5 · Read text
( Display Window)

  Q Pulsatingmark indicatingYMD-                                         Pulsatingmark indicatingDTM
    Modein effect                                            Mode in effect
          E trg:"qff
 @ Film speed index                                            -Q   lmprint confirmation mark
    Comeson to indicatesoeed                                   Comeson (for one sec.)only
      ratingof loadedfilm.                                         whendata is beingimprinted.
                                                                           Indicatesthat data has been
                                                                         imorintedon film


1 0
View original page 5Page 6 · Read text
The data back is powered by two 1.55 V silver oxide
    batteries (5R44)or 1.5 V alkaline batteries (LR44).

     tr  Insertcoin edgeor othersuitableobjectintothe slotof
   screwheadlocatedrn the centerof batterycompartmentcover,
   thenturn the screwcounterclockwiseand openthe cover.Install
   the batterieswith theirplus(+ ) marksfacingupward,otherwise
   the databackwill not function.


12                   www.butkus.us
View original page 6Page 7 · Read text
When the batteriesare installed,the displaywindowwill show
 the date 1 January1981(81 1 1). Be sure to changethis to
 the current date and time accordingto the instructionson                            rt tt  rl  vr.!
 page 36 showing horu to reset the date and time.                                      trt'tirilfrta at  rl   trsu
A  After installingthe batteries,replacethe battery                               aa, l ,a ,a
comoartmentcover and securelvscrew it into olace.
View original page 7
Page 8 · Read text
E  Openthe regularcameraback,and whilepushingdownon
   the cameraback releaselug, removethe cameraback by tilting
      it slightlyoutward.


  A   Installthe Data Backontothe cameraby insertingthe lower
  end of the hingepin intocamerapin socket,and thenslip in the
   upperend of the'pininto its socketwhilepushingdownon the
  cameraback releaselug untilthe insertionis accomplished


t o                   www.butkus.us
View original page 8Page 9 · Read text
The imprinting mode is toggled on                                    Die Au fzeichn u ng s-Bet riebsart wi rd
   and oft using the "MODE" bLttton,                                       mit Hilte des Betriebsartenknoptes
   and resetting of the date and time                             "MODE" ein- und ausgeschaltet,    is accomplished using the                       MOOEo.           wdhrend die Einstellung von
   "SELECT" and "SET" buttons. The                              Datum und Uhneit mit Hilfe der
   "ASA" button is used to select the           O.         Wehl- und Einstellknopfe   exposure level for imprinting on                     SELECT         "SELECT" und "SET" erfolgt. Der
   the film. The control button cover                                   "ASA"-Knopf dient zur Wahl des
                                                                    BelichtungsmaBes ftir d ie   can be opened by lifting up on the           o.SET    tingernail catch located on upper                                   Aufzeichnung auf den Film. Der
   end of the cover.                                                     Steuerknopfdeckel kann durch                                                               ASAo            Hochheben am oberen Ende mit
                                                       dem Fingernagel geotfnet werden.


1 8
View original page 9Page 10 · Read text
"MODE'Button                                     Betriebsartenknopf "MODE"                                                   IIf-
This buttonis used to selectthe imprintingmode.Each    DieserKnopfdientzur Wahl der Aufzeichnungs-           *
time the buttonis depressed,it will selecteach one of      Betriebsart.Mit jedem Druckauf den Knopfwerdendie
the followingmodesin succession:"YMD", "DTM",      folgendenBetriebsartender Reihenach abgerufen:"COUNT","lNDEX"and "NON-DISPLAY",and indicate  "YMD", "DTM", "COUNT"(Ztihlbetrieb),"lNDEX"        fthe respectivemode data in the digitaldisplaywindow.    (lndexbetrieb)und "NON-DISPLAY"(KeineAnzeige).         I
                                                      Gleichzeitigwerdendie entsprechenden
                                                  Betriebsartendatenim Dig ital-Anzeigefensterangezeigt.

                             I                  www.butkus.us
View original page 10Page 11 · Read text
"SELECT" Button                               Wdhlknopf "SELECT"
   Thisbuttonis usedto selectthe digitsto be corrected,    DieserKnopfdientzur Wanl der zu korrigierenden
   applicableto all modes,up to two digitsat a time.Only    Stellen.Er gilt fUr alle Betriebsartenund kannbis zu
   the digitsselectedfor correctionwill beginto pulsate     zwei Stellengleichzeitiganwdhlen.Nur die zur Korrektur
   whileall otherdisplayeddigitswill stay on steadily.       angewEihltenStellenbeginnenzu pulsieren,wdhrendalle
   o When in the "SELECT"mode,depressingof the       UbrigenangezeigtenStellenruhigstehenbleiben.
   "MODE" buttonwill not changethe data sfrownin the     o  Wdhrend-derWtihlbetriebsart"SELECT"bewirktder
    digitaldisplaywindow.                            Druckauf den Betriebsartenknoof"MODE" keine
   o When in the "SELECT"mode.the data back will not   Verdnderungder im Digital-Anzeigefenstersichtbaren
   imprint.                                         Daten.
                                                  o  Wdhrendder Waihlbetriebsart"SELECT"werden
                                                     keineDatenaufgezeichnet.


22
View original page 11Page 12 · Read text
*SET"      Button                                         Einstellknopf "SET"
A depressingof the buttonwill advancethe digit to the   Ein Druckauf den Knoofstelltdie betreffendeStelleum
next number.Continuouspressingwill fast-forwardthe    eine Zahl weiter.SttindigerDruckauf den Knopfbewirkt
digitto the next seriesof numbers.Hold down the       einenSchnellvorlaufder Stelleauf die neichste
buttonuntilthe desirednumberis nearlyreached,then   Zahlenreihe.Den KnopfgedrUckthalten,bis die
adjustto the desirednumberby advancingone number  gewUnschteZahl nahezuerreicht ist, dann mit kurzen
at a time with each depressionof the button.         DrUckenauf den Knopfdie Zifferneinzelnweiterrucken,
.  Upon makingof the adjustment,the data back will,   bis die endgUltigeZahlerreichtist.
after a lapseof two or three minutes,automaticallyclear o  Nach Beendigungder Einstellungwird die Einstell-
from the "SET" mode and revertto its regularmode.    betriebsart"SET" nach einerZeitsoannevon zwei bis
"TIME CHECK" Function: When the "SET" buttonis    drei Minutenautomatischaufgehobenund die
depressedat timesfor other than adjusting,it will       DatenrUckwandin ihre regultireBetriebsartzurUckversetzt.
indicatethe DTM data. Regardlessof the mode          Zeitprtilfunktion"TIME CHECK": Wird der
(including"NON DISPLAY")in effect,this buttonwill     Einstellknopf"SET" auRerhalbder Einstellfunktion
indicatethe "Day-Hour-Minute"data for as longas it is   gedrUckt,so werdendie "DTM"-Datenfl-ag-Stunde-
keptdepressed.                                  Minute)angezeigt.SolangedieserKnopfgedrUcktbleibt,
                                           werdendie "DTM"-Datenohne Rricksichtauf die
                                        momentaneBetriebsart(einschlieRlich"NON DISPLAY"
                                                                             -  KeineAnzeige)angezeigt.
                 www.butkus.us
View original page 12Page 13 · Read text
*ASA"          Button                                     "ASA".Knopf
   This button is used to select the exposurelevel for         DieserKnopfdientzur Wahl des BelichtungsmaResfUr
    imprinting,basedon the speedratingof the loadedfilm.    die Datenaufzeichnung,basierendauf der
   With each depressionof the button,the film speedindex   Empfindlichkeitdes eingelegtenFilms.Mit jedem
   mark "V" will alternatelyindicate"50 100" and "400      Knopfdruckzeigtdie Filmempfindlichkeits-lndexmarke                                                        "V" abwechselnd"50 100" und "400 B&W" an. Als   B&W".The buttoncan be set usingthe following                                                    AnhaltspunktfUr die Einstellungdes Knopfesdienen   informationas a guide.                                        *50        folgendeAngaben:   Forcolorfilmup to ASA/ISO200 ...........         100'.   FUrFarbfilmbiszu ASA/ISO200              ......"50100".
   For colorfilm over ASA/ISO200 and                          Frir FarbfilmUberASAJISO2OO
  B&Wfilm                            "400 B&W".   undSchwarz-WeiR-Film               "4(X)B&W".


26
View original page 13Page 14 · Read text
( Year-Month-Day(YMD) Mode>
In the YMD mode,the Year-Month-Daydata,as read from a left-
to-rightorder in the displaywindow,is imprintedexacilyas thus
displayed.In this mode,the "  / " mark appearingto the left of
the Year data pulsates.The "Year" data is indrcatedshowingthe
last two digitsof the Gregoriancalendaryear.
Example:1983October10 is indicatedas '83 10 10


                  www.butkus.us
View original page 14Page 15 · Read text
< Day-Hour-Minute(DTM)Mode>
     ln the DTM mode,the Day-Hour-Minutedata,as readfrom a left-
    to-rightorder in the displaywindow,is imprintedexacilyas thus
    displayed.In this mode,the ": " mark appearingbetweenthe
    "Hour" and "Minute"data pulsates.The "Hour" is indicatedon
   a 24-hourbasisso "5 pm" is shownas "17".
   Example:Tenthday, 5.25pm is indicatedas 10 1T:25


30
View original page 15Page 16 · Read text
< COUNT>Mode
   Beingcoupledto the film imprintingfunction,the figureshownin
   the CoUNT mode advancesto the next numberwheneveran
   exposureis undertakenand is directlyimprintedonto the film.
   Thismodeallowsthe imprintingof threedigitfiguresranging
   from "000" to "399".
   o Whenshootingin any of the other imprintingmodes,the
   figurewill advanceto the next number
  wheneverthe shutteris released.   However,when in the "NON-DISPLAY"         g{}   Mode,the shotstakenwill not be       P
   registeredin the count.
   Example:When it is set to countfrom
   "200", the displaywill show 2 fi).


32
                    www.butkus.us
View original page 16Page 17 · Read text
< "lNDEX" Mode>
   Becauseof the flexibilityof the numbersat your disposal,you will
   be ableto imprintin any suitableformatfor datingphotographs,
    or for catalogingresearchand scientificand otherdata.lt
    imprintssix digitfiguresrangingfrom "000000"to "999999"
    directlyonto the film exactlyas they are indicatedin the display
   window.
   Example:A lengthof 16 cm is expressed
    as: (X)00 16.


34
View original page 17Page 18 · Read text
( CalendarSetting>
   The Data Back Quartz D-5 has a built-in autocalendar sysfem
    that automatically adiusts the date. However,when it
   becomes necessary for you to reset the date or time as a
     result of battery changing or other circumsfances, you can do
   so by using the "SELECT"and "SET" buttons. Each time the
   "SELECT" button is depressed, it causes the nexf sef of
     digits to the right, in the order of year, month and day, to
    pulsate on a rotating basis. Here it will be explained on how
    fo sef the calendar for "1983 October 10".

   E  Press the "MODE" button until the YMD mode is
    displayed in the window.
                                                                                                                                     il


36
                    www.butkus.us
View original page 18Page 20 · Read text
,EJ                    I                                                                                                                                                                                                          I    gt  Adjust the day digits.                         ,O
   Depressthe "SELECT"button,causingthe day digitsto pulsate
   Thendepressand holddown the "SET" buttonuntilthe day    digitsadvanceto "10" Afterthe end of a monthwith 30 or 3t                              I
    days,the day digitsautomaticallyrevertto "1"  In February,the   day digitsautomaticallyrevertto "1" afterthe 29thday.                 'gl                                             ,g ,0

     tr  Depressthe "SELECT" Button Again
   Thisclearsthe digitadjustingfunction,returningthe displayto
    the normalYMD modein whichall the data exceptfor the "  I "
    stay on steadily.
                                    ,EJ                                                      SET      'O 'O

40                   www.butkus.us
View original page 20Page 21 · Read text
<Setting the Time>
The Contax Data Back Quartz D-5 has a built-in quartz clock.
When il is necessary to reset it because ol a battery change
or for some other reason, use the "SELECT" and the "SEf"
buttons to do the resetting. Each time the "SELECT" button
is pressed the hour, minute and second digits will
successively pulsate in the above order, indicating the digits
to be reset.
Here, 17:25hours (5:25pm) on the 1Othday shall be given as
an example.
E  Depressthe "MODE" button until the "DTM" mode
appears in the display window.
The Day digitswill displaybut they cannotbe resetin the "DTM"
mode.
View original page 21
Page 22 · Read text
A  Reset the "Hour" digits.
   Depressthe "SELECT"buttonuntilthe hourdigitsbegin
   pulsatingThenuse the "SET" buttonto advancethe hourdigits
    to ".17".Afterpassing"23", the hourdigitswill revertto "0".
                                                                                                                       f n                                               1U  l'l: ,l

     tr  Reset the "Minute" digits.
   Depressthe "SELECT"buttonuntilthe minutedigitsbegin
   pulsating.Thenuse the "SET" buttonto advancethe minute
    digitsto "25". Afterpassing"59", the minutedigitswill revertto
    "0"
                                                                                                  *
                                                        I                                                       SET             i l:e5
44                  www.butkus.us
View original page 22Page 23 · Read text
4t  Reset the second digits.                                                  Pulsatingwhen seconds are reset (lwice a second)
   Althoughdigitsfor secondsare not displayed,the clockcan still           Pulsierenbeim Nachstellender Sekunden
   be resetto synchronizewith the secondson radioand telephone        (zweimalClignotementpro Sekunde)lors de la mise a la seconde
   time signals.When the "SELECT"buttonis depressed                   (deux fois par seconde)
   subsequentto a resettingof the minutedigits,thiswill be the              (dosParpadeavecescuandopor segundo)se reponen los segundos
   onlytime that the ": " markwill pulsateat a fasterreset
   pulsatingrate.Depressingof the "SET" buttonto synchronlze                                                        I   with the time signalwill causethe countfor secondsto revertto        SELECT   "0"
                                                        I                                                      SET    ,0  i ?:;5


40
View original page 23Page 24 · Read text
.  The built-inquartzclock is designedto normallycontinue
runningat all times.Thus,when the clock count for secondsis
somewherebetween"0" and "29" before the "SET" button is
depressed,depressingof the buttonwill causethe count to
revertto "0" second,and when the count is between"30" and
"59" at that time,the count will revertto "0" and advancethe
minutecount in the displaywindowto the next number.Thus,the
resettingof the secondhas been accomplished,makingit a
simplematterto resetthe minutedigitsaccordingto step 3
above.

E  Depress the "SELECT" button again.
The clock will be clearedfrom the resettingmode,revertingto
the DTM mode and to the regularpulsatingrate for the ": "
mark.


                  www.butkus.us
View original page 24Related documents and language editions
ContaxPDF
Contax D-4
User manual
72 pages · EnglishRead →
ContaxPDF
Contax DATA-BACK-10
User manual
36 pages · EnglishRead →
ContaxPDF
Contax Data Back D-6
User manual
72 pages · EnglishRead →
ContaxPDF
Contax Data-back D-8
User manual
39 pages · EnglishRead →
ContaxPDF
Contax D-10
User manual
40 pages · GermanRead →
ContaxPDF
Contax Data Back D 5
User manual
38 pages · German, French, SpanishRead →
ContaxPDF
Contax Data Back D 8
User manual
49 pages · German, French, SpanishRead →
ContaxPDF
Contax Data Back D 9
User manual
78 pages · German, French, SpanishRead →
ContaxPDF
Contax Data-back D-9
User manual
107 pages · German, French, SpanishRead →
ContaxPDF
Contax Databack D 4 3
User manual
36 pages · German, French, SpanishRead →
ContaxPDF
Contax Data Back D-6-J
User manual
25 pages · JapaneseRead →
From the M. Butkus archive. Original publisher and archive notices are retained.
Check the model and edition against your equipment.
PDF verified 2026-10-10.