Camera accessories
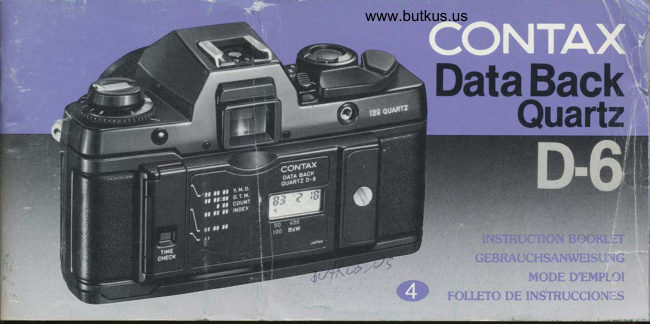
Contax Data Back D-6 User manual
User manual for Contax Data Back D-6. 72 pages in English. Read the original PDF, download or print a copy without registration.
72 pagesEnglish3.4 MB PDF
Loading your manual…Open PDF directly
Document details
- Brand
- Contax
- Model / document
- Contax Data Back D-6
- Document type
- User manual
- Language
- English
- Pages
- 72
- File size
- 3.4 MB
- Category
- Camera accessories
- Document date
- Not specified in catalog
Search available document text
Find a term, then jump to its page in the original PDF. Image-only pages may not be searchable; check the PDF for exact wording and diagrams.
Page 3 · Read text
Congratulations on purchasing the Contax Data Back              Wir, gratulieren lhnen zum Kauf der Contax Datenrilckwand
Quartz D-6, featuring the latest in electronic technology.        Quartz D-6, Cie nrit fortschrittlichsier Elektronik
The Data Back Quartz D-6 is a digitalized, automatic data-       au$gestattet  ist. Die Datenruckwand Quartz D€ ist eine
recording device, dedicated for use with the .139 Quariz,           digitale, aulomatische Datenaufzeichnungsvorrichtung, die
incorporating a liquid-crystal-display quartz clock. lts                   filr die 139 :luartz entworfen ist, und eine Quartz-Uhr mit
capabilities are not limited to the Year-Month-Day (YMD)         FlUssigkristallanzeige beinhaltet. lhre Fahigkeiten sind
and Day-Hour-Minute (DTM) modes but even include the          nicht auf die Betriebsarten Jahr-Monat-Tag (YMD) und Tag-
count mode which couples to the shutt€r release and the       Stunde-Minute (DTM) begrenzt, sondern erslrecken sich
index mode that allows the selection of any given six digit     auch auf Ziihlbetrieb, der rnit dem VerschluRausloser
figure, all mode$ capable of being imprinted onto film from      gekoppelt isi, und lndexbetrieb, der die Wahl einer
a format using a $even-segment  liquid crystal output            beliebigen sechsstelligen Zahl gestattet. In allen
display. its imprinting function even permits data                Betriebsarlen konnen die Daten, deren Format von einer
inrprinting coupled to the sequence shooting mode. Before       siebenteil irJen Fh"issigkristallanzeige  abgelesen werden
using the Data Back Quartz D-6, please be sure to              kann, auf rjen Film aufgezeichnet werden. Die
familiarize yourself with the contents of thi$ instruction          Aufzeichnungsfunktion gestattet sogar mit
manual so you will be able to operate the data back             Serienauf nahmebetrieb gekoppelte Dateneinbelichtung.
properly and enjoy long years of use.                          Bevor Sie nun die Datennickwand Quartr D-6 in Gebrauch
                                                         nehmen, lesen Sie diese Anleitung aufmerksam durch,
                                                             damit Sie in der Lage sind, sie richtig zu bedienen, um
                                                                 jahrelang Freude an ihr zu haben.
View original page 3Page 4 · Read text
www.butkus.us

Bezeichnung der Teile                  ........................... 7
Einsetzen der Batterien               .......................... 13
Anbau an die Kamera                 ............................ 17
Bedienungsknopfe  ..............
Aufzeichnungsarten  .............              ..................29
Einstellen des Datums und der Uhrzeit ......................... 37
Einstellen der Zdhl- und Index- Betriebsarten ................ 51
Datenaufzeichnung auf den Film                     ............ 55
Zeitpunkt der Batterieerneuerung       .......... 60
VorsichtsmaBnahmen  bei der Bedienung ..................... 64
Anmerkungen zur FlLissigkristallanzeige  ....................... 66
Technische Daten ..... ..                       ......................69
View original page 4
Page 5 · Read text
Control Button Covero
   Mode Button
     Battery Compartment Cover@o
    Select tsutton
    Film Speed Button
    Set Button (fime-Check)
    Display Window@ooo
@  Retaining Screw
View original page 5Page 6 · Read text
www.butkus.us

      @ Hinge Pin              (E Belease Lug
       @ Data lmprinting Window
       @ Hinge Pin
       @ Film Pressure Plate
       @ Sensor
View original page 6Page 8 · Read text
www.butkus.us

   The data back is powered by two 1.55 V silver oxide
    batteries (5R44)or 1.5 V alkaline batteries (LR44).
 O  Insert coin edge or other suitable object into the slot of
   screwhead located in the center of battery compartment cover,
   then turn the screw counterclockwise and open the cover. Install
   the batteries with their plus (+) marks facing upward, otherwise
    the data back will not function.


tz
View original page 8Page 9 · Read text
When the batteries are installed, the display window will show
      the date 1 January 1981 (81 1 1). Be sure lo change this to
      the current date and time according to the instructlons on
     page 36 showing how to reset the date and time.

                                                      battery  A  After installing the batteries, replace the
    compartment cover and securely screw  it into place.


14
View original page 9Page 10 · Read text
www.butkus.us

  n  Open the regular camera back, and while pushing down on
    the camera back release lug, remove the camera back by tilting
        it slightly outward.


  A   lnstall the Data Back onto the camera by inserting the lower
   end of the hinge pin into camera pin socket, and then slip in the
    upper end of the'pin into its socket while pushing down on the
   camera back release lug until the insertion is accomplished.


16
View original page 10Page 11 · Read text
The imprinting mode is toggled on                                       Die Au fzei ch n u ng s-Betriebsart w  i rd
   and off using the "MODE" button,                                       mit Hilfe des Betriebsartenknopfes
   and resetting of the date and time                              "MODE" ein- und ausgeschaltet,    is accomplished using the                                 MODEft.            wdhrend die Einstellung von
   "SELECT" and "SET" buttons. The                                          ,,    Datum und Uhrzeit mit Hilfe der   "ASA" button ls used to select the                                              Wiihl- und Einstellkndpfe                              E.I          t,     "SELECT" und "SET" ertolgt. Der   exposure level for imprinting on                             DELEU
   the film. The control button cover                                    "ASA"-Knopf dient zur Wahl des                                                                                                    tt                                                                                Be  I ic htu n g s m aBes  f ti r d ie   can be opened by lifting up on the           E.           tt
    fingernail catch located on upper                                     Aufzeichnung auf den Film. Der
   end of the cover.                                                       Steuerknopfdeckel kan n durch                                                                   ASAD            Hochheben am oberen Ende mit
                                                       dem Fingernagel geoffnet werden.


18
View original page 11Page 12 · Read text
www.butkus.us
   'MODE" Button                                     Betriebsartenknopf ,,MODE,,                                                                                                                   '
    This button is used to select the imprinting mode. Each  Dieser Knopf dient zur Wahl der Aufzeichnungs-
    time the button is depressed, it will select each one of      Betriebsart. Mit jedem Druck auf den Knopf werden die    the follcwing modes in succession: "YMD", "DTM",     folgenden Betriebsarten der Reihe nach abgerufen:
   "COUNT", "INDEX" and "NON-DISPLAY", and indicate "YMD", "DTM", "COUNT" (Zeihlbetrieb), "lNDEX"                 '    the respective mode data in the digital display window. (lndexbetrieb) und "NON-DISPLAY" (Keine Anzeige).
                                                                        Gleichzeitig werden die entsprechenden
                                                              Betriebsartendaten im Digital-Anzeigefenster  angezeigl.


20
View original page 12Page 13 · Read text
:   "SELECT' Button                               Wdhlknopl "SELECT"
    This button is used to select the digits to be corrected, Dieser Knopf dient zur Wahl der zu korrigierenden
    applicable to all modes, up to two digits at a time. Only   Stellen. Er gilt fur alle Betriebsarten und kann bis zu    the digits selected for correction will begin to pulsate   zwei Stellen gleichzeitig anwahlen. Nur die zur Korrektur
                                                                                                            pulsieren, wdhrend alle       {    white itt other displayed digits will stay on steadily.     angewdhlten Stellen beginnen zu    r  When in the "SELECT" mode, depressing of the       ubrigen angezeigten Stellen ruhig stehenbleiben.   "MODE" button will not change the data shown in the   o Wdhrend-der Wdhlbetriebsart "SELECT" bewirkt der
     digital display window.                             Druck auf den Betriebsartenknopf "MODE" keine   r  When in the "SELECT" mode, the data back will not   Verdnderung der im Digital-Anzeigefenster  sichtbaren
   imprint.                                                Daten.                                                                  .  Wdhrend der Wdhlbetriebsart "SELECT" werden
                                                             keine Daten aufqezeichnet.


22
View original page 13Page 14 · Read text
www.butkus.us

    "SET" Button                                            Einstellknopl "SET"
   A depressing of the button will advance the digit to the     Ein Druck auf den Knopf stellt die betreffende Stelle um
    next number. Continuous pressing will fast-forward the     eine Zahl weiter. Standiger Druck auf den Knopf bewirkt
      digit to the next series of numbers. Hold down the         einen Schnellvorlauf der Stelle auf die nachste
    button until the desired number is nearly reached, then    Zahlenreihe. Den Knopf gedruckt halten, bis die
     adjust to the desired number by advancing one number   gewUnschte Zahl nahezu erreicht ist, dann mit kurzen
     at a time with each depression of the button.              Drtjcken auf den Knopf die Ziffern einzeln weiterrucken,
     .  Upon making of the adjustment, the data back will,     bis die endgUltige Zahl erreicht  ist.
     after a lapse of two or three minutes, automatically clear   .  Nach Beendigung der Einstellung wird die Einstell-
    from the "SET" mode and revert to its regular mode.       betriebsart "SET" nach einer Zeitspanne von zwei bis
    "TIME CHECK" Function: When the "SET" button is     drei Minuten automatisch aufgehoben und die
    depressed at times for other than adjusting, it will         DatenrUckwand  in ihre reguldre Betriebsart zuruckversetzt.
     indicate the DTM data. Regardless of the mode            Zeitpriiffunktion "TIME CHECK": Wird der
     (including "NON DISPLAY")  in effect, this button will        Einstellknopf "SET" auRerhalb der Einstellfunktion
     indicate the "Day-Hour-Minute" data for as long as  it is    gedrUckt, so werden die "DTM"-Daten (fag-Stunde-
     keot deoressed.                                            Minute) angezeigt. Solange dieser Knopf gedrUckt bleibt,
                                                    werden die "DTM"-Daten ohne RUcksicht auf die
                                                 momentane Betriebsart (einschlieRlich "NON DISPLAY"
24                                                    -  Keine Anzeige) angezeigt.
View original page 14Page 15 · Read text
3rASA" Button                                          "ASA''-Knogf
     This button is used to select the exposure level for          Dieser Knopf dient zur Wahl des BelichtungsmaBes  ftir
     imprinting, based on the speed rating of the loaded film.      die Datenaufzeichnung,  basierend auf der
    With each depression of the button, the film speed index     Empfindlichkeit des eingelegten Films. Mit jedem
    mark "V" will alternately indicate "50 100" and "400       Knopfdruck zeigt die Filmempf indlichkeits-l ndexmarke                                                "V" abwechselnd "50 100" und "400 B&W" an. Als   B&W". The button can be set usino the followino                                                                 Anhaltspunkt  fUr die Einstellung des Knopfes dienen     intormation as a guide.                                                                 folgende Angaben:
     For color film up to AStulSO 200 ..............,........ "50 100".      FLir Farbfilm bis zu ASA/ISO 200 ........................ "50 100'.
    For color film over ASAJISO 200 and                        FUr Farbfilm uber ASAi/|SO 200
   B&W film                                               ......... "400 B&W".     und Schwarz-WeiR-Film    ......... "400 B&W".


26
View original page 15Page 16 · Read text
www.butkus.us

    (Year-Month-Day (YMD) Mode)
      In the YMD mode, the Year-Month-Day data, as read from a left-
      to-right order in the display window, is imprinted exactly as thus
     displayed. In this mode, the " / " mark appearing to the left of
    the Year data pulsates. The "Year" data is indicated showing the
      last two digits of the Gregorian calendar year.
    Examole: 1983 October 10 is indicated as'83 10 10


28
View original page 16Page 17 · Read text
( Day-Hour-Minute (DTM) Mode)
     In the DTM mode, the Day-Hour-Minute data, as read from a left-
     to-right order in the display window, is imprinted exactly as thus
    displayed.  In this mode, the " r " mark appearing between the
    "Hour" and "Minute" data pulsates. The "Hour" is indicated on
    a24-hour basis so "5 pm" is shown as "17".
    Example: Tenth day, 5:25 pm is indicated as 1O 17:,25


30
View original page 17Page 18 · Read text
www.butkus.us

  <COUNT> Mode
    Being coupled to the film imprinting function, the figure shown in
    the COUNT mode advances to the next number whenever an
   exposure is undertaken and is directly imprinted onto the film.
    This mode allows the imprinting of three digit figures ranging
   from "000" to "399".
   r  When shooting in any of the other imprinting modes, the
    figure will advance to the next number
   whenever the shutter is released.
   However, when in the "NON-DISPLAY"
   Mode, the shots taken will not be
    registered  in the count.
   Example: When it is set to count from
    "200", the display will show 2 00.


32
View original page 18Page 19 · Read text
<"lNDEX" Mode)
    Because of the flexibility of the numbers at your disposal, you will
    be able to imprint in any suitable format for dating photographs,
     or for cataloging research and scientific and other data.  lt
     imprints six digit figures ranging from "000000" to "999999"
     directly onto the film exactly as they are indicated in the display
    window.
    Example: A length of 16 cm is expressed
     as: 00 00 16.


34
View original page 19Page 21 · Read text
ffi.....  A  Adjust the year digits.                                      SELECT
    Depress the "SELECT" Button, causing the year digits to pulsate.
   Then depress and hold down the "SET" button until the year                                                              *    drgits advance to "83". After passing "99" (for 1999), the year
     digits will revert to "00".

  El Adjust the month digits.
    Depress the "SELECT" Button, causing the month digits to
    pulsate. Then deoress and hold down the "SET" button until the
   month digits advance to " l0". After passing "12", the month
     dioits will revert to "1".
                                                                     *


3B
View original page 21Page 22 · Read text
www.butkus.us

   4l  Adjust the day digits.
    Depress the "SELECT" button, causing the day digits to pulsate.
   Then depress and hold down the "SET" button until the day                                                                         *     digits advance to "10". After the end of a month with 30 or 31
    days, the day digits automatically revert to "1". In February, the
   day digits automatically revert to "1" after the 29th day.                                                                                 tfr                                                   'fi] ,fi
  E  Depress the "SELECT" Button Again
    This clears the digit adjusting function, returning the display to
    the normal YMD mode in which all the data except for the " f "
    stay on steadily.


40
View original page 22Page 23 · Read text
(Setting the Time)
   The Contax Data Back Quartz D-6 has a built-in quartz clock.
   When it is necessary to reset it because ol a battery change
    or for some other reason. use the "SELECT" and the "SET"
   buttons to do the resetting. Each time the "SELECT" button     ls pressed, the hour, minute and second digits will                  ffi.....
    successlve/y pulsate in the above order, indicating the digits         MODE
    to be reset.
    Here, 17:25 hours (5:25 pm) on the 10th day shall be given as
   an example.
 O Depress the "MODE" button until the "DTM" mode
   appears in the display window.
   The Day digits will display but they cannot be reset in the "DTM"
    mooe.


42
View original page 23Page 25 · Read text
gl  Reset the second digits.
    Although digits for seconds are not displayed, the clock can still
   be reset to synchronize with the seconds on radio and telephone
    time signals. When the "SELECT" button is depressed
    subsequent to a resetting of the minute digits, this will be the
    only time that the ": " mark will pulsate at a faster reset
    pulsating rate. Depressing of the "SET" button to synchronize                                                   f'l   !{.    with the time signal will cause the count for seconds to revert to                                       I  f.:.     "0".                                         5f


46
View original page 25Related documents and language editions
ContaxPDF
Contax D-4
User manual
72 pages · EnglishRead →
ContaxPDF
Contax DATA-BACK-10
User manual
36 pages · EnglishRead →
ContaxPDF
Contax Data Back D-5
User manual
34 pages · EnglishRead →
ContaxPDF
Contax Data-back D-8
User manual
39 pages · EnglishRead →
ContaxPDF
Contax D-10
User manual
40 pages · GermanRead →
ContaxPDF
Contax Data Back D 5
User manual
38 pages · German, French, SpanishRead →
ContaxPDF
Contax Data Back D 8
User manual
49 pages · German, French, SpanishRead →
ContaxPDF
Contax Data Back D 9
User manual
78 pages · German, French, SpanishRead →
ContaxPDF
Contax Data-back D-9
User manual
107 pages · German, French, SpanishRead →
ContaxPDF
Contax Databack D 4 3
User manual
36 pages · German, French, SpanishRead →
ContaxPDF
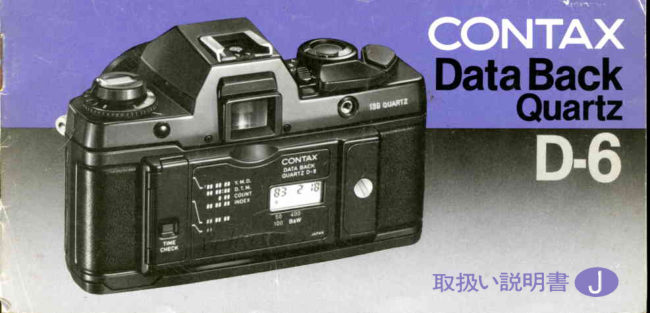
Contax Data Back D-6-J
User manual
25 pages · JapaneseRead →
From the M. Butkus archive. Original publisher and archive notices are retained.
Check the model and edition against your equipment.
PDF verified 2026-10-10.