Film cameras
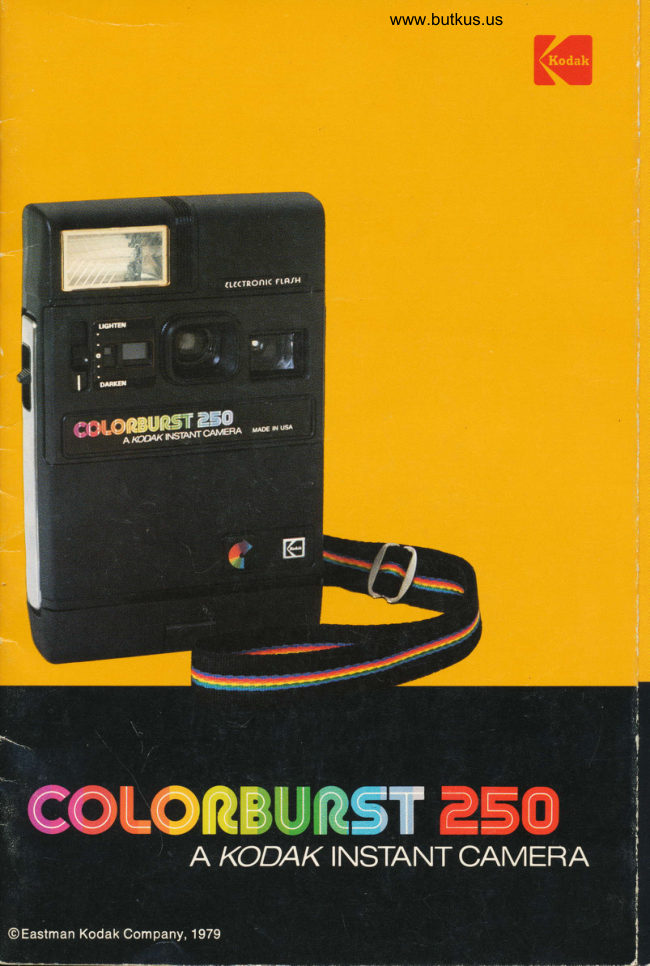
Kodak Colorburst 250 Instant Camera User manual
User manual for Kodak Colorburst 250 Instant Camera. 26 pages in English. Read the original PDF, download or print a copy without registration.
26 pagesEnglish7.9 MB PDF
Loading your manual…Open PDF directly
Document details
- Brand
- Kodak
- Model / document
- Kodak Colorburst 250 Instant Camera
- Document type
- User manual
- Language
- English
- Pages
- 26
- File size
- 7.9 MB
- Category
- Film cameras
- Document date
- Not specified in catalog
Search available document text
Find a term, then jump to its page in the original PDF. Image-only pages may not be searchable; check the PDF for exact wording and diagrams.
Page 2 · Read text
TABLE OF CONTENTS
BasicOperating Instructions .......   IFC
  Neck Strap                       3
  Tripod Socket                      3                                 This instruction booklet will help Monogram                       3
Batteries                          3   you to achieve the most reward-
Loading the Camera                4   ing picture results and the best
Viewfinder                ........      4                             performance from your KoDAKTakingPictures.....                4
  Flash Pictures                     5    CoLoneuRsr 250 Instant Gamera and
  Extended Exposures              7   KooRx lnstant Color Film. Please
Unloading the Camera               7                               read these instructions carefullyLighten/Darken Control                 ITipsforBetterPictures  ....           10   and familiarize yourself with the
Care and Storage of Film and Prints .  14   camera and its features before tak-
Care of Your Camera                                                           '15    ing pictures. With proper care andService for Your Camera           16                                        handling, your camera can provide  Troubleshooting Guide            17
  Kodak Consumer Centers        22   you with years of picture-taking
Accessories                     24    pleasure.
Warranty                 ...OBC
ServiceCenters         ....OBC                           More Information-For picture-
                               taking help, write to Eastman
                             Kodak Company, Photo Informa-
NOTE: The illustrations showing the KoDAK     tion, Department 841A, Rochester,
Instant Camera and film packs were made                           New York 14650, or contact one ofwith standard photographic equipment.  All
the remaining illustrations were made with   the Kodak Consumer Centers or
KoDAK Instant Cameras and KoDAK Instant    your photo dealer. See the com-
Color Film PR10.                       prehensive service section begin-
                                    ning on page 16, and the warranty
                               and list of Service Centers on the
                                 back cover of this manual.
View original page 2Page 3 · Read text
www.butkus.us

                     FLASH ELECTRIC EYE

               FLASH UNIT         CAMERA ELECTRIC EYE


    LIGHTEN,/OARKEN


SHUTTER RELEASE


                                                        NECK STRAP


                  FILM DOOR
                   EXIT SLOT (not visible)
                         FILM-COMPABTMENT LATCH


                     READY LIGHT


                                                      EXPOSURE COUNTER


                                                            BATTERY-COMPARTMENT  DOOR


    TRIPOO SOCKET


Keep
this page
folded out lor                                            Equipment subiect to minor appearance change3.
leference as
you read
the manual.
View original page 3Page 4 · Read text
Venmo @mike-butkus-camera  Ph. 2083
PayPal Name  Lynn@butkus.org      www.PayPal.me/lynnbutkus
View original page 4
Page 5 · Read text
-..l
            Basic Operating
             Instructibns

                                1I
                                     Pull down on the top of the BArrERy-
                            coMPARTMENT DooR at the back of the
                              camera. Before inserting the 4 AA-size
                                  batteries (supplied), clean the ends with
                             a rough cloth; then insert the batteries
                               as shown by the diagram molded inside
                                 the battery compartment. Place the
                                  batteries on top of the BArrERy srnnp. The
                                strap helps you to remove the batteries
                                      easily.
                                Close the battery-compariment door
                             by pressing  it against the camera body                       T
                                       until  it snaps securely into place.
                               rtz
                               Holding the film pack by the edges only,
                           remove the protective wrapping by
                                grasping the FLAP and pulling in the
                                  direction shown by the arrows. Be careful
                                   not to squeeze the pack, since this
                              could allow light to fog the pictures.
                      ar
                                    t
                         Open the FrLM DooR by pressing on the
                             FrLM-coMpARrMENr LATcH, and lower the
Mike Butkus  Digitally                                            DN:ou=butkus.org,Date:cn=Mike2022.01.26signedButkus,email=mike@butkus.org,by21:02:49Mikeo=ButkusButkus-05'00'camera manuals,c=US      door. Insert the FrLM pAcK into the FtLM
                            coMpARrMENr by lining up the orange
                                 srRrpE on the pack with the orange LoADtNG
                                 LINE on the camera. Close the film door
                              so that it latches securely at both sides
                                      of the camera. The exposunr coururen will
                          show the symbol Q.
                                      Fully depress the sHUTTER RELEASE and
                               allow it to return. The film cover will be
                               automatically ejected through the Extr
                                         sr-or. Then grasp the cover and remove it.
                          The exposure counter will read "1 ".
View original page 5Page 8 · Read text
www.butkus.us


NECK STRAP
For your convenience and safe handling of
the camera, a NEcK srnnp has been pro-
vided. Clip the ends onto the coNNEcroRS
on the back of the camera. You can ad-
just the strap to the length most comfort-
able for you.

TRIPOD SOCKET
For extra camera steadiness, you can
mount your camera on a tripod by using
the rRrpoD socKET on the side of the cam-
era. See "Extended Exposures" on page 7.

MONOGRAM
Peel off the desired initials from the sheet
provided, and place them in the Recessrs
on the back of the camera.


BATTERIES
Your camera uses 4 AA-size batteries (sup-    and the maximum flash distance (10 feet)
plied) to power the automatic exposure     will be reduced. The normal recycling
control, the camera motor, and the elec-    time for  f resh alkaline batteries is 10 sec-
tronic flash. To install the batteries, sim-     onds.
ply follow step 1 on the inside front cover.      Nickel-cadmium batteries provide a
                                          shorter recycling time (approximately 7NOTE:  lf you depress the shutter release                                              seconds), and a slightly shorter flash rangebefore installing the batteries, inserting                                             (approximately 4 to 9 feet). Fully chargedthe batteries will cause the camera motor                                      nickel-cadmium batteries will provideto run for about 3 seconds.                                          about 40 flashes before recharging is nec-
  You can use either alkaline (the type     essary.
supplied with your camera) or recharge-      The batleries should be replaced or re-
able nickef-cadmium batteries. However.    charged when it takes more than 30 sec-
don't mix battery types.                 onds for the flash ready light to start
  With a fresh set of alkaline batteries,      blinking, or when the camera motor lakes
the flash unit on your camera will normal-   5 or more seconds to eiect a print lrom
ly provide approximately 100 flashes. As    the camera.
batteries gradually lose strength,  it will            lf you store your camera for a period of
take longer for the ready light to blink     time, it's a good idea to remove the bat-
again (recycle) after each flash picture,      teries.
View original page 8Page 9 · Read text
LOADING         TAKING
THE CAMERA     PICTURES
Each pack of Kooex Instant Color Film    1. Be sure that your subiect is at least 4
contains a film cover and film for 10 color     feet from the camera.
exposures. Before loading the camera,    2. Check to see that the lrexrEn/oenxen
check to see that the rollers contained  in    coNrRoL is in the center position. Most of
the film door are clean.  lf you see residue    your pictures will be taken with the con-
or any foreign material on the rollers, see                                                         trol in this position. (See page B.)
page 15 for cleaning instructions. Load the                                           3. Frame your subject within the view-camera as shown in steps 2 and 3 on the                                               finder. Keep your fingers away from theinside front cover.
                                                 lens and the Electntc eves.  We do not recommend removing and re-
inserting a partially used film pack (or a    4, Hold the camera steady and partially
full pack after the film cover has been    depress the shutter release.  lf the red cau-
ejected) because at least one of your pic-     tion light doesn't appear in the viewfinder,
tures will be spoiled. Also, when you re-    slowly press the shutter release down and
insert the pack, the exposure counter will    allow  it to return.  lf the red light appears,
be reset to [.                            see page 5.
                                           5. The print will be automatically ejected
VIEWFINDER               fromslot withtheyourcamera.fingersDon'tor byobstructresting thethe bot-exit
Hold the camera up to your eye in a com-    tom of the camera on any surface as the
fortable position so that the rubber ryEcup     print is ejected.
rests against your face and you can see all                                     NOTE: Be sure not to depress the shutterfour corners of the vrewnnoen. The area                                             release again while the camera motor isthat you see within the viewfinder will be                                               running, as this may spoil your picture.included in your picture.
  The red caution light, located at the    6. When the motor has fully ejected the
top of the viewfinder, may appear as you      print, simply grasp the print by the bottom
partially depress the shutter release. See   edge and remove it from the slot before
page 7 for important information.              taking another picturc.
                                    The exposure counter will indicate the
                                      numbers of the exposures from 1 through
                                        10 as you take pictures.
                                         Don't leave prints in direcl sunlight
                                        or on a hot surface during development
                                             or they will become too dark.
                                  An image will begin to appear in about
                             30 seconds under normal temperature
                                                conditions.
                                IMPORTANT: Handle prints with care,
                                                especially during the first '10 minutes after
                                           exposure. Hold them by the borders, and
                                          never bend, cut, or attempt to fold them.
                                      See "Caution," page 14.
View original page 9Page 11 · Read text
3. Frame your subject in the viewfinder.
Hold the camera steady and depress the
shutter release smoothly to take the pic-
ture. The camera motor will eject the print
as you allow the shutter release to return.
When the ready light begins to blink again,
you are ready for another flash picture.
NOTE: For best results when you take pic-
tures of subjects that are more than 7 feet
from the camera, it's a good idea to wait
an additional 30 seconds after the readv
 light begins to blink.
4. To turn the flash unit off, slide  it toward
the camera body until  it stops.
NOTE: To conserve battery power, push
the unit to its off position whenever you
 don't expect to be taking flash pictures for
a few minutes. Always store the camera
with the unit pushed to its off position.
 Loss of battery power affects the exposure
 control, the camera motor, and the flash.
  See WARNING on page 15.

Minimizing Eye Reflections
When you take flash pictures, people's
eyes sometimes appear red. The red is    For the most pleasing vertical{ormat flash
produced by reflections from the retina of     pictures, hold the camera as shown here.
the eye. This effect is especially notice-    This positions the flash above the lens to
able when your subject is young, has a    help prevent unusual shadows on your
light complexion, or has blue eyes-also     subject and the background.
when your subject is in a dimly lighted
olace.
  To help reduce these reflections, you     Fill-in Flash
can (1) turn on additional room lights, and   You can often use your flash to improve
(2) have your subject look directly at one    outdoor pictures, especially when your
of the room lights. This will cause the    subject is in shadow or when sunlight is
pupils of the eyes to contract, reducing     striking the subject so that it casts shad-
the reflections.                          ows on the subject's face. The use of flash
                                              also allows you to turn your subject's face
                                    away from the sun to eliminate squinting
                                    and bring out natural, relaxed facial ex-
                                                 pressions. Flash is helpful in obtaining bet-
                                                      ter exposure on cloudy days as well.
                                          Always remember to keep your subject
                                               within the recommended flash range.


6
View original page 11Page 12 · Read text
www.butkus.us


                                   NOTE: lf you brace the camera, be sure
                                              the exit slot isn't blocked when you let up
                                      on the shutter release and the print starts
   Without fill-in flash.                                                to eject.
                                           Mounting the camera on a tripod is the
                                       most effective way to steady the camera.
                                      Screw the tripod connection into the tri-
                                      pod socket on the side of the camera.
                                             Extended exDosures are most useful un-
                                            der lighting conditions such as those found
                                            outdoors on dull days or in late afternoon,
                                      and for some commercially lighted indoor
                                        scenes such as bright stage sets.
                                              Generally, extended exposures aren't
                                         adequate for outdoor night scenes or in-
                                          door scenes with average room lighting'
                   With fill-in flash.
                UNLOADING
Extended        THE CAMERA
                                                  After you have taken and ejected the tenthExposures                        picture in a film pack, the exposure count-
When you are taking pictures in low-light     er will read "0". Open the film door and
conditions, the red caution light will ap-     pull the FrLM-pAcK EXTRACToR for easy re-
pear at the top of the viewfinder as you     moval of the empty film pack.
partially depress the shutter release. This
means that the shutter will remain open
for longer than 1 /15 second, and that any
movement of the camera or the subject
will blur your picture.
  To help keep the camera steady when
the caution light comes on, brace the cam-
era or yourself against a FIRM support,
such as a wall, table, or tree, as you take
the picture. Hold the shutter release fully
down until the caution light goes off, in-
dicating that the shutter has closed.
View original page 12Page 13 · Read text
LIGHTEN/DARKEN
CONTROL
Under most conditions, you will be taking
pictures with the lighten/darken control
in the center position. However, the light-
ness or darkness of your prints can be
affected by such factors as temperature,
and type and brightness of your subject.
The lighten/darken control helps you to
compensate for these effects in either
daylight or flash pictures.
  After taking a picture, if you want a
 lighter or darker picture of the same sub-
ject in the same location without chang-
ing the lighting or your position, adiust
the control betore you take another pic-
ture. To take a lighter picture, move the
control toward LIGHTEN; for a darker pic-    Subjects and Lighting Conditions
ture, move the control toward DARKEN.       In certain types of situations, you may
                                         judge your subjects to be too light or too  The control doesn't automatically re-
                                             dark. For example, if you are photograph-turn to the cenier position after you take                                             ing a very light subject in very dark sur-a picture.
                                              roundings, your main subject may be too
Temperature Effects on Prints                light in your print. A dark subject in light
The recommended temperature range dur-     surroundings may appear too dark.
ing development of prints is 60 to 100'F      Under such conditions, the lighten/
(16 to 38"C). At temperatures below 60"F     darken control can help you achieve more
(16'C), place prints in a warm place-an     pleasing exposure of your main subject.
inside coat pocket, for example-as soon     See the examples on page 12.
as they are ejected from the camera, and
leave them there during development.
Otherwise, prints may appear too light. Be                                      Judging Your Printssure not to bend or fold the orints.
    It may be advisable at the upper end     Don't attempt to make critical judgment of
of the temperature range-approaching      print appearance until development is suf-
100"F (38"C)-to set the control toward      ficiently advanced. A 2- to 3-minute wait is
LIGHTEN to keep prints from becoming     usually adequate under normal tempera-
too dark.                                        ture conditions.
  Don't leave prints in direct sunlight or   NOTE: Prints will appear lighter when
on a hot surface during development.    judged in direct sunlight than they will
Prints will probably be too dark when     under normal room lighting.
developed at temperatures above 100'F
 (38'C).
  See your film instruction sheel for com-
plele and up-to-date information.


8
View original page 13Page 15 · Read text
TIPS FOR BETTER
PICTURES


                  Move in close to concentrate attention on
                       your main subject.


                    Watch out for distracting backgrounds. Try
                       shooting from a different angle to use the
                          plain sky or the ground as a background.


10
View original page 15Page 16 · Read text
www.butkus.us


When taking flash pictures of groups, keep
all subjects in the picture at approximately
the same distance from the  f lash.


                               Be sure that your subjects are evenly
                                             lighted-not partially in bright sun and par-
                                                         tially in the shade. Or use the electronic
                                                   flash within the correct range to fill in the
                                           shadows.


                                                                                 11
View original page 16Page 17 · Read text
When you photograph a very light subject
                      against a dark background, the camera
                       exposure-control system may be "fooled"
                     by the background, and your subject may
                    be too light in the picture. Often you can
                 move the lighten/darken control toward
               DARKEN before taking the picture to
                    achieve better exposure of your main
                         subject.


                 When you photograph a very dark subject
                     with a light background, try moving the
                     lighten/darken control toward LIGHTEN
                       to get better exposure of your main sub-
                             ject.


12
View original page 17Page 19 · Read text
CARE AND
STORAGE OF FILM
AND PRINTS

Leaving your film and camera in a hot
 place such as a sunny window or a closed
car on a warm day may lead to reduced
picture quality.  lf you accidentally leave
the film and camera in a hot place, allow
them to cool to normal temperature before
 taking any pictures.  lf there is a film pack
 inside the camera, wait approximately one
 hour after the surface of the camera is cool
 to allow adequate cooling of the film.
   Also allow your film and camera to re-
turn to normal temperature it they have
been left in a cold place such as a car
 trunk during winter.
   Store your developed prints in a cool,
 dry place. Print colors will remain un-
 changed longer if pictures are protected
 from long exposure to bright light.
  Each picture is a sealed unit that con-
 tains a caustic fluid. Never cut, ttim, punc-
 ture, tear, or separate the picture unit,
 s,nce th,s may allow some of the fluid to
 escape and come into contact with skin or
 eyes. lt there is any of this tluid or other
 torcign material on the print surface, re-
 move it with a damp cloth. Any cloth con-
 taining fluid should then be discarded.


14
View original page 19
Page 20 · Read text
www.butkus.us
  CARE OF
  YOUR CAMERA
     With proper care and handling, your cam-    which can affect the quality of your pic-
     era can provide you with years of enjoy-      tures.  lf this should happen, clean the roll-
     ment. When you're not taking pictures,     ers as follows:
      protect your camera by putting  it in a case     1. Ooen the film door. The RoLLERS are
    such as the Kooax CoLoRBURST Instant     contained in the door.
     Camera Case (page 24).                                                 2. Use a cotton swab or a small piece of        Clean the viewfinder lenses and the pic-                                                        soft, lintless cloth moistened with clean      ture-taking lens by blowing away any dust                                                     water. Don't use solvents or detergents.      or dirt. Then breathe on the lenses to form
     a mist, and gently wipe the mist away with     3. Wioe the contaminated area of the roll-
     a soft, clean, lintless cloth (or use a drop     ers with the swab or cloth (never with your
      of Koonr Lens Cleaner, or equivalent, and     fingers) until the surfaces are clean. Ro-
     then wipe with a clean, soft cloth). Don't      tate the rollers by moving the GEAR at the
     use solvents or solutions not designed for    end of the rollers to position the foreign
     cleaning camera lenses, and never use     material where it can be removed easily.
     chemically treated tissues intended for     Dispose of the swab or cloth in a closed
      eyeglasses.                                   refuse contai ner.
              lf specks of dust collect on the mirrors                                        CAUTION: The residue cleaned from the       inside the camera (indicated by small dark                                                          rollers may be caustic. Observe the pre-     shadowy spots in the same location on                                                    cautions outlined on page 14.      consecutive prints), use a rubber syringe
      to blow air into the film compartment (see             lf the rollers need cleaning when there
     page 20). Never attempt to clean the mir-       is a partially used pack of film in the cam-
      rors with a brush, a cloth, or any other      era, you can clean them while the camera
      cleaning material!                                 is loaded. Open the film door in subdued
        Store your camera and film away from      light or in the shade, and keep the film
     heat and direct sunlight-never in the     pack firmly inserted in the camera to pre-
     glove compartment, on the rear-window     vent fogging the film as you follow the
       shelf, or in any other hot spot in a car-     procedure above.
      since this may cause permanent damage
       to the film or the camera. lf you store your
     camera for a period of time, it's a good
      idea to remove the batteries.
    WARNING
    Do not attempt to disassemble or repair
 I     the flash unit. The internal parts contain
       potentially dangerous power levels when
 l
      charged. For service, return the camera to
     Kodak (see outside back cover) or other
,      qualified repair facility.
     Cleaning the Rollers
      Occasional fluid leakage may cause small
      deposits on the camera roller surfaces,


                                                                                15
View original page 20Page 21 · Read text
ll you believe your camera does need
                                            service-
                                  Take your camera and several sample
                                                     prints to your photo dealer.
                                              OR
                                      Take your camera and several prints to aSERVICE FOR             Kodak Consumer Center  if one is located
YOUR CAMERA           nearpages you.22 andThe23.addresses are listed on
                                              OR
 lf you have questions about your camera    Send a letter describing the problem to
or Kooar Instant Color Film, or are having    Eastman Kodak Company, Department
difficulty in using your camera, carefully     841A, 343 State Street, Rochester, New
reread the section of this manual that per-    York '14650. Please enclose samole orints
tains to the questions you have. ESPE-     with your letter to aid us in helping you,
CIALLY be sure to consult the illustrated    and be sure to specify the model of your
Troubleshooting Guide, which begins on     camera.
the next page. Slnce many cameras which            lf your camera requires repair, you may
are returned for repair do not need ser-    send it through your photo dealer or di-
vice, please carefully review this informa-      rectly to one of our Service Centers, listed
tion.                                 on the back cover. Follow these steos in
                                            packing your camera.
                                      Packing Instructions
                                            1. Include a note with your camera giving
                                                                all details: date and place of purchase and
                                 a description of the problem, as well as
                                              several sample prints.  lf possible, include
                              a telephone number where you can be
                                          reached between 8:00 a.m. and 5:00 p.m.
                                            2. Use a sturdy carton that is large enough
                                                    for you to surround the camera complete-
                                                           ly with packaging material, such as crum-
                                             pled newspaper.
                                              3. Securely fasten the carton with tape.
                                              Clearly write the address of the Service
                                           Center and your name and address on the
                                            top and bottom of the carton.
                                         4. Mail the carton to Kodak. Remember to
                                                  insure the camera to reolacement value.


16
View original page 21Page 24 · Read text
www.butkus.us


Whal Happened                                 Probable Cause              Correction

Picture area black.                                      a. Hand or obiect              a. Keep hands and
                                                 completely covering lens     objects away from lens.
                                       when picture was taken.
                                                    b. Electronic flash didn't      b. See page 21.
                                       go olf.


 Repeating pattern of                                    Dirt on rollers.              Clean rollers (page 15)
 spots approximately l%
 inches apart on
 consecutive Drints.


 Subiect not tramed                              lmproper use of             View subiect as described
 properly or partly cut off.                           viewfinder.                on page 4.


                                                                       19
View original page 24Related documents and language editions
KodakPDF
Kodak Colorburst 350 Instant Camera
User manual
23 pages · EnglishRead →
KodakPDF
Kodak Colorburst 50 Instant Camera
User manual
27 pages · EnglishRead →
KodakPDF
Kodak Colorbust 100 Instant Camera
User manual
30 pages · EnglishRead →
KodakPDF
Kodak EK100 Instant Camera
User manual
17 pages · EnglishRead →
KodakPDF
Kodak EK200 Instant Camera
User manual
20 pages · EnglishRead →
KodakPDF
Kodak EK4 Instant Camera
User manual
30 pages · EnglishRead →
KodakPDF
Kodak EK6 Instant Camera
User manual
31 pages · EnglishRead →
KodakPDF
Kodak Partytime Instant Camera
User manual
18 pages · EnglishRead →
KodakPDF
Kodak Pleaser Instant Camera
User manual
30 pages · EnglishRead →
KodakPDF
Kodak The Handle Instant Camera
User manual
30 pages · EnglishRead →
From the M. Butkus archive. Original publisher and archive notices are retained.
Check the model and edition against your equipment.
PDF verified 2026-10-10.