Film cameras
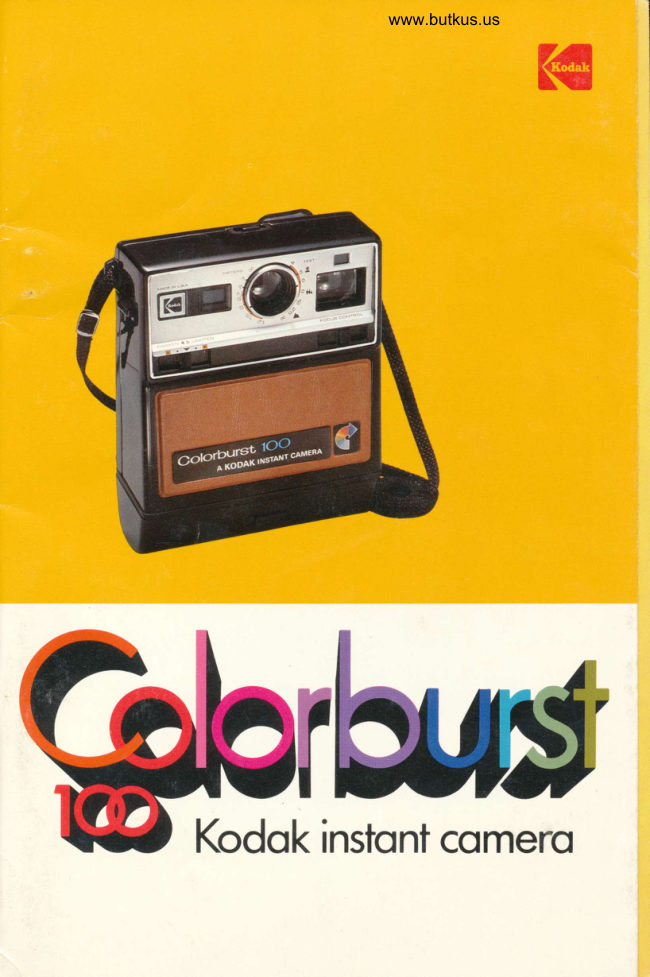
Kodak Colorbust 100 Instant Camera User manual
User manual for Kodak Colorbust 100 Instant Camera. 30 pages in English. Read the original PDF, download or print a copy without registration.
30 pagesEnglish9.1 MB PDF
Loading your manual…Open PDF directly
Document details
- Brand
- Kodak
- Model / document
- Kodak Colorbust 100 Instant Camera
- Document type
- User manual
- Language
- English
- Pages
- 30
- File size
- 9.1 MB
- Category
- Film cameras
- Document date
- Not specified in catalog
Search available document text
Find a term, then jump to its page in the original PDF. Image-only pages may not be searchable; check the PDF for exact wording and diagrams.
Page 2 · Read text
This instruction booklet will help
                              you to achieve the most reward-
                                 ing picture results and the best
                              performance from your KooRx
                                  Cor-oRsunsr 100 Instant Camera
                                and KoDAK Instant Print Film PR10.
                                Please read these instructions
                                       carefully and familiarize yourself
                                          with the equipment and its features
                                       before taking pictures. With proper
                                        care and handling, your camera can
                                      provide you with years of picture-
                                        taking pleasure.
                                 See the warranty and the list of
                                       service facilities on the back cover
                                             of this manual.  lf your camera does
TABLE OF CONTENTS                    require warranty service by Kodak
Basic Operating Instructions          . tFc    and some of your pictures were
Neck Strap                    .4        spoiled, we will return a test print
Tripod Socket                  .4       with the serviced camera and theMonogram                     .4
Eyecup                       .4         rest of the film pack to use with our
Battery                       .5       compliments.
Loading the Camera             .6                               More Information-For picture-tak-Focusing the Camera            .8
Viewfinder                     .9       ing help, write to Eastman Kodak
Taking Pictures                         .  10    Company, Photo Information, De-
Flash Pictures                .12     partment 841A, Rochester, NewUnloading the Camera .         .            .  13
Lighten/Darken Control     .              .  14     York 14650, or contact one of the
Tips for Better Pictures                 .  16    Kodak Consumer Centers or your
Care and Storage of Film and Prints   .  19     photo dealer.  lf you have diff iculty in
Caution                                  .  19                                  using your camera and write toCare of Your Camera                   .  19
Troubleshooting Guide          .21      Department 841A at Kodak, please
Accessories                 .25         tell us the model of your camera and
Warranty                                                        . oBc                                      enclose sample prints with your let-Service Facilities .    .             oBc
                                              ter to help us in giving you advice.

NOTE: The illustrations showing the Koonr
Instant Camera and film packs were made
with standard photographic equipment. All
the remaining illustrations were made with
Koonx Instant Cameras and KooRr lnstant
Print Film.
View original page 2Page 3 · Read text
www.butkus.us


              ELECTRIC EYE


    SHUTTER RELEASE

                                                                      FOCUS CONTFOL


LIGHTEN/DARKEN CONTROT


          FILM DOOR


Keep                                    EXIT SLOT (not visible)
this page
folded out for
reterence as
you read
the manual.
                                                                        EXPOSURE COUNTER


           VIEWFINDER


                                                                        NECK STRAP


   TRIPOD SOCKET


Equipment subiect lo minor appearance changes
View original page 3Page 4 · Read text
Venmo @mike-butkus-camera  Ph. 2083
PayPal Name  Lynn@butkus.org      www.PayPal.me/lynnbutkus
View original page 4
Page 7 · Read text
Fo
Check to see that the LIcHTEN/DARKEN
coNrRoL is in the center position
(see page 14).


      -,I
Focus the camera for the correct
camera{o-subject distance by using the
Focus coNTRoL (see page 8). Don't focus the
camera by turning the lens itself  , or you
could damage the focusing mechanism.


       l,
Look through the vtEwFtNoEB, and frame your
subject within the luminous frame (page 9).
 Press the shutter release smoothly and allow
 it to return. The print will be automatically
 ejected from the camera. Don't obstruct the
 exit slot! Then grasp the picture by its wide
 border and remove  it from the slot before
taking another picture.


These are only basic instructions; read on
 for the imporlant details . . .  .
View original page 7Page 9 · Read text
NECK STRAP
For your convenience and safe handling ot
the camera, a NEcK srRAp has been provided.
Insert the ends of the strao behind the posrs
on the sides of the camera. Then thread the
ends back through the buckles as shown,
and pull the strap tight. You can adjust the
strap to the length most comfortable for you.


TRIPOD SOCKET
For extra camera steadiness, you can mount
your camera on a tripod by using the TRtPoD
socKET. located on the side of the camera.


                        MONOGRAM
                                           Peel off the desired initials and place them in
                                            the REcESSES on the back of the camera.

                            EYECUP
                                      The rubber EyEcup, attached to your camera,
                                           helps you position your eye at the center of
                                            the viewfinder tor easy viewing of your sub-
                                              ject. lf you prefer not to use the eyecup,
                                           simply slip  it off the viewfinder.
View original page 9Page 10 · Read text
www.butkus.us
 6@t
                BATTERY
                                         Your camera uses one size J 6-volt battery
                                                  (supplied) to power the automatic exposure
                                                control and the motor. To install the battery,
                                              simply follow this procedure:
                                  NOTE: lf you depress the shutter release
                                       ].,:                                before installing the battery, inserting a bat-
                               LATCH             tery will cause the camera motor to run for
                                   FILM DOOR      about 3 seconds.
                                              1. Open the FILM DooR by depressing the
                                         LATCH and gently lowering the door. Don't
                                              force the door beyond the position shown.
                                                        2. Insert the 6-voLT BATTERy into the BATTERy
                                      COMPARTMENT at the front edge of the cam-  =ro'l                   era, above the FtLM coMpARTMENT. Insert the
                                       end with the ANGLED coRNER first. Push the
                                                  battery a// the way into the battery compart-
                                       ment and toward the right side of the com-
                                         partment until the NorcH in the battery  fits
                                           behind the HOLDTNG LUG in the camera. The
                                                  battery will be "locked" in place.
                                                    3. Close the film door by pressing  it against
                                               the camera body until it latches securely at
                                            both sides of the camera.
                                       The battery should be replaced when the
                                          motor takes five seconds or longer io eiect a
BATTERYCOMPARTMENT  FILMCOMPARTMENT        print, or runs erratically in eiecting a print.
                                                                                     lf you must replace the battery when the
                                     camera is loaded with film, change it in
                                     subdued light. Be sure that the film pack
                                                 stays  f irmly inserted in the film compartment.
                                   The battery will normally provide power to
                                        expose and eject ten or more film packs.
                                            To remove the battery, simply push  it firmly
                                           toward the back of the battery compartment
                                  and to the left to release the notch from
                                           behind the holding lug
View original page 10Page 11 · Read text
LOADING
THE CAMERA
Each oack of KoDAK Instant Print Film con-
tains a film cover and film for ten color
exposures. Load the film pack into the cam-                         .?era as follows:                                   *d
                                                         FLAP \-\
                                                -)\
                                       LATCH                    +'                                                 &r'ts                            t          % iI                  &


 t.-*!f                ;'*;rre*'/        FILM DOORE
1. Open the F|LM DooR by depressing the
LAToH and gently lowering the door. Don't
force the door beyond the position shown in
the illustration at the right.
2. Before loading the camera, check lo see
that the rollers contained within the film door
are clean. lf you see residue or any foreign
material on the rollers, see page 20 for
cleaning instructions.


IMPORTANT NOTE: After you have removed
the  f ilm pack from its carton, handle  it by the
edges only! (See illustration.) When you re-
move the protective wrapping, be careful not
to squeeze the pack or to apply pressure lo
the frlm cover, since this could possibly allow
light to fog the edges of the pictures (see
page 23). Grasp the rLnp and pull in the     3. Insert the film pack firmly into the film
direction shown by the arrows.                 compartment, thin end first, by lining up the
                                            orange srRrpE on the pack with the orange
                                              LoADTNG  r-true on the inside of the camera. Be
                                              sure that the film pack is fully seated in the
                                                       film comoartment.
View original page 11Page 12 · Read text
www.butkus.us


4. Close the film door firmly so that it latches      5. Press the sHUrrER RELEASE and allow  it to
securely at both sldes of the camera. The     return. The film cover will be automatically
EXposuRE couNTER will show the symbol     ejected through the EXtr sLor. Be sure not to
" E," indicating that the film cover is still in     obstruct the exit slot. Grasp the cover and
orace.                                  remove it. The exoosure counter will read
                                                    "1."


  NOTE: We do not recommend removing and
   reinserting a partially used film pack (or a full
  pack after the film cover has been ejected)
  because at least one of your pictures will be
   ruined. Also, when you reinsert the pack, the
  exDosure counter will be reset to E.
View original page 12Page 13 · Read text
FOCUSING
THE CAMERA
Set the camera lens for the correct camera-    Zooming Circle
to-subject distance by moving the Focus    Use the zooming circle to focus on your
coNTRoL, located on the front of the camera.     subject when you are photographing an adult
Never focus the camera by turning the lens     or a teen-ager who is 3/z to 25 feet from the
itse/f or you may damage the focusing     camera. Look at your subject through the
mecnantsm.                                         vrewf inder. At the same time, move the focus
  You can choose from three ways of focus-     control on the front of the camera with your
ing the camera-using the focus symbols,       left forefinger. You will see the size of the
using the distance scale, or using the zoom-    zooMrNG crRCLE change. Adjust the size of
inq circle.                                       the circle until your subject's head-from the
                                              chin to the crown ot the head-iusf fil/s the
                                                    inside of the circle. See the illustrations on
                                           page 9. This sets the lens for a sharp picture
                                                      of that person at that distance.
                                         The zooming circle is designed to set the
                                            focus correctly for average adult head size
                                                (teen-agers' heads included)-a measure-
                                           ment of approximately 9 inches from chin to
                                        crown of head. lt isn't designed for tocusing
                                           on babies, young children, pets, scenery, etc.
                                         Use the distance scale or focus symbols to
                                                      set the distance for these other subjects.
                                      NOTE:The zooming circle helps you to locus
                                                  accurately on your subject. lt's not intended
                                                          for framing or placing your subject's head in
                                                 the picture. After you have used the zooming
                                                    circle to focus accurately on your subject,
                                        you can often look through the viewfinder
                                           and shift the camera slightly to achieve more
Focus Symbols                                 pleasing composition. See the examples on
                                           page 18. Remember when you shift the cam-Move the focus control so that the |NDEX                                                  era after focusing, though, not to change theL|NE is opposite the correct symbol on the                                           distance between the camera and vourDrsrANcE scALE surrounding the lens. The                                                         su biect.                                           3y2close-upsymbol  ( I   ) indicatesthe tange
to 6 feet; the group symbol  ( f,fu ), 6 to 12 feet;
and the scene symbol ( [   ), beyond 12 teel.
Distance Scale
Estimate or measure the camera-to-sub.ject
distance: then move the focus control until
the rNDEX ltrue is opposite the correct dis-
tance on the DrsrANcE scALE surrounding the
lens. The scale indicates the distance in
either feet or meters.
View original page 13Page 14 · Read text
www.butkus.us

             VIEWFINDER
                                   Hold the camera up to your eye in a comfort-
                                      able position where you can see all four sides
                                           of the LUMrNous FRAME in the vtEWF|NDER. Be
                                       careful not to obstruct the ELEcrRtc EyE with
                                  your fingers or any object. The area that you
                             see within the luminous frame will be in-
                                  cluded in your picture.
                             The red Low-LtcHr stcNAL, located in the
                               upper right-hand corner of the viewfinder,
                         may appear as you partially depress the
                                      shutter release. This tells you that there is notINCORRECT                           enough light for proper exposure without
                                   using flash.
                               The zooMrNG crRCLE, which you see in the
                                    viewfinder, helps you to focus quickly and
                                       easily when taking pictures of people.


 CORRECT


                                                                    LOW-LIGHT SIGNAL


INCORRECT
View original page 14Page 15 · Read text
TAKING
PICTURES


 '1 . Set the focus control for the correct cam-    NOTE: Be sure not to deoress the shutter
era{o-subject distance.                        release again while the camera motor is
2. Check to see that the LTcHTEN/DARKEN      running, as this may cause the camera to
CoNTROL is in the center position. Most of     Jam.
your pictures will be taken with the control in     When the picture area of the print is fully
this position. (See page 14.,                    ejected from the camera, simply grasp the
                                                           print by its wide border and remove  it from the
                                                          slot before taking another picture.
                                     The exoosure counter will indicate the
                                         numbers of the exposures from 1 through 1 0
                                              as you take pictures.
                                                    Don't leave the prints in direct sunlight or
                                            on a hot surface during development or they
                                                          will become too dark.
                                  An image will begin to appear in about
                                    1 to 2 minutes under normal temoerature
                                                    conditions.

                                     IMPORTANT NOTICE: Handle the prints with
                                                   care, particularly during the first 10 minutes
                                                     after exposure. Hold them by the borders,
                                         and never bend, flex, cut, or attempt to fold3. Frame your subject within the luminous                                                Inem.frame in the viewfinder. Keep your fingers
away from the lens and the ELEcrRtc EyE.                 lf you don't want the print to be ejected
4. Hold the camera steady and partially     immediately after you take a picture, simply
depress the shutter release.  lf the low-light     keep the shutter release depressed. The print
signal doesn't appear in the viewfinder,       will not begin to develop until you allow the
slowly press the shutter release all the way      shutter release lo return and the camera
down and allow it to return. lf the signal    motor has ejected the print through the
appears and you take a picture,  it will proba-     camera exit slot.
bly be too dark.
5. The print will be automatically ejected from
the camera. Don't obstruct the exit slot with
your fingers or by resting the bottom of the
camera on any surface as the print is ejected.


10
View original page 15Page 17 · Read text
FLASH
PICTURES
 When the low-light signal in the viewfinder
 indicates that there isn't enough light for
 pictures without flash, use a flipflash to take
 flash pictures of subjects from 4 to 10 feet
 from the camera.
 1. Firmly insert a flipflash into the FLASH
 socKET on the top of the camera, with the
 bulbs facing forward and with one or more
 fresh bulbs at the top half of the flash array-
 the half farther from the camera. The flip-
 flash will "lock" on the camera: to remove  it.
 simplv "rock"  it to one side.

                                                 the picture. The color in the dot on the back
                                                 of the flipflash will disappear as the corre-
                                          sponding bulb flashes. The camera motor
                                                          will eject the print as you allow the shutter
                                                 release to return.
                                           You can remove and reinstall a flipflash at
                                             any time. When you replace a partially used
                                                          flipflash, make sure that the top half ol the
                                                   flash array (farther from the camera) con-
                                                      tains one or more unused bulbs.
                                        NOTE: The low-light signal will not appear in
                                                    the viewf inder when a  f lipflash is installed on
                                                 tne camera.
                                                   4. After you have taken {our flash pictures,
                                       remove the flipflash from the socket by
                                                 "rocking"  it to one side. Turn the flash over to
                                                  position fresh bulbs at the top half of the
                                                        aftay.
2. Check the distance and focus the camera            lf at any time a bulb should fail to flash,
carefully. Camera-to-subject distance is very     remove the array and install a new one. Then
important for proper flash exposure. lf you     take a flash picture.  lf the bulb flashes, the
are farther than 1 0 feet from your subject, it    camera is operating properly; refer to the
will appear too dark (underexposed); closer      /arnp manufacturer's warranty.  lf the bulb still
than 4 feet, your subject will be too light        fails to flash. the camera may require service:
(overexposed) and unsharp. The lighten/      see the warranty in this manual.  lf a bulb fails
darken control will have no effect on flash       to  f lash, any remaining good bulbs in that half
pictures outside the 4- to 1O-foot flipflash       of the array won't flash.
range. The orange bands on the distance                                     NOTE: To prevent wasting a flash, no bulbscale show the flash range in feet and meters.                                                       will flash if you press the shutter release
3. Frame your subject in the viewfinder. Hold    when the exposure counter is in the "8"
the camera steady and press the shutter      position or the "0" position (all pictures in a
release smoothly to flash the bulb and take      film pack have been exposed).


12
View original page 17Page 18 · Read text
www.butkus.us


                UNLOADING            ...THECAMERA

  Occasionally people's eyes appear red in      After you have taken and ejected the tenth
flash pictures. The red is produced by reflec-      picture in a film pack, the exposure counter
tions from the retina of the eye, and is most       will read "0." Open the film door and pull the
evident under the following conditions: (1)     FtLM-PACK EXTRACTOR for easv removal of the
when your subject is young, has a light     empty pack.
complexion, or has blue eyes, and (2) the
surroundings are dimly lighted. You can min-
imize these reflections by (1) turning on
additional room lights; (2) having your sub-
ject look directly at one of the room lights,
causing the pupils to contract; or (3) using a
KooAK Flipflash Extender, available from
photo dealers. See "Accessories," page 25.
  You can also use an electronic flash unit
with your camera, such as the KoDAK Instant
Flash, Model B (page 25), which extends the
flash range to 3/z lo 1 2 feet. Before usi ng any
electronic flash unit with your camera, read
the manufacturer's instructions to be sure
that the unit is designed so that  it will operate
properly with your camera and PR10 Film.
View original page 18Page 19 · Read text
LIGHTEN/DARKEN
CONTROL
 Under most conditions, you will be taking      too light, and subiects fartherthan 10feet will
 pictures with the lighten/darken control in     be too dark regardless of the control setting.
 the center position. However, the lightness or                                            Temperature Effects on Prints darkness of your prints can be affected by
                                      The recommended temperature range dur- such factors as temperature, and type and
 brightness of subiect. The lighten/darken     ing development of prints is 60 to 100'F
 control helps you to compensate for these     (16 to 38'C). At temperatures below 60'F
                                              (16'C), place prints in a warm place-an effects, especi ally in daylight picture-taking.
 After taking a picture,  if you want a lighter or      inside pocket, for example-as soon as they
 darker picture of the same subject in the     are eiected from the camera, and leave them
 same location without changing the lighting      there during development. Otherwise, prints
 or your position, adjust the control belore you    may appear too light. Be sure not to bend,
 take another picture. To take a lighter pic-       flex, or fold the orints.                                                                         It may be desirable at the upper end of ture, move the control toward LtGxreru; for a
 darker picture, move the control toward     the temperature range-approaching 100oF                                             (38'C)-to set the control toward LtcHrEN to oARKEN. The control does not automatically
 return to the center position after you take a     keep prints from becoming too dark.
 picture.                                            Don't leave prints in direct sunlight or on a
                                                 hot surface during development. Prints will NOTE: Setting the control toward LtcHrEN                                             probably be too dark when developed at will not help you to get a lighter picture  if the                                               temperatures above 1 00'F (38"C). red low-light signal appears in the viewfinder.                                        See your film instruction sheet for com-      lf you use the control to adjust lightness or                                                     plete intormation. darkness for f/ash pictures of subjects from 4
to 10 feet from the camera (with flipflash),     Subjects and Lighting Conditions
move the control a// the way (two marks)      In certain types of situations, you may judge
toward LtcHTEN or DARKEN. Remember,   if you     your subjects to be too light or too dark. For
take flash pictures of subjects outside the     example, if you are photographing a very
correct flash distance range (4 to 10 feet with       light subject in very dark surroundings, your
flipflash), subjects closer than 4 feet will be     main subject may be too light in your print. A
                                            dark subject in light surroundings may ap-
                                        pear too dark. A subiect in open shade
                                            (shaded from the sun but lighted by a large
                                             area of the sky) may appear too dark.
                                            Under such conditions the lighten/darken
                                                  control can help you achieve more pleasing
                                          exposure of your main subject. See the
                                          examples on page 18.


14
View original page 19Page 21 · Read text
TIPS FOR
BETTER PICTURES


                  Move in close to concentrate attention on
                        your main subiect.


                    Watch out for distracting backgrounds. Try
                       shooting from a different angle to use the
                           plain sky or the ground as a background.


16
View original page 21Page 22 · Read text
www.butkus.us


                 When taking flash pictures of groups, keep
                              a// subiects in the picture at approximately
                        the same distance from the flash.


                   Be sure that your sublect is evenly lighted-
                        not partially in bright sun and partially in the
                        shade.


To help "stop" action, photograph subiects
moving toward or away from you-not at a
right angle to the camera.


                                                                                17
View original page 22Page 23 · Read text
,                                             "&& *&i
                                                        li  I tln


After you have used the zooming circle to focus accurately for taking a picture of a person, you
can often achieve more pleasing composition by looking through the viewfinder and shifting the
camera slightly.


When you photograph a very light subject against a dark background, the camera exposure-con-
trol system may be "fooled" by the background and your subject may be too light in the picture.
Often you can move the lighten/darken control toward DARKEN before taking the picture to
achieve better exposure of your main subject.


When you photograph a very dark subject with a light background, try moving the lighten/darken
control toward LTcHTEN to get better exposure of your main subject.


18
View original page 23Page 24 · Read text
www.butkus.us
CARE & STORAGE  CARE OF YOUR
OF FILM & PRINTS CAMERA
Leaving your film and camera in a hot place     With proper care and handling, your camera
such as a sunny window or a closed car on a     will provide you with years of enjoyment.
warm day may lead to reduced picture qual-   When you're not taking pictures, protect
ity. lf you inadvertently leave the film and     your camera by carrying or storing  it in a
camera in a hot olace. allow them to cool to    case such as the KoDAK Instant Camera
normal temperature before taking any pic-     Case, Model D.
tures.  lf there  is a film pack inside the camera,       Clean the viewfinder lenses and the pic-
wait approximately one hour after the sur-     ture{aking lens by blowing away any dust or
face of the camera is cool to allow adequate       dirt. Then breathe on the lenses to form a
cooling of the film.                                mist, and gently wipe the mist away with a
  Also allow your film and camera to return      soft, clean, lintless cloth (or use a drop of
to normal temperature   if they have been left    KoDAK Lens Cleaner, or equivalent, and then
in a cold place such as a car trunk during    wipe with a clean, soft cloth). Don't use
winter.                                      solvents or solutions not designed for
  Store your developed prints in a cool, dry     cleaning camera lenses, and never use
place. Print colors will remain unchanged     chemically treated tissues intended for
longer if pictures are protected from long     eyegrasses.
exposure to bright light.                                         lf soecks of dust collect on the mirrors
  Each oicture is a sealed unit that contains     inside the camera (indicated by small dark
a caustic fluid. Never cut, trim, puncture,     shadowy spots in the same location on con-
tear, or separate the picture unit, since this     secutive prints), use a rubber syringe to blow
may allow some of the fluid to escape and      air into the lilm compartment (see page 23).
come into contact with skin or eyes. lf there is    Never attempt to clean the mirrors with a
any ot this fluid or other foreign material on      brush, a cloth, or any othet cleaning material!
the print surface, remove it with a damp        Store your camera and film away from heat
cloth. Any cloth containing  tluid should then    and direct sunlight-never in the glove com-
be discarded.                                   partment, on the rear-window shelf, or in any
                                            other "hot spot" in a car-since this may
                                             cause permanent damage to the film or the
                                         camera.  lf you store your camera for an
                                         extended period of time, it's a good idea to
                                         remove the batteries.
View original page 24Page 25 · Read text
Roller-Cleaning Procedure
Occasional  fluid leakage may cause small
deoosits on the camera roller surfaces.  lf this
should happen, clean the rollers as follows:
1. Open the Jilm door. The RoLLERS are
contained in the door.
2. Use a cotton swab or a small Diece of soft.
 lintless cloth moistened with clean water.
Don't use solvents or detergents.
 3. Wipe the contaminated area of the roller
surfaces with the swab or cloth (never with
your fingers!) until the surfaces are clean.
 Rotate the rollers by moving the GEAR at the
end of the rollers to position the foreign
material where it can be removed easily.
Dispose of the swab or cloth in a closed
 refuse container.
CAUTION: The residue cleaned from the
 roller surfaces is caustic. Observe the pre-
cautions outlined on page 19


     lf the rollers need cleaning when there is a
partially used pack of film in the camera, you
can clean them while the camera is loaded.
Open the Jilm door in subdued light or in the
shade, and keep the film pack firmly inserted
in the camera as you follow the procedure
described above.


20
View original page 25Page 30 · Read text
www.butkus.us
ACCESSORIES-See your photo dealer.
K9DAK Instant Flash, Model B-A compact, easy-to-use, automatic electronic flash unit
specially designed for use with your camera. Powered by 4 AA-size batteries (supplied),  it plugs
directly into the camera flash socket, and extends the  f lash range to 3% to 12 feet. The unit can
be used for  f ill-in flash outdoors. CAT. No. 11'1 3315
KoDAK Instant Camera Case, Model D-Made of water-resistant brown expanded vinyl, this
handsome plush-lined case protects your camera when you're not taking pictures  lt has an
adjustable shoulder strap, a nylon zipper which won't scratch your camera, and inside pockets
to hold prints and additional film as well as extra flash arrays.
                                                                                                                                                                                                                                                    f lipf lash toK9DAK Flipflash Extender-lncreases the distance between the camera lens and the
reduce red reflections in people's eyes, sometimes visible in flash pictures. The extender also
can be separated into two sections for off-camera flash to produce more pleasing shadow
effects in flash pictures. CAT. No. 149 3089
Copyprints and Enlargements-You can have copyprints, wallet-size prints, and enlargements
made from your original prints. This service is available through photo dealers
Photo Albums for Prints from KoDAK Instant Print Film-Handsome, durable albums provide an
excellent means of organizing and storing your prints
  KoDAK GALLERY Instant Photo Album, CAT. No.132 9879
  KoDAK Mini GnuLenv Instant Photo Album, CAT. No. 132 9796
  KoDAK Instant Flip Album, CAT. No. 132 9895

                                                                                                                                                                                                                                                                                                                           :.    ff your photo dealer doesn't have these items in stock, ask him to


                                                                                                                                               ,i,.^     '  $

                                                                                                                                                                                                                                                                          ll          I                          \   c./     l^P
                         ,1./.!"                    t                                                                                                                                it.   t'-,    fn    }A >)'t
  1t,V   lu'


                                                                                                                                                                                                                                                                        ii
View original page 30Related documents and language editions
KodakPDF
Kodak Colorburst 250 Instant Camera
User manual
26 pages · EnglishRead →
KodakPDF
Kodak Colorburst 350 Instant Camera
User manual
23 pages · EnglishRead →
KodakPDF
Kodak Colorburst 50 Instant Camera
User manual
27 pages · EnglishRead →
KodakPDF
Kodak EK100 Instant Camera
User manual
17 pages · EnglishRead →
KodakPDF
Kodak EK200 Instant Camera
User manual
20 pages · EnglishRead →
KodakPDF
Kodak EK4 Instant Camera
User manual
30 pages · EnglishRead →
KodakPDF
Kodak EK6 Instant Camera
User manual
31 pages · EnglishRead →
KodakPDF
Kodak Partytime Instant Camera
User manual
18 pages · EnglishRead →
KodakPDF
Kodak Pleaser Instant Camera
User manual
30 pages · EnglishRead →
KodakPDF
Kodak The Handle Instant Camera
User manual
30 pages · EnglishRead →
From the M. Butkus archive. Original publisher and archive notices are retained.
Check the model and edition against your equipment.
PDF verified 2026-10-10.