Film cameras
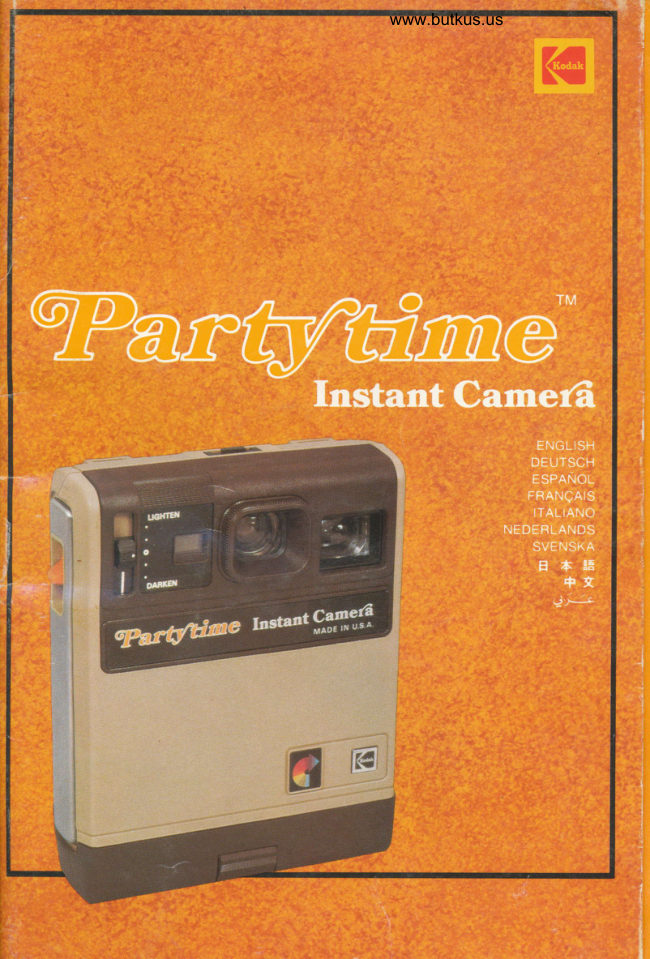
Kodak Partytime Instant Camera User manual
User manual for Kodak Partytime Instant Camera. 18 pages in English. Read the original PDF, download or print a copy without registration.
18 pagesEnglish2.5 MB PDF
Loading your manual…Open PDF directly
Document details
- Brand
- Kodak
- Model / document
- Kodak Partytime Instant Camera
- Document type
- User manual
- Language
- English
- Pages
- 18
- File size
- 2.5 MB
- Category
- Film cameras
- Document date
- Not specified in catalog
Search available document text
Find a term, then jump to its page in the original PDF. Image-only pages may not be searchable; check the PDF for exact wording and diagrams.
Page 4 · Read text
Venmo @mike-butkus-camera  Ph. 2083
PayPal Name  Lynn@butkus.org      www.PayPal.me/lynnbutkus
View original page 4
Page 5 · Read text
ENGLISH                                        color prints, consult your photo dealer.
                                                             -rg fl           . omcYour new Kooex Instant Camera follows
Kodak's high standards lor picture quality       Depress the rarcn (l,D) to the film-
and color reproduction. With proper care    compartment door and gently lower the
and handling) your camera can provide     door.
years of picture-taking  pleasure.           6 Make sure that the nor-r-rns (4,A) con-
  This insruction manual will help you     tained within the film-compartment door
achieve the most rewarding picture     are clean (see "Cleoning Comerq Rollers,"
results. Before you start to take instant    page 6).
pictures, pleose reod fhe inslruclions core-                                   Remove the protective wrapping lrom
fully ond follow lhem closely,                                       a film pack by holding the rr-ap (5'A) and-
Equipment subjtrt to minor appearance  changes.       pulling in the direction of the printed
                                               arrows.
Your new camera uses one 6-volt J-size    IMPORTANT: Hold the film pack by the
battery to power the camera motor and     edges only as shown in illustrations 5 and
the automatic exposure control.               6. Be careful not to apply pressure to the
NOTE: Ifyou depress the snurT rt RELEASE     area of the film cover when you remove
(l,H) before installing the battery, the     the protective wrapping.
camera motor will run lor about 3 seconds          'e, Line up the orange srr.ree (6,C) on the
when you insert the battery.                 film pack with the orange LoADING LINE
  Open the battery compartment bY     (6,D) on the inside of the camera. Then
pressing down on the lercs (2,D) on the     firmly slide the film pack oll the woy into
back of the camera. Gently lower the bat-     the film compartment and close the film-
tery-compartment door  ( 2,C).              compartment door. Be sure that the film
                                       pack is fully seated in the film compart-O Insert the battery into the BATTERY                                            ment.cHANNEL (3,A1 as shown in the diagram                                The pxposunE couNTER (2,8) on theinside the battery compartment. The bat-                                       back of the camera will show the symboltery's angled corner should be at the upper                                             El. which indicates that the film packright.                                          cover is still in place.
   Close the battery-comPartment door by                                              Depress the snu'rron RELEASE (l,H) onpressing it against the camera body until                                        the side of the camera and allow it toit securely snaps into place.                                                  return. The film pack cover will be auto-  Normally a battery should last for d                                             matically ejected through the ExIr sr-orminimum of 15 film packs. Replace the                                                (l,E) in the bottom of the 6lm-comPart-battery when the camera takes 5 seconds                                        ment door. Grasp the cover and remove it.or longer to eject a print or if the motor                                The exposunp couNTER will read "1."runs eriatically while ejecting a print.
    If you store your camera for an extend-    NOIE: We do not recommend removing
ed period of time, it is a good idea to    and rcinserting a partially used film pack
remove the battery.                           even a full pack whose cover has                                    -orbeen ejected-because at least one of the
                                                picture units will be ruined. Furthermore,Your Kooar Instant Camera uses Kooer                                   when such a pack is reinserted, the Bxpo-Instant Color Film PRl0 in film packs of
 10 picture units and a film cover. Each    suRE couNTER is reset to [.
color print you make will have an image                                                     ,€:rl
size of about 7 x 9 cm (25/sx3e/ts inches).       I Your subjects should be at least 1.2
To obtain copies and enlargements of your     metres (4 feet) from the camera. Anything


 2
View original page 5Page 6 · Read text
www.butkus.us

   closer than 1.2 metres will appear blurry    and the camera rnotor has eiected the
   in your picture.                               prinr through llrc r.rr r slor.
  O Check to see that the rrcnrrN/oenxoN                                  NOTE: Do                                                       depress                                                not                                                           the sr-tur.rsn  coNTRoL                            center position            (l,G) is in the                                           RELEASE                                                     again                                                               while                                                                        the camera                                                                        motor  is  between         "LIGHTEN,,                    and,,DedfEN.',                                                running.
  This settine should be the correct one for
                                                 couNTER (2,8) will  most of the pictures you will take (see   O The pxposlrRE
  "lighten/ Dorken Control," paqe 5).          advance lrom I throueh l0 to indicate the
                                   number of the picture you will next     plirre tlre carrrera up to your eye and      expose.   .-  hold ir in a comlorrable position io that                                                                                             ' Do nof leove prinfs in direct sunlight or  the rubber eyecup on tt.  vlE\vl-TNDER
  (2,A) rests against your l:rce and you can    on o hot surfoce during development!
  see through  ir. Hold the camera lo vour     An image will begin to appear in about
  eye so thar all lour corners of rhe vir:w_     30 seconds. Do nol ollempt to moke criticol
  FTNDER are visible when you look through     iudgment of print oppeqronce until devel_
   it; what you see in this position is wh"at    opment is sufticienfly complefe. A 2_ to
  will be in your picrure.                      3-minute wait is usually adequate under
   Hold the camera as shown in Illustra_      no.rmal temperaturc ..onditi,,ns. Judee
  tion 7 for a horizontal picture and as     prints in subdued light since the1.; rniv
 shown in Illustration 8 foi a vcrrical oic-     appear light irr very bright sunlishr.
  ture. Be sur.c lhal rhe r.ENS (l,C) and rhe    IMPORTANT: Durins the first l0 minutes
  ELEcrRrc Evr ( l,A) are not obstructed by      alter exposure, prints should be handled
 your fingers or arry object.                  with care. Hold them by the edges only.
 a Hold the camera steady and depress the     Al no time should you bend, flex, cuf, or
  sHtjllER nr:r.aese ( l,Hl.                    otlempt to fold them.
 O If the red caution lieht comes on in the    Coution Light
 viewfinder as you stirt to depress the    When you are taking pictures in low_lisht
 SHUTTER REr.EASE, hold the camera verv     conditions a red caution liqhr nill come
  still. Keep the srrurrsn r.er_oase Iullv     on in the top part of the vrewrrNuan (2,A)
 depressed unril rhe liqht goes off. lSee    as you start to depress the snu.rrun
 "Coution Lighr" below.)                          RELF;ASE. This means that your shutter will
 O Allow the snurr.er RET.EASE to return to     stay open lonqer. and any nl(,\.enlent of
 its original position. As it returns, a print      the camera or the subjecl will show up in
 will be auromarically ejected frorn 1fie     your plcture.
 camera throush the rxrr sr_or. (l,E). Be      To help keep the camera steady when
 sure that you do not obstruct the Exrr      the caution Iiqht comes on, brace lhe cam-
 sr-or with vour fingers or by resting the     era or yourself aeainst something as you
                                      take the picture. Hold the rnurr.* bottom of the camera on something  \,\,hile
 the print is beirrg ejected. When rhe motor     RELEAsE down until the light soes offindi_
 stops. grasp the print bv its lower border     cating that the shutter has closed.
and remove it lrom the sr_or BEFORE TAK_    NOTE: If you brace the camera. be sure
ING ANOTHER PICTURE.                      the exn sr-or is no( blocked when you let
    If you do not \\-ant the print to be     up on the 5HUTTER RELEASE and the pic_
ejected immediately after v,rx 12las 2 pi6_      ture starts to eject.
ture. simplv keep the sHU r rER RELEASE       Mounting the camera on a tripod will
depressed. The print utill not besin to     also help steady the camera. Screw the
develop until you allow rhe sHJrrnn      tripod connection into the .rnrpoo soc-KET
RELEASE to return to its orieinal position       (2,E), which is located on the side of the
View original page 6Page 7 · Read text
camera. Another alternative you have      ject distance is very important for correct
when the caution light comes on is to use      flash exposure. With ruprlasn make sure
 flash.                                      that your subject is no closer than 1.2
                                         metres (4 feet) or farther away than 2.7
Flosh Pictures                            metres (about 9 feet). If you are closer
Your camera features easy, rapid, flash     than 1.2 metres, your prints will appear
picture-taking with a flash array called      too light (overexposed) and unsharp. They
FLTeFLAsH (7,A). Each array has bulbs at       will appear too dark (underexposed) ifyou
each end which flash in sequence as you     are farther away than 2.7 metres. Flash
take pictures. When a bulb flashes, the     pictures can frequently be improved at
color in the dot on the back of the array     the far and close limits by using the
(above the number of the bulb) will disap-    ucnrpN/oenxEN coNTRoL. (See the sec-
pear. After you have used all the bulbs in     tion on "lighten/Dorken Control" for
the top half of the array, invert the array    more details.)
to position fresh bulbs at the top. Remove     3. Toke the piclure-Frame your subjectand reinstall an arcay at any time.                                          in the vrewprNoen. Hold the camera
IMPORTANT:  If a bulb fails to flash, any     steady and press the SHUTTER RELEASE
remaining good bulbs in that half of the     smoothly to flash a FLTeFLASH bulb and
array utill not fash. Remove the array and    make an exposure.
invert it to position fresh bulbs at the top      As the ssurreR RELEASE returns to its
or install a r,ew array. Then take a flash      original position, the camera motor will
picture . If the bulb flashes, the camera is      eject the print through the rxrr sr-or.
operating properly; refer to the lamp war-         After you have used all the bulbs in the
ranty to replace the defective array. If the     top half, remove the lr-rprresn from the
bulb still fails to flash, the camera may     camera. Turn the array over to position
require service.                                  fresh bulbs at the top.
  Sometimes people's eyes appear red in     You can remove and reinstall a
color flash pictures. The red is caused by     FLIPFLASH at any time. When you replace
reflections from the retina ofthe eye. This    a partially used rr-rprresn, however,
effect is especially evident in a young sub-     always make certain that there is at least
ject who has a light complexion and blue     one fresh bulb in the top halfofthe array.
eyes or when your subject is in dimly                                    NOTE: If you press the snurrun RELEAsElighted surroundings. To minimize these
reflections, you can turn on additional    when the ExposuRE couNTER shows I  or                                            "0," no bulb in the array will flash.room lights, have your subject look                                       Your camera will also work with somedirectly at one of the lights, causing the                                                 electronic flash units such as the Koonxpupils ofthe subject's eyes to close slightly,                                              Instant Flash, Model C. Read the flashor use FLTIFLAsH with a flipflash extender                                    manual carefully.(available from your photo dealer).
l.  Inserl o FupFrAsH-With the bulbs fac-     You may leave the Kooar Instant                                              Flash, Model C, on your camera all theing forward and with fresh bulbs at the top,                                                time. The caution light in the viewfinderinsert the FLTpFLAsH into the T.LASH socKET
(l,B) on the top of the camera. The       will continue to come on in low-lisht con-                                                                         page 3).FLTpFLASH will lock on the camera. To      ditions (see "Coution lighr" on                                        However, when you extend the flash toremove it, simply rock it to one side.                                             the "ON" position, the caution light will
NOTE: The caution light will not appear     not come on.
in the vrewrrNorn when a plrpplesH is
installed on the camera.                   Unlooding
2. Check lhe disfcnce-Camera-to-sub-      After you have taken the tenth picture in

4
View original page 7Page 8 · Read text
www.butkus.us

      a film pack, the Bxposunn couNrs,n will      there during the entire development time
       read "0." Open the film-compartment       or your prints may appear too light.  If this
       door and pull the FrLM pAcK EXTRAcToR      precaution is not enough, you may want
         (6,E) over to the right to remove the empty     to set the rtcHTeN,/oarKEN coNTRoL
         film pack.                            "DARKEN" and reshoot the pic-
                                                                  l:;',j.o         Lighr" .,2 Dorken Conlrol
ll     The light or dark characteristic of prints       Eftects of lighting: Under certain condi-       produced by this camera can be affected       tions, you may judge your subjects to be
       by such factors as temperature, type and      too light or too dark. For example, a very
        brightness ofa subject, type and brightness       light subject against a dark background
       of the subject background, etc. The    may appear too light in a print and, con-
        rrcrrrrN/oenxEN coNTRoL (l,G) can help      versely, a dark subject against a lightI      you to compensate for the effects ofthese     background may appear too dark. A dark
         variables, especially when taking daylight      subject in open shade (shaded from the
                                                                                                      sky)ll        prctures.                               sun but lighted by a large area of                                     may also appear too dark.          After taking a picture, if you want a                                                  As you begin to recognize these types of         lighter or darker picture of the same sub-                                                            situations, you can sometimes adjust the         ject in the same location without changing                                                  rrcrrrrN/nanrEN coNTRoL before makins       the lighting or your position, adjust the                                       a trial exposure. When photographing a      Lrcnret/oenKEN coNTRor_ and take                                                       bright subject in dark surroundings, move       another picture. To obtain a lighter pic-                                               the coNrnor toward "DARKEN"; and         ture, move the r-tcnrBN/uARKEN coNTRoL                                                    with a dark subject in light surroundings,       toward "LIGHTEN"; to take a darker                                        move it toward "LIGHTEN."         picture, move it toward "DARKEN.',
                                           Core of Comero, Film, ond Prinfs      NOTE: If you use the r-rcnrEN/DARKEN                                       a Store your camera and film away from      coNTRoL,              remember                             to check                                                  it before                                               heat and direct sunlight-never in the      each           exposure-the                       coNTRoL                               does                                           nol                                                    rear window of the car or in any other        return automatically to the center position                                                 area of concentrated  heat. Excessive heat         after you take a picture.                                       may cavse permanent damage to the film or
            . When you use the lrcnrpt/DARKEN      the camera.
      coNTRoL                    for                      flash pictures                                   ofsubjects                                       from                                       e Keep prints in a cool, dry place. Print                 merres        1.2 to 2.7                                      feet) from                                              the                       (4 to 9                                                       colors will remain unchanged longer if       camera, move the coNTROr_ as far as it will                                                        prints are stored in the dark (in a photo       go toward "LIGHTEN" or "DARKEN".                                              album, for example).
         Efiecls of lemperolure: Best picture results                                   O Each picture is a sealed unit that con-      are obtained when the temperature  is                                                             tains a caustic fluid. Never cul, lrim, punc-      between 16o and 3B"C (60' and 100'F).                                                        lure, leor, or seporole the piclure unil,
     a At the higher temperatures in this      since this may allow some of the fluid to
      range, it may be desirable to set the      escape and come into contact with skin or
      r-rcrrrr'N/oaRKEN coNTRoL toward      eyes. If there is any of this fluid or other
     "LIGHTEN" to get prints that are not     foreign matter on the print surface,
       too dark.                               remove it with a damp cloth. Any cloth
     O When the temperature is below l6oC,      containing fluid should then be discarded
       place the prints in a warm place (inside      in a closed container.
      your coat, for example) os soon os lhey       Cli i.-',      ii
      ore eiecled from lhe comero. (Be careful    O Each picture unit contains a caustic
       not to bend them.) You should leave them        fluid.
View original page 8Page 9 · Read text
O Normally. the {luid will not appear. But    Cleoning Comerq Rollers
if it does, an alkali burn may result from     Occasional fluid leakage may cause small
direct contact. Keep the fluid arvay lrom     deoosits on the camera's roller surfaces. If
eves. mouth. and skin. Avoid fluid contact      this should happen, clean the rollers as
with labrics. carpeting, and furniture to      follows. (You may do this even while there
prevent staining.                                     is film in the camera.)
O In case of fluid contact with eyes, imme-    o Open the film-compartment door. The
diatelv flush the eyes with plentv of water     RoLr-ERs (4,A) are contained in the door.
and set medical attention.  I1' the fluid    O IJse a cotton swab or a small piece of
comes in contact with the mouth or skin,      soft. lintless cloth moistened with clean
thoroughly wash the affected areas at     water. Do nof use solvenls or detergenls.
once.                            o Wipe the contaminated areas of the
Cleoning Comero Lenses                      RoLLr.rRS with the swab or cloth until the
o Clean the vrrlwRtNonn lenses and the      surf;aces are clean. Rotate the nolI-rrls by
picture-taking r.cNs by blorvinq a\\ay any     moving the ceaR (4,B) at the end of the
dust or dirt. Then breathe on the lenses to     RoLLFTRS to position any loreign matter
form a mist and gently wipe the mist away     where  it can be more easily removed. Dis-
with a soft, clean. lintless cloth rnoistened      pose ofthe swab or cloth in a closed refuse
with Kooar Lens Cleaner or equivalent.      container.
o If soecks of dust collect on the mirrors
inside the camera, use a rubber syringe to
blow air into the film compartment. Never    CAUTION: The residue cleaned lrom the
otfempt lo cleon the mirrors with o brush,      RoI-LERS is caustic. Be sure to observe the
clolh, or ony olher cleoning moteriol!         orccautions outlined above.
View original page 9Page 11 · Read text
Smoll dork (shodowy)               Dusi on mirrors wilhin             Wilh comero unlooded,
spots which oppeor in               comero.                            use o rubber syringe lo
some locolion on                                                blow ony dusl from
conseculive prinls.                                                            inside comero.
Flosh doesn'l go oft.             o. Flipflosh nol iurned over      o. Turn flipflosh over io
                                     ofter using oll bulbs in top          position fresh bulbs ot
                                        holf of orroy.                    top (poge 4).
                                b. Flosh not firmly inserled     b. Insert flipflosh
                                         in flosh socket.                     correcily.
Comero motor runs very           Boflery weok or deod.                       lf print is portiolly
slowly or slops when                                                         eiected, pull print from
eieciing print (or film                                                               slof. Reploce botiery.
coverl.
Comero mol,or runs bui          Comero ottempling to eiect      Open film door in
prinl (or film cover) isn't         two prinfs ot lhe some          subdued light. Remove
ejected.                  time.                                 film pock ond pull top
                                                                                  print from pock. Reinsert
                                                                                  film pock in film
                                                                    comporlmenl. Print pulled
                                                                from pock ond top
                                                       .                          piclure remoining in pock                                                                                      will be sooiled.
View original page 11Page 12 · Read text
www.butkus.us

 Bevor Sie die ersten Sofortbilder mit Ihrer                                   DEUTSCH
 neuen Koonr Instant Camera machen.                                                 bild hat eine Bilderdfie von ca. 7 x 9 cm. lesen Sie bitte diese Anleituns aufmerk-                                  Wenden Sie sich bitt. *eget-t Kopien und sam durch. Sie werden sehen, wie einlach                                          Vergrri8erungen Ihrer Bilder an Ihren es ist, mit dieser Camera farbbrillante                                             Fotohdndler. Solortbilder aufzunehmen. Einlach und
 problemlos. In Farben, die Sie verbli-iffen        F!'
 werden. Mit einer Camera, mit der das   G Driicken Sie den xNorr (l,D) und
 Fotografieren SpaB macht.                   offnen Sie die Klappe fiir das Filmfach.
  Aber wie eesagt: Bitte lesen Sie die      Achten Sie darauf, daB die RoLLEN
 Bedienungsanleitung  sorg*iltig durch und     (4,A) in der Klappe fiir das Filmfach
 beherzigen Sie die RatschlSge. Dann wer-     sauber sind (s. "Reinigen der Cqmerorol-
 den Ihre Bilder ein voller Erfolg.              len", Seite l3).
 Konstruktionsdnderungen wdhrend der Ferrigung vorbchalten-                                                               ' Fassen Sie die Filmkassette an den Sei-
                                         ten an und ciffnen Sie die Schutzfolie
                                        durch Ziehen des rerzes (5,A) in Rich- Fiir den Camera-Motor und die automa-                                         tung der aulgedruckten Pfeile.
 tische Belichtungssteuerung benritigen Sie
 eine 6V Batterie, size-J.                   WICHTIG: Halten Sie die Filmkassettc nur
                                    on den Schmolseilen, wie in den Abb. 5 H|NWE|S: Wurde der ausrosrn (l,H)                                    und 6 gezeigt. Vermeiden Sie Druck auf bereits vor Einlegen der Batterie gedriickt,                                            das Filmdeckblatt, wenn Sie die Schutzfo- so lduft der Camera-Motor nach dem                                                            lie ciffnen.
 Einleeen der Batterie ca. 3 Sekunden.                                o Der orange sTREIFEN (6,C) auf der Kas- t Ztm Offnen des Batteriefaches ziehen                                              sette mu8 mit dem oransen STRETFEN
 Sie die vErrrBcELUNc (2,D) an der Cam-     (6,D) in der Camera iibeieinstimmen.era-Riickwand nach unten und <iffnen Sie                                        Schieben Sie die Kassette bis zum An-den Deckel vorsichtig (2,C).                                              schlog in das Filmfach und schlieBen Sie
 ' Legen Sie die Batterie so in das nlrrs-      die Klappe.
 RTEFAcH (3,A), daB die abgeschriigte Ecke      Der srLnzAHrER (2,81 auf der Came-
nach rechts oben zeigt.                           rariickseite zeigt jetzt das Symbol B. Das
 ' SchlieBen Sie das Batteriefach durch      bedeutet. da0 sich das Filmdeckblatt noch
Andriicken des Deckels an die Camera,      in der Kassette befindet.
bis er einrastet.                                Driicken Sie kurz den eusr.osen (l,H)
   Normalerweise  reicht eine Batterie fiir    an der Seite der Camera. und lassen Sie
mindestens l5 Filmkassetten. Erneuern      ihn in die Ausgangsstellung zuriickgehen.
Sie die Bat(erie, wenn der Bildtransport     Dadurch wird das Filmdeckblatt durch
aus der Camera 5 Sekunden oder llnser    DEN scHlrrz rirn oE,N nrr-lausrntrr (l,E)
dauert, oder wenn der Motor wihrend des    an der (Jnterseite der Klappe fiir das
Transports langsamer oder unregelmiBig      Filmfach transportiert, Entfernen Sie das
liiuft.                                          Filmdeckblatt. Der enozriF{r-rn zeigt jetzt                                                           ((I".  Bewahren Sie Ihre Camera einiee Zeit
auL ohne zu lotosrafieren. sollten Si. di.     H|NWE|S: Wir empfehlen nicht, eine Kas-Batterie herausnehmen.                                                   sette ohne das Filmdeckblatt aus der Ca-
                                     mera herauszunehmen, da dann die ober-
Fiir Ihre Koo.lx Instant Camera benci-     sten Bildeinheiten Lichteinlall erhalten.
tigen Sie Kooer Instant Color Film PRl0    AuBerdem steht nach dem Wiedereinle-
in Kassetten mit l0 Bildeinheiten und    gen einer teilbelichteten Kassette der
einem Lichtschutz-Deckblatt. Jedes Farb-      srloz.liHrpn auf [.
View original page 12Page 13 · Read text
Togeslichtoufnohmen                     HINWEIS: Driicken Sie den.qusr-osrn nicht
o Halten Sie einen Mindestabstand Ca-    hemnter, so lange noch der Camera-
mera/Motiv von 1,2 m ein; weniger als    Motor lduft.
1,2 m ergibt unscharfe Bilder.           G Der srrozAnr-en (2,B) zeigt Ihnen von
a Uberzeugen Sie sich, daB die nrrrl     1-10 jeweils die Nummer der Ndchsten
DUNKEL-srEUar<uNc (l,G) in der Mitte    Aulhahme an.
zwischen "LIGHTEN" und "DARKEN"    € Lossen Sie dos Bild wiihrend der Ent-
steht. Dies ist in den meisten Fzillen die     wicklung nicht in direkter Sonne oder on
richtige Einstellung (s. "Hell/Dunkel-     einem heissen Plotz liegen.
Sleuerung" Seite l2).                            In ca. 30 Sekunden erscheinen die Bild-
o Nehmen Sie die Camera ans Auge und     konturen. Beurleilen Sie die Bildquoliiiit
halten Sie sie so, daB die eucnNpruscner-       ersl, wenn die Entwicklung viillig obge-
(2,A) arn Kopf anliegt und Sie das     schlossen isl. Bei normaler Temperatur
sucHERBTLD sanz i-ibersehen. Achten Sie     reichen 2 bis 3 Minuten aus. Priifen Sie
dabei darauf, daB Sie alle vier Ecken des      die Bilder bei gediimpftem Licht; bei Son-
srrcHERS sehen. Was jetzt sichtbar ist, wird     nenschein z.B. kcinnten sie zu hell er-
auch auf dem Bild zu sehen sein. Abb. 7     scheinen.
zeigt die Haltung fiir Aufnahmen im    WICHTIG: Wiihrend der ersten 10 Minu-
Querformat, und Abb. 8 {iir Aufnahmen     ten nach der Belichtung sollten die Bilder
im Hochformat. Achten Sie darauf, daB     vorsichtig behandelt werden. Halten sie
oBJEKTTv (l,C) und BELTcHTUNGSMESSER      diese nur am Rand. Bilder nie knicken,
(l,A) nicht durch Finger abgedeckt sind.     biegen, zuschneiden, oder folten.
o Halten Sie die Camera ruhig und                                        Wornlicht
driicken Sie den eusr-osEn  ( l,H) herunter.    Bei Aufnahmen mit unzureichenden
 . Wenn bei Beginn des Driickens auf den     Lichtverhiltnissen  erscheint ein rotes
euslosnn das rote Warnlicht im Sucher    Warnlicht im oberen Teil des sucHERS
aufleuchtet, halten Sie die Camera ganz     (2,A), sobald der ausr-osrn teilweise
ruhig und halten den ausrosEr< bis zum     heruntergedriickt wird. Das bedeutet, daB
Verloschen des Lichtes ganz herunter-     der VerschluB ldnger offen bleibt; Bewe-
gedriickt (siehe "Wornlicht").             gungen der Camera oder des Motivs
t" Nach dem Loslassen des ausrostns      fiihren dann zu unscharfen Bildcrn. Leh-
                                     nen sie sich oder die Camera fest an, umtransportiert die Camera automatisch ein
Bild durch DEN scHLrrz pirn oEN BTLDAUS-      sie bei der Aufnahme ganz ruhig zu hal-
rnrrr  ( l,E). Achten Sie darauf, daB dieser     ten. Halten Sie den Ausldser bis zum
Schlitz nicht durch Finger abgedeckt     Verl6schen des Lichtes heruntergedriickt.
wird, oder die Camera auf einer lJnterlage      Erst dann schlieBt sich der VerschluB und
steht, wihrend das Bild transportiert wird.    der Bildtransport beginnt. Achten Sie
Wenn das Bild ganz heraustransporliert     jedoch dabei darauf. da[J lerv scsrrrz rijn
ist. fassen Sie es nur am unteren Bildrand    DEN BrLDAUSTnrrr frei bleibt.
                                   (Jm eine ruhige Camerahaltung zuan und nehmen es ab, BEVOR SIE EINE
NEUE AUFNAHME MACHEN.                  erreichen, kcinnen Sie Ihre Camera auch
  Mochten Sie nicht, da8 das Bild sofort    aufeinem Stativ belestigen. Schrauben Sie
nach der Aufnahme heraustransportiert    das Kugelgelenk des Stativs in das
wird. brauchen Sie nur den lusr-osnt     srATrvcEwrNDn (2,E) an der Cameraseite.
gedriickt zu halten. Erst wenn Sie den    Eine weitere Moglichkeit ist das Blitzen,
eusr-cjspn loslassen, wird das Bild aus der     sobald das Warnlicht aufleuchtet.
Camera transportiert und die Entwick-    Blifzoufnohmen
lung beginnt.                                 Ihre Camera ist liir oroblemloses Blitzen

l0
View original page 13Page 14 · Read text
www.butkus.us

 mit einem Blitzrnagazin, z.B. r.r-rppLasH       sich nicht nhher als 1,2 m und nicht weiter
 (7,A) eingerichtet. Das Blitzmagazin      als 2,7 m von der Camera entfernt befin-
 besitzt in jeder Halfte Blitzlampen, die bei     den. (Jnter 1,2 m wird das Bild zu hell
 Blitzaufnahmen der Reihe nach blitzen.       (iiberbelichter ) und unscharf. Uber 2,7 m
 Nach dem Ztinden der Blitzlampe wird     wird es zu dunkel (unterbelichtet). Hiiufig
 der Farbpunkt auf der Rijckseire des      kcinnen Blitzaufnahnrcn im Grenzbereich
 Blitzmagazins iiber der Numerierung des     bei 1,2 m und 2,7 m noch durch die
 Blitzes dunkel. Sind alle Blitzlamoen in      Betzitigung der nar-llourKF:,LsTEUERUNG
 der ,rberen Hdlfte des Masazins ver-     verbessert werde. Siehe hierzu aucl-r:
 braucht, ziehen Sie dieses heraus und dre-      "Hell/ Dunkel-Sleuerung".
 hen es liir weitere Blitzaufnahmen um.                                         3. Blitzoufnohme-Visieren Sie Ihr
 WICHTIG: Wenn eine Blitzlampe nicht     Motiv im sucHER an, halten Sie die Ca-
 ziindet, werden auch die restlichen Blifz-     mera ruhig und lcisen Sie gleichmziBig aus.
 lompen der betrefienden Hiilfle nichl      Wlhrend der ausrosen in seine Aus-
 ziinden. Drehen Sie das Blitzmasazin um.     gangsstellung zurilckeeht, transportiert
 so dafi sich neue Lampen in dir oberen     die Camera das Bild durch ueN scHlrrz
 Hiilfte befinden, oder stecken Sie ein neues      FiJR DEN BILDAUSTRITT.
 Blitzmaeazin auf. Wenn bei der nichsten       Sind alle Blitzlampen in der oberen
 Blitzaufnahme der Blitz ziindet, ist die      Hilfte verbraucht, nehmen Sie das Blitz-
 Camera in Ordnung. Sollte das neu auf-     magazin ab und drehen es um; die unee-
 gesteckte Blitzmagazin wiederum versa-     brauchten Blitzlampen belinden sich wle-
 gen, ist eine Uberpriifung der Camera    derum in der oberen Hdlfte.
 angebracht.                                     Sie kcinnen jederzeit das sLrrzr4acazrN
  Bei Blitzaufnahmen von Personen    abnehmen und wieder auGtecken. Wenn
 kcinnen die Augen rot erscheinen. Die      Sie ein teilweise gebrauchtes Blitzmagazin
 [Jrsache ist die Reflexion der roten Netz-      aufstecken, iiberzeugen Sie sich, da8 sich
 haut. Dieser Effekt zeiet sich besonders     mindestens noch eine ungebrauchte  Blitz-
bei Menschen mit hellem Teint und     lampe in der oberen HZillie beflndet.
 blauen Augen, oder bei geringer Umge-
 bungshelligkeit. Um diese Rcflexion zu     HINWEIS: Wenn der srr-ozrinr-pn auf                                          oder aul-"0" steht und Sie lcisen bei auf- verringern, schalten Sie die volle Raum-
beleuchtung ein und lassen die Personen      gestecktem Blitzmagazin aus, ziindet der                                                  Blitz nicht. in die Lampe sehen, damit sich die Pupil-                                              Ihre Camera ist auch ftir einiee Elek-len etwas schlieBen, oder verwenden Sie
                                                 tronenbli(zserzire geeignet. z.B. fiir dasden Kooax Flipflash Extender, erhiiltlich                              Kooax Instant Blitzgerdt, Modell C.bei Ihrem Fotohd'ndler.
                                            Lesen Sie die Bedienungsanleitune genau
 l.  Fttpnasx oufslecken-Stecken Sie das     durch.
Blitzmaeazin in den socxer- (l,B) auf der       Sie kdnnen das Blitzgerit, Modell C,
Cameraoberseite. Die unsebrauchten      stiindig an der Camera belassen. Das
Blitzlampen miissen sich dabei in der     Warnlicht wird dann auch weiterhin bei
oberen Htilfte befinden und nach vorn zei-     unzureichenden Lichtverh6ltnissen im
gen. Zum Abnehmen ziehen Sie das Blitz-     Sucher erscheinen (siehe "Wornlichl",
magazin einfach seitlich ab.                  Seite l0); das Warnlicht erscheint jedoch
HINWEIS: Bei aufgestecktem Blitzmagazin      nicht, wenn das Blitzgerit eingeschaltet
erschcint das Warnlicht nicht im sucHER.          ist.
2. Enlfernun g pfijlen-Zur  richtieen     Film herqusnehmen
Ausleuchtung des Motivs ist dessen    Nach der 10. Aulnahme steht der nrro-
Abstand zur Camera sehr wichtis. Es soll     zAsr-En auf "0". Offnen Sie die Klappe

                                                                                                                           ll
View original page 14Page 15 · Read text
des Filmfachs und ziehen Sie den     Voraussetzungen kann Ihr Motiv zu hell
AUSWERFER (6,E) nach rechts und entneh-      oder zu dunkel wiedergegeben werden. So
men Sie die leere Kassette.                    erscheint z.B. ein sehr helles Motiv vor
                                    dunklem Hintergrund auf dem Bild zui-lell/ F',rnkct-5te,;o   "i,tl                                                   hell, und umgekehrt ein dunkles MotivEine hellere oder dunklere Bildwieder-                                        vor hellem Hintergrund zu dunkel. Eingabe kann durch verschiedene Faktoren,
wie Temperatur, Art und Helligkeit des     dunkles Motiv im offenen Schatten (im                                          Schatten der Sonne, jedoch unter lreiemMotivs oder Hintergrundes, beeinfluBt                                   Himmel) kann ebenfalls zu dunkel wie-werden. Die nalr-louNKEL-sTEUERUNc
(l,G! erm6glicht Ihnen, besonders bei     dergegeben werden.                                          Unter diesen Voraussetzungen kcinnenTageslichtaufnahmen, einen Ausgleich.                                         Sie die Belichtung mit dem Korrektur-6 Wiinschen Sie vom gleichen Motiv,                                            schieber steuern. Fotografieren Sie ein
ohne Anderung der Beleuchtung oder des                                                helles Motiv in dunkler IJmgebung, so
Hintergrundes,  ein helleres Bild, so stellen     stellen Sie auf "DARKEN", und bei
Sie den Schieber der nor-llruN<er--     einem dunklen Motiv in heller Umgebung
sTEUERUNG in Richtune "LIGHTEN"       stellen Sie auf "LIGHTEN".(hell). Soll die nichste Aulnahme dunkler                                               Lt      :            ';i r!           "ilm und Bildwerden, verstellen Sie zu "DARKEN"
(dunkel).                                Bewahren Sie Camera und Film nicht in
                                              der Sonne oder an einem sonstigen heiBen
HfNWElS: Wenn Sie mit der wr.r,t-l      Platz auf. Legen Sie sie niemols in das
DUNKEL-srEUEnuNc arbeiten. achten Sie                                           Handschuhfach,  unter das Heckfenster, in
stets auf deren Stellung, da sich der     den Kofferraum oder an andere sehr heiBe
scHTEBER nichl automatisch auf die Mitte                                                   Stellen im Wagen. Ein UbermaB anHitze
-Normalstellung-zuriickstellt.             kann den Film zerstciren und die Camerao Korrigieren Sie Blitzaufnahmen zwi-       bleibend beschidigen.
schen 1,2 und 2,7 m, so stellen Sie den                                          Lagern Sie die Bilder an einem kiihlen,
scHTEBER jeweils bis zum Anschlag unter                                             trockenen Platz. Farbbilder halten liinger,
"DARKEN" oder "LIGHTEN".         wenn Sie diese dunkel, z.B. in einem
Temperofureinfl uB: Beste Bildergebnisse     Album, aufheben.
erhalten Sie bei Temperaturen zwischen     * Jede Bildeinheit des Filmpacks enthiilt16' und 3B'C.                                            eine alkalische Fltissigkeit. Dqs Bild sollte
  Bei hciheren Temperaturen kann es     doher nie ouf- oder zugeschnillen, ouf-
erforderlich werden, den scHIEnrn auf     gerissen, gelocht oder von der Folie ouf
"LIGHTEN" zu stellen, um keine zu     der Riickseile gelrennl werden. Dadurch
dunklen Bilder zu erhalten.                     ktjnnte die Fltissigkeit auf die Haut oder
.- Liegen die Temperaturen unter 16oC,      in die Augen gelangen. Sollte die Bildo-
sollten Sie die Bilder zur Entwicklung       berfliiche irgendwelche  Flilssigkeiten  auf-
soforl warm aufbewahren, z.B. in der      weisen, wischen Sie diese mit einem feuch-
                                           ten Tuch ab, das Sie dann in einen ge-Innentasche des Mantels oder der Jacke.
(Vorsicht, nicht knicken!) Die Bilder soll-      schlossenen Abfallbehiilter werfen.
ten wihrend der vollen Entwicklungszeit    VORSICHT
in diesem Temperaturbereich bleiben, da     o Jede Bildeinheit des Filmpacks enthdlt
sie sonst zu hell werden k6nnten. Sollte     eine alkalische Fliissigkeit, die normaler-
das Bild trotzdem zu hell geworden sein,      weise nicht austritt. Geschieht das im Aus-
wiederholen Sie die Aufnahme mit Stel-                                           nahmefall, kann bei direktem Kontakt
lung auf "DARKEN".                      eine Verzitzung auftreten. Kontakt der
Helligkeitskonlrosle: IJnter bestimmten       Fliissigkeit mit Augen, Mund und Haut

t2
View original page 15Page 16 · Read text
www.butkus.us

vermeiden. Von Textilien und Mcibeln     kcinnen zu Ablagerungen auf den
fernhalten, um Flecken zu verhindern.       Camerarollen filhren. Sie kcinnen die
O Bei Kontakt mit den Ausen sofort mit     Camerarollen folgendermaf3en reinigen  :
viel Wasser spiilen und Arzi hinzuziehen.     c Offnen Sie die Klappe liir das Filmfach
In anderen Fdllen sorgfiltig mit Wasser      bei gediimpftem Licht. Die nor-rrx (4,A)
waschen.                                    befinden sich in der KLAr,r,E.
Reinigen der Comerolinsen            O HINWEIS: Ein eingelegter Film erhiilt
o Reinigen Sie den sucHER und das     beim Offnen Licht, so daB zumindest ein
oBJEKTTv durch Abblasen von Staub oder      Bild unbrauchbar wird.
Schmutz. Hauchen Sie die Linse an und     € Verwenden Sie ein mit Wasser anse-wischen Sie sorglliltig mit einem weichen,                                                 leuchtetes Wattestdbchen oder ein kleinis,
nicht fasernden Tuch, das leicht mit      nicht faserndes Tuch. Benulzen Sie kein
"Kooex Lens Cleaner" oder einem 6hnli-       Liisungs- oder Reinigungsmittel.chen Mittel angefeuchtet wurde, dariiber.
                               O Wischen Sie die Ablagerungen von den  Staub auf den Spiegeln im Camerain-                                    RoLLEN, wihrend Sie diese mit demnern entfernen Sie durch Ausblasen des                                  ZAHNRAD (4,B) drehen. Werfen Sie denFilmfachs mit Hilfe einer Gummispritze.                                        Wattestab oder das Tuch in einen se-Verwenden Sie hierzu nie einen Pensel,                                               schlossenen Ablallbehzilterein Tuch oder ein onderes Reinigungsmil-
fel.                                  ACHTUNG: Die von den nor-r-rN entfern-
Feiniqen der Comerclrolle^                  ten Chemikalienreste  sind dtzend. Beach-
Gelegentlich austretende  Fliissigkeiten      ten Sie die vorgegebenen Hinweise.


                                                                                         13
View original page 16Page 18 · Read text
www.butkus.us


 Helle Flecken, die sich im            Schmutzflecken  ouf den             Rollen reinigen (S. l3)
 Abstond von co. 3 cm                Rollen
 wiederholen

 Kleine dunkle Punkte (wie           Sloub ouf den Spiegeln in        Ohne eingelegte
 Schoilen), die ebenfolls            der Comero                           Filmkossette durch dos
 hinlereinonder ouf den                                                     Kossetfenfoch dos
 Bildern erscheinen                                                  Comeroinnere mil einer
                                                                   Gummisprifze ousblosen

 Blitz ziindet nicht                  o. Flipflosh noch Verbrouch        o. Flipflosh umslecken,
                                           oller Blilzlompen in der            domit sich neue Lompen
                                 oberen Hcilfte nicht gedreht        oben befinden (S. I I )
                                b. Blitzmogozin nichi              b. Blitzmogozin richtig
                                             richtig oufgesleckf                    oufsiecken

Beim Tronsport des Bildes             Botlerie schwoch oder leer            Bild oder Deckbloft gonz
oder Filmdeckblotts l6uft                                                obziehen, Boflerie
der Comeromotor sehr                                                      erneue rn
longsom oder bleibt
slehen

Comero-Molor lduft, Bild            Die Comero mtichte 2                Botterie enifernen  (folls
(oder Filmdeckblott) wird              Bilder gleichzeiiig                      nicht bereits geschehen)
iedoch nicht ous der                  lronsporlieren                   Comero im gedcimpften
Comero ironsporlierl                                                                Licht <iftnen und die
                                                                            Kossette eninehmen, dos
                                                                                  Bild von Hond
                                                                     herousnehmen, dos
                                                                                  niichsie Bild wird jedoch
                                                                    durch Iichteinfoll
                                                                                      verschleiert


                                                                                          t5
View original page 18Related documents and language editions
KodakPDF
Kodak Colorburst 250 Instant Camera
User manual
26 pages · EnglishRead →
KodakPDF
Kodak Colorburst 350 Instant Camera
User manual
23 pages · EnglishRead →
KodakPDF
Kodak Colorburst 50 Instant Camera
User manual
27 pages · EnglishRead →
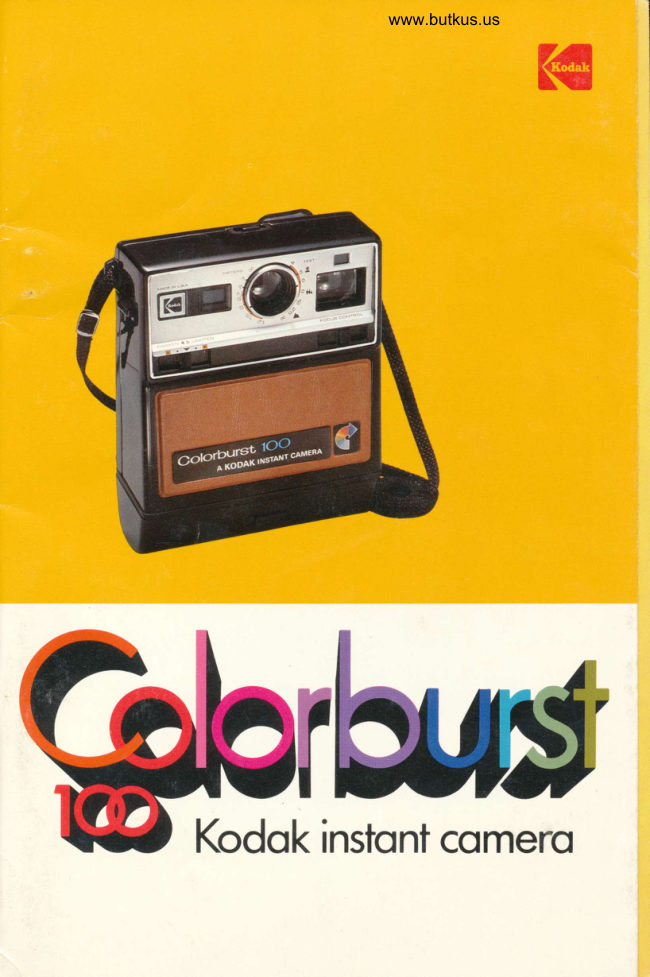
KodakPDF
Kodak Colorbust 100 Instant Camera
User manual
30 pages · EnglishRead →
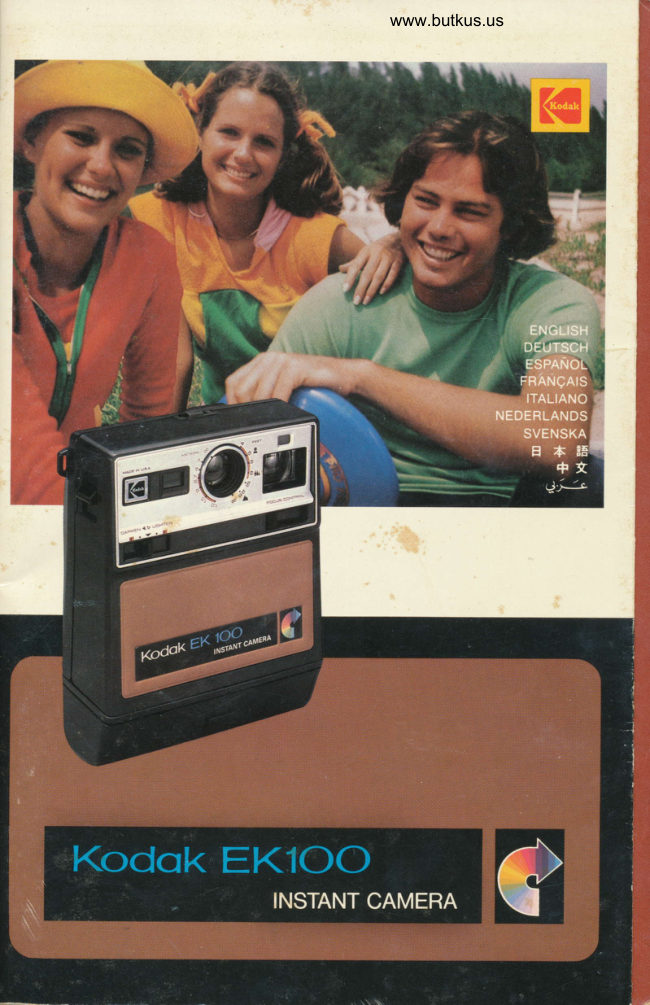
KodakPDF
Kodak EK100 Instant Camera
User manual
17 pages · EnglishRead →
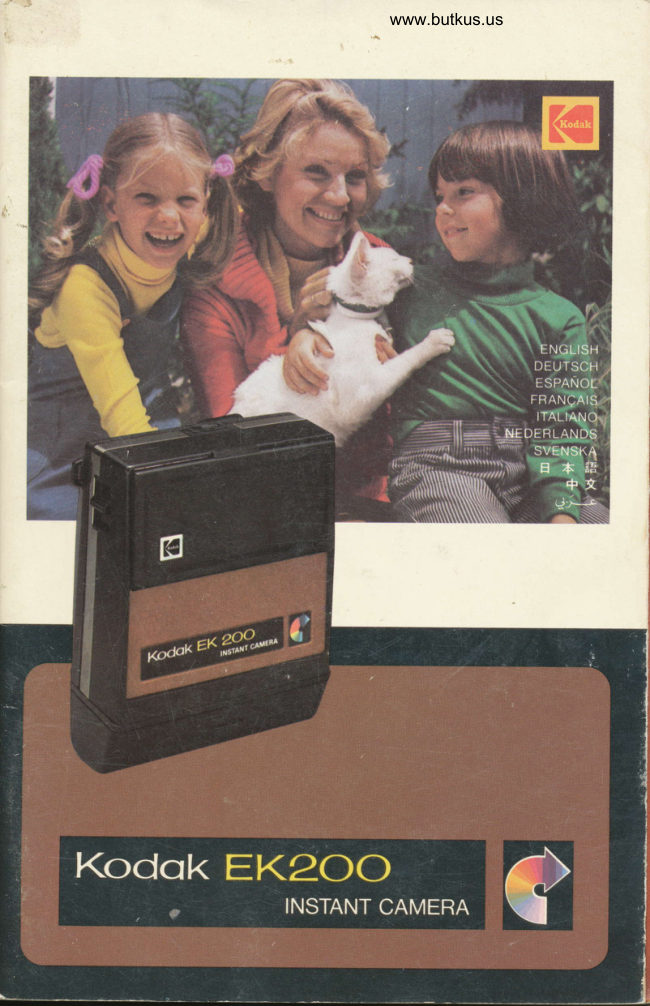
KodakPDF
Kodak EK200 Instant Camera
User manual
20 pages · EnglishRead →
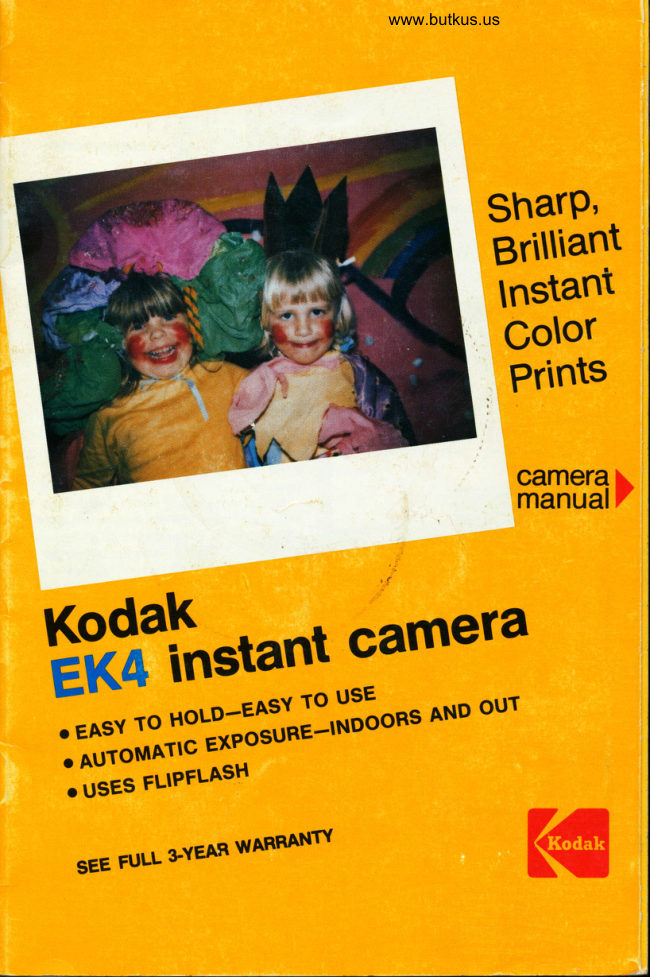
KodakPDF
Kodak EK4 Instant Camera
User manual
30 pages · EnglishRead →
KodakPDF
Kodak EK6 Instant Camera
User manual
31 pages · EnglishRead →
KodakPDF
Kodak Pleaser Instant Camera
User manual
30 pages · EnglishRead →
KodakPDF
Kodak The Handle Instant Camera
User manual
30 pages · EnglishRead →
From the M. Butkus archive. Original publisher and archive notices are retained.
Check the model and edition against your equipment.
PDF verified 2026-10-10.