Film cameras
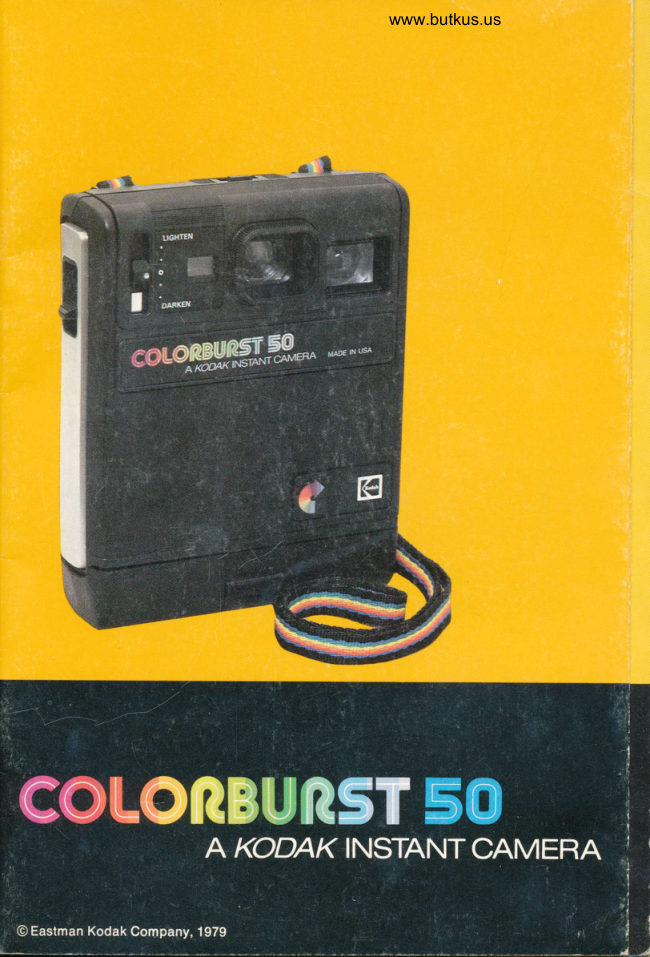
Kodak Colorburst 50 Instant Camera User manual
User manual for Kodak Colorburst 50 Instant Camera. 27 pages in English. Read the original PDF, download or print a copy without registration.
27 pagesEnglish9.4 MB PDF
Loading your manual…Open PDF directly
Document details
- Brand
- Kodak
- Model / document
- Kodak Colorburst 50 Instant Camera
- Document type
- User manual
- Language
- English
- Pages
- 27
- File size
- 9.4 MB
- Category
- Film cameras
- Document date
- Not specified in catalog
Search available document text
Find a term, then jump to its page in the original PDF. Image-only pages may not be searchable; check the PDF for exact wording and diagrams.
Page 4 · Read text
Venmo @mike-butkus-camera  Ph. 2083
PayPal Name  Lynn@butkus.org      www.PayPal.me/lynnbutkus
View original page 4
Page 8 · Read text
www.butkus.us

 NECK STRAP
 For your convenience and safe handling of
 the camera, a NECK srnep has been pro-
 vided. Insert the ends of the strap through
 the sLors on the top of the camera. Then
 thread the ends back through the buckles
 as shown, and pull the strap tight. You can
 adjust the strap to the length most com-
 fortable for you.

TRIPOD SOCKET
 For extra camera steadiness, you can
 mount your camera on a tripod by using
 the rRrpoD socKET on the side of the cam-
 era. See "Extended Exposures" on page 5.

MONOGRAM
 Peel off the desired initials from the sheet
provided, and place them in the REcEssEs
on the back of the camera.


                 LOADING
BATTERY        THE CAMERA

Your camera uses one size J 6-volt battery    Each pack of Kooex Instant print Film con-
(supplied) to power the automatic expo-     tains a film cover and film for ten color
sure control and the motor. To install the     pictures. Load the camera as shown in
battery, simply follow Step 1 on the inside     Step 3 on the inside tront cover.
front cover.                                     Before loading the camera, check to see
NOTE:  lf you depress the shutter release     that the rollers contained in the film door
before installing the battery, inserting a     are clean.  lf you see residue or any foreign
battery will cause the camera motor to run     material on the rollers, see page 15 for
for about 3 seconds.                           cleaning instructions.
  The battery should be replaced when
lhe molor takes five seconds or longer to    IMPORTANT NOTE: After you have re-
eject a print, or runs erratically in ejech    moved the film pack from its carton, han-
ing a print. The battery will normally pro-     dle it by the edges only! When you remove
vide power to expose and eject 15 or more     the protective wrapping, be careful not to
packs of film.                              squeeze the pack or to apply pressure to
View original page 8Page 9 · Read text
the film cover, since this could possiblyallow light to fog the edges of the pictures.  TAKING PICTURES
(See page 20.) Grasp the flap and pull  it in
the direction of the arrows.
 We do not recommend removing and re-
inserting a partially used film pack (or a     1. Be sure your subject is at least 4 feet
full pack after the film cover has been     from the camera.
ejected) because at least one of your pic-     2. Check to see that the LtcHrEN/DARKEN
tures will be spoiled. Also, when you rein-    coNTRoL is in the center position. Most of
sert the pack, the exposure counter will     your pictures will be taken with the con-
be reset to E.                                        trol in this position. (See page 9.)
                                           3. Frame your subject within the view-
                                                   finder. Keep your fingers away from the
                                                 lens and the elecrntc eve,
                                           4. Hold the camera steady and partially
                                             depress the shutter release. lf the red cau-
                                                  tion light doesn't appear in the viewfinder,
                                               slowly press the shutter release down andVIEWFINDER                 allow it to return.
                                              5. The print will be automatically ejected
Hold the camera up to your eye in a com-    from the camera. Don't obstruct the exit
fortable position so that the rubber eyecup      slot with your fingers or by resting the bot-
rests against your face and you can see all    tom of the camera on any surface as the
four corners of the vtrwrtnoen. The area      print is ejected.
that you see within the viewfinder will be
included in your picture.                  NOTE: Be sure not to depress the shutter
  The red caution light, located at the     release again while the camera motor is
top of the viewfinder, may appear as you     running, as this may spoil your picture.
partially depress the shutter release. See
page 5 for important intormalion!              6. When the motor has fully ejected the
                                                          print, simply grasp the print near its edge
                                    and remove it from the slot belore taking
                                             anothet picture.
                                       The exposure counter will indicate the
                                      numbers of the exposures from 1 through
                                         10 as you take pictures.
                                                 Don't leave the prints in direct sunlight
                                                or on a hot sudace during development or
                                                they will become too dark,
                                    An image will begin to appear within 60
                                        seconds under normal temperature condi-
                                                     tions.
                                  IMPORTANT NOTICE: Handle prints with
                                                   care, especially during the first 10 minutes
                                                     after exposure. Hold them by the borders,
                                         and never bend,  f lex, cut, or attempt to fold
                                             them. See "Caution," page 14.
View original page 9Page 10 · Read text
www.butkus.us

                              EXTENDED EXPOSURES
                                 When you are taking pictures in low-light
                                               conditions, a red caution light will come
                                       on in the top part of the viewfinder as you
                                                      partially depress the shutter release. This
                                    means that the shutter will remain open
                                                     for longer than 1 /15 second, and that any
                                     movement of the camera or the subject
                                                        will blur your picture.
                                     To help keep the camera steady when
                                                  the caution light comes on, brace the cam-
                                             era or yourself against a FIRM support as
                                        you take the picture. Hold the shutter re-
                                           lease lully down unlil the ceution light
                                      goes olf, indicating that the shutter has
                                                   closed.

                                    NOTE: lf you brace the camera, be sure
                                               the exit slot isn't blocked when you let up
                                       on the shutter release and the print starts
                                                 to eject.

                                            Mounting the camera on a tripod will
                                               also steady the camera. Screw the tripod
                                          connection into the tripod socket on the
                                               side of the camera.
                                                                                                 lf you want to avoid making an extended
                                          exposure, you can insert a flipflash or
                                                electronic flash and take a flash picture.
                                     See page 6.


     lf you don't want the print to be ejected
immediately after you take a picture, sim-
ply keep the shutter release depressed.
The print will not begin to develop until
you allow the shutter release to return and
the camera motor has ejected the print
from the camera.
View original page 10Page 11 · Read text
FLASH PICTURES        at Youany cantime.removeWhen andyou reinstallreplace aa flipflashpartially
                                          used flipflash, make sure that the top halfWhen the caution light in the viewfinder                                                      of the flash array (farther  f rom the camera)indicates that the lighting is low, you can                                              contains one or more unused bulbs.make an extended exposure (page 5), or
take a flash picture with flipflash or elec-
tronic flash.                            NOTE: The caution light will not appear in
                                              the viewfinder when a flipflash is installedFLIPFLASH                                      on the camera.
1. Firmly insert a flipflash into the russ
socKEr on the top of the camera, with the
buf bs facing forward and with one or more     4. After you have used the bulbs in the top
fresh bulbs at the top halt ot the flash     half of the flipflash, remove it from the
ailay-the half farther from the camera.     socket by "rocking" it to one side. Turn
The flipflash will "lock" on the camera.    the flash over to position fresh bulbs at
                                              the top of the array.2. Check to see that your subject is 4 to                                                                                    lf at any time a bulb should fail to flash,9 teet  f rom the camera. Camera-to-subject                                      remove the array and install a new one.distance is very important for proper flash                                        Then take a flash picture.  lf the bulb flash-exposure.  lf you are farther than I  feet                                                   es, the camera is operating properly; referfrom your subject,  it will appear too dark                                                      to the f/ash manufacturer's warranty.  lf the(underexposed) in your picture; closer                                             bulb still fails to flash, the camera may re-than 4 feet, your subject will be too light                                           quire service; see the warranty in this(overexposed) and unsharp. You can lre-                                        manual. lf a bulb fails to flash, any re-quently improve flash pictures throughout                                        maining good bulbs in that half of thethe flash range by using the camera light-                                                 arcay won't llash.enldarken control. See page 9.
3, Frame your subiect in the viewfinder.
Hold the camera steady and press the    NOTE: To prevent wasting a flash, no bulb
shutter release smoothly to flash the bulb      will flash if you press the shutter release
and take the oicture. The color in the dot    when the exposure counter is in the El
on the back of the flipflash will disappear     position or the "0" position (all pictures in
as the corresponding bulb flashes. The    a film pack have been exposed).
camera motor will eject the print auto-
matically                                               Occasionally people's eyes appear red
                                                    in flash pictures. The red is produced by
                                                   reflections from the retina of the eye, and
                                                  is most evident under the following con-
                                                ditions: (1) when your subiect is young,
                                        has a light complexion, or has blue eyes,
                                      and (2) the surroundings are dimly lighted.
                              You can minimize these reflections by
                                                                       ('l) turning on additional room lights; (2)
                                           having your subject look directly at one
                                              of the room lights, causing the pupils to
                                               contract; or (3) using a Kooar Flipflash
                                          Extender, available from photo dealers.
                                      See "Accessories," page 24.
View original page 11Page 12 · Read text
www.butkus.us

FLASH RANGES WITH
KODAK INSTANT PRINT FILM

                                                                xLight Source
 Flipf lash                      o)=                   o                                                                                                        oo
                   o                                                                                                               o)                                              (With alkaline batteries)                              JElectronic            @                                                                                                                                                            Joo
Flash               x                                                                                                        Xo(Koonx Instant                                        (With nickel cadmium batteries)                                 0)
Flash, Model C)                                                                           c
                                                                                                                                                                                                           l

"Your pictures may not be too light when taken at
 distances closer than 4 feet, but they will be out
 of tocus (blurred).


ELECTRONIC FLASH
You can also use an electronic flash unit
with your camera, for example, the Kooer
Instant Flash, Model C (page 24), which
extends the flash range to 10 feet with
alkaline batteries (9 feet with nickel cad-
mium batteries). The Model C Flash, which
is designed for use with your camera, fits    NOTE: Before using any electronic flash
into the camera flash socket and attaches      unit with your camera, read the flash man-
with a bracket.                                   ufacturer's instructions to be sure that the
  To take a flash picture with this unit, in-     unit provides sufficient light output, and
stall the unit as described in the flash     that it is designed so that it will operate
instruction manual, push the unit to its ON     properly with your camera and Koonx
position, and wait for the ready light to     lnstant Print Film without causing physical
blink. Then simply take your flash picture    damage to the camera.  lf you get unsatis-
within the correct electronic-flash range.     factory picture results with an electronic
Using the lighten/darken control on the     flash unit, try a flipflash.  lf you get good
camera will have no effect on electronic-     results with the flipflash, the electronic
flash pictures indoors or under low light     flash is probably defective or not suitable
levels.                                             for your camera.
View original page 12Page 13 · Read text
Fill-in Flash Outdoors
You can use electronic flash outdoors in
daylight conditions to help lighten shad-
ows falling on your subject. Both your
camera and the Model C Flash have a
lighten/darken control. Under brighf light
outdoors, use the lighten/darken control
on your camera instead of the lighten/
darken control on the llash unit to control
overall print lightness or darkness. Ad-
justing the lighten/darken control on your
camera will have no effect on indoor elec-
tronic{lash pictures or flash pictures tak-
en outdoors under low light levels. Use the               No fill-in llash.
lighten/darken control on the flash unit
under these conditions. See page 9 for
details on the camera lighten/darken con-
trol.
NOTE: With the Model C Flash, it isn't
necessary to remove the unit from the
camera when you want to take non-flash
pictures under outdoor lighting conditions.
Just be sure that the unit is pushed to its
OFF position. The caution light will appear
in the viewfinder at low light levels to indi-
cate that you should use flash or brace the
camera for an extended exposure.

                                                          With fill-in flash.

UNLOADING
THE CAMERA

After you have taken and ejected the tenth
picture in a film pack, the exposure count-
er will read "0." Ooen the film door and
pull the FrLM-pAcK ExrRAcroR for easy re-
moval of the film pack.


                                       FILM.PACK EXTRACTOR
View original page 13Page 14 · Read text
www.butkus.us
LIGHTEN/DARKEN
CONTROL


 Under most conditions, you will be taking    LIGHTEN to keep prints from becoming
 pictures with the lighten/darken control     too dark.
 in the center position. However, the light-       Don't leave prints in direct sunlight or
 ness or darkness of your prints can be   on a hot surface during development.
 affected by such factors as temperature,      Prints will probably be too dark when de-
and type and brightness of your subject.    veloped at temperatures above 100'F
The lighten/darken control helps you to      (38.C).
 compensate for these effects.                                        See your film instruction sheet for com-   After taking a picture, if you want a                                                 plete and up-to-date information. lighter or darker picture of the same sub-
 ject in the same location without chang-
 ing the lighting or your position, adjust
the control belore you take another pic-
ture. To take a lighter picture, move the
 control toward LIGHTEN; for a darker pic-
ture, move the control toward DARKEN.
  The conlrol doesn't automatically re-
lurn to the cenler position after you take
a picture.
     lf you use the camera control to adjust
lightness or darkness fo( fliptlash pictures
of subjects from 4 to g feet from the cam-
era, move the control all the way (two
marks) toward LIGHTEN or DARKEN.

Temperature Effects on Prints
The recommended temperature range dur-    Subjects and Lighting Conditions
ing development of prints is 60 to 100.F    In certain types of situations, you may
(16 to 38'C). At temperatures below 60"F    judge your subjects to be too light or too
(16'C), place prints in a warm place-an     dark. For example, if you are photograph-
inside coat pocket, for example-as soon     ing a very light subject in very dark sur-
as they are ejected from the camera, and     roundings, your main subject may be too
leave them there during development.       light in your print. A dark subject in light
Otherwise, prints may appear too light. Be     surroundings may appear too dark.
sure not to bend, flex, or fold the prints.      Under such conditions, the lighten/
    It may be advisable at the upper end of    darken control can help you achieve more
the temperature range-approaching      pleasing exposure of your main subject.
100"F (38'C)-to set the control toward    See the examples on page 13.
View original page 14Page 16 · Read text
www.butkus.us
TIPS FOR BETTER
PICTURES


                   Move in close to concentrate attention on
                      your main subject.


                    Watch out for distracting backgrounds. Try
                       shooting from a different angle to use the
                         plain sky or the ground as a background.


                                                                                11
View original page 16Page 17 · Read text
When taking flash pictures of groups, keep
all subjects in the picture at approximately
the same distance from the flash.


                                   Be sure that your subiect or subjects are
                                            evenly lighted-not partially in bright sun
                                         and partially in the shade. Or use electron-
                                                               ic flash to fill in the shadows.

The picture at the left was made with flip-
flash. Notice how electronic flash "froze"
the fast action of the subjects in the pic-
ture at the right.
View original page 17Page 18 · Read text
www.butkus.us


I
I


      when you photograph a very light subject against a dark background, the camera expo-
         sure-control system may be "fooled" by the background and your subject may be too light
         in the picture. Often you can move the lighten/darken control toward DARKEN before
         taking the picture to achieve better exposure of your main subject.


      when you photograph a very dark subject with a light background, try moving the lighten/
       darken control toward LIGHTEN to get better exposure of your main subject.


                                                                                 13
View original page 18Page 19 · Read text
CARE AND
STORAGE OF FILM
AND PRINTS


Leaving your film and camera in a hot
place such as a sunny window or a closed
car on a warm day may lead to reduced
picture quality. lf you accidentally leave
the film and camera in a hot place, allow
them to cool to normal temperature before
taking any pictures.  lf there is a film pack
inside the camera, wait approximately one
hour after the surface of the camera is cool
to allow adequate cooling of the film.
  Also allow your film and camera to re-
turn to normal temperature  if they have
been left in a cold place such as a car
trunk during winter.
  Store your developed prints in a cool,
dry place. Print colors will remain un-
changed longer if pictures are protected
from long exposure to bright light.
  Each oicture is a sealed unit that con-
tains a caustic  f luid. Never cut, trim, punc-
ture, teat, or separate the picture unit,
srnce thrs may allow some of the tluid to
escape and come into contact with skin or
eyes. lf therc is any ot this fluid or other
foreign matetial on the ilint surface, re-
move it with a damp cloth. Any cloth con-
taining lluid should then be discarded.


14
View original page 19
Page 20 · Read text
www.butkus.us
  CARE OF                       CleaningOccasionalthefluidRollersleakage may cause small
                                                                                             surfaces.
                                                                                                        pic-  YOUR CAMERA           whichdepositscanonaffectthe camerathe qualityrollerof your
                                                           tures.  lf this should happen, clean the roll-
                                                        ers as follows:
                                                     1. Open the film door. The RoLLERs are      With proper care and handling, your cam-,v                                                   contained in the door.
      era can provide you with years of enjoy-                                                  2. Use a cotton swab or a small piece of      ment. When you're not taking pictures,                                                          soft, lintless cloth moistened with clean       protect your camera by carrying or storing
                                                      water. Don't use solvents or detergents.             it in a case such as the Koonr CoLoneunsr
        Instant Camera Case.                         3, Wipe the contaminated area of the roll-
         Clean the viewfinder lenses and the pic-     er surfaces with the swab or cloth (never
       ture-taking lens by blowing away any dust     with your fingers!) until the surfaces are
       or dirt. Then breathe on the lenses to form     clean. Rotate the rollers by moving the
      a mist, and gently wipe the mist away with    GEAR at the end of the rollers to position
      a soft, clean, lintless cloth (or use a drop     the foreign material where it can be re-
       of Koorx Lens Cleaner, or equivalent, and    moved easily. Dispose of the swab or cloth
      then wipe with a clean, soft cloth). Don't      in a closed refuse container.
      use solvents or solutions not designed for
      cleaning camera lenses, and never use    CAUTION: The residue cleaned from the
      chemically treated tissues intended for     roller surfaces may be caustic. Observe
       eyeglasses.                                   the precautions outlined on page 14.
               lf specks of dust collect on the mirrors
        inside the camera (indicated by small dark                                                                                           lf the rollers need cleaning when there
     shadowy spots in the same location on       is a partially used pack of film in the cam-
      consecutive prints), use a rubber syringe     era, you can clean them while the camera       to blow air into the film compartment (see                                                            is loaded. Open the film door in subdued      page 20). Nevet attempt to clean the mit-                                                           light or in the shade, and keep the film
       rots with a brush, a cloth, or any other     pack firmly inserted in the camera as you       cleaning material!                                                      follow the procedure above.        Store your camera and film away from
      heat and direct sunlight-never in the
      glove compartment, on the rear-window
        shelf, or in any other hot spot in a car-
      since this may cause petmanent damage
        to the film or the camera. lf you store your
     camera for a period of time, it's a good
       idea to remove the batterv.


                                                                                15
View original page 20Page 21 · Read text
SERVICE FOR
YOUR CAMERA


 lf you have questions about your camera
 or Koonx lnstant Print Film, or are having
 difficulty in using your camera, carefully
 reread the section of this manual which
 pertains to the questions you have.
ESPECIALLY be sure to consult the illus-
trated Troubleshooting Guide, which be-    Packing Instructions
gins on the next page. Since many cam-     1. Include a note with your camera giving
 eras which are returned for repair do not       all details: date and place of purchase and
need service, please carefully review this   a description of the problem, as well as
 information.                                   several sample prints. lf possible, include
                              a telephone number where you can be
 lf you believe your camera does need     reached between 8:00 a.m. and 5:00 p.m.
service-                                   2. Use a sturdy carton that is large enough
Take your camera and several sample      for you to surround the camera complete-
prints to your photo dealer.                          ly with packaging material, such as crum-
                                             pled newspaper.             OR
Take your camera and several prints to a     3. Securely fasten the carton with tape.
Kodak Consumer Center if one is located     Clearly write the address of the Service
near you. The addresses are listed on     Center and your name and address on the
pages 22 and 23.                            top and bottom of the carton.
             OR                       4. Mail the carton to Kodak. Remember to
Send a letter describing the problem to     insure the equipment to replacement value.
Eastman Kodak Company, Department
841A, 343 State Street, Rochester, New
York 14650. Please enclose sample prints
with your letter to aid us in helping you,
and be sure to specify the model of your
camera as well as the type of flash you
used (if any).
     lf your camera requires repair, you may
send it through your photo dealer or di-
rectly to one of our Service Centers, listed
on the back cover.


16
View original page 21Page 24 · Read text
www.butkus.us

What Happened                                 Probable Cause              Correction

Picture area black.                                   a. Hand or object              a. Keep hands and
                                                 completely covering lens     objects away from lens.
                                       when picture was taken.
                                                        b. Flipflash didn't go off.      b. See page 21.
                                                        c. Electronic flash didn't      c. See page 21.
                                       go off.


Repeating pattern of                         Specks of dirt on rollers.   Clean rollers (page 1S).
spots approximately 1/s
inches apart on
consecutive prints.


Subject not framed                              lmproper use of             View subject as described
properly or partly cut off.                            viewf inder.                on page 4.


                                                                      19
View original page 24Page 27 · Read text
ACCESSORIES- See your photo dealer.


Koonx Instant Flash, Model C-A compact, easy-to-use, automatic electronic flash unit
specially designed for use with your camera. Powered by 4 AA-size batteries (supplied),  it
plugs directly into the camera flash socket, and extends the flash range to 4 to 10 feet.
The unit can be used for fill-in flash outdoors. CAT. No. 140 0613

Koolx Cot-oReunsr Inslant Camera Case-Made of water-resistant brown expanded  vinyl,
this handsome cushioned case protects your camera when you're not taking pictures.  lt
will accommodate your camera with the Koonr Instant Flash, Model C, attached, and has
one pocket for an extra pack of lnstant Print Film and another for carrying and protecting
your developed prints. The expanded carry strap allows adjustment from hand strap to
neck strap, and the nylon zipper at top and sides provides easy removal and insertion of
camera and film. CAT. No. 140 0746

Koonx Flipflash Extender-lncreases the distance between the camera lens and the flip.
flash to reduce red reflections in people's eyes, sometimes visible in flash pictures. The
extender also can be separated into two sections for off-camera flash to produce more
pleasing shadow effects in flash pictures. CAT. No. 149 3089

Copyprints and Enlargements-You can have copyprints, wallet-size prints, enlargements,
and slides made from your original prints. This service is available through photo dealers.

Photo Albums for Prints from Koolr Instant Print Film-Handsome, durable albums pro-
vide an excellent means of organizing and storing your prints.
  Koonx GRr-lrnv Instant Photo Album, CAT. No. 132 9B3B
  Koonx Mini Gnlleny lnstant Photo Album, CAT. No. 132 9796
  Koonx Instant Flip Album, CAT. No. 132 9895
    lf your photo dealer doesn't have lhese items in stock, ask him to order them for you.


24
View original page 27Related documents and language editions
KodakPDF
Kodak Colorburst 250 Instant Camera
User manual
26 pages · EnglishRead →
KodakPDF
Kodak Colorburst 350 Instant Camera
User manual
23 pages · EnglishRead →
KodakPDF
Kodak Colorbust 100 Instant Camera
User manual
30 pages · EnglishRead →
KodakPDF
Kodak EK100 Instant Camera
User manual
17 pages · EnglishRead →
KodakPDF
Kodak EK200 Instant Camera
User manual
20 pages · EnglishRead →
KodakPDF
Kodak EK4 Instant Camera
User manual
30 pages · EnglishRead →
KodakPDF
Kodak EK6 Instant Camera
User manual
31 pages · EnglishRead →
KodakPDF
Kodak Partytime Instant Camera
User manual
18 pages · EnglishRead →
KodakPDF
Kodak Pleaser Instant Camera
User manual
30 pages · EnglishRead →
KodakPDF
Kodak The Handle Instant Camera
User manual
30 pages · EnglishRead →
From the M. Butkus archive. Original publisher and archive notices are retained.
Check the model and edition against your equipment.
PDF verified 2026-10-10.