Film cameras
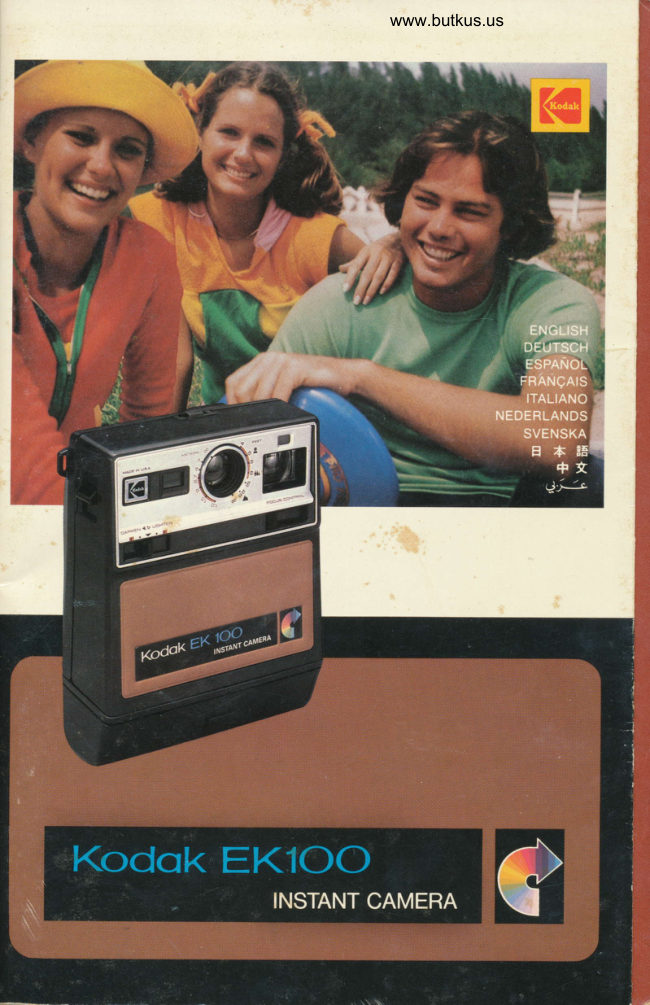
Kodak EK100 Instant Camera User manual
User manual for Kodak EK100 Instant Camera. 17 pages in English. Read the original PDF, download or print a copy without registration.
17 pagesEnglish2.6 MB PDF
Loading your manual…Open PDF directly
Document details
- Brand
- Kodak
- Model / document
- Kodak EK100 Instant Camera
- Document type
- User manual
- Language
- English
- Pages
- 17
- File size
- 2.6 MB
- Category
- Film cameras
- Document date
- Not specified in catalog
Search available document text
Find a term, then jump to its page in the original PDF. Image-only pages may not be searchable; check the PDF for exact wording and diagrams.
Page 3 · Read text
www.butkus.us
ENGLISH                                    gently lower the noon open. Do not force
                                                                 it open beyond the position shown inYour new Koonx Instant Camera follows                                               Illustration  | 2.Kodak's high standards for picture qual-
ity and color reproduction. With proper  O Insert the battery into the snr:rBnv
care and handling, your camera can pro-   cHANNEL {3,Ff above the film compart-
vide years of picture-taking  pleasure.       ment. Be sure that the battery's angled
  This instruction manual will help you    corner is at the upper left when you do so.
achieve the most rewarding picture re-    Slide the battery into the BATTERv cHAN-
sults. Before you start to take instant    NEL, press it in as far as it will go, and then
                                                                                             sopictures, pleose reqd the instruclions    shift it to the right'side of the cHANNEL
corefully ond follow them closely.           that the battery's NorcH (5'Bf fits behind
                                              the HororNG LUG {5,A1 in the cHANNEL.
Equipment subject to minor appearancc changes.    o Close the rrlu coMpARTN{rur ooon by
                                             pressing it against the camera body until
                                                                        it securely snaps into place on both sides.
Monogrom                             Normally a battery should last for a
You may personalize your camera by   minimum of 10 film packs. Replace the
peeling your initials off the enclosed sheet    battery when the camera takes 5 seconds
and placing them in the RECESSES (l,E) on    or Ionger to eject a print or if the motor
the back of the camera.                      slows down greatly while ejecting a print.
                                                             If you must replace the battery when
Neck Slrop                              the camera is loaded with film. do it in
For your convenience, a neck strap has   subdued light. Be sure that the film pack
been provided. It will also help protect the   stays firmly  inserted in the film
camera from falls. To attach the strap,    compartment.
insert the end of the strap behind the   Removing the bottery: Push the battery in
Posrs  { l,B and l,G) on the sides of the    toward the back of the BATTERv cHANNEL
camera, and thread each end back   and then shift it to the left to release the
through the buckle as shown in lllustra-   NorcH from behind the soroING LUc.
tion 4. Then pull the strap tight. You can        If you store your camera for an ex-
adjust the strap to the length most com-    tended period of time, it is a good idea to
fortable for you.                         remove the battery.

Tripod Socket                                           FilmFor extra camera steadiness, you can                                        Your Koonx Instant Camera uses Kooermount your camdlaon atripod. Screw the                                            Instant Print Film PR10 in film packs oftripod connection into the rRIpoD socKET                                           ten picture units and a film cover. Each{l,Al, which is located on the side of the                                              color print you make will have an imagecamera.                                                size of about 7 x 9 cm (25/e" x 3eho"). To
                                          obtain copies and enlargements of your
Botlery                                      color prints, consult your photo dealer.
Your new camera uses one 6-volt J-size
battery to power the camera motor and
the automatic exposure control.           Looding lhe Comero
                               o Depress the rercn (2,81 and gentlyNOTE: If you depress the snurrnR RELEAsE                                             lower the rrllvt coMIARTMENT DooR (2rCl.(9,A1 before installing the battery, the
camera motor will run for about 3 seconds   o Make sure that the nolrEns  ( l2,C|
when you insert the battery.                contained within the rll*r coMPARTMENT
                                 DOoR are clean (see "Cleoning Comero lnstolling the bottery: Depress the lercn
 (2,8| on the rrr-u coMPARTMENT DooR     R,ollers," page 7).
 {2,C} on the front of the camera and  o Remove the protective wrapping from

 I
View original page 3Page 4 · Read text
Venmo @mike-butkus-camera  Ph. 2083
PayPal Name  Lynn@butkus.org      www.PayPal.me/lynnbutkus
View original page 4
Page 5 · Read text
a film pack by holding the ruep (6,A) and     in Illustration  | | for a vertical picture. Be
 pulling in the direction of the printed    sure that the rrncrnrc EyE (2,A and 9,31
 arrows.                                               is not obstructed by your fingers or any
                                                 object. The area that you see within the IMPORTANT: Hold the film pack by the                                       LUMrNous FRAME (7,C1 in the vrBwrrNonn edger only as shown in Illustrations 3 and                                                  will be included in your picture. 6. Be careful not to apply pressure to the
 area of the film cover when you remove   O The zooMrNc crRcLE (7,8f that is in the
 the protective wrapping.                 vIEwFTNDEn helps you to focus quickly
 O Line up the orange srRrpE (3,Et on the    and easily when taking pictures of people
 film pack with the orange LoADTNG LrNE     (see "Focusing").
 (3,C1 on the inside of the camera. Then
 firmly slide the film pack oll the woy into
 the film compartment and close the    Focusing
 FrLM coMpARTMENT DooR Be sure that the    There are three ways to focus your camera
 film pack is fully seated in the film    for the correct camera-to-subject  dis-
 compartment.                                 tance. All three are controlled by moving
  The nxposuRE couNTrn (l,Hl on the    the rocus coNTRoL (3,G and 8,D1. Do not
 back of the camera will show the symbol    focus lhe comero by moving the lrxs (3,A
 El, which indicates that the film pack   and 8,C) itself. The three ways are:
 cover is still in place.                        Distonce scole: Estimate or measure the
o Depress the snurrrR RELEASE (9,Af on    distance between the camera and your
 the side of the camera and allow it to    subject. Then move the rocus coNTRoL
                                                rNDEX LrNES (8,B) are opposite return. The film pack cover will be auto-    until the
 matically ejected through the nxrr sror    the representative number on the ors-
 (2,Df in the bottom of the FrLM coMpART-   TANCE scALE (8rAl that surrounds the
MENT DooR Grasp the cover and remove it.     lens. The numbers for distances in metres
The nxposuRE couNTBn will read " 1'l          are printed in gray, and those for distances                                                                                  '  in feet are printed in black. Do not turn
 NOTE: We do not recommend removing    the lens itself because you may damage
and reinserting a partially used film    the focusing mechanism.
 pack-or even a full pack whose cover has                                    Zooming circle: You can use the zooMrNG been ejected-because at least one of the                                           cIRcLE (7,B) to correctly focus the camera picture units will be ruined. Furthermore,
                                  when you are taking pictures of adults orwhen such a pack is reinserted, the Bxpo-                                              teenagers who are from I to 7.5 metres (3.5suRE couNrr,n is reset to El.                                                 to 25 feet) away from the camera.
                                       Look at your subject through the vrBw-
                                          FTNDER and move the rocus coNrnol with
Viewfinder                               your left forefinger. You will see the size of
The vrBwrrNDER  ( l,Df on your camera    the zool,rrNc cTRCLE change. Adjust the
comes equipped with a rubber EyEcup     size of the circle until your subject's head
 ( l,C) for better picture-taking. The nve-    just fills the inside of the circle-from the
cue helps you position your eye at the    chin to lhe crown of the heod (not the
center of the viewfinder for easy viewing     hairline or the top of the hairdo).
of your subject. If you wish to take                                     NOTE: After you use the zoourNc crRcLEpictures without the nyncup, you can                                                       to focus accurately, you may want to moveremove  it and later replace it quite easily.                                            the camera slightly to obtain the compo-
o Bring the camera up to your eye and     sition you desire.
hold it in a comfortable position so that     The zoor*arNc crRcLE is designed to set
the Byocup rests against your face and you    the focus correctly for an average adult
can see through the vrBwrrNonn clearly.    size head of approximately 23 cm (9
Hold the camera as shown in Illustration    inches) from the top of the head to the                         j
I O for a horizontal picture and as shown    chin. Therefore, when photographing

                                                                                  I
View original page 5Page 6 · Read text
..--'---J               www.butkus.us
babies, young children, pets, scenery, etc,       If you do not want the print to be
use the distance scale or the focus symbols   ejected immediately after you take a
to set the camera for the correct distance.    picture, simply keep the sHUTTER RELEASE
                                          depressed. The print will not begin toFocus symbols: Move the rocus coNTRoL                                     develop until you allow the sHUTTERso that the ruonx LINEs (8,8) point to one                                      RELEAsE to return to its original positionof the three symbols. The close-up sym-                                and the camera motor has ejected thebol (9,) indicates a camera-to-subject                                             print through the Exrr slor.distance range of I to 1.8 metres (3.5 to 6
feet). The group symbol (000) i. for a   NOTE: Be sure that you do not depress the
distance range of 1.8 to3.7 metres (6 to 12   sHUTTER RELEASE again while the camera
feet). Use the scene symbol (A)  for   motor is running, as this may cause the
camera-to-subject distances beyond 3.7   camera to jam.
metres (12 feet).                        Do nol leqve prinls in direcl sunlight or
                                      on o hol surfoce during developmenl!
                             O An image will begin to appear in 1 to 2
Doylighf Piclures                        minutes. Do nol ottempt lo moke criticol
O Set the pocus coNTRoL for the appro-   iudgment of prinf oppeoronce unlil de-
priate camera-to-subject  distance.        velopmenl is sufticiently complele. A
                                        five-minute wait is usually adequateO Check to see that the I-IGgInN/oARKEN
coNTRoL (3,B and 9'Cf is in the center   under normal temperature conditions.
position between "DARKEN"  and  Judge prints in subdued light since they
"LIGHTEN." This setting should be the  may appear light in very bright sunlight.                                  The BxposuRE couNTnn (l,Hf will ad-correct one for most of the pictures you
will take (see "lighten/Dorken Conlrol,"   vance from I through l0 to indicate the                               number of the picture you will  nextpage 5).
                                              exPose.
o Frame your subject within the ruur-
Nous FRAMB in the vTEwFINDEn Be sure to   IMPORTANT: During the first l0 minutes
                                                 after exposure, prints should be handledkeep your fingers or any objects away from
                                        with care. Hold them by the edges only.the rnNs and the ELECTRTc EYE.                                        At no time should you bend, flex, cul, or
O Hold the camera steady and partially   otlempt to fold them.
depress the sHurrBR RELEASE. If the row-
LrcHT srcNAL 17,Al does not appear in the
upper right-hand corner of the vIEw-   Flosh Piclures
FINDER when the srrurrnn RELEASE is   Whenever the row-ucHT sIGNAT l7,Al
partially depressed, continue pressing the   goes on in the vrEwFrNDEn to indicate that
sHUTTER RELEASE until  it is all the way   there isn't enough light in the area, you
down and then allow it to return. If the   will have to use flash. Your camera fea-
sIGNAL does appear and you take a pic-    tures easy, rapid, flash picture-taking with
ture, it will probably be too dark. (See  a flash array called FLIIFLASH (l0,A1.
"Flosh Piclures.")                     Each array has bulbs at each end which
                                            flash in sequence as you take pictures.O As the sHUTTER RELEASE returns to its                              When a bulb flashes, the color in the dotoriginal position, a print will be automat-                             on the back of the array (above theically ejected from the camera through                                   number of the bulb) will disappear, Afterthe Bxrr sr-or. Be sure that you do not                                       you have used all the bulbs in the top halfobstruct the nxlr slor with your fingers or                                             of the array) invert the array to positionby resting the bottom of the camera on                                        fresh bulbs at the top. Remove andany surface while the print is being                                                    reinstall an array at any time.ejected. When the image area of the print
 is fully ejected, grasp the print by its lower   IMPORTANT: If a bulb fails to flash, any
border and remove it from the sI-or   remaining good bulbs in that half of the
BEFORE TAKING ANOTHER PICTURE.         array uill notfasft. Remove the array and

4
View original page 6Page 7 · Read text
invert  it to position fresh bulbs at the top   4. Toke the picture-Frame your subject
 or install a new array. Then take a flash   in the vrEwFrNDEn Hold the camera
 picture. If the bulb flashes, the camera  is   steady and press the snumER RELEASE
 operating properly; refer to the lamp   smoothly to flash a FLTIFLASu bulb and
 warranty to replace the defective array.   make an exposure.
 If the bulb still fails to flash, the camera    As the sHUTTER RELEASE returns to its
 may require service.                         original position, the camera motor will
   Sometimes people's eyes appear red in    eject the print through the EXrr slor.
 color flash pictures due to reflections from      After you have used all the bulbs in the
 the retina of the eye. This effect becomes   top half, remove the nuppresrr from the
 more noticeable when your subject  is   camera. Turn the array over to position
 young, has a light complexion, or has blue    fresh bulbs at the top.
 eyes, or when your subject is in dimly    You can remove and reinstall a rup-
 lighted surroundings. To minimize these   FLASH at any time. When you replace a
 reflections, you can ( 1) turn on additional    partially used rupnlesH, however; always
 room lights, (2) have your subject look   make certain that there is at least one fresh
 directly at one of the room lights, causing   bulb in the top half of the array.
 the pupils of the subject's eyes to close                                     NOTE: If you press the sHUTTER RELEASE slightly, or (3) use a Kooex Flipflash                                  when the nxposuRE couNTEn shows E or Extender, available from your photo                                                 "0," no bulb in the array will flash. dealer.                                          Your camera will also work with some
                                               electronic flash units such as the Kooar l. Insert o FupFtAsH-With the bulbs fac-                                            Instant Flash, Model B. Read the flashing forward and with fresh bulbs at the top,                                     manual carefully.insert the pllprrasn into the nresu socKET
ll,F) on the top of the camera. The
FLIpFLASH will lock on the camera. To   Unlooding
remove it, simply rock it to one side.         After you have taken the tenth picture in a
NOTE: The row-LrcHT srcNAL will not    film pack, the BxposuRE couNTEn will read
appear in the vrEwFrNDEn when a FLrp-    "0." Open the nrr-u coMIARTMENT DooR
FLASH is installed on the camera.         and pull the rnu nACK ExrRecron (3,D                ,,ti
                                    and l2,A! over to the right to remove the
2. Check lhe distonce-Camera-to-sub-    empty film pack.
ject distance is very important for correct
flash exposure. Make sure that your sub-
ject is no closer than 1.2 metres (4 feet) or    Lighten / Dorken Conlrol
farther away than 3 metres (about 10   The light or dark characteristic of prints
feet). If you are closer than 1.2 metres,   produced by this camera can be affected
your prints will appear too light (overex-   by such factors as temperature, type and
posed) and unsharp. They will appear too    brightness of a subject, type and bright-
dark (underexposed) if you are farther    ness of the subject baclground, etc. The
away than 3 metres. Refer to the oRANcE   ucnrnx/oARKEN coNTRoL (3,8 and 9,C!
BANDS (8,E| on the orsreNcE scALE, which    can help you to compensate for the effects
show the flash distance range in metres    of these variables, especially when taking
and feet.                                    daylight pictures.
                             O After taking a picture, if you want a
3. Focus lhe comero corefully-Focusing    lighter or darker picture of the same
is especially critical when taking flash   subject in the same location without
pictures. IJse one of the three ways de-   changing the Iighting or your position,
scribed in "Focusing" on page 3. If used    adjust the r-rcnrnN/nnRrBNr coNrRor and
correctly, most people find the zoor'rrlrc    take another picture. To obtain a lighter
cTRCLE helpful in taking flash pictures of   picture, move the r-rcnrnN/neRrBn coN-
adults.                            TRoL toward "LIGHTEN": to take a
View original page 7Page 8 · Read text
www.butkus.us
darker picture, move it toward      As you begin to recognize these types of
..DARKEN.''                                   situations, you can sometimes adjust the
                                                r-rcHrnN /oARKEN coNTRoL before makingNOTE: If you use the llcnrnr.l/oARKEN                                    a trial exposure. When photographing acoNTRoL. remember to check it before                                                bright subject in dark surroundings, moveeach exposure-the pointer doer nol re-                                     the pointer toward "DARKEN"; andturn automatically to the center position                                           with a dark subject in light surroundings,after you take a picture.                                   move it toward "LIGHTEN.'
o When you use the r-rcnrrN/oenKrN         If you are photographing a subject on
coNTRoL for flash pictures of subjects from    an overcast day or in open shade and the
1.2 to 3 metres (4 to 10 feet) from the   red row-ucHT sIGNAL appears in the
camera, move the pointer to the farthest    vTEwFINDEn when you depress the sHUT-
point-two marks-under "DARKEN"    TER RELEASE, your pictures will be too
or "LIGHTEN."                      dark unless you use flash. Setting the
o Remember,  if you take flash pictures,   coNTRoL toward "LIGHTEN" will nol
outside ofthe flash range, subjects that are    produce a lighter picture under these
too close will be too light and subjects that    conditions.
are too far away will be too dark regord-
less of the coxrror setting. Also, if the
Low-LIGHT sIGNAL appears in the vIEw-   Core of Comero, Film, ond Prints
FINDE& setting the r-rcnrnN/onRxBu coN-   o Store your camera and film away from
TRoL toward "LIGHTEN" will not help    heat and direct sunlight-never  in the car
you obtoin o lighter piclure.                 glove compartment, in the rear window,
Efiecis of temperolure: Best picture re-     or in any other areas ofconcentrated heat                                          in the car. Excessive heat may causesults are obtained when the temPerature
 is between 16o and 38"C (60' and 100'F).    permanent damage to the film or the
                                          camera.
o At the higher temperatures in  this                                 o Keep prints in a cool, dry place. Printrange, it may be desirable to set the                                              colors will remain unchanged longer ifLIGHTEN /onnre N coNTRoL toward                                               prints are stored in the dark (in a photo"LIGHTEN" to get prints that are not too                                         album, for example).dark.
                               o Each picture is a sealed unit thato When the temperature  is below 16oC,                                            contains a caustic fluid. Never cul, lrim,place the prints in a warm place (inside                                          punclure, leor, or seporole the pictureyour coat, for example) os soon os lhey                                                      unit, since this may allow some of the fluidore elected from the comero. (Be careful                                                    to escape and come into contact with skin, not to bend them.) You should leave them                                                 or eyes. If there is any of this fluid or other there during the entire development time                                            foreign matter on the print surface) re- or your prints may appear too light. If this                                 move it with a damp cloth. Any cloth precaution is not enough, you may want                                             containing fluid should then be discarded to set the rrcHrnn/oenxnN coNTRoL                                                 in a closed container.toward "DARKEN" and reshoot the
 picture.
 Eftects of lighting: IJnder certain condi-                              CAUTION tions, you may judge your subjects to be                            O Each picture unit contains a caustic too light or too dark. For example, a very                                                       fluid. light subject against a dark background
may appear too light in a print and,   O Normally, the fluid will not appear. But
 conversely, a dark subject against a light       if it does, an alkali burn may result from
 background may appear too dark. A dark     direct contact. Keep the fluid away from
 subject in open shade (shaded from the     eyes, mouth, and skin. Avoid fluid contact
 sun but lighted by a large area of sky) -ty     with fabrics, carpeting, and furniture to
 also appear too dark.                       prevent staining.

 6
View original page 8Page 9 · Read text
O In case of fluid contact with eyes,    deposits on the camera's roller surfaces. If
 immediately flush the eyes with plenty of    this should happen, clean the rollers as
 water and get medical attention. If the    follows. (You may do this even while there
 fluid comes in contact with the mouth or     is film in the camera.)
 skin, thoroughly wash the affected areas                             O Open the rrru coMeARTMBNT ooon The at once.                                         RoLLERS (l2,Cl are contained in the DooR
Cleoning Comero lenses            O Use a cotton swab or a small piece of
O Clean the vrBwprNDER lenses and the    soft, lintless cloth moistened with clean
picture-taking rrxs by blowing away arry   water. Do not use solvenls or delergenls.
dust or dirt. Then breathe on the lenses ro   o Wipe the contaminated areas of the
form a mist and gently wipe the mist away   RoLLERS with the swab or cloth until the
with a soft, clean, lintless cloth moistened    surfaces are clean. Rotate the nollnns by
with Kooex Lens Cleaner or equivalent.    moving the cnen (l2,Bl at the end of the
O If specks of dust collect on the mirrors   ROLLERS to position any foreign matter
                                   where it can be more easily removed.inside the camera, use a rubber syringe to
blow air into the film compartment.    Dispose of the swab or cloth in a closed
Never oltempt lo cleon the mirrors with o    refuse container.
brush, cloth, or ony olher cleoning   CAUTION: The residue cleaned from the
moteriol!                                RoLLERs is caustic. Be sure to observe the
                                          precautions outlined above.
Cleoning Comero Rollers
Occasional fluid leakage may cause small

         Troubleshooting Chqrt

 Whot Hoppened                  Proboble Couse                   Correclion

  Doylight pictures too                 o. Light level of scene                o. Insert flosh for flosh
  dork..                               too low.                                  picture of subject within
                                                               recommended flosh
                                                                                   distonce.
                                          b. Temperoture too high               b. See temperolure
                                      during development.                recommendofions on
                                                                  poge 6.
                                             c. Print ploced on hot                   c. Never leove prinl on
                                        surfoce or in direci                   hol surfoce or in direct
                                            sunlight during                          sunlight during
                                     development.                        developmenl.
                                       d. Hond or obiect wos in             d. Keep honds ond
                                           front of lens.                           obiects owoy from lens.

 Doylight pictures foo                 o. Eleclric eye obstrucfed              o. Keep fingers ond
  light.                                during picture-toking.                  obiects owoy from electric
                                                                             eye.
                                         b. Temperolure below                 b. Put print in worm
                             l6"C (60'F) during                  ploce during
                                     development.                     developmenl-on inside
                                                                        coof pocket, for exomple.
View original page 9Page 10 · Read text
www.butkus.us
                                                                                                                     lf neceslory, move
                                                                           lighten/dorken  control
                                                                   toword "DARKEN".


Repeoting pottern of               Specks of dirt on rollers.             Cleon rollers (pqge 7).
spots opproximotely
3 cm opori on
consecutive prinls.

Smolldork (shodowy)                Dust on mirrors within             With comero unlooded,
spots which oppeor in               comero.                           use o rubber syringe fo
some locolion on                                                   blow ony dust from inside
consecutive prints.                                                     comero.


Flosh doesn't go off.                 o. Flipflosh nol turned                 o. Turn flipflosh over lo
                                  over ofter using oll bulbs              position fresh bulbs qt
                                              in top holf of orroy.                  top (poge 4).
                                     b. Flosh not firmly                     b. Insert flipflosh
                                      inserled in flosh socket.                 correctly


Comero motor runs very               Bottery weok.                      Reploce bottery.
slowly in eiecting print.

Comero molor stops when            Bottery deod or                         Pull portiolly elected print
print (or film cover)  is                exiremely weok.                   from exit slot. Reploce
portiolly eiecfed.                                                                    bottery.


Comero motor runs but            Comero ottempting to            Open film door in
print (or film cover) isn't               eiecl fwo prints ot the              subdued light. Remove
eiected.                        some time.                               film pock, ond pull top
                                                                                      print from pock. Reinserf
                                                                                      film pock in film
                                                                  comportmenl. Prini pulled
                                                                   from pock ond top picture
                                                                          remoining  in pock will be
                                                                                    spoiled.
View original page 10Page 11 · Read text
DEUTSCH                                (2,8) auf der rrappB  fiir das rnprecs
                                         l2,Cl ein und dffnen Sie die KLAPrEBevor Sie die ersten Sofortbilder mit Ihrer                                                soweit, wie es Abbildung l2 zeigt,neuen Kooex Instant Camera machen,
lesen Sie bitte diese Anleitung aufmerk-     I Legen Sie die Batterie so in das snr-
sam durch. Sie werden sehen. wie einfach   TERTEFAcH (3,F1 daB die abgeschrdgte
es ist, mit dieser Camera farbbrillante   Ecke naclt links zeigt Driicken Sie die
Sofortbilder aufzunehmen. Einfach und   Batterie bis zum Anschlag in das Fach
problemlos. In Farben, die Sie verbltiffen   und dann nach rechts, so dafJ die serrBnlB-
werden. Mit einer Camera, mit der das   KERBE (5,Bf in die sarrnnuNc {5,A} des
Fotografieren SpaB macht.                  Batteriefachs einrastet.
  Aber wie gesagt: Bitte lesen Sie die  O SchlieBen Sie die KLAppE ftrr das FrLM-
Bedienungsanleitung sorgfeiltig durch   pacH durch festes Andriicken, damit die
und beherzigen Sie die Ratschliige. Dann    Verriegelu ng an beiden Seiten einrastet.
werden lhre Bilder ein voller Erfole.         Normalerweise reicht eine Batterie fiir
                                       mindestens 10 Filmkassetten. Erneuern
Konstruktionsiinderungen wdhrend der Fertigung    Sie die Batterie, wenn der Bildtransport
vorbehalten.                               aus der Camera 5 Sekunden oder liinger
                                                dauert, oder wenn de r Motorwiihrend des
Monogromm                                 Ti.ansports Iangsamer Iziuft.
                                              Miissen Sie mit eingelegterKassette  dieLosen Sie Ihr Monogramm von dem
beigefilgten Blatt und kleben Sie es in    Batterie wechseln, so machen Sie das bei                                      gediimpftem Licht. Achten Sie darauf,die vrnrrnnuNc (l,E) auf der Camera-                                      daB die Kassette ganz im KASsETTENTACHRirckseite.
                                                    bleibt.
Trogebond                                  Bqtterie wechseln: Zum Herausnehmen
Damit Sie Ihre Camera bequem und   der Batterie driicken Sie diese in das
sicher tragen kcinnen, wird ein Ti"ageband   BATTERTEFAcg ein und schieben sie dann
mitgeliefert. Ftihren Sie das Ende des   nach links, damit sich die KERBE aus der
Ti"agebandes durch die oso { l,B und l,Gf  ,   snlrE'RuNc lcist.
und fiideln Sie es dann wieder durch die     Bewahren Sie Ihre Camera einige Zeit
Metallschnalle, wie in Abbildung 4 ge-    auf, ohne zu fotografieren, sollten Sie die
 zeigt. Ziehen Sie das Band dann fest. Sie    Batterie herausnehmen.
konnen das Band auf die sewiinschte
Liinge einstellen.                                          Film
                                                   Fiir Ihre Konax Instant Camera benoti-
Stofivgewinde                        gen Sie Koonx Instant Print Film PR l0
Um eine ruhigere Camerahaltung zu er-   in Kassetten mit 10 Bildeinheiten und
reichen, kdnnen Sie Ihre Camera auf  einem Lichtschutz-Deckblatt. Jedes
einem Stativ befestigen. Schrauben Sie    Farbbild hat eine BildgroBe ca.7 x 9 cm.
das Kugelgelenk des Stativs in das sre-   Wenden Sie sich bitte wegen Kopien und
TTvGEWTNDE (l,A).                       Vergro8erungen Ihrer Bilder an Ihren
                                                   Fotohzindler.
Bolterie
Fiir den Camera-Motor und die Belich-                                          Film einlegen
tungssteuerung benotigen Sie eine 6V     I Drticken Sie den KNopF (2,81 und off-
Batterie, J-size.                                nen Sie die ruppe  fi.ir das ptlurecH
HINWEIS: Wurde der Ausloser bereits vor    (2,C1.
Einlegen der Batterie gedriickt, so lduft                                  o Achten Sie darauf, daB die norrElr
der Camera-Motor nach dem Einlegen   (l2,Cl in der KLAppE fiir das FILMFAcHder Batterie ca. 3 Sekunden.                                         sauber sind (s. "Reinigen der Comerorol-
Botterie einlegen: Driicken Sie den KNopF    len", Seite 14).
View original page 11Page 12 · Read text
www.butkus.us
o F-asscn Sie die Filmkassette an den    LEUCHTRAHTTanN  (7,C) gezeigte Ausschnitt
Seiten an und tiffnen Sie die Schutzfolie     ist identisch mit dem Bildausschnitt.
durch Ziehen des rerzns (6,A1 in Rich-                          O Der zooM-KRErs 17,Bl im sucHER
 turrg dcr aufgedruckten Pfeile.            ermdglicht Ihnen ein schnelles und
WICHTIG: Halten Sie die Filmkassette nur    leichtes Scharfstellen bei Personen-
on den Schmolseiten, wie in den Abb. 3   aufnahmen.
und 6 gezeigt. Vernreiden Sie Druck auf
das Filrndcckblatt. wenn Sie die Schutz-
 fblic oflhen.                             Entfernung einstellen
                                                Sie haben drei M<iglichkeiten, die Entfer-O Der oranse sTREIFEN (3,E! auf der Kas-                                  nung zum Motiv einzustellen. Alle dreisette rnul3 mit dem orangen sTRETFEN                                     werden durch den nNIppRNUNGSSCHIEBER(3,C) in der Carnera ibereinstimmen.                                     (3,G und 8,D) gesteuert. Benulzen SieSchieben Sie die Kassette bis zum An-                                             hierzu jedoch nicht die oBJEKTIv-Fossungschlog in das rrLMF-AcH und schlieBen Sie                                        (3,A und I,C). Die drei Mriglichkeitendie xlappE.                                                   sind:
O Das srlnzAFrr-wunx (l,H) auf der Ca-                                           Enlfernungsskolo: Schiitzen oder messenmerariickseite zeigt jetzt das Symbol @.                                                Sie die Entfernuns zwischen Camera undDas bedeutet, daB sich das Filmdeckblatt                                   Ihrem Motiv. Dann verstellen Sie dennoch in der Kassette befindet.                                      ENTFERNUNGSSCHIEBER,  bis die MAR-
O Driicken Sie kurz den nusrosEn (9,A)    KTERUNG (8,8f gegeniiber der m-Zahl der
an der Seite der Camera, und lassen sie   ENTFERNUNGSSKALA (8,A) steht. Die Me-
ihn in die Ausgangsstellung zuriickgehe n.    terzahlen sind grau und die Feetzahlen
Dadurch wird das FTLMDEcKBT-nII durch   schwarz gedruckt. Nicht am Objektiv
den scsllrz des BrI-DAusrRrrrs (2,D) an   drehen; Sie konnten den Mechanismus
der [.Jnterseite der KLAppE ftir das FrLM-    beschiidigen.
FACH transportiert. Entfernen Sie das                                      Zoom-Kreis: Bei Personenaufnahmen-Filrndeckblatt. Der erLozAHr-En zeist                                    auBer Kleinstkindern-im Bereich vonjetzt " l"   .                                                 l-7,5 m kcinnen Sie mit dem zoou-KRErs
HlNWE|S: Wir empfehlen nicht, eine Kas-    (7,B) die Schiirfe genau einstellen.
sette ohne das Filmdeckblatt aus der      Betrachten Sie Ihr Motiv durch den
Camera herauszunehmen, da dann die   sucHER und betdtieen Sie den nNrpE,n-
obersten Bildeinheiten Lichteinfall er-   NuNcsscHrosen mif dem linken Zerge-
halten. AuBerdem steht nach dem Wie-    finger. Verindern Sie den Kreisdurch-
dereinlegen einer teilbelichteten Kassette    messer, bis sich der Kopf der Person
der eILozAnr-en auf p.                   innerhalb des Kreises befindet-vom
                                      Kinn bis zur Stirnoberkonle (Frisur aus-
Sucher                                        geschlossen).
Danrit Sie das Sucherbild gut beurteilen                                  HlNWE|S: Nach der BNTTTRNUNGSETN-
konnen, ist der sucHER (l,D) mit einer    sTELLUNG mit dem zooM-KRErs konnen Sie(;tJMIvIIAUCENMUSCHEI- ( l,C) versehen.                                         die Camerarichtung auch leicht verdn-
l)iese kann nach Belieben abgenommen                                          dern, um dadurch einen besseren Bild-
und wieder aufgesetzt werden.               ausschnitt zu erhalten; das Motive muB
O Nehmen Sie die Camera ans Auge und    sich nicht unbedinet in der Bildmitte
halten Sie sie so. daB die nuceNuuscHEI-     befinden.
am Kopf anliegt und Sie das sucnpnsrI-o     Der zoou-KREIs ist zur Entfernungs-
ganz i.ibersehen. Abb. l0 zeigt die Hal-    einstellung bei Aufnahmen von Erwach-
tung fiirAufnahmen im Querformat, und    senen mit einer mittleren KopfgroBe (ca.
Abb. 1l fiir Aufnahmen im Hochformat.    23 cm vom Kinn bis zur Kopfoberkante)
Achten Sie darauf, daB das aucE des    ausgelegt. Stellen Sie daher die Entfer-
BE,r-r(;r{'r'LiN(}sMESSERS  {2,A und 9,8) nicht   nung bei Aufnahmen von Babies, Klein-
durch F irrscr abgedeckt wird. Der im    kindern, Tieren und Landschaften nach
l0
View original page 12Page 13 · Read text
" der ucTBRSKALA oder nach den sr'IrFnn-   HlNWElS: Driicken Sie den eusr-bsnR
        NUNGSSYMBoI-e,N ein.                         nicht nieder, so lange noch der Camera-
                                  Motor l'duft. Die Camera kbnnte        Enlfernungssymbole: Verstellen Sie den                                                        beschiidigt werden.        ENTFERNUNGSSCHIEBER so, daB die r'aen-                                        Dos Bild wiihrend der Entwicklung        KTERUNG (8,8) an einem der drei Symbole                                                     nicht in direkler Sonne oder on einem         steht. Das Nohsymbol ( g, ) steht fiir   heissen Plotz liegen lossen.tl        l-1,8 m, das GruPPensYmbol ($6) ftir                                                       1-2 Minuten erscheinen die Bild-           1,8-3,7 m und das Londschoftssymbol   ( [   )  o In
             ftir Entfernungen iiber 3,7 m.               konturen. Beurteilen Sie die Bildquolitiit
                                                         ersl, wenn die Entwicklung vtillig ob-
                                                  geschlossen ist. Bei normaler Temperatur
        Togeslichtoufnohmen                     reichen etwa 5 Minuten aus. Priifen Sie
      o Stellen Sie mit dem ENTFERNUNGS-   die Bilder bei gedzimpftem Licht; bei
        scHIEBER den Abstand Camera-Motiv   Sonnenschein z.B. konnten sie zu hell
           ein.                                         erscheinen.
      o Uberzeugen Sie sich, daB die nnlr-     Der sllozAnrnn (l,H| zeigt Ihnen von
        DUNKEL-sTEUERUNc (3,8 und 9'Cl in der    1-10 jeweils die Nummer der ndchsten
                                                                       an.       Mitte zwischen "DARKEN" und   Aufnahme
      "LIGHTEN" steht. Dies ist in den meis-   WICHTIG: Wiihrend der ersten 10 Minu-
        ten Fdllen die richtige Einstellung (s.    ten nach der Belichtung sollten die Bilder             '         "Hell-Dunkel-Steuerung"  Seite 12).         vorsichtig behandelt werden. Halten Sie
                                                                              Sie sollten die Bilder            ' O Visieren Sie Ihr Motiv im rpucnrnen-    diese nur am Rand.
       MEN des sucsnns an. Verdecken Sie nicht   nie knicken, biegen, zuschneiden, oder
           (2.B. mit dem Finger) das on;nrrrv oder    folten.
        den gTLTcHTUNGSMESSER
           - o Halten Sie die Camera ruhig und   Blitzoufnqhmen
        driicken Sie den euslbsBR teilweise  Wenn das UNTERBELIcHTUNGSSIGNAL
          herunter. Wenn das uNIr'RBELICHTUNGS-    17,Al im sucnnn anzeigt, daB die Licht-
        sIGNAL l7,Al in der rechten oberen Su-    verhdltnisse nicht ausreichen, sollten Sie
          cherecke nicht erscheint, driicken Sie zur    blitzen. Ihre Camera  ist fi.ir problemloses
        Aufnahme den nuslosER ganz durch und   Blitzen mit einem Blitzmagazin, z.B.
           lassen Sie ihn wieder los. Lcisen Sie jedoch   FLTIFLASH (lO,Al eingerichtet. Das Blitz-
           trotz sIcNAL aus, wird Ihr Bild vermutlich   magazin besitzt in jeder Hiilfte Blitzlam-
         zu dunkel. (Siehe "Blilzqufnohmen").       pen, die bei Blitzaufnahmen der Reihe
                                        nach blitzen. Nach dem Ziinden der      o Nach dem Loslassen des ,cusl-oseRs                                                 Blitzlampe wird der Farbpunkt auf der          transportiert die Camera automatisch ein                                                          Ri.ickseite des Blitzmagazins i.iber der         Bild durch den scnr-trz fiir den BILDAUS-                                              Numerierungdes Blitzes dunkel. Sind alle         TRITT. Achten Sie darauf, daB dieser                                              Blitzlampen in der oberen Hiilfte des         Schlitz nicht durch Finger abgedeckt                                           Magazins verbraucht, ziehen Sie dieses          wird, oder die Camera auf einer [Jnter-                                                heraus und drehen es fiir weitere Blitz-           lage steht, w2ihrend das Bild transportiert                                            aufnahmen um.         wird. Wenn das Bild ganz heraustrans-
           portiert ist, fassen Sie es nur am unteren   WICHTIG: Wenn eine Blitzlampe nicht
         Bildrand an und nehmen es ab, BEVOR SIE    zilndet, werden auch die restlichen Blitz-
         EINE NEUE AUFNAHME MACHEN.         lompen der betrefienden Hiilfie nicht
          Mochten Sie nicht, daB das Bild sofort    ziinden. Drehen Sie das Blitzmagazin
        nach der Aufnahme heraustransPortiert   um, so daB sich neue LamPen in der
         wird, brauchen Sie nur den nust-osBn    oberen H2ilfte befinden, oder stecken Sie
           gedri.ickt zu halten. Erst wenn Sie den    ein neues Blitzmagazin auf. Wenn bei der
         iusrosnn loslassen, wird das Bild aus der    niichsten Blitzaufnahme der Blitz ziindet,
        Camera transportiert und die Entwick-     ist die Camera in Ordnung. Sollte das neu
          lung beginnt.                                aufgesteckte Blitzma gazinwiederum ver-
                                                                                                                                                         ll
View original page 13Page 14 · Read text
www.butkus.us
         sagen, ist eine Uberpriifung der Camera   magazin ab und drehen es um; die unge-
         angebracht.                           brauchten Blitzlampen befinden sich
         Bei Blitzaufnahmen von Personen   wiederum in der oberen Hzilfte.
        kcinnen die Augen rot erscheinen. Die      Sie konnen jederzeit das surzNlAcAzIN
        Ursache ist die Reflexion der roten Netz-   abnehmen und wieder aufstecken. Wenn
        haut. Dieser Effekt zeigt sich besonders    Sie ein teilweise gebrauchtes Blitzmaga-
        bei Menschen mit hellem Teint und    zin aufstecken, iiberzeugen Sie sich, daB
       blauen Augen, oder bei geringer Um-    sich mindestens noch eine ungebrauchte
         gebungshelligkeit. Um diese Reflexion zu    Blitzlampe in der oberen Hiilfte befindet.
         verringern, schalten Sie die volle Raum-                                       HINWEIS: Wenn der srrozAnrnn auf        beleuchtung ein und lassen die Personen                                             E] oder auf "0" steht und Sie losen bei          in die Lampe sehen, damit sich die Pupil-                                                   aufgestecktem BIitzm agazin aus, ziindet
         len etwas schlieBen, oder verwenden Sie                                                 der Blitz nicht.
       den Koonx FIipflash Extender; erhiiltlich                                                      Ihre Camera ist auch fi.ir einige Elek-         bei Ihrem Fotohandler.                                                      tronenblitzgerdte  geeignet, z. B. fiir das
             l. FttPFtAsH oufslecken-Stecken Sie das  Kooax Instant Blitzger:it, Modell B.
        Blitzmagazin in den socxsl (l,Ff auf der   Lesen Sie die Bedienungsanleitung genau
       Cameraoberseite. Die ungebrauchten    durch.
        Blitzlampen miissen sich dabei in der
       oberen Htilfte befinden und nach vorn   Film herousnehmen
         zeigen. Zum Abnehmen ziehen Sie das  Nach der 10. Aufnahme steht der
        Blitzmagazin einfach seitlich ab.         srrozAHrnn auf "0". Offnen Sie die
                                               KLAppE des nrlurecns und ziehen Sie den       HINWEIS: Bei aufgestecktem Blitzmaga-                                          AUSwERFER (3,D und l2,Al nach rechts        zin erscheint das uNTERBELTcHTUNGSSTc-                                           und entnehmen Sie die leere Kassette.       Nar nicht im sucnBn.
         2. Entfernung prtifen-Zur   richtigen    Hel l-Dunkel-Sleuerung
        Ausleuchtung des Motivs ist dessen Ab-   Eine hellere oder dunklere Bildwieder-
         stand zur Camera sehrwichtig. Es soll sich   gabe kann durch verschiedene Faktoren,
         nicht ndher als 1,2 m und nicht weiter als   wie Temperatur, Art und Helligkeit des
       3 m von der Camera entfernt befinden.   Motivs oder Hintergrundes, beeinfluBt
         IJnter 1,2 m wird das Bild zu hell (iiber-   werden. Die snrr-DUNKEL-sTEUERUNc
          belichtet) und unscharf. Uber 3 m wird es   (3,B und 9,Cl ermriglicht Ihnen, be-
       zu dunkel (unterbelichtet). Der orange   sonders bei Tageslichtaufnahmen, einen
       sTRETFEN (l8,El auf der ENTFERNUNGS-    Ausgleich.
        sKALA zeigt Ihnen den Blitzbereich an.     O Wiinschen Sie vom eleichen Motiv.
         3. Entfernung einstellen-Stellen  Sie die   ohne Anderung der Beleuihtung oder des
       Entfernung bei Blitzaufnahmen be-    Hintergrundes, ein helleres Bild, so stellen
                                                                        HELL-DUNKEL-         sonders genau ein; wdhlen Sie hierzu eine   Sie den Schieber der
       der drei beschriebenen Moglichkeiten.    sTEUERUNG in Richtung "LIGHTEN"
        Bei richtiger Anwendung ist der Zoom-     (hell). Soll die ndchste Aufnahme dunkler
        Kreis eine wertvolle Hilfe.               werden. verstellen Sie zu "DARKEN"
                                                       (dunkel).
        4. Blitzoufnohme-Visieren Sie Ihr                                             H|NWE|S: Wenn Sie mit der Hnrr-ouN-       Motiv im sucHER an, halten Sie die                                              KEL-srEUERuNc arbeiten. achten Sie stets       Camera ruhig und kjsen Sie gleichmziBig                                                auf deren Stellung, da sich der scHtEsER.
          aus.                                   nicht automatisch auf die Mitte-         Wiihrend der eusrosnn in seine Aus-                                                     Normalstellung-zurtickstellt.        gangsstellung zuriickgeht, transportiert
         die Camera das Bild durch den scnr-rlz   O Korrigieren Sie Blitzaufnahmen zwi-
             fiir den BTLDAUSTRTTT.                    schen 1,2 und 3,0 m, so stellen Sie den
         Sind alle Blitzlampen in der oberen    scHTEBER jeweils bis zum Anschlag unter
          Hiilfte verbraucht, nehmen Sie das Blitz-   "DARKEN" oder "LIGHTEN".

         t2
t-
View original page 14Page 15 · Read text
O Denken Sie bei Aufnahmen auBerhalb    durch eine Einstellung auf "LIGHTEN"
       des Blitzbereichs daran, daB zu nahe   dos Bild nicht heller.
li       entferntMotive zusind,hellzuunddunkelMotive.wiedergegebendie weiter   logerung yon Comero,        werden, und zwar unobhiingig von der                                                Film und Bild         Stellung des Schiebers der Hell-Dunkel-                                   O Bewahren Sie Camera und Film nicht
         sleuerung. Bei einer uNTERBELTcHTUNGS-     in der Sonne oder an einem sonstigen        ANZETcE im sucHnn erhalten Sie auch bei                                                 heiBen Platz auf. Legen Sie sie niemots in
         einer Einstellung auf "LIGHTEN" kein    das Handschuhfach, unter das Heckfen-         helleres Bild.                                                                  ster, in den Kofferraum oder an andere
        TemperolureinfluB: Beste Bildergebnisse    sehr heiBe Stellen im Wagen. Ein
         erhalten Sie bei Temperaturen zwischen   tJbermaB an Hitze kann d1n Film
         16o und 38"C.                         zerstbren und die Camera bleibend
                                                         beschiidigen.     O Bei hoheren Temperaturen kann es
         erforderlich werden. den scnrBspR auf  O Lagern Sie die Bilder an einem
      "LIGHTEN" zu stellen, um keine zu    ktihlen, trockenen Platz. Farbbilder hal-
        dunklen Bilder zu erhalten.                 ten ldnger; wenn Sie diese dunkel, z.B. in
                                               einem Album, aufheben.
      O Liegen die Temperaturen unter l6oC,
         sollten Sie die Bilder zur Entwicklung   O Jede Bildeinheit des Filmpacks enthdlt
        soforl warm aufbewahren, z.B. in der    eine alkalische Fliissigkeit. Dqs Bild sollte
                                            doher nie ouf- oder zugeschnillen, ouf-        Innentasche des Mantels oder der Jacke.         (Vorsicht, nicht knicken!) Die Bilder soll-    gerissen, gelocht oder von der Folie ouf
         ten wdhrend der vollen Entwicklungszeit    der Riickseile getrennl werden. Dadurch
         in diesem Temperaturbereich bleiben, da   konnte die Fliissigkeit auf die Haut oder                                                 in die Augen gelangen. Sollte die Bild-         sie sonst zu hell werden kcinnten. Sollte
        das Bild trotzdem zu hell geworden sein,   oberfldche irgendwelche  Fliissigkeiten
        wiederholen Sie die Aufnahme mit Stel-    aufweisen, wischen Sie diese mit einem
        lung auf "DARKEN".                     feuchten Tuch ab, das Sie dann in einen
                                                    geschlossenen Behdlter werfen.        Helligkeitskontrosie: IJnter bestimmten
        Voraussetzungen kann Ihr Motiv zu hell                                       voRstcHT        oderzu dunkel                     wiedergegeben                                    werden.                                  So '  O                                                Jede Bildeinheit des Filmpacks enthiilt        erscheint                   z.B. ein                         sehr helles                               Motiv vor                                                     eine alkalische Fliissigkeit, die normaler-      dunklem Hintergrund auf dem Bild zu                                              weise nicht austritt. Geschieht das im         hell, und umgekehrt ein dunkles Motiv                                              Ausnahmefall, kann bei direktem Kon-       vor hellem Hintergrund zu dunkel. Ein                                                  takt eine Verdtzung auftreten. Kontakt       dunkles Motiv im offenen Schatten (im                                            der Fliissigkeit mit Augen, Mund und        Schatten der Sonne, jedoch unter freiem                                    Haut vermeiden. Von Textilien und      Himmel) kann ebenfalls zu dunkel wie-                                   Mbbeln fernhalten. um Flecken zu        dergegeben werden.
          Ijnter diesen Voraussetzungen konnen    verhindern.
       Sie die Belichtung mit dem Korrektur-   O Bei Kontakt mit den Augen sofort mit
       schieber steuern. Fotosrafieren Sie ein     viel Wasser spi.ilen und Arzt hinzuziehen.
        helles Motiv in dunkler [Jmgebung, so    In anderen Fiillen sorgfiiltig mit Wasser
        stellen Sie auf "DARKEN". und bei    waschen.
      einem dunklen Motiv in heller Umge-
      bung stellen Sie auf "LIGHTEN".         Reinigen der Comerolinsen
       Wenn Sie im Schatten oder bei Bewcil-    Reinigen Sie den sucHER und das oBJEK-
      kung fotografieren und im sucHER er-    rlv durch Abblasen von Staub oder
         scheint das rote uNTERBELTcHTUNGSsTcNAL,     Schmutz. Hauchen Sie die Linse an und
       wird die Aufnahme zu dunkel. wenn Sie    wischen Sie sorgfziltig mit einem weiche n,
      nicht blitzen (Blitzbereich beachten).    nicht fasernden Tuch, das leicht mit
      Unter diesen Verhiiltnissen wird auch   "KoDAK Lens Cleaner" oder einem dhn-
                                                                                              l3
View original page 15Page 16 · Read text
www.butkus.us
lichen Mittel angefeuchtet wurde,    FAcH. Die norrpN (l2,Cf befinden sich in
dartiber.                                    der xr-eppB.
o Staub auf den Spiegeln im Camerain-   o Verwenden Sie ein mit Wasser ange-
nern entfernen Sie durch Ausblasen des   feuchtetes Wattesthbchen oder ein
Filmfachs mit Hilfe einer Gummispritze.    kleines, nicht faserndes Tirch. Benulzen
Verwenden 5ie hierzu nie einen Pinsel, ein    Sie kein Liisungs- oder Reinigungsmittel.
Tuch oder ein onderes Reinigungsmittel.    o Wischen Sie die Ablagerungen von den
                                  RoLLEN, whhrend Sie diese mit dem
Reinigen der Comerqrollen            zAHNRAD (l2,Bl drehen. Werfen Sie den
Gelegentlich austretende Fliissigkeiten   Wattestab oder das Tirch in einen ge-
kbnnen zv Ablagerungen auf der    schlossenen Abfallbehiilter.
Oberflziche der Camerarollen fiihren.                                 ACHIUNG: Die von den RorrBN entfern-Reinigen Sie dieselben, auch wenn sich                                     ten Chemikalienreste sind iitzend. Be-eine Filmkassette in der Camera befindet.                                          achten Sie die vorgegebenen Hinweise.wie folgt:
O Offnen Sie die KLAppE fiir das FILM-


           Fehlerbehebung

Erscheinung                             evll. Ursqche                      Abhilfe

Togeslichioufnohmen  zu               o. Beleuchtung zu                     o. Bei Aufleuchten des
dunkel.                             schwoch.                          U nterbelichtungssignols  im
                                                                      Sucher im Bereich von
                                                                                                                                                 I ,2-3 m blitzen.
                                         b. Zu hohe Temperotur                  b. Siehe
                                     wcihrend der Entwicklung.              TemperotureinfluB,  S. I 3.
                                         c. Bild liegt wcihrend der                c. Bild nie bei hohen
                                      Entwicklung on einem zu             Temperoluren entwickeln
                                    heiBen Plqtz oder in                    lossen (in direktem
                                         direkter Sonne.                         Sonnenlicht, ouf heiBen
                                                                                 Unterlogen).
                                      d. Hond oder sonsfiger                d. Dorouf ochten, doB
                               Gegenstond vor dem                dos Objektiv frei ist.
                                        Obiektiv.


Togeslichtoufnohmen zu               o. Belichtungsmesser                  o. Belichtungsmerser muB
hell.                            wdhrend der Aufnohme                    frei sein.
                                      obgedeckt.
                                      b. Bei Temperoturen                   b. BiH wdhrend der
                                      unter l6oC entwickelt.                 Entwicklung worm hohen,
                                                                                z.B. in der Innentosche
                                                                                   einer Jocke oder eines
                                                                         Montels. Folls ncitig,
                                                                             Hell-Dunkel-Steuerung  ouf
                                                        "DARKEN"  stellen.


t4
View original page 16Page 17 · Read text
Helle Flecken, die sich im             Schmutzflecken ouf den               Rollen reinigen
 Abstond von co. 3 cm                    Rollen.                                 (Seite l4).
 wiederholen.


 Kleine dunkle Punkte (wie            Stoub ouf den Spiegeln           Ohne eingelegte
 Schotten), die ebenfolls                   in der Comero.                         Filmkossette durch dos
 hintereinonder ouf den                                                      Kossettenfoch dos
 Bildern erscheinen.                                                     Comeroinnere  mit einer
                                                                         Gummispritze  ousblosen.

 Blitz zr.indet nicht.                     o. Flipflosh noch Verbrouch            o. Flipflosh umslecken,
                                              oller Blitzlomoen  in der               domii sich neue Lompen
                                 oberen Hcilfte nicht                oben befinden (Seite I I ).
                                         gedreht.
                                       b. Blitzmogozin  nicht                  b. Blitzmogozin  richtig
                                              richtig oufgesteckt.                     oufstecken.

Comero-Motor lduft beim              Botterie schwoch.                       Botierie erneuern.
 Bildtronsport sehr
longsom.


Comero-Motor  bleibt                   Botterie leer oder sehr                   Bild oder Deckblbtt gonz
beim Tronsport des Bildes oder       schwoch.                            obziehen, Botlerie
des Filmdeckblotts stehen.                                                    erneuern.


Comero-Motor  lciuft, Bild              Die Comero mcichte 2              Comero im gedcimpften
(oder Filmdeckblort) wird                Bilder gleichzeitig                         Licht ciffnen und die
iedoch nicht ous der                       tron sporlieren.                         Kossette entnehmen. Dos
Comero lronsportierl.                                                                      Bild von Hond
                                                                     herousnehmen. Dos
                                                                                  ncichsie Bild wird jedoch
                                                                          durch Lichteinfoll
                                                                                 versch leieri.


                                                                                          l5
View original page 17Related documents and language editions
KodakPDF
Kodak Colorburst 250 Instant Camera
User manual
26 pages · EnglishRead →
KodakPDF
Kodak Colorburst 350 Instant Camera
User manual
23 pages · EnglishRead →
KodakPDF
Kodak Colorburst 50 Instant Camera
User manual
27 pages · EnglishRead →
KodakPDF
Kodak Colorbust 100 Instant Camera
User manual
30 pages · EnglishRead →
KodakPDF
Kodak EK200 Instant Camera
User manual
20 pages · EnglishRead →
KodakPDF
Kodak EK4 Instant Camera
User manual
30 pages · EnglishRead →
KodakPDF
Kodak EK6 Instant Camera
User manual
31 pages · EnglishRead →
KodakPDF
Kodak Partytime Instant Camera
User manual
18 pages · EnglishRead →
KodakPDF
Kodak Pleaser Instant Camera
User manual
30 pages · EnglishRead →
KodakPDF
Kodak The Handle Instant Camera
User manual
30 pages · EnglishRead →
From the M. Butkus archive. Original publisher and archive notices are retained.
Check the model and edition against your equipment.
PDF verified 2026-10-10.