Film cameras
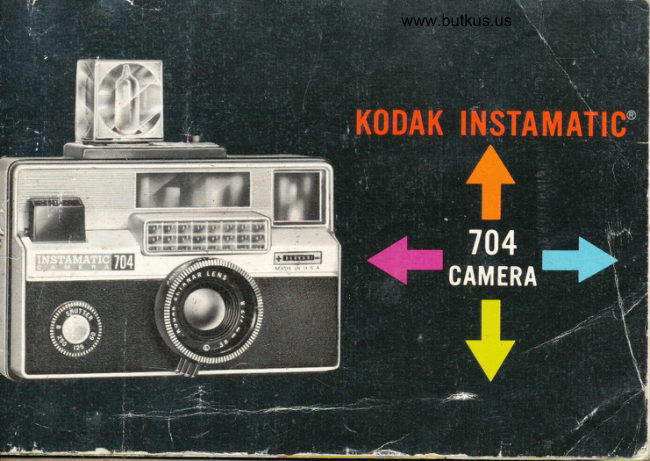
Kodak Instamatic 704 User manual
User manual for Kodak Instamatic 704. 20 pages in English. Read the original PDF, download or print a copy without registration.
20 pagesEnglish5.2 MB PDF
Loading your manual…Open PDF directly
Document details
- Brand
- Kodak
- Model / document
- Kodak Instamatic 704
- Document type
- User manual
- Language
- English
- Pages
- 20
- File size
- 5.2 MB
- Category
- Film cameras
- Document date
- Not specified in catalog
Search available document text
Find a term, then jump to its page in the original PDF. Image-only pages may not be searchable; check the PDF for exact wording and diagrams.
Page 2 · Read text
DAK
                 Your Kooer INsrevrerrc 7O4 Camera-with   f 12.8$F{STArui                        lens, fast-action shutter, automatic electric-eye expo-
                       sure setting, automatic flash control, illuminated finder
                         signals, and automatic flashbulb advance with the new
                      flashcube-is one of the most distinguished members
                      of the Kooex INsrevrerrc family.
                      Simply do this . .  .
                  o Drop in film cartridge-camera  is loaded
                   o Operate Film Advance Lever-first exposure is ready
                    o Set for CLOSE, GROUP, or SCENE-camera is
                       focused
                   o-Aim through Viewfinder and press Shutter Release
                     -you've taken the picture
                                                    read on lor the details
View original page 2Page 5 · Read text
www.butkus.us For 12 black-and-white snapshots. Standard enlarged
 black-and-white prints from your negatives are 3/z x
 31/z inches in size. Bigger enlargements are available.
For 12 or 20 color snapshots. Standard enlarged color
prints are 3Vz x 3Vz inches in size. Color slides, as well                                         d     NOTE:as bigger color enlargements, are also available.
                                                         You obtain color negatives
For 20 color slides. These color pictures on film are        Thesefrom Kooecor-on-Xnegatives areFilm.pri-
                                                                   marily for enlarged color.framed in2x 2-inch mounts, for slide projection.     w                                                                                       prints, but you can also ob-
For 20 color slides. Can be processed by the user or by           tainnegatives.color slidesFromfromKooe-the
a laboratory. These color pictures on film are framed        cnnoue-X, Kooex Exre-
                                                                   cxnoue-X,                                                                                      Speed                                                                         or                                                                     Highin 2 x 2-inch mounts, for showing in slide projectors.                                                                                                        Film,.                                                              Errlcxnoue                                                                     you                                                                                                               ob.                                                           $
                                                                    T";,      tain color slides, ready forFor 20 color slides. This extremely fast film is ideal for           projection. You can also
taking pictures of dimly lighted subjects or fast action.          largedhave duplicatecolor printsslides ormadeen-
These color pictures on film are frame d in 2 x 2-inch         from the original slides.
mounts, for slide projection. Can be processed by user
or a laboratorv.
Films, processing, printing, and mounting service, can
be obtained from your photo dealer.
View original page 5Page 6 · Read text
LOADING
                                                                                                                           Digitally signed by Mike Butkus
                                                                                             DN: cn=Mike Butkus, o=Butkus camera manuals,
                                                                                                       ou=butkus.org, email=mike@butkus.org, c=US             Mike Butkus Date: 2024.01.31 21:13:15 -05'00'

                          ffi                I                         2                         3
Open the back of the cam-      With the cover in its per-       Close the back of the cam-
era by sliding the r-ocx but-       pendicular loading position,      era by pressing the back
ton down to pop open the       place a film cartridge in the       against the body until it
hinged cover; then swing      camera, as illustrated, with        locks. The film name and
out the cover, as far as  it     the larger cylindrical end      number of exposures per
will go, until it "click-stops"     down and toward the lock        cartridge appear in the wtx-
approximately perpendicu-        button.                   Dow on the back of the
lar to the camera. The cover                                      camera. The film speed and
must be opened to this posi-                                              flash guide number are now
tion to allow the film car-                                         automatically set.
tridge to automatically set
the correct film speed.
View original page 6Page 7 · Read text
www.butkus.us
                                             UNLOADING
                                                                                           l. After the last picture, operate
                                                                    the film advance lever until it locks,,
                                                               before you open the back of the
                                                             camera, The appearance bf an "X"
                                                                                  in the center window indicates that
                                                                    the film has been exposed, but that
                                                         the backing paper has not been
                                                  wound into the take-up chamber.
                                                                 cilFOXl                          2. Slide down the lock button:
                                                         open the back.
                                                         3. Remove the cartridge by turning
                                                            the camera over to allow the car-
                     4                                      tridge to fall into your hand. Clirse                                                                    the back. Do not open the cartridgeSlide the FILM ADvANce lever as far as it will go toward the              pictures may be ruined. right, and allow  it to return; repeat untit the lever locks (about     -your
8 full strokes). The appearance of a series of arrows in the     NOTE:
center of the window indicates that the film is advancing to-     Do not remove the cartridge from
ward the first exposure. After each picture, operate the fitm      theper, camerawith the until"Xs,"allhasthebeenyellowmovedpa-advance lever one full stroke (or several short strokes until the      past the window; otherwise several
lever locks) to advance the film.                               exposures will be "light-fogged."
  The number that appears in the center of the window on the     Removing and replacing partially-
back of the camera (shown above, right) serves as your expo-     exposed cartridges, even under
sure couNrEn, The same number may appear in dupticate.          darkroom conditions, may result in                                                                       loss of one exposure.
View original page 7Page 8 · Read text
SHUTTER SETTING
Your camera has four manuatly'adjustable
           shutter settings - 60
(1/60 sec.), 125, 25O, and "8" -plus 1/30, which is automatical-
ly selected for flash by inserting
the flashcube in the socket. A
shutter speed of t/125 (125) is
recornmended for general daylight picturetaking; the faster speed (25O) is use-
ful to minimize the effect of subject or camera movement, while the slower
speed (60) can be used for less favorable light conditions.
   If there.is not s,ufficient available light for proper exposure at the slowest
shutter speed (selected automatically; page 9l), a red warning srcNAL, usE
FLASH, will appear in the viewfinder, as the shutter release is slightly depressed.*
                                                           the shutter opensIf flash is hot appropriate, use the "Bo' (Brief time) setting -when the shutter release is fully depressed and closes when pressure is removed.
Af1er, each "8" exposure' the shutter setting .moves automatically to 250
QiZi0).and can easily be reset for another "Bi exposure. The cameri must be
on a solid support, such as a tripod for these longer exposures
*Batteries must be installed as on page 14 to power the warning signal.
View original page 8Page 10 · Read text
Unusual Situations: Because the electric eye reads the over-all brightness of a
    scene, better results sometimes can be obtained by altering the exposure when
   there is considerable brightness difference between the subject and the back-
   ground. If you wish to give one stop more exposure for a dark subject against   a larger light background, rotate and hold the knurled covrprNsAToR as far as       I
     it will go toward the plus (*) sign while taking the picture; for a light subject
    against a larger dark background, you can give one stop less exposure by rotat-
   ing and holding the covrpBNSAToR as far as it will go toward the minus (-)
    sign, during exposure. The compensator resets to normal when released- This
   exposure compensator can also be used with flash to give one stop more expo-
    sure for a dark subject, or one stop less for a light subject.
      Also, in daylight pictures, when severe brightness differences occur between
   the subject and the background and it is possible to get close to the subiect,
   you can exclude the background by moving up to a place where only the sub-
    ject fills the finder. Then press down the shutter release, shown, page 13, about
    r/+ of the way (not far enough to release the shutter), continue to hold the
    release in this position to maintain the close-up exposure setting; then step                                                                          $    back, aim, and press the release down fully to take the picture.
lo
View original page 10Page 11 · Read text
www.butkus.us
                           VIEWING AND DISTANCE SETTING
                            Hold the camera close to your eye with the eye cen-
                                   tered on the rear eyepiece so that the complete lumi-
                               nous viewframe is visible. The image seen within this ti                           viewframe will be included in the picture, except at
                                   short camera-to-subject  distances. The two indicators
                                 (one on each side) near the top of the frame, and theilr                        one at the lower left, provide parallil( correction at
                                a subject distance of about 5 feet. Therefore, when the
                                   subject is at about this distance, aim the camera so
                                    that the subject image is within this smaller area, as
                                  outlined by the dotted lines in the illustration at left.
                                 NOTE: Since the picture area is square, there will be no format
                                       advantage in holding the camera vedically.


                                                                                    t1
View original page 11Page 12 · Read text
scale Distance setting-Estimate the camera-to-subject* distance carefully and
rotate the LENs MoUNT by its convenient knob until the figure representing the
camera-to-subject distance in feet is opposite the focusing uem.
Handy, Zone Distance setting-For quick distance setting while viewing the
subject, a symbol-type scale appears at the top of the luminous frame in the
viewfinder. Rotating the lens mount moves the rNDrcAToR to the left symbol
for CTOSE-UPS (4-foot range), middle symbol for GROUpS (9-foot range),
or right symbol for SCENES Ql-foot range and beyond). Intermediate dis-
tances can be estimated on this scale.
*For precise measurement  at the shorter subject distances, measure to the film plane marker
 (-G) on the top of the camera.


                                        ntais ix n.8


              www.butkus.us
View original page 12Page 13 · Read text
www.butkus.us
                      OUTDOOR PICTURES
                        o Set the shutter speed. For general picturetaking, the
                                 shutter speed setting may be left at 125.
                        o Set the camera-to-subject distance by the symbol scale
                                in the finder, or the footage scale on the lens mount.
                          o View the subject, as illustrated, with your eye close to
                               the rear opening of the viewfinder so that the subject
                                             is framed by the luminous viewframe. If, as the shu-tter
                                   release is slightly depressed, the red warning signal ap-
                             pears in the right side of the viewframe, there's not
                                  sufficient light for proper exposure. However, flash
                            can be used for close subjects, or a .,B,' exposure for a
                                               still subject.
                        o Hold the camera steady and take the picture by slowly
    cD                                pressing the snurrER RELEAsn all the way down.] SHUTTER                  -.
];RELEASE                 o Operate the film advance lever one full stroke. you
                               are ready for the next exposure.
                              NOTE: The shutter release cannot be depressed a second time
                                         until the film advance lever has again been operated one furl
                                        stroke. This provides double exposure prevention.
View original page 13Page 14 · Read text
FLASH PICTURES
      Your camera features easy, rapid flash picturetaking with the new rotating
                                                                                                                                                                                                                                                                                                                                                                                               ,f         flashcube, and automatic flash control-the correct lens opening is automati-
         cally set as you focus for the camera-to-subject  distance. The iotating flash-
       cube incorporates 4 blue bulbs (for all films), reflectors and flashguards.                                         II
       o For color slid'es, use Kooer Emncnnovre-X, High Speed EmecHRoME, or
         KooecnRovrc-X Film.
       o For color prints, use Konecolon-X Film.
       o For black-and-white prints, use Kooe< Venrcunovn Pan Film.
                          Batteries: Two photoflash, N-size, batteries (alkaline-type rec-
                  ommended) are required to power the flash and finder signals.':.
                     Clean battery contacts, before installing, with a rough cloth. To
                         install batteries, first open the battery compartment on the
                    bottom of the camera, as shown, by inserting the thumbnail in
                      the notch, pressing in the direction of the arrow, and swinging
                    open the hinged covER. Insert the batteries-one base down; the
www.butkus.us         other base up-as illustrated. Close the cover securely.
          '*Flash failure usually results from tarnish (often invisible) on battery and camera con-
            tacts. Clean battery and battery-compartment  cover contacts often with a rough cloth.
         Clean recessed contacts in battery compartment often by rotating a pencil eraser several
          times against the contacts. If flash failure persists after cleaning, install fresh batteries.
View original page 14Page 15 · Read text
www.butkus.us
                  TAKING FI.ASH PICTURES
                          . Insert Flashcube-Insert the base of the rrAsncuse
                        into the socket on the top of the camera; then press
                 down the flashcube until it snapJocks in place with
                    one of its four sides facing forward in its detent (click-
                        stop) position. If a fresh bulb is.in the frontal firing
                          position, a FLAsH READv srcNAL appears in the left sidi
                      of the viewframe a,r the ihutter release is slightly de.
                         pressed. Absence of this signal indicates that the cube
                            is not detented in its frontal firing position or that a
                      used bulb is in the forward position. Also,. a dim signal
                   or no signal can indicate that batteries should.be
                    checked and possibly replaced. The use rr-lsr signal
                 may or may not appear, depending on the amount of
                        illumination present.
  The cube revolves* one quarter turn (clockwise) each time film is advanced
to the next exposure, thus providing flash for 4 exposures il a lresh cube is in
place. If a partially used cube is in place and film has been advanced, a fresh
*IMPORTANT: Do not obstruct rotation of flashcube.
                                                                    l5
View original page 15Page 16 · Read text
bulb must face forward; if film is to be advanced, make sure that a fresh bulb
is facing toward the e.rncron button, so that it will rotate into position as film
is advanced. The cube can also be rotated by hand to bring an-y fresh bulb to
its. frontal firing position.
  Press down the r-recron button (shown, page 15) to remove a flashcube.
o Set Distance-Rotate the lens mount until the figure representing the camera-
to-subject distance in feet (up to 25 feet) is opposite the focusing mark.
o View Subject-Look through the eyepiece and compose the picture within the
luminous viewframe of the viewfinder.
o Take Picture-Hold the camera steady and slowly press the shutter release to
flash the bulb and take the picture.
AUTOMATIC FILL.IN FLASH
When flash is used in combination with available light (fill-in flash) the elec-
tric eye determines the lens opening on the basis of available light at 1 130
second, and the flash exposure control determines the lens opening on the
basis of the distance setting in the 3 to 25 foot range. The smailer of the two
openings is automatically set when taking the picture. At short subject dis-
tances or relatively low available light levels, fill-in flash will produce better
lighted pictures, especially of side- or back-lighted subjects.
View original page 16
Page 17 · Read text
PHOTO AIDS                                www.butkus.us
You can extend your picturetaking scope and enjoyment with the photo aids
describedbelow.SeeyourKodakdealerfortheseandothers.
Koonx hsrnunnc Field Gase, Model F_This attractively lined, molded case will provide
maximum camera protection. The special design permits instant picturetakin-g, load-
ing and unloading without removing the cameri from its case. A Koolr InJnurnc
compartment case is available for carrying camera, film, bulbs, filters, etc.
Koolr Lens Attachments-A removable ring is provided on the front of the lens mount
of your camera to retain a Series 5 filter or other useful lens attachment.
  Merely unscrew the ring on the front of the lens mount, insert a filter or other
lens attachment; then screw the ring in place to hold the accessory.
Koorx Flashcube Extender-Increases the distance between the lens and the flashcube
to produce more pleasing modeling and shadow eftects in crose-ups.
Koolx Projectors-A Kooex Projector will show your color slides big, bright, and
sharp on the screen. Ask your dealer to see the revolutionary, fully-aut6matiE Kooex
CnRousr'r Projector. Features round, 80-slide trays that changb ai quickly and easily
as a hi-fi record. Other features include remote focus, remotJ forward slide change,
remote reverse, instant editing and 500-watt power.
Koonx Publications-The keys to snapshot fun and success are to be found in "How to
Make Good Pictures"-perhaps the most popular picturetaking book of all time.
Your Kodak dealer will be glad to show you this ind other inixpensive books onphotography.                                                           17
View original page 17
Page 18 · Read text
CARE OF THE CAMERA                        GUARANTEE
Your Kooe< INsrewerlc is a         Within a year after purchase, any repairs                                            necessary to this Koonx Insrnulrtc Camerafine, ruggedly built camera, but                                   due to a defect in materials or workman-yet a precision instrument. Pro-           ship will be made or, at our option, the cam-
tect it from dust and dirt and          era will be replaced without charge. No other
avoid rough handling. Use a rub-          warranty or guarantee, express or implied,
ber syringe to blow out any dust            shall be applicable to this equipment. Nor are                                 we responsible for loss of film, for other ex-
that may accumulate inside the         penses or inconveniences, or for any conse-
camera. If the lens needs clean-           quential damages occasioned by the equip-
ing, first brush or blow away any           ment.                                                ln case of a defect, the camera can begrit or dust, then wipe the surface                                             sent directly or through a Kodak dealer to
gently with Kooer Lens Cleaning         Eastman Kodak Company or a repair firmPape.r. If necessary, use Kooer          authorized by us to make such repairs.* lt
Lens Cleaner.                             should be accompanied by a description of
  Do not attempt to make any         the trouble encountered and other available                                               information regarding the camera, including
repairs or remove any parts from          the date and place of purchase.
the shutter, lens, or camera.         *Kodak service facilities, with addresses, are
Never oil the shutter or any other           described on the following page.
parts of the camera.                    EASTMAN KODAK COMPANY                                               Rochester, New York 1465O
View original page 18
Page 19 · Read text
www.butkus.us

                               SERVICE FACILITIES
             lf your Kodak camera should  Eastman Kodak Company   Eastman Kodak Company
        require attention, complete Apparatus Service          Apparatus Service
         service facilities are provided 8OO Lee Road             3250 Van Ness Avenue
       at Rochester and in Kodak  Rochester, NewYork 14650  San Francisco, California 94119
        Regional Sales Divisions at
                                                                  Eastman Kodak Gompany        thJ addresses opposite. Also,  Eastman Kodak Gompany                                                                    Apparatus Service        service covered under the   Apparatus Service      guarantee is  available   1901_West22nd Street      -1334YorkAvenue                                                       New York, New York 10021       through independent service Oak Brook, lllinois 60523
                                      Eastman Kodak Gompany  Eastman Kodak Gompanylt      shopssuch local,in guarantee_-c"Y:I:.1manv "'t':::..|E                                                   ;;;;;;irt  service           Apparatus Service        service' please see. your                                   l;50 Hi Line Drive         l2loo Rivera Road       Kodak dealer                            refer                    or                                 b-llttli                                   o"iiJr,'r"""s75207           Whittier, catifornia 90606             pages        yellow                                           tele-                     your                   of
       phone directory under fh_oto- Eastman Kodak Gompany  Eastman Kodak Company        graphic Equipment and Sup-  Apparatus Service          Apparatus Service         plies-Factory Approved War-  S3L5 peachtree             ltlbS fapiotani Btvd.
         ranty Service.                    ndustrial Blvd.               Honotulu, Hawaii 96807
                                       Chamblee, Georgia 30005
View original page 19Page 20 · Read text
DETAILS
Film.                                                               I Lens openings set automatically by
o Film Size-Kooex No. 126 in the film car-           electric eye.
   tridge; 12- or 2O-exposure.                  o Automatic shutter control reduces speed
o Negative Size-28 x 28mm.                             after maximum lens opening is reached.
Lens-38mm, t/2.8 Koonx Exreren                                               Automatic Flash Gontrolo Lens Openings-f /2.8 through f/64-set  by automatic exposuYe controls.             o Guide number is set automatically by film
 . Focusing Range-3 feet to infinity.                   cartridge (4O to 228).
a Le4s Attachments-Series  5. Ring           o Built-in socket for 4-bulb flashcube.
   supplied.                               a Correct lens opening is set automatically
                                                  by focusing.Shutter-Automatically set
r Speeds-1,/60, l/I25,  l/25O; plus 1/30,      o automaticallyFlash shutter speedby inserting(1,/30 flashcube.sec.) is set   set by exposure control and for flash. Also
  "8" for brief time exposures.                            I Uses 2 N-size batteries.
Viewfinder                                      Other Featureso Optical, projected viewframe-type  with   parallax marks for 5 feet.                 a lnstant Loading and Unloading.
r Handy distance-setting scale for  Close-      o Single-Stroke Film Advance.
  Ups, Groups, and Scenes.                   o Automatic Double Exposure Prevention.
o llluminated signals for insufficient  light     o Exposure Compensation.
  and flash readiness.                                        I Tripod Socket.   '
Automatic Daylight Exposure Gontrol           o Eyelets for neckstrap (supplied).   '   -
r Film speed is set automatically by film        o Die-cast metal body; black and satin
   cartridge (ASA 25 to 800).                       chrome finish.
       EASTMAN KOT'AK COMPANY . Rochester, New York ltt650
Pt. No. 633042
J-67-CH-l                                                                     Printed in lhe United Siofes of Ancrico
View original page 20Related documents and language editions
KodakPDF
Kodak Instamatic 100
User manual
18 pages · EnglishRead →
KodakPDF
Kodak Instamatic 104
User manual
17 pages · EnglishRead →
KodakPDF
Kodak Instamatic 300
User manual
17 pages · EnglishRead →
KodakPDF
Kodak Instamatic 324
User manual
17 pages · EnglishRead →
KodakPDF
Kodak Instamatic 400
User manual
37 pages · EnglishRead →
KodakPDF
Kodak Instamatic 404
User manual
17 pages · EnglishRead →
KodakPDF
Kodak Instamatic 414
User manual
16 pages · EnglishRead →
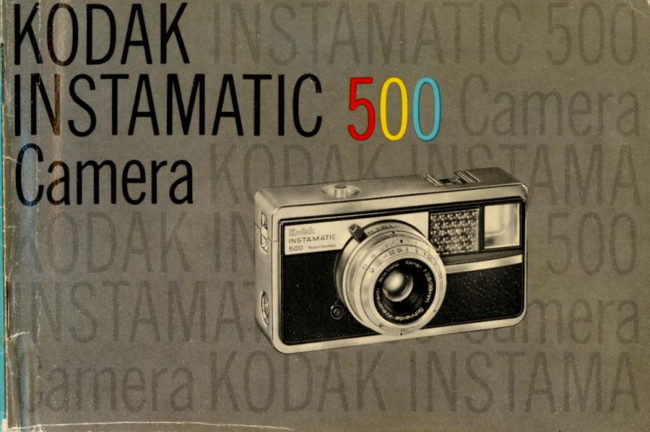
KodakPDF
Kodak Instamatic 500
User manual
21 pages · EnglishRead →
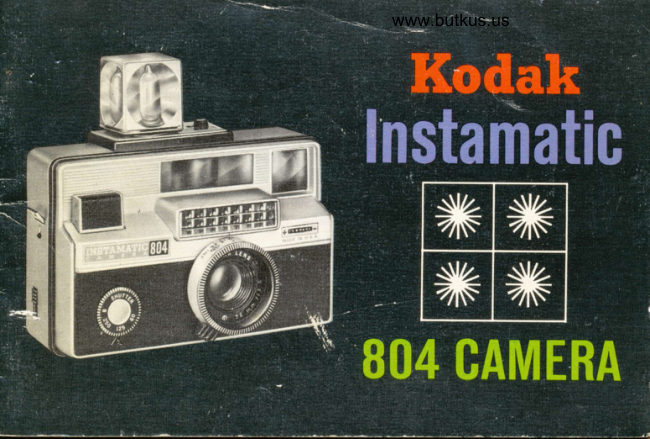
KodakPDF
Kodak Instamatic 804
User manual
21 pages · EnglishRead →
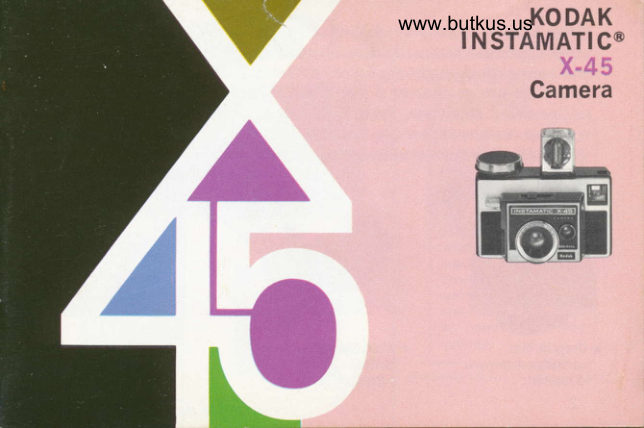
KodakPDF
Kodak Instamatic X45
User manual
18 pages · EnglishRead →

KodakPDF
Kodak Instamatic X90
User manual
23 pages · EnglishRead →
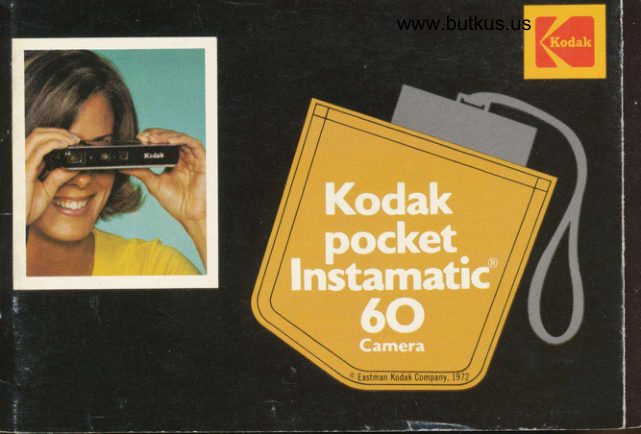
KodakPDF
Kodak Pocket Instamatic 60
User manual
33 pages · EnglishRead →
From the M. Butkus archive. Original publisher and archive notices are retained.
Check the model and edition against your equipment.
PDF verified 2026-10-10.