Film cameras
Polaroid 110A User manual
User manual for Polaroid 110A. 30 pages in English. Read the original PDF, download or print a copy without registration.
30 pagesEnglish3.9 MB PDF
Loading your manual…Open PDF directly
Document details
- Brand
- Polaroid
- Model / document
- Polaroid 110A
- Document type
- User manual
- Language
- English
- Pages
- 30
- File size
- 3.9 MB
- Category
- Film cameras
- Document date
- Not specified in catalog
Search available document text
Find a term, then jump to its page in the original PDF. Image-only pages may not be searchable; check the PDF for exact wording and diagrams.
Page 2 · Read text
www.orphancameras.com
             how   to make
                  g ood  p i ctu res
                        with  yo u r


www.orphancameras.com
        Polqroid
                   LAND
                GAMERA
View original page 2Page 5 · Read text
www.orphancameras.com


DO YOURSETFA BIG FAVOR and spend a few minutes readingthis bookletbeforeyou
takeyourf irst picture.


                                               This booklet tells you everything you
There are about two  million Land         need to know   the basicoperatingin.
Camera owners who will tell you that            structionsin the first half, the fine points
their cameras produce wonderful pic-              in th e second. lf yo u go th ro ugh it care-
tures    but they'll also tell you that                      f ufly, you r very f irst picture will be ex-
you can spoil some film  if you don't            cellent and you'll have a  lifetime of
use the camera correctly.                      wonderful picture-making.


                                                                                             Page  I
View original page 5Page 7 · Read text
www.orphancameras.com


      OPEN ALL T H E WAY AND LAY FLAT
                               (


                                                                          T H I S I S T H E
                                                                  INSIDECOVER
                                                                       LIFT IT AND LAY IT FLAT


  NOW IT'S R EA DY    POSTTTVE(WHtTE)ROLL     NEGATTVE(SPOOLED)ROLL WrLL
                          WILLDROPIN HERE             D R O PI N H E R E   FOR,tOA DI NG


               ROLLER     STOPPINS                ROLLER


which control the picture-making by squeezing the developer reagent evenly between the positive and negative
sheets. Keep these .ollers clean -   spin them before each roll is loaded, and remove with a damp cloth any
particles of  dirt. The stop pins shown above drop into holes punched in the paper and stop  it automatically
in the correct place each time you advance the paper to develop a picture.
                                                                                 Page 3
View original page 7Page 8 · Read text
DO NOTBREAK                    www.orphancameras.com
THESESCOTCHTAPE


  UNWRAPTHE PICTUREROtt. Polaroid Land  picture  rolls are the only              PIACE THE SP00t in  the  negative
   o n e s  t h a t c a n b e u s e d   i n y o u r c a m e r a . Open the box and remove                  slots so that transparent tape seal
   the sealed foil wrapper.  Unroll gently, being careful  not to break                      is on top of the spool.
   the transparent tape seals.


                                                                       PICK UP IHE CAMERAlike  this. Squeeze
           FOLDLEADERBACKaround  roller.  Lay  it flat between                                 it shut and swing the latch all the way
               guides. Now close the outside cover.                                            left to engage prongs, then  all the way
                                                                                                    right to lock. Make sure both sides lock.
View original page 8Page 9 · Read text
www.orphancameras.com


                                                 SWINGINSIDEC0VERBACK a s  s h ow n.
DROPTHE POSITIYE(white)                                                        Draw out leader gently until stars ap-
roll into its well.                                                  pear beyond roller.


 PUIL THE IEADERTAB straight out about  l5"  until it clicks and stops
 automatically at the words, "STOP  -  PICTU RE NO. 1 Ready to          H0LDCUTTERBARdown firmly with
 Take." Allow the cutter bar to ride along the leader as you pull tab.           thumb   -   tear  off and discard
 This will prevent stray light from entering tab slot and fogging film.            excess paper.
                     www. butkus.orglchinon                         Page 5
View original page 9Page 13 · Read text
www.orphancameras.com    HOWtO SET F[|R EXpISURE(rheeosiesrwoy)
Althoughthe various controls shown on the opposite page may appear complicated,there is one very
simple way to set the camera for correct exposure, and you'll probably want to standardize on it.
 Here's how:
           Selectthe shutter speed you want to use. l/l25th  is the
           best average setting. On a bright day, for fast action  FlpqT.
    I rnrr  I r  shots, you can use 1/300th without trouble, and on a
             dull day use 1/60th. (More on this on page 10.)


         Read the number on your meter (PR-23Aor 620) or use
              numberin theexposureguidepackedwith  1{EXT:              lffi f,#.EV


                                                                                                                                                                                                                                                                                                                                                                                                                                                                                                                                    :r,:r,f;m.:::ilwffN UM BER
         Move the Aperture Control until the pointer below the
           lens rests on the number you want. These are the ..EV"
  TllFN.   numbers, an extension of the original Polaroid Land     I llLlro         Camera number system that makes it unnecessaryto
           bother with "f-stops."

lf you want to change shutter speeds,you can do so. You'll noticethat this will shift the "EV" numbers
and you must reset the EV pointer to the number you want. You'll also notice that there's a limit to
how far the pointer will go, and if the number you want is beyond that limit, you must turn the shutter
controf ring to bring the number to the pointer. For more detailed instructions,see pages 20 and 2L.

                                                                                            Page 9
View original page 13Page 15 · Read text
www.orphancameras.com


     N O T I N F O C U S                       I N F O C U S

A I M T HR O UG H
T H E VI E W F I N D E RW I N D O W :

Now that you have focused the camera, just move your
eye over to the viewfinder window, and you're ready
to  ta ke the  picture. The viewfinder opticaI system        C O C K T H E S H U T T E R
automatically corrects for parallax when you focus the                                                                                                             . . . then tqke the picture
cam era, which means that you simply can't cut off
heads or a im the camera inaccurately. Whatever you           Press the shutter release lever slowly.
see through the viewfinder,you'll actually get in the          D o n ' t p u n c h    i t o r  " s n a p "      i t .  ( W o u l d
picture.                                                                        that  pictures had never been  called
                                                                                                                          " s n a p s h o t s " !  S o m a n y  p i c t u r e s a r e
Do not use the viewfinder at all for pictures made with            spoiled  by  literally "snapping"   the
the Close-upLens Kit, becauseit will not show you the             shutter, jarring the camera so that the
exact scene. Follow instructions with the close-up kit          w o r l d g o e s  b y     i n  a  b l u r w h i l e   t h e
for a im ing the camera.                                                       s h u t t e r     i s  o p e n . ) H o l d   t h e  c a m e r a
                                                                                    firmly  against  your  cheekbone  a'nd
                                                                 S - Q - U - E - E - Z - Et h e   s h u t t e r    r e l e a s e
                                                            s-L-o-w-L-Y.

                                                                                                 Page 1 I
View original page 15Page 16 · Read text
www.orphancameras.com
Howto DEVEL0P
A PICTURE
 S h i e l d  t h e c a m e r a   f r o m d i r e c t
 s u n l i g h t d u r i n g  t h i s o p e r a t i o n .

  H O L D T H E C A M E R A T H I S

                                          S N A PT H I SS W I T C Hi n e i t h e r             L I F T C U T T E RB A Ra n d  t a k e a
                                                    direction to release film.  (lf              firm hold on the paper tab,
                                                        y o u  s n a p   i t a c c i d e n t a l l y ,             putting your thumb  length-
                                                    don't  worry  -   no harm  is            wise along the top.
                                                done,)

                              WAIT 60 SECONDS! The picture is now devetopinginside
                                        the cam era. Developmenttime is important. Followthe in-
                                   structionsthat are packedwith the pictureroll. In cold weatheraddi-
 H o l d c a m e r a w i t h o n e h a n d       tionaldevelopmenttime is required.Untilyou get usedto estimating
  u n d e r s t r a p a s s h o w n , g r i p -     developmenttiffie, check yourselfwith a watch.
 ping top of ca mera secu rely.
   lf you hold it this way, film wrll    IMPORTANT. When ycu pultedthe tab, you startedthe processing
 always track correctly because       of your first picture -  and also advancedthe paper for the next.
 c a m e r a a n d  f i l m w i l l b e   i n a     (You can checkthis by liftingthe cutter bar and lookingat the print-
  s t r a i g h t l i n e . l f y o u h o l d c a m -      ing on the tab.) The "negative" of the first picture remains in the
 era any othe r way you  risk     camera until you pull the tab again. At that time it is torn off and
 tearing film because you may      d iscard ed.
  pull ta b at an angle.
                                  NOTE. ff  at any time  tab  won't  pull, snap switch again, then open and
                                           close back door as previous negative sometimes sticks to this door.
Page L2
View original page 16Page 18 · Read text
www.orphancameras.com
                                 ns    I MP0 RTANT il:,';:,1?s#:i:r:;:i:#iJ:lTni'ff:1:?JJ:fftc'a'[
                                                              There a re ma ny com mon a buses
    l .  c o A T E A c H P R I N Tt M M E D t A T E [ Y .              which are harmful to any picture
                                                                 whether at be a Polaroid Land
      Flatten print by drawing over                                   Picture or a conventional print.  lf
     a table edge. Apply the print                               you want any picture to give you
     coater su pplied with each                               yea rs  a nd  yea rs  of  en1oyment,
      Picture Roll. Coat entire sur-                                here  a re some  specific  don'ts:
     face with 6 or 8 firm strokes,
     includingedges and corners.                         D O N ' T W R I T E
     Get the  habit  of  coating                        on the backof yourprintsor harm
     you r  pictu res  right  away.                             them  by other mechanical abra-
     For  last  pictures  in  each                                   sions. lf you must make notes, jot
        roll,  press  coater  agairlst                             them along the very edge of the
      print to release extra liq u id.                               back of the print.
                                               D O N ' T B E N D
 2 .  s r o R E P R t N T S                                 buckleor creaseyour picturesin
          I N E I T H E R                                                 a ny  fa sh ion. Ca rrying  th em  u n -
    O F T H E S EW A Y S :                                        protected in a pocket, for instance,                                                                              c a n c a u s e  t i n y c r a c k s  i n  t h e s u r -
        ln a Polaroid Picture Album.                                  face which may give you trouble in
          ( S e e  y o u r  d e a l e r . )   I n  a n y                                                                      t h e f u t u r e .
      a l b u m w i t h  s e p a r a t e  t r a n s -                        D O N ' T U S E P A S T E
      parent acetate pages. Do not                     O R R U B B E R C E M E N T      store prints in ordin ary paper
      a l b u m s , o r u s e o r d i n a r y b l a c k                                to mountyourpictures.lmpurities
                                                                                                                                                                                i n a l m o s t a l l a d h e s i v e s m a y c a u s e      paper mounting corners.                                                                        pictures to discolor.

Page 14
View original page 18Page 19 · Read text
www.orphancameras.com

Howto C(IRRECTY0URPICTURE0N THESPOT
Now-  let'slookat the pictureyoujust made.In caseit's not exactlywhatyouwant,here'showto spot
somecommonerrorsand how to correctthem.


 I N C O R R . E CETX P O S U R E


A pictu re that's too dark
 is  underexposed   (not
enough light reached the
 film). Correct bY using a
 lower  EV nu mber. You
 can also correct bY using
 a slower  shutter speed.
 For a picture that's  too
 light,  (overexPosed) do
 just the opposite  -  use
 a  h i g h e r  E V n u m b e r
 or faster  shutter sPeed.
                           T00 DARK-  set to a      JUSTRIGHT-  no change      T00 tIGHT-  set to a
                                                                                    l o w e r E V n u m b e r           in lens opening required       higherEV number

                                                                                            Page 1 5
View original page 19Page 22 · Read text
www.orphancameras.com
Howto take FLASHPICTURES

The  shutter  is synchronized  for  regular  wire-filled
flash bulbs (the "M"  position of the Synchronization
Selector) and  for electronic flash  (the "X"  position
 of the  Selector     also used  for  gas-filled bulbs).
F O R R E G U T AR F L A S H B U t B S
( " M " p o s i t i o n )
                ModelUse the         Polaroid                      28L Flash                                Gun, which                                                      clips       E L E C T R O N I C F T A S H ( " X " p o s i t i o n )           camera                  and makesright       to the                                     electrical                                         connection
in the  clip  -   no wires needed. The  'tEV" shutter           The  "X"   position  of the  Selector Switch  provides
settings for various distances are given  in the flash            zero-delay synchronization for high-speed electronic
guide on  the  back  of the  gun.  Set the  shutter  at                         f l a s h    l a m p s   ( a n d  g a s - f i l l e d b u l b s ) . R e m o v e   f l a s h
l/125  second. Focus with the rangefinder, and read            connector (see picture) and attach cord from  flash
the  distances  on  the  scale  on  the  camera  bed.             g u n . T h e  f i t t i n g   i s a E u r o p e a n s t a n d a r d ,  f o r w h i c h
The flash guide on the gun gives the proper "EV"            adaptor  cables are available through  your  dealer.
setting  for  that  distance. NOTE:  if you  are using           Exposure settings must be worked out experimentally
the  Self-Timer  for  flash  pictures,  set  shutter  to                          f o r  t h e  i n d i v i d u a l g u n , b e c a u s e o f t h e w i d e v a r i a t i o n s
l/30  instead ot l/L25.                                                                                                               i n  l i g h t o u t p u t a m o n g  t h e m a n y u n i t s o n  t h e m a r k e t .
(See page 20.)
Use "BOUNCE FLASH"
for  pictures with  a  nat-
ural  daylight  look. The
# 2 9 2  B o u n c e  F l a s h
Bracket makes this  pro-
fessional technique easy
to use. Ask your dealer
about the bracket.


 Page  I 8
View original page 22Page 23 · Read text
www.orphancameras.com
IND(|(IRSHOTSANdTIMEEXPOSURES
The large lens apertures and slow shutter speeds
offered in your camera make  it possible to take many
p i c t u r e s    i n d o o r s ,  u s i n g  d a y l i g h t  c o m i n g    t h r o u g h
w i n d o w s o r h i g h - l e v e l a r t i f i c i a l  i l l u m i n a t i o n . A t   t h e
s l o w e r s h u t t e r  s p e e d s , d o w n   t o  1 / 1 5 t h  s e c . , b e
particularly careful to  hold the camera  steady. At
 l / B t h  s e c . , a n d  b e l o w , u s e a   t r i p o d o r o t h e r   f i r m
base to steady camera.                                 USEA TRIPOD.  . .  ORRESTCAMERAONTABLE
Y o u ' l l b e u s i n g  t h e    l o w e r  " E V "  n u m b e r s    i n d o o r s ,
w h i c h m e a n s  t h a t  t h e    l e n s w i l l p r o b a b l y b e  " w i d e -
open"  for most of your pictures. This requires extra
c a r e  i n  f o c u s i n g , a n d w i l l  l i m i t t h e s h a r p z o n e o f  t h e
scene. But the pictures can be very rewarding-
Avoid as much as possible a lighting situation which
p u t s a l l t h e  l i g h t o n o n e s i d e o f t h e s u b j e c t , p r o d u c i n g
a h igh ly-contrasty print wh ich is a pt to be u nf lattering.
    'Iime
For     ExposureSrset shutter  to "B"  (which means
" B u t b " -   a h a n g - o v e r f r o m  t h e o l d d a y s w h e n s h u t -
t e r s w e r e h e l d o p e n b y s q u e e z i n g a  r u b b e r b u l b ) .
The shutter  will stay open as long as you hold the
release lever down. Always have the camera mou nted
on a firm support, and use a cable release,  if you
have one, to eliminate carnera motion. For vertical
m o u n t i n g o f c a m e r a , s e e y o u r d e a l e r  t o r # 1 6 I  t r i p o d
ada pte r.
View original page 23Page 28 · Read text
www.orphancameras.com
                                               by fingerprints and scratches. Clean lens byCAREOf CAMERA                  first blowing off or brushing off (with soft lens
                                                brush) looselint and dust particles,then polish
Your Model 110A Camera is ruggedly built to                                                    gently with lens tissue or soft, lintless cloth.
withstandcontinued use, and with reasonable
                                  CARE0F R0ttERS: The two steel rollers(seecare your camerashouldlast indefinitely.Some
                                            page 3) which control the picture processingof the parts-even  though well protected-
                                                 are the heart of the camera.They must be keptare necessarilydelicate,and careful handling
as noted below will prove rewarding. Periodic       clean, free of foreign matter which can spoil
                                                 your pictures by causing white spots Lrf" apartcleaning is of great importance,and instruc-
                                               along length of picture. Before loading eachtions below should be followed carefully.
                                                                     roll, turn each roller slowly and remove foreign
CARE0F SHUTTER:Do notleaveshuttercocked       depositswith fingernailor moistenedcloth.
when camerais not in use. Do not leaveshutter        Lubrication:With the Model 11OAno lubrication
set at 1/300 even when not cocked. Shutter is          is neededon any parts of the camera.The tips
lifetime lubricated; do not oil or attempt to         of the steel rollers in the Model 110A are
adjust shutter.                                  sealed in a self-lubricatingbearing chamber.
CARE0F LENS:Alwayskeep lens cap in position     G E N E R A PT R E C A U T I 0 NKSe: e p c a m e r ac l o s e d
over lens except when taking a picture. The      when not in use. Keep away from sand and
highly-polishedlens surfaces are coated with a        moisture.Do not store camerain direct sunlight
specialcoatingto reduce reflectionsand make        or in damp locations. Avoid excessive heat,
sharper pictures. Do not touch surfaces.The       which can spoil pictures and interfere with
coatingis relativelyhard, but it can be damaged       proper camera operation.


Page24
View original page 28Page 29 · Read text
www.orphancameras.com

         YOUR CAMERA MUSTBE REGISTERED     POTAROIDCORPORATION
                                              SERVICESTATIONS
                   . TO VALIDATEYOUR GUARANTEE.
                                                                             730 Main  Street
                   . TO PUT YOU ON OUR MAILING LIST SO YOU WILL      2257Cam brCascadeidge 39,Road,M ass.S.W.
       RECEIVEFIRST.HANDINFORMATIONABOUTNEW DEVEL.      Atlanta,  Georgia
      OPMENTSIN 6O-SECONDPHOTOGRAPHY.                    844ChicagoWest 7,AdamslllinoisStreet
                                                                            3105 Commerce  Street
                                                                                       Dallas 26, Texas
                                                                            1637 Court  Place
                   SERVICE INSTRUCTIONS                       Denver  2, Colorado
                                                                             826 Cole Avenue
         For repair and servicingunder the terms of the Polaroid      Hollywood  38, California
        Land Camera Guarantee,send camera in originalor com'      431 West Walnut Street
         parablepacking,transportationcharges prepaid to which'       Louisville 2, Kentucky
'4         bver Polaroid Service Station is nearest you (see next      2319St. LouisBrentwood17 (Brentwood),BoulevardMo.
         column).                                                        1025 Commerce Avenue
         Attach a separately-stampedletter giving nature of com-       Union, New Jer sey
           plaint and enclosingsample pictures. Be sure camera is      930 F Street N.W.
         iagged to show your name and address. Repairsnot c_overed     Washington  4, D.C.
        Oythe guaranteecan also be made by the PolaroidService      ForGraflexCanadianLtd. Residents Only
        Departmentat an appropriatecharge,or if more convenient        47 Simcoe  Street
           for'you, by the local camera serviceorganizationsuggested         Toronto, Canada
         by your dealer.


                                        Your Polaroid l-and Camera  is guaranteed  against defects  in materials  or
                                   wo rkma n sh ip  fo r a fu ll ye a r following date of or iginal pur chase- Dur ing this
                                              period, any such defects will be remedied without charge (except for trans'
                                                 portation) when camera  iS returned  prepaid  to Polaroid Service Department.   frUABANTAT

                                                                                        Page25
View original page 29Related documents and language editions
PolaroidPDF
POLAROID 220
User manual
37 pages · EnglishRead →

PolaroidPDF
POLAROID 350
User manual
53 pages · EnglishRead →

PolaroidPDF
Polaroid 108 film information
User manual
5 pages · EnglishRead →

PolaroidPDF
Polaroid 125
User manual
23 pages · EnglishRead →

PolaroidPDF
Polaroid 135
User manual
25 pages · EnglishRead →

PolaroidPDF
Polaroid 210
User manual
27 pages · EnglishRead →

PolaroidPDF
Polaroid 215
User manual
25 pages · EnglishRead →

PolaroidPDF
Polaroid 225
User manual
29 pages · EnglishRead →

PolaroidPDF
Polaroid 230
User manual
28 pages · EnglishRead →

PolaroidPDF
Polaroid 240
User manual
27 pages · EnglishRead →
PolaroidPDF
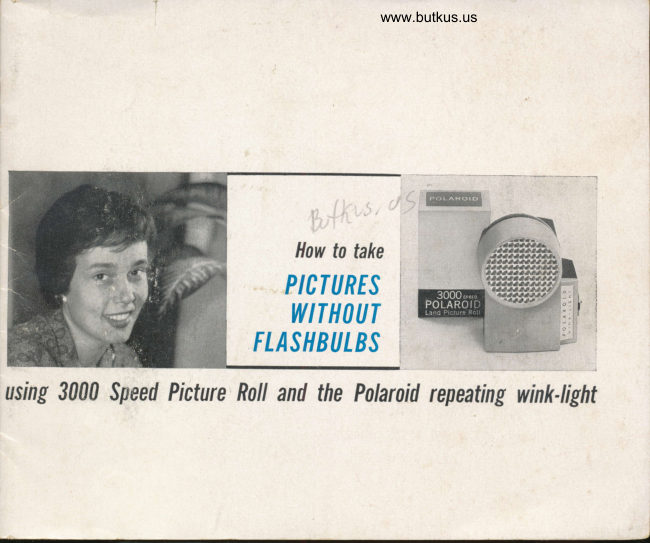
Polaroid 3000 Wink Flash
User manual
13 pages · EnglishRead →

PolaroidPDF
Polaroid 315
User manual
50 pages · EnglishRead →
From the M. Butkus archive. Original publisher and archive notices are retained.
Check the model and edition against your equipment.
PDF verified 2026-10-10.