Film cameras
POLAROID 220 User manual
User manual for POLAROID 220. 37 pages in English. Read the original PDF, download or print a copy without registration.
37 pagesEnglish4.5 MB PDF
Loading your manual…Open PDF directly
Document details
- Brand
- Polaroid
- Model / document
- POLAROID 220
- Document type
- User manual
- Language
- English
- Pages
- 37
- File size
- 4.5 MB
- Category
- Film cameras
- Document date
- Not specified in catalog
Search available document text
Find a term, then jump to its page in the original PDF. Image-only pages may not be searchable; check the PDF for exact wording and diagrams.
Page 5 · Read text
www.orphancameras.com
HOWTO OPENTHE CAMERA                           GETTINGACQUAINTED


1. To unlatchcover,presson centerof top.         2. Youcanlet coverhangdownor                       to removeit, pushspring(A) andlift.


4, RaisebuttonNc.1; thisunlockscamerafront.   5. Pullcame.afrontoutasfarasit willgo,

 PHOTo5' ltlPoRTANTt Be sure to pull the camerafront    into place. tf the front isn't fully out and locked,your prints
outuntilthereisadefiniteclickandthelockingbar(A)snapswill comeoutallblack,orbadlyblurred.
                  This booklet is designedto fit neatly inside the cover, under a spring clip (photo 2).

220
View original page 5Page 6 · Read text
www.orphancameras.com
HOWTO USETHE VIEWFINDER


  Lookingthrough the viewfinder window (A) you'll see a    subject is very close (3y2tt.,for example),allow a little extra
bright,white broken line. Frame the scene with this line.   space betweenyour subject and the top frame line (above)
Always try to look through the center of the window and       lf not, you may accidentallycut off the top of someone's
concentrateon your subject, not on the white line.  lf your   head in your picture.


I                                                                                           220
View original page 6
Page 7 · Read text
www.orphancameras.com
HOW TO FOCUSTHE CAMERA                          GETTINGACQUAINTED


Lookthroughhereat the brightspot.e


  Holdingthe camera horizontal,placeyour forefingerson    the bright spot; this means that the camera is not focused
both No. 1 buttonsas shown and push them all the way to     for that distance. Push the No. 1 buttons back and forth
your left. Lookthroughthe Focuswindowand aim the bright    until the two images becomeone -  sharp and clear. Now
spot in the center at a nearby subject (about 5 ft. away,   the camera is focused. For vertical pictures,focus with the
for example). You should see two imagesof your target in   camera horizontal;turn it to aim and shoot.


220
View original page 7
Page 8 · Read text
www.orphancameras.com
' WHATTHE FILM SPEEDDIAL DOES                       GETTINGACQUAINTED


     L A N t f    C A M € F 1   A                      A I . j T Q M A T I g       E A i . J ^
                      WALM ffiWffiW,ffi

                                                            For3000speedblackandwhitefilm.r,       v For75speedcolorfilm.                ffi


                               F I L M     S i " H f : D              W4Ly%feffiWffiffiffi                                                                                                                  ',
    The Film Speed Dial (A) sets the camera for the kind of    sure. To prevent accidentalturning, this dial has a strong
    film you are using. For 3000 speed black and white film    spring. lt must be turned a rather long way to make it snap
   turn the dial to 3000:.torT5speedcolorfilmturnto 75.  lf you    to its next position.The other numberson the dial (besides
   don't do this, the electriceye (B) can't make a correct expo-   75 and 3000) are for films that may be sold in the future.


   220                                                                                             1 1
View original page 8Page 9 · Read text
www.orphancameras.com
WHATTHE LIGHTINGSELECTORDOES

 You must set the yellow square in the Lighting Selector
(shownat right) for the kind of light with which the picture
will be taken. For example, sunlight outdoors,or flash
indoors,or just room light.
 The yellow squares in the Lighting Selector move back
and forth when you push the LightingSelectorKnob (below)   With3000speedfilm,usethrssi0eof theLightingSelector.
from side to side. Try it a few times. The knob is on the
front of the camera. below the lens.

With 3000 speed film
   lf there's3000 speed film in the camera,look at the 3000
spEEDotrtly side of the Lighting Selector and move the
yellow square next to the label that describesthe lighting
conditions. Here it's shown set for OUTDooRSoR FLASH,
the right settingfor any picturemade in daylightor with f lash.
  For picturesby room light, just push the knob to placethe
yellowsquare next to tNDooRSwtrHouT FLASH.                                                 Pushthe knobto settheyellowsquare.


t2                                                                                            220
View original page 9
Page 10 · Read text
www.orphancameras.com
                                                GETTINGACQUAINTED

With 75 speed color and all other films except 3000 speed
  With any film other than 3000 speed film, look at the
side of the Lighting Selector marked 75, r5o,3oo SeEED.                                                                               :t'    ';                ,  ,:,r
This side is mainly for use with 75 speedcolor film. The
other numbers are for films that may be manufacturedin
the future.                                              With75speedcolorfilm,usethissideof theLightingSelector.
 Use the LightingSelectorKnob to set the yellow square
nextto the labelthat describesthe lightingconditions,
 Remember: You must set the LightingSelectorcorrectly
in order to get a well exposedpicture.


                                                  Pushthe knobto settheyellowsquare.


220                                                                                                            r.3
View original page 10Page 11 · Read text
www.orphancameras.com
PRACTICETHE 1, 2, 3 SYSTEM


 ONEis for focusing.Lookthroughthe    TWO is for shooting. Practice press-    THREE is for resetting. Right after
Focus window and aim  the  bright    ing the No. 2 button slowly until the    snappinga picture,alwayspush down
spotat varioussubjects.Pushthe No. 1    shutterclicks. In dim light hold No. 2    No. 3 button firmly until it locks and
buttons and practice bringing together   down and stay very still until you hear    staysdown. This resetsthe shutter for
the two images of your subject in the    the second click as the shutter closes.   the next picture. lf you don't reset No.
bright spot to make one clear image.   Then you can move and let No. 2 up.    3 button,you won't be able to shoot.

r4                                                                                            220
View original page 11
Page 12 · Read text
www.orphancameras.com
HOWTO LOADA FILM PACK(Cont.)


1. Pushthebackdoorlatch;thedoorwillpopup.    2. Openit all theway.Aretherollers(A) clean?   3. Holdthe film packby the edgesas shown
                                                                        lf not,cleanthemas describedin the sectionon   andpushthe closedendof the packunderthe
                                      careof yourcamera.                     doorhingeagainstspringtension.


4. Pushthe packdownintothecamera.You'1,                                                   packandthecamerabody.
feelit snapintoplace.                    Closethebackdoor.Pressbothsidesfirmlyto besurethatbothsideslatch.Theblacktabof thesafety
                                      covermuststickoutof thesmallslot. lf not,reopentheback,leadthe tab out.

16                                                                                            220
View original page 12Page 14 · Read text
www.orphancameras.com
HOWTO SET THE CAMERAFOR3OOOSPEEDFILM


                           Movethe knobto settheyellowsquarefor thelightingconditions.


                    {l*+      Ftrtg;t# ,f1 E*HHffi

 OUTDOORSOR FLASHSETTING: Use this for all subjects    DIM LIGHT SETTING: Use this for pictures without flash
in daylightoutdoors,in bright sun, in the shade,or on cloudy    indoors,in dim daylight,and outdoorsat night.
days. lt's alsofor allflash pictures.                         Turn the Film SpeedDial to 3000. With light from windows
  Turn the Film Speed Dial to 3000. Set the dot on the     or fluorescents,set the dot on the Lighten/Darkencontrol
Lighten/Darkencontrol (A) as shown. This is the Normal    (A) at Normal position, as shown. With ordinary tungsten
positionfor the L/D control.                                 bulbs, set it two marks toward Lighten.

                                                                                              220 18
View original page 14Page 15 · Read text
www.orphancameras.com
HOWTO SET THE CAMERAFOR75 SPEEDCOLORFILM


Settheyellowsquareasshownfor mostcolorpictures.                Thissettingis usedonlyfor specialsituations.


                    F r i*ru*

 ALL-PURPOSESETTING:Use itfor practicallyall your color    EXTRA DEPTH SETTING: Use  it only for subjects in
pictures-  in brightsun, in the shade,or on a dull day. Also    brightest sun, or when you want to add "depth" to your
for flash picturesindoors or for long exposuresin dim light.    picture by getting more near and far objects into focus at
At this settingthe lens is at its widest openingand you must    the same time. The lens openingis smaller and the shutter
focuscarefully. Checkthat the Film Speed Dial is set to 75.   speed slowerthan at the All-Purposesetting.Check that the
                                                         Film Speed Dial is set to 75.
           Set the L/D control as shown, unless instructions printed on the film pack show a different setting.
20                                                                                            220
View original page 15Page 16 · Read text
www.orphancameras.com
HOWTO TAKE A PICTURE!


          FRAME                     FOCUS                         AIM
  1  FOCUS:Look at your subject through the View win-     until the-brightspot shows a single clear image of the most
     I   dow. Come close enough to fill most of the frame.    important part of your subject. Shift your eye back to the
Shiftyour eyeto the Focuswindow. Push the No. 1 buttons   View winciow,center your subject in the white frame.


                                                                                              220
View original page 16Page 18 · Read text
www.orphancameras.com
HOWTO DEVELOPTHE PRINT


First,thesmallwhitetab. Pullit all thewayoutof thecamera.Don'tblockthedoor(A).            Next,thelargeyellowtab.

  A   PULLTHE TABS: Hold the camera in your left hand,    When 51oupull the yellow tab, hold the camera so the lens
  T   as shown. (Don't hold it any other way!) Graspthe    faces straight ahead of you, not pointing down. This, plus
small white tab betweenthe thumb and forefingerand pull    grippingthe centerof the tab, helpsyou to pull it out straight.
it straight out of the camera, all the way, without stopping.                                                                 Pull the yellow tab straight out of the camera all the way,When you pull the white tab out, a concealed door (A)                                                                   swiftly, without hesitating. This starts developmentof youropensand a yellowtab popsout. Don'tblockthis door in any                                                              picture,so begin timing as soon as you get the tab out. Howwaywhile pullingthe tabs.                                                              fast is a swift pull? lt shouldtake about as long as it takes  Pulling the small white tab does not start development.                                                  you to say "PULL lT" briskly,eachtime you pullthe tab.  lfIt only preparesthe film for the next step, which is pulling                                                       your picture is full of white specks,pull a bit slower.the yellowtab. Grip the yellow tab in the center so it will
come out straightwhen you pull it out of the camera. lf you     The picture develops outside the camera. While it's de-
pull the yellowtab out at an angle, one edge of your picture    veloping, hold the tab by the yellow tip, or lay the picture
may not developproperly.                              assemblydown flat. Don't touch or bend the white paper or

24
View original page 18
Page 19 · Read text
www.orphancameras.com
IF NO YELLOWTAB APPEARSWHENYOU PULL THE WHITETAB, STOP!


  Don't pull another white tab. Instead,gently open the     in the shade. While holdingthe pack down lightly (picture
camera back just enough to get one finger under it to hold    at left) slowtyopen the back all the way and take hold of the
down the film pack and keep it in place. Do this indoorsor    topmostyellow PULL tab, as shown.


  Gentlypull the entire picture assemblyall the way out of     Closethe back of the camera, ffi?kingsure that the next
the pack and discard it. Don't try to save it. While the back   white tab sticks out of the small slot next to No.4. Check
door is open check that the rollersare clean (page36).         that both sides of the back latch securely.

                                                                                               22026
View original page 19Page 20 · Read text
www.orphancameras.com
CHECKTHE TEMPERATURE!IT'S IMPORTANT                       OPERATIO
  Cold and heat have a great effect on the way your picture  HOW TEMPERATUREAFFECTSCOLORFILM
developsand on the print quality. Even moderatecold can     The normal developmenttimes for color film are set for
ruin your picturesunlessyou take precautions.              temperatures'of 7O"F (2L'C) and warmer. When it's a bit
                                                         coolerthe action of the developerchemicalsslowsdown and
 The important factor is the temperature of the camera   you must developfor a longertime. See the film instructionand film at the time you're developingthe picture.                                                      sheet for more details.
 A foaded camera carried outdoors in cold weather for half    When the temperaturegets to 65'F (18"C)and below, the
an hour gets thoroughlychilled.  lf you then enter a warm   chemicalactionis so sluggishthat the picturewon't develop
house and a  f ew min utes later shoot a  f lash color picture    well without help. That help is the Cold-Clip(page 30).
the resultsare likelyto be bad.  lt takesa longtime for a cold    Printsdevelopedin cold weatherwithout using the Cold-Clip
cameraand film to warm up.                                        will be dark, with muddy colors.
                                                  Whenever it's cool enough so that you must wear warm  However,if camera and f ilm are indoorsand warm, you                                                              clothes, use the Cold-Clipfor all color pictures.can step outsideto snap the children in the snow, pop back                                                                 You'll get your best colors in pictures made in pleasantlyin againin a minute and developthe picturenormally.                                              warm wehther.
  In coolweatherdevelopmenttimes may haveto be adjusted     But when you're swelteringand can think only of a cool
accordingto the temperature. The instructionsheet with    drink and a swim, it may be too hot for best resultswith color
each film pack containsdetailed informationabout develop-   film;your printsmay showweakcolors.For more details,see
ment times and temperatures. Be sure to read these recom-   the film instructionsheet.
mendations;theymay changefrom time to time.                                    HOW TEMPERATUREAFFECTSBLACK AND WHITE FILM
  In very hot weatherthere is a greater tendencyfor chemi-    The film's normal range of developmenttimes gives good
cals to be squeezedout of the edges of the picture assembly    results in temperaturesof 60'F (15"C)and above.
as you pull the yellowtab to begin development. lf these    When the temperature of film and camera is below 60"F
chemicalscollect on the steel rollers they can cause defects    (15'C), develop tor a longer-than-normaltime.  For details
in your prints. So, when it's hot, be extra carefulto keep the    see the film instructionsheet.
rollersclean (page 36).                                   Never use the Gold-Clipwith black and white film.
 220                                                                                               27
View original page 20Page 21 · Read text
www.orphancameras.com
      MAKE PRINTSLIGHTEROR DARKER


Thisiswellexposed. . . leavetheL/Dcontrolhere.      lf it'stoolight. . . settheL/D controlhere.            lf it'stoodark. . . setthe L/D controlhere.


                                                                                                                                                                                                                       ::).:)i.i.i.:l:::::::: ):::i:l::)
                                                 ::::::::,,1,1;t;,.:;;,.:.i:1:.:i::::::|::::::::::::::|:.i:::|


                                                                                                                                                                                             i",::,::,::'i'
                                                   ul.:&,*,';:,m,.,,,,*!1)".",.  t:'.'                                              $ &H]r8l.r

                                                                                                                                                                                                                      :l::r:t .:.::t:::l
  Most picturesmade with the light coming from behind you     to the first small mark. Use the L/D control in the same way
or from the side will be well exposedwith the L/D control at     to lighten or darken f lash pictures,too. on some color f ilm
Normal position(left, above),but sometimesyou may prefer   packsyou may find a printed instructionadvisingyou to set
a lighter or darker print. To lighten or darken the next print    the L/D controlone mark towardLightenfor all picturesmade
of the same subject,in the same lightingconditions,adjust    with that film pack. Pleasefollow those suggestions;they
the L/D controlas shown. To make a smaflchang€,turn only    are important.
2 8                                                                                            220
View original page 21Page 22 · Read text
www.orphancameras.com
CAREOF THE PRINT                                        OPERATION
                                         prints and fading. Each black and     of prints, use a soft pencil and write
                                      white film box contains a coater. To     lightly, and on ly in the areas around
                                      coat the print, lay it face up on a clean    the edges. Keep freshly coated prints
                                 smooth surface and hold it down by   away f rom each other, or they will
                                 one edge. An empty flattenedfilm box    stick together.
                                                   is a good coating surface.                Don't use cornermounts,paste,glue,
                               Remove the coater from the tube.    or rubber cement to mount pictures.
                                  Hold it by the plastichandle and run   Many ad hesives contain impurities
                                      the liquid-soakedside down the length    that discolorpictures. Never put your
                                             of the picture,awayf rom you. Use 6 to    pictures in albums with black paper
                                      8 overlapping strokes and moderate   leaves; use Polaroid Picture Albums.
                                     pressure. Cover the ENTIRE print,  MOUNT COLORPRINTS
                                      including the borders. Don't scratch     Color prints should be mounted to
                                       the print with the edge of the coater.    protectthem from curlingor from being
                                 To get more liquid from a partly used    bent and cracked d ue to rough han-
                                        coater, press  it down on the near    dling. Use the PolacolorPrint Mounts
                                 end of the  print, then spread the    supplied with each color film pack.
                                  squeezed-outliquid acrossthe picture.  DO NOT COAT COLOR PICTURES.
                                 The coating dries quickly and forms     The dyes used to form colors in the
                                      a tough protectivelayer over the image.    prints are long lasting. However,like
                                       Don't bend or creasecoated pictures,     all dyes, they will fade if exposed to
COAT BLACK AND WHITE PRINTS     and don't write on the back with a ball-    bright light for long periods of time.
  Black and white prints should be    point pen or a sharppencil;thecoating   For maximum protection and easy
coated within two hours, if possible,   may crack and cause discolorationin    access, store prints in Polaroid Pic-
to protect them f rom scratches,f inger'    the print. When you write on the backs   ture Albums.

220                                                                                     29
View original page 22Page 23 · Read text
www.orphancameras.com
HOWTO USE THECOLD.CLIPWITH COLORFILM


 The Cold-Clip,whichshouldbe stored    To use the Cold-Clip,take it out of          lf the temperatureof the cameraand
in your camera cover when not in use,    the camera cover and preheat it in a     film is 65'F (18'C) or belowwhen you
makes it possible to get good color   warm inside pocket, or between your    develop the picture, using the Cold-
pictureswhen the temperatureis 65"F   body and arm, for about five minutes    Clip,you shouldexposeyour color pic-
(18'C) or below. lf you are unsure of    before starting to take pictures.          tureswith the L/D controlset two marks
the temperature,usethe Cold-Clipany-                                      toward Lighten,?s shown here.  lf the
way.   lt may make a noticeable im-                                 NormaI positionof the L/D control for
provementin the color of your pictures                                            that film pack already is one mark
and  it can do no harm even if the                                       toward Lighten,set th e L/D controltwo
temperatureis warm.                                                           additionalmarkstoward Lightenfor the
                                                                           conditionsdescribed above.


30                                                                                            220
View original page 23Page 24 · Read text
www.orphancameras.com                   OPERATIO


                    t#
 As soonas you havepulledthe yellow     Put the Cold-Clip,with the picture     Developthe picture tor 60 secondt
tab to removethe picture packet f rom   assembly inside, between your body    inside the Cold-Clip,then removetht
the camera and start develoPment,  and arm while the picturedevelops.     packetand separatethe picture.
place the packet inside the Cold-Clip                                         Occasionally,developer may  lea
with the tab hangingout. This must be                                       from the pictureassemblyand stick t<
d on e withi n 1O second s.                                                        the Cold-Clip. Avoid contact with thit
                                                                               material. (Please read the cAUTto
                                                                   paragraphin your film instructions
                                                                      Before using the Cold-Clip,wipe   i
                                                                        cleanwith a damp cloth.

                  Never use the Cold'Glip tor black and white pictures. Instead, follow the
                      cold weather directions on the instruction sheet packed with each box of film.
220                                                                                                        3 l
View original page 24Page 25 · Read text
www.orphancameras.com
TROUBLESOMELIGHTINGSITUATIONSTO AVOID


Facein shade,brightsunbehind.              Brightwindowbehindor nearsubject.          Brightlampbehind0r nearsubject.

 When you aim your camera at a subject, the electric eye    That's what happenedin the three picture situationsshown
measuresthe brightnessof the entire scene and sets the    above. The subject'sface is in the shade or in a fairly dim
exposurefor what it "sees" there. As long as the light on the     light, but either the backgroundis bright or there's a strong
main subjectis just about as bright as the light on the rest    light in the scene.
of the scene,the picturewill be well exposed.                 Try to avoid these troublesomelighting conditions.lf you
  However,if most of the light comes from behind your   have to shoot a shaded subject against a bright background
subject,or if the light is brighter behind your subject than    or a strong light, turn the L/D controlall the way to Lighten.
in front, or if there's a strong light in the scene,the electric    To beat this problem, arrangeyour subjects so the light
eye will be "fooled" and your picturewill come out too dark.   on them comesfrom behindyou or from the side.


32                                                                                            220
View original page 25
Page 26 · Read text
www.orphancameras.com
   FASTFOCUSINGFOR PICTURESMADEWITH 3OOOSPEEDFILM            OPERATIO
I

i


     Portraits,up close,3Yzto 5 tt.                Groups,othersubjects5 to l0 ft. away. .          Scenics,everythingbeyond10ft.
     setthescaleherev                       usethissettingv                            setthescalelikethis v


          lf there's 3000 speed black and white film in the camera    find er and shoot. The FastFocusScaleis handyfor snapping
    and you're shooting outdoors in daylight or indoors with    children,pets, etc. in action nearby,or for getting both near
     flash, it's not always necessaryto use the rangefinderin   and distant subjectssharp in the same picture (top, right)
    order to get sharp pictures. J ust push the No. 1 buttonsto     Use the Fast FocusScaleonly with 3000 speed black and
    preset the Fast FocusScale (bottom) for the kind of subject   white film in bright sunshineor with direct flash. Don't use it
    you are snapping. Then frame your subiect in the view-    in dim light,with bounceflash, or with color fif m at anytime.
    220                                                                                              33
View original page 26Related documents and language editions
PolaroidPDF
POLAROID 350
User manual
53 pages · EnglishRead →
PolaroidPDF
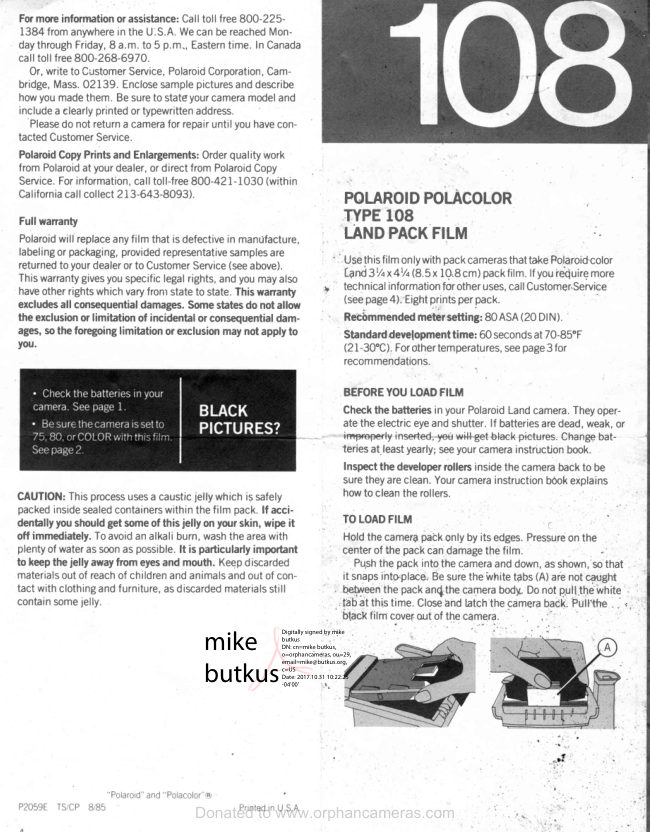
Polaroid 108 film information
User manual
5 pages · EnglishRead →
PolaroidPDF
Polaroid 110A
User manual
30 pages · EnglishRead →
PolaroidPDF
Polaroid 125
User manual
23 pages · EnglishRead →
PolaroidPDF
Polaroid 135
User manual
25 pages · EnglishRead →
PolaroidPDF
Polaroid 210
User manual
27 pages · EnglishRead →
PolaroidPDF
Polaroid 215
User manual
25 pages · EnglishRead →
PolaroidPDF
Polaroid 225
User manual
29 pages · EnglishRead →
PolaroidPDF
Polaroid 230
User manual
28 pages · EnglishRead →
PolaroidPDF
Polaroid 240
User manual
27 pages · EnglishRead →
PolaroidPDF
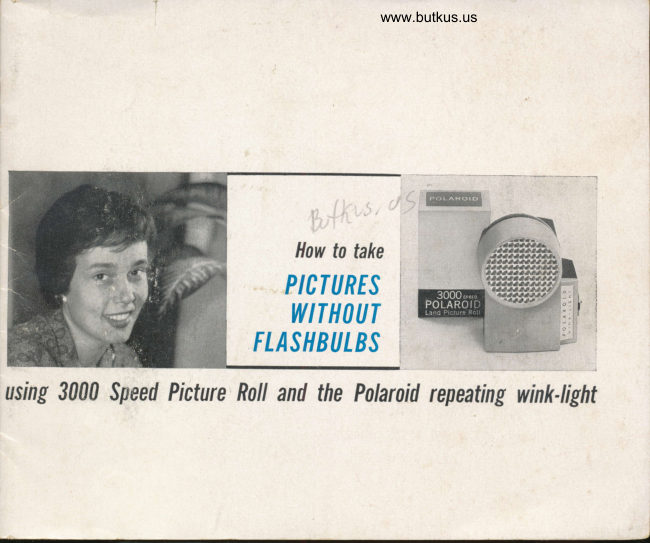
Polaroid 3000 Wink Flash
User manual
13 pages · EnglishRead →
PolaroidPDF
Polaroid 315
User manual
50 pages · EnglishRead →
From the M. Butkus archive. Original publisher and archive notices are retained.
Check the model and edition against your equipment.
PDF verified 2026-10-10.