Film cameras
Polaroid 135 User manual
User manual for Polaroid 135. 25 pages in English. Read the original PDF, download or print a copy without registration.
25 pagesEnglish2.0 MB PDF
Loading your manual…Open PDF directly
Document details
- Brand
- Polaroid
- Model / document
- Polaroid 135
- Document type
- User manual
- Language
- English
- Pages
- 25
- File size
- 2.0 MB
- Category
- Film cameras
- Document date
- Not specified in catalog
Search available document text
Find a term, then jump to its page in the original PDF. Image-only pages may not be searchable; check the PDF for exact wording and diagrams.
Page 4 · Read text
CONTENTS

GettingAcquainted                                                Checkthe temperature!  lt's important                             , 2L
                                               Page   How to make daylight pictureslighter or darker   ..   .    . 22
I ntrod uction                                     2    Black and white prints must be coated                             . 23
How to oprr the camera                              3   How to use the Cold-Clipwith color film                             , 24
How to close and cover the camera .    .                  4    Troublesomelightingsituationsto avoid .             26
How to hold the camera                                  Black and white picturesin dim daylight .                        . 27
How to use the viewfinder                            6    Fastfocusingfor black and white pictures                       . 2a
How to focus the camera                              7    Flashpictures .                                 29
Practicethe 1, 2, 3 system                            8
                                        Miscellaneous
Operation                                           Some helpful accessories.    .                    30
How to load a film oack                               9    A filter can pep up biack and white scenics .               5 I
How to set the camera for a daylight black & white picture T 2   Devicesfor close-upsand portraits.               32
Tips for good daylight black and white pictures            You must take care of your camera
How to set the camera for a daylightcolor picture      L4    Picturetroubles,their cause and cure                       ? 6
Tips for good daylightcolor pictures                  1 5    Protectfilm and camerafrom heat .                         5 v
How to take a picture                            16   Whereto write for information                               3 Y
How to developthe print                          18    Warranty                                  39
 lf no yellowtab pops out                         20     List of repair stations                                                     . 4 0
                     Donated to www.orphancameras.com
View original page 4Page 6 · Read text
HOWTO GET THE MOSTOUT OF THIS CAMERA

  This is one of the world's easiest-to-usecameras. once    the instruction sheet packed with your film, Those instruc-
you understand a few simple techniques. However,it is    tions may change from time to time, so it's a good idea to
very important that you learn the basic operatingsteps or    reviewthe film instructionsheet occasionally.
you're bound to waste film and money and be disappointed    As a quick guide to help you get a good pictureeverytime,
with your picture results,                                here are seven helpful hints. They'reimportant.
  With this camera, snap all your outdoor pictures in bright     1.  In daylightpicturesalwayshave the light on the subiect
daylight, shoot all indoor pictures with flash.               coming from behind you. For best color picturesplaceyour
                                                        subjectsin bright sunshine.
  Before you load your camera with film, please be sure to                                                                  2. Move in close,to get a big image in the print.read carefullythe first two sectionsin this booklet: Getting
Acquainted,and Operation(the red edged pages). As you     3. Choosecolorful subjects for your color pictures,
read the text and look at the pictures,go through all the     4.  Pick a good background,particularlywith flash.
motionsof using the camera-  withoutfilm.                                                                     5.  Pull the tab correctly.
 Onceyou get the simple operatingroutine down pat, load                                                                     6. Time development carefully.
a film pack. We suggestthat you start with black and white.
Pleaserememberthat even the finest cameraand film need    7.  Keep an eye on the temperature.
some help from the photographerif they are to producegood     As you go throughth i s booklet you'lI fi n d thesesevenpoints
pictures. That help can be summed up in one sentence:   explainedin detail. They can make the differencebetween
Plan and think before you shoot. As a starter, read carefully    getting good pictures and poor ones.


                     Donated to www.orphancameras.com2
View original page 6Page 7 · Read text
HOWTO OPENTHE CAMERA                           GETTINGACQUAINTED


L Magnetholdscoverdown.Liftbackedge.       2. Youcanlet coverhangdownor . . .             3. . .  . to removeit, pushspring(arrow)andlift.


4.4. LiftLift finderfinderupup andandback;back;magnetmaSnetwillwill gripgripit.it.       5. RaisebuttonNo.l; this unlockscameratront.    6. Pullcamerafrontout asfar as it will go.

PHOTO6, IMPORTANT:Be sure to pull the camera lfont out     into place.  lf the front isn't fully out and locked, your prints
untilthereisadefiniteclickandthelockingbar(arrow)snaps will be badly blurredand may have lafge black areas.
                  This booklet is designedto fit neatly inside the cover, under a spring clip (photo 2).
                     Donated to www.orphancameras.com
View original page 7Page 8 · Read text
HOWTO CLOSEAND COVERTHE CAMERA


  Pressdown on the locking bar. This     A magnetholdsthe finder up.  Fold          lf you have removed the cover: to
releasesthe f ront of the camera. Push    the finder down gently. Try not to bang    replaceit slide the hinge down over the
the front in all the way until it locks.         it on the camera.                       lockspringuntil itsnapsinto place(top).
                                                                  Swingthe cover up and over; the mag-
                                                                            net on top of the camera will hold it.
                   When storingDonatedthe camerato www.orphancameras.combe sure that nothing presseson the No. 2
                            button; if it's depressedeven slightly, the battery may be drained.
View original page 8Page 9 · Read text
HOWTO HOLDTHE CAMERA                           GETTINGACQUAINTED


 H O R I Z O N T A L :G r i p t h e t w o e n d s . P l a c e y o u r f o r e f i n g e r s o n     VERTICAL:Grip the c a m e r a a s y o u w o u l d  f o r a h o r i z o n t a l
t h e N o . I b u t t o n s ; y o u c a n e a s i l y s h i f t t h e r i g h t f o r e f i n g e rt o    p i c t u r et,u r n i t s o y o u r r i g h t h a n d  i s b e l o w . B r a c e t h e c a m e r a
N o . 2 b u t t o n . T o s t e a d y t h e c a m e r a , p r e s s y o u r e l b o w s  i n t o    a g a i n s yt o u r f o r e h e a da n d f a c e .
y o u r r i b s ; r e s t t h e c a m e r a a g a i n s t y o u r n o s e .
                     Donated to www.orphancameras.com
View original page 9Page 10 · Read text
HOWTO USETHE VIEWFINDER


  Lookingthrough the viewfinderwindow (arrow)you'll see a    subject is very close (3y2ft., for example), allow a little extra
bright, white broken line. Frame the scene with this line.   space betweenyour subject and the top frame line (above).
Always try to look through the center of the window and       lf not, you may accidentallycut off the top of someone's
concentrateon your subject, not on the white line.  lf your   head in your picture.
                    Donated to www.orphancameras.com6
View original page 10Page 12 · Read text
BEFORELOADINGFILM, PRACTICETHE L, 2,3 SYSTEM


 ONEis for focusing. Lookthroughthe    TWOis for shooting.Practicepressing    THREE is for resetting. Right after
Focuswindowand aim the bright spot    the No.2 buttonslowlyuntilthe shutter   snappinga picture,alwayspush down
at varioussubjects. Pushthe No. 1 but-    clicks.In dim light hold No.2 downand    No. 3 button firmly until it locks and
tons and practicebringingtogetherthe    stay very still until you hear the second   staysdown. This resetsthe shutter for
two imagesof your subjectin the bright    click as the shutter closes. Then you    the next picture.   lf you don't reset
spot to make one clear image. Then   can move and let No. 2 up.  lf nothing   No. 3 button,you won't be able to shoot
shift your eye to the View windowand   happenswhenyou pressNo.2, perhaps   your next picture;nothingwill happen
f rameyour subjectin the white line.     you forgot to reset No. 3 (rieht).        when you press No. 2 button.                    Donated to www.orphancameras.com
8
View original page 12
Page 13 · Read text
LOADING:OPENTHE FILM PACKAGE                            OPERATION


                                                                                         I
                                                                                         I
                                        RgtAsgJp.


 O p e n t h e  t o p o f  t h e b o x . W i t h c o l o r  f i l m  t h e r e ' s a s e t o f   m i d d l e o f  t h e p a c k a g e . S t a r t i n g a t t h e c o r n e r , t e a r o p e n t h e
m o u n t s ; w i t h b l a c k a n d w h i t e f i l m  t h e r e ' s a c o a t e r . R e m o v e    e n t i r e s i d e o f  t h e p a c k a g e a l o n g t h e d o t t e d  l i n e . W h e n  t h e
t h e s e a n d t h e  i n s t r u c t i o n s h e e t ( p l e a s e r e a d  i t ) . p u l l o u t t h e      s i d e   i s o p e n ,  r i p a p a r t  t h e  f r o n t a n d b a c k o f  t h e p a c k a g e .
f i l m p a c k a g e . H a n d l e  i t g e n t l y , c a r e f u l l y . S a v e t h e b o x t o     L i f t o u t  t h e p a c k . D i s p o s e o f  t h e   l i t t l e p a c k a g e o f s i l i c a g e l .
c a r r y p r i n t s  i n s a f e l y .   l t a l s o c a n b e v e r y u s e f u l f o r c o a t i n g    A l w a y s h a n d l e t h e p a c k b y t h e e d g e s o n l y .
b l a c k a n d w h i t e p r i n t s .                                      Always open the package and load film  in the shade, not
 H o l d t h e p a c k a g e n e a r t h e e d g e s . D o n ' t p r e s s h a r d o n  t h e             i n d i r e c t s u n l i g h t , t o a v o i d f o g g i n g t h e f i l m .
                      Donated to www.orphancameras.com
View original page 13Page 14 · Read text
LOADING(Cont.)


l. Pushthebackdoorlatch;thedoorwillpopup.      2. 0penit all theway.Aretherollers(arrow)      3. Holdthe film packby the edgesso the
                                     clean?lf not,cleanthemasshownon page33.       printingon the safetycoverfacesthe lens,
                                                                      and pushthe closedend of the packunder
                                                                                  thedoorhingeagainsta lightspringtension.


4. Pushthepackdownintothecamera.You'll     5. & 6. Besurethewhitetabsarefreeandnotfoldedunder.Closethebackdoor. Pressbothsides
feelit snapintoplace.                         firmlyto besurethatbothsideslatch.Theblacktabof thesafetycovermuststickoutof thesmallslot.
                    Donatedlf not,toreopenwww.orphancameras.comtheback,leadthetabout.
10
View original page 14Page 15 · Read text
7 & 8  Pullthesafetycoverall thewayoutof thecamerawithoutstopping.Don'trip it.                     9. Withthesafetycoverout,the white
                                                                                      tab(arrow)shouldstickoutof the small
                                                                                               slot(No.4). Don'tpullthe whitetab.
                                                                                  You'renowreadyforthefirstpicture.
IF NO WHITE TAB APPEARS


lf there'sno whitetab to pull,    Openthe backof thecamerapartwayand,without    Closethebackof thecamera,makingsurethatboth
do the followingin the shadeor      disturbingor movingthefilmpack,pushthewhite     sidesarelockedsecurelyandthewhitetabis outside
rndoors,notin thebrightsun.        taboutintotheopen.                                 in theNo.4 slot.
                     Donated to www.orphancameras.com
                                                                                                           1 1
View original page 15Page 16 · Read text
HOWTO SET THE CAMERAFORA DAYLIGHTBLACKAND WHITEPICTURE

                                       C A M E                   A U '


                                                                                 D A R X E N                                         L I q H T E N


Set the Film Selectoras shownfor black and white pictures.      Set the white dot on the Lighten/Darken(L/D) control next
                                                                 to the arrow,as shown. This is the Normalposition.

                    Donated to www.orphancameras.comL2
View original page 16Page 17 · Read text
TIPS FORGOODDAYLIGHTBLACKAND WHITEPICTURES               OPERATION

 USE BRIGHT,EVENLIGHT,COMINGFROMBEHINDYOU:    try to get somethingbig and solid lookinginto the foreground
Placeyourselfso the light on the subjectis coming over your    to help fill the print and add a feeling of distance.
shoulder. Don't have the subject betweenyou and the sun.                                               TIME DEVELOPMENTCAREFULLy:Followthe recommen-For portraitsyou'll get best resultswhen a cloud blocksthe                                                        dations in the film instructionsheet. These may changedirect sun, or on an overcastbut bright day,or in open shade.                                                      from                                                             time                                                                              to                                                                         time. With                                                                               black                                                                           and                                                                                         white                                                                                                               film no                                                                                       harm                                                                                                                                               is             pictures,  For     scenic                    avoid high                           overhead                                       sun,                                          shoot with                                                 done                                                                                                                if you                                                               overdevelop                                                                                              for                                                                                  a few                                                                                          extra                                                                                     seconds;                                                                                                                              in                                                                                                                          fact.                                                                                                                                                                                                   itthe    light       coming              from behind                        you and                                from the                                             side.                                             may improvesome pictures. However,if you developfor less
 AVOID DIM tIGHT: The shutter moves slowly ano your    than the recommendedtime, your pictures will be of poor
picture may be blurred. But if you must mak-ea picture    quality,with a gray, washed-outlook.
withoutflash in dim light,followthe suggestionson page27.                                           KEEPAN EYEON THE TEMPERATURE:Cold weathercan
 WATCHTHE BACKGROUND:The light on the background,   affect the quality of your pictures. Be sure to read page
behind your subject, should be just about as bright as the    21, which explainshow the temperatureaffectsyour pictures
light on the subject. Don't photographsomeonein the shade   and what to do about it.
if the backgroundis out in the open and brighily lit. Strong
light behindthe subjectwill ',fool',the electriceye (page26).      lF YOURPICTURElS TOO DARK OR TOO LTGHT:Use the                                                       L/D control as shown on page 22 to make the next one of the
 MOVE lN CLOSE:The bigger your subject is in the print,   same subject,in the same locationand lighting conditions,
the more detailsyou'll be able to see. For scenic pictures,  come out exactlyas you want it to.

                                Never try to use flash with daylight pictures.

                      Donated to www.orphancameras.com
                                                                                         13
View original page 17Page 18 · Read text
HOWTO SETTHE CAMERAFORA DAYLIGHTCOLORPICTURE

                                                                                                                                                                                                                                                                                                                                                                                                                  !v:|f,lft.+rqwg.                                                                                                                               i
                                       C A M E


                                                                                ?:',.


  Set the Film Selectoras shown abovefor all color oictures.   they are important. The new positionof the L/D controlthen                                                      +Set the Lighten/Darkencontrol (right) to Normal, as shown,   becomesthe Normal setting for all daylight pictures made
with this exception. On some color film packs you'll find a    with that pack. You can still make your pictures lighter or                                                                                                                                                                     Iprinted instructiontellingyou to set the L/D controlone mark    darker (p. 22) with the L/D control.  lf there's no special
toward Lightenfor all picturesmade with that pack. Please   instructionon the pack, set the L/D control to Normal as   $
followthcse instructions,which may vary from pack to pack;   shown above.
                           Check all color packs for special L/D control instruction.
                     Donated to www.orphancameras.com
View original page 18Page 19 · Read text
HOWTO SET THE CAMERAFORA DAYLIGHTCOLORPICTURE

                                       C A M


  Set the Film Selectoras shown abovefor all color pictures.   they are important. The new positionof the L/D controlthen
Set the Lighten/Darkencontrol (right) to Normal, as shown,   becomesthe Normal setting for all daylight pictures made
with this exception. On some color film packsyou'll find a    with that pack. You can still make your pictures lighter or
printedinstructiontellingyou to set the L/D controlone mark    darker (p. 22) with the L/D control.  lf there's no special
toward Lighten tor all pictures made with that pack. Please   instruction on the pack, set the L/D control to Normal as
followthcse instructicns,which may vary from pack to pack;   shown above.
                          Check all color packs for specialL/D control instruction.
                     Donated to www.orphancameras.com
View original page 19Page 20 · Read text
TIPS FORGOODDAYLIGHTCOLORPICTURES                       OPERATION
  USE BRIGHTSUN, COMTNGFROM BEHTNDyOU: you'tl   your subject isn't wearing colorful clothes,add color with a
 get strongestcolors if your subject is in bright sun (but you    bright shirt, scarf, or jacket. Or, find a colorful background
can also get pleasingresults on an overcastbut very bright      -  anythingthat will fill at least one-thirdof the picture area
 day). Stand so the light on the subject is coming over your    with strong,solid color.
shoulder. Don't have the subject betweenyou and the sun.    TIME DEVELOPMENTCAREFULLY:Followthe recommen-
  AVOID DIM LIGHT: The shutter moves slowly and your    dations in the film instruction sheet. These may change picture may be blurred.                                                      from time to time. Use an accuratetimepiece. lf you have a
 MOVE lN GLOSE:The bigger your subject is in the print,    Polaroid DevelopmentTimer, check it occasionallyagainst
the more color and detail you'll be able to see. For scenic   a watch with a second hand; if it's fast or slow, allow for this
pictures,try to get somethingbig, solid looking,and colorful   when developingyour pictures A few secondsoverdevelop-
into the foreground.                                 ment is not harmful, but prints that are much overdeveloped
 FOCUSCAREFULLY:Focuson the main subject. lt wiil be   may look too bluish; those that aren't developedlong enough
sharp, but objects much farther or nearer than the subject    will havea pinkishcast and the colorswill be weak.
may be fuzzy.                                  KEEP AN EYE ON THE TEMPERATURE:Cold weather or
 WATCHTHE BACKGROUND:The tight on the background   excessiveheat can affect the quality of your pictures. Be
should be just about as bright as the light on the subject.   sure to read page 21, which explains how the temperature
Don't photographsomeone in the shade if the background   affectsyour picturesand what to do about it.
is out in the open and brighttylit. The strong light behindthe       lF YOUR PICTURElS TOO DARK OR TOO LIGHT: Use the
subject will "fool" the electriceye (see page 26).             L/D control as shown on page 22 to make the next one of the
 HAVE PLENTY OF COLOR:Look for subjects and back_  same subject, in the same locationand lighting conditions,
grounds with strong, bright colors in big, solid chunks.  lf   come out exactlyas you want it to.

                              Never try to use flash with daytight color pictures.
                    Donated to www.orphancameras.com
View original page 20Page 21 · Read text
HOWTO TAKEA PICTURE!


            FRAME                         FOCUS

     FOCUS:Look at your subjectthrough the View win-    until the bright spot showsa singleclear image of the most1
 r     dow. Come close enough to fill most of the frame.    important part of your subject. Shift your eye back to the
Shift your eye to the Focuswindow. Push the No. 1 buttons   Viewwindow,centeryour subjectin the white frame.
                    Donated to www.orphancameras.com16
View original page 21Page 22 · Read text
OPERATION


                          RES^ET:lmmediatelyafter snapping a picture, press                         ?
                             a,    No.3 buttondownfirmly until it locksand staysdown.
                        This resetsthe shutterso you'll be readyfor the next picture.
                      Always reset No. 3 right away; if you don't, nothing will
                     happennext time you press No. 2 buttonto shoot.Donated to www.orphancameras.com
View original page 22Page 23 · Read text
HOWTO DEVELOPTHE PRINT


First,thesmallwhitetab. Pullit all thewayoutof thecamera.Don'tblockthedoor(arrow).         Next,thelargeyellowtab.

A    PULLTHE TABS: Hold the camera in your left hand,         lf no yellow tab pops out when you pull the white tab, stop.'f      as shown. (Don't hold it any other way!) Graspthe    Don't pull another white tab. Page20 shows you what to do
small white tab betweenthe thumb and forefingerand pull     in this situation.
it straightout of the camera,all the way, without stopping.    Never pull a white tab when you can see a yellow tab.  lf
When you pull the white tab out, a concealeddoor (arrow)   you do so accidentally,don't pull the yellowtabs that appear
opens and a yellowtab pops out. Don't block this door in    or you'll spread developerall over the rollers. Instead,as
a n y w a y w h i l e p u l l i n gt h e t a b s .                        shownon page20, carefullyopen the cameraback,disengage
  Pullingthe small white tab does not start development.  the tabs from the tab slot and rollers,removethe crumpled
It only preparesthe film for the next step, which is pulling    pictureassemblies,and closethe back.
the yellowtab. Grip the yellow tab in the center so it will    When you pull the yellow tab, hold the camera so the lens
come out straightwhen you pull it out of the camera. lf you    faces straightahead of you, not pointingdown. This, plus
pull the yellowtab out at an angle,one edge of your picture   grippingthe centerof the tab, helpsyou to pull it out straight.
may not develop properly.
                     Donated to www.orphancameras.com
18
View original page 23Page 24 · Read text
PULLSTRAIGHT,PULL SWIFTLY                               OPERATION
           T


Pullit straightoutof thecamera,swiftly.Begintimingdevelopment.      Liftoffthewhiteprintquickly.      Foldup thenegative.

  Pull the yellow tab straight out of the camera all the way,     A f t e r t h e r c c o m m e n d e d d e v e l o p m e n t t i m e , q u i c k l y s t r i p t h e
s w i f t l y , w i t h o u t h e s i t a t i n g . T h i s s t a r t s d e v e l o p m e n t o f y o u r    w h i t e p r i n t o f f t h e b r o w n p a p e r s t a r t i n g f r o m  t h e e n d n e a r e s t
p i c t u r e , s o b e g i n t i m i n g a s s o o n a s y o u g e t t h e  t a b o u t . H o w         t o t h e y e l l o w t a b . A c o l o r p r i n t w i l l  l o o k n e a r l y d r y , b u t d o n ' t
f a s t  i s a s w i f t p u l l ?   l t s h o u l d  t a k e a b o u t a s  l o n g a s  i t  t a k e s         t o u c h  t h e  f a c e f o r a  f e w m i n u t e s .    l t w i l l h a r d e n t o a  t o u g h ,
y o u t o s a y " P U L L  l T " b r i s k l y , e a c h t i m e y o u p u l l t h e t a b .    l f     g l o s s y f i n i s h . W h e n  i t  i s d r y , m o u n t  i t o n a c o l o r p r i n t m o u n t ,
y o u r p i c t u r e i s f u l l o f w h i t e s p e c k s , p u l l a b i t s l o w e r .         w h i c h i s s u p p l i e d w i t h t h e f i l m .
  The picture develops outside the camera.  While  it's oe-     D o n ' t t o u c h  t h e  f a c e o f b l a c k a n d w h i t e p r i n t s .  y o u m u s t
v e l o p i n g , h o l d  t h e  t a b b y  t h e y e l l o w  t i p , o r   l a y t h e p i c t u r e     c o a t t h e m  t o p r e v e n t f a d i n g a n d o t h e r d a m a g e ( s e e p a g e 2 3
a s s e m b l y d o w n f l a t . D o n ' t t o u c h o r b e n d t h e w h i t e p a p e r o r      for how to coat prints).
l i f t i t o f f . O u t d o o r s , d o n ' t  l e t t h e p i c t u r e a s s e m b l y f l a p  i n t h e      To avoid contact with chemicals  left after the print  is re-
b r e e z e . D e v e l o p t h e p i c t u r e f o r  t h e  f u l l t i m e  r e c o m m e n d e d   m o v e d , f o l d u p  t h e n e g a t i v e w i t h  t h e m o i s t s i d e  i n .  P l e a s e
i n t h e f i l m  i n s t r u c t i o ns h e e t .                                    p u t  i t  i n a w a s t e b a s k e t o r  f i l m b o x . D o n ' t b e a  l i t t e r b u g .
                     Donated to www.orphancameras.com                          Check the temperature!  lt's important. See page 21.                          19
View original page 24Related documents and language editions
PolaroidPDF
POLAROID 220
User manual
37 pages · EnglishRead →
PolaroidPDF
POLAROID 350
User manual
53 pages · EnglishRead →
PolaroidPDF
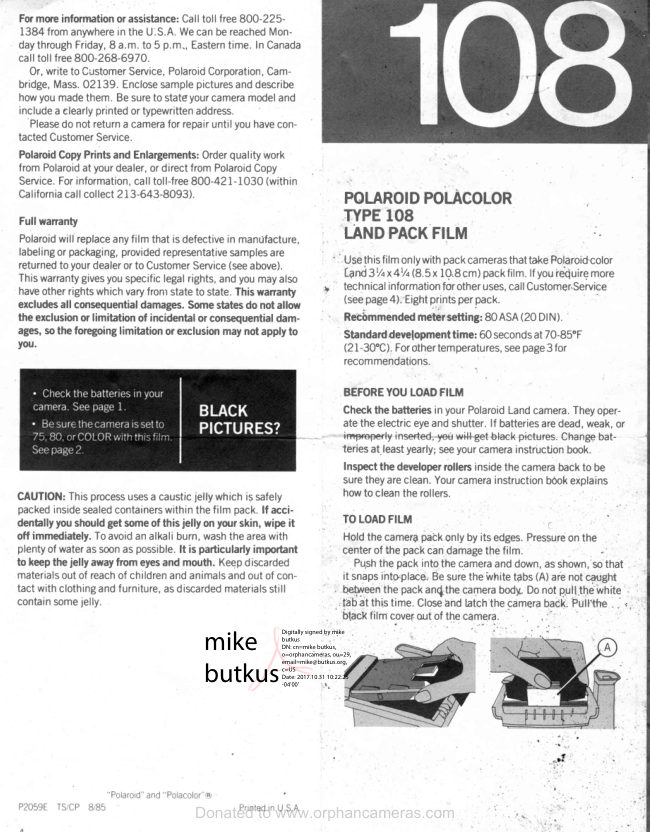
Polaroid 108 film information
User manual
5 pages · EnglishRead →
PolaroidPDF
Polaroid 110A
User manual
30 pages · EnglishRead →
PolaroidPDF
Polaroid 125
User manual
23 pages · EnglishRead →
PolaroidPDF
Polaroid 210
User manual
27 pages · EnglishRead →
PolaroidPDF
Polaroid 215
User manual
25 pages · EnglishRead →
PolaroidPDF
Polaroid 225
User manual
29 pages · EnglishRead →
PolaroidPDF
Polaroid 230
User manual
28 pages · EnglishRead →
PolaroidPDF
Polaroid 240
User manual
27 pages · EnglishRead →
PolaroidPDF
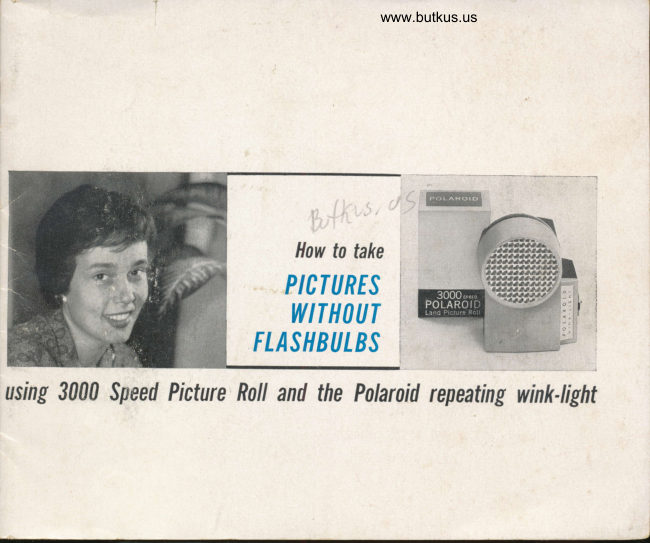
Polaroid 3000 Wink Flash
User manual
13 pages · EnglishRead →
PolaroidPDF
Polaroid 315
User manual
50 pages · EnglishRead →
From the M. Butkus archive. Original publisher and archive notices are retained.
Check the model and edition against your equipment.
PDF verified 2026-10-10.