Film cameras
Polaroid 215 User manual
User manual for Polaroid 215. 25 pages in English. Read the original PDF, download or print a copy without registration.
25 pagesEnglish1.9 MB PDF
Loading your manual…Open PDF directly
Document details
- Brand
- Polaroid
- Model / document
- Polaroid 215
- Document type
- User manual
- Language
- English
- Pages
- 25
- File size
- 1.9 MB
- Category
- Film cameras
- Document date
- Not specified in catalog
Search available document text
Find a term, then jump to its page in the original PDF. Image-only pages may not be searchable; check the PDF for exact wording and diagrams.
Page 6 · Read text
HOWTO GETTHE MOSTOUT OF THIS CAMERA


  Before you load your camera with film, please be sure to    Plan and think before you shoot.
read carefully the first two sections in this booklet: Getting     As a quick guide to help you get a good pictureeverytime,
Acquainted, and Operation (the pages with colored edges).    here are some helpful hints. They'reimportant.As you read the text and look at the pictures, go through
a l l  t h e m o t i o n s o f u s i n g t h e c a m e r a -  w i t h o u t  f i l m .  T h e n     1. Always have the light on the subject coming from
                                                     behind you.  For best color pictures place your subjectsiny o u ' l l b e c o m p l e t e l y f a m i l i a r w i t h  r t b e f o r e y o u m a k e y o u r                                                         b r i g h ts u n s h i n e .first oicture.
                                                                  2. Move in close,to get a big image in the print.  This  is one of the world's easiest-to-use cameras, once
y o u u n d e r s t a n d a   f e w s i m p l e  t e c h n i q u e s . H o w e v e r , i t   i s     3.  Focuscarefully,to get sharp pictures.
v e r y  i m p o r t a n t t h a t y o u   l e a r n t h e b a s i c o p e r a t i n g s t e p s o r     4. Choosecolorful subjectsfor your color pictures.
y o u ' r e b o u n d t o w a s t e f i l m a n d m o n e y a n d b e d i s a p p o i n t e d    5.  Pick a good background,particularlywith flash.
w i t h y o u r p i c t u r e r e s u l t s .                                                                  6.  Pull the tabs correctly.
 O n c e y o u g e t t h e s i m p l e o p e r a t i n g r o u t i n e d o w n p a t ,  l o a d                                                                  7. Time developmentcarefully.a film pack. We suggest that you start with 3000 speed
b l a c k a n d w h i t e f i l m .  P l e a s e r e m e m b e r t h a t e v e n t h e  f i n e s t    B. Keep an eye on the temperature.
c a m e r a a n d  f i l m n e e d s o m e h e l p  f r o m  t h e p h o t o g r a p h e r i f     A s y o u g o t h r o u g h t h i s b o o k l e ty o u 'l l f i n d t h e s e p o i n t s
t h e y a r e t o p r o d u c e g o o d p i c t u r e s . T h a t h e l p c a n b e s u m m e d    explainedin detail. They can make the differencebetween
u p  i n o n e s e n t e n c e :                                         gettinggood picturesand poor ones.

                     Donated to www.orphancameras.com
View original page 6Page 7 · Read text
HOWTO OPENTHE CAMERA                           GETTINGACQUAINTED

                                                       A


l. To unlatchcover,press0n centerof top.        2. Youcanletcoverhangdownor . . .            3. . . . to removeit, pushspring(A) andlift.


4. RaisebuttonNo.l; thisunlockscameralront.   5. Pullcamefatronloutasfarasit willgo.

 PHOTO5, IMPORTANT:8e sure to pull the camerafront    into place. lf the front isn't fully out and locked,your prints
outuntilthereisadefiniteclickandthelockingbar(A)snapswill comeoutallblack,or badlyblurred,

                   This booklet is designed to fit neatly inside the cover, under a spring clip (photo 2).
                     Donated to www.orphancameras.com
View original page 7Page 8 · Read text
HOWTO CLOSEAND COVERTHE CAMERA


  Pressdown on the lockingbar. This          lf you lraveremovedthe cover:to re-     Swing the cover up. Press the top
releasesthe f ront of the camera Push   place it, slide the hingedown over the    centersectionunderthe f inder housing
the front in all the wav until it locks.      lock spring until it snapsinto place.     so it latchessecurely.

                   When storing the camera be sure that nothing presseson the No. 2
                          button; if it's depressedeven slightly,the battery may be drained.
                     Donated to www.orphancameras.com
View original page 8Page 11 · Read text
HOWTO FOCUSFORPICTURESOF PEOPLE                 GETTINGACQUAINTED


 FOR ADULTS: Placethe top line at the top of your sub'      F O R S M A L L G H I L D R E N :    l f  t h e y ' r e 1 - 3 y e a r s o l d , p l a c e
jcct's forehead,and move the No. 1 buttons to place the         t h e  t o p   l i n e o n  t o p o f  t h e h e a d a n d  t h e m o v i n g  l i n e a t  t h e
movingline at the bottom of the chin.                          b o t t o m o f  t h e c h i n . W i t h b i g g e r c h i l d r e n , f o c u s  i n  t h e s a m e
   lf the lineswon't separatefar enoughto frame the subject   way as for adults.
properly,you're too close; back up a bit.
                 For vertical pictures, focus with the camera horizontal,then turn it to aim and shoot.
                     Donated to www.orphancameras.com
View original page 11Page 12 · Read text
PRACTICETHE L, 2,3 SYSTEM                         GETTINGACQUAINTED


  O N E i s f o r f o c u s i n g . L o o k t h r o u g h t h e    TWOis for shooting.Practicepressing   THREE is for resetting. Right after
 f i n d e r a t s o m e o n e n e a r b y .  P l a c e t h e        t h e N o . 2 b u t t o ns l o w l yu n t i l t h es h u t t e r   snappinga picture,alwayspush down
 t o p  r a n g e f i n d e r l i n e a t  t h e  t o p o f y o u r     c l i c k s .I n d i m l i g h th o l dN o . 2 d o w na n d    No. 3 button firmly until it locks and
 s u b j e c t ' s f o r e h e a d .  P r a c t i c e p u s h i n g    stay very still until you hearthe second   stays down. This resetsthe shutter for
 t h e N o . 1 b u t t o n s  t o p l a c e  t h e m o v i n g     c l i c k a s t h e s h u t t e rc l o s e s . T h e n y o u    the next picture. lf you don't reset No.
  l i n e a t t h e b o t t o m o f y o u r s u b i e c t ' s c h i n .    can move and let No. 2 up.              3 button,you won't be able to shoot.
                     Donated to www.orphancameras.com                             1 1
View original page 12Page 13 · Read text
WHATYOU SHOULDKNOWABOUTYOURFILM
  This camera uses PolaroidLand pack     The Polaroidfilm pack containsall
 films. At presentthere are two: 3000    the materialsto make eight pictures.
speed black and white,Type 107, and    For each picture there is a piece of
75 speed color, Type 108. There may    negativef ilm, a sheet of print paper,
be additionaltypesof film in the f uture.   and a thin foil container (the pod)
  You must know the film speed num-    filled with the  jeily-tike chemicals
 ber, 3000 or 75, to set the camera   needed to develop the picture.
controls correctly.  However, if you      After snappingthe picture,you start
forget the number, just look at the   developmentby the simple act of pull-
film instructionsheet.                   ing a pieceof paperout of the camera.
  The film speed number describes   This drags the exposed negative, a    3000speedblackandwhitefilm. Setthecamera's
how "fast" (light sensitive)the film is.    sheet of print paper, and a pod of     film selectorto 3000.
For example, 75 speed film  is tairly   chemicals between two steel rollers.
"fast" but should be used in bright   The pressureof the rollers squashes
daylightor with flash for good results.   the  pod, spreading the chemicals
  However, 3000 speed black and    betweenthe negativeand print paper
white is 40X as "fast" as75 speedcolor    to form a picture"sandwich".
film, so you can make pictures with it     The picture develops outside the
where there isn't enough light to use   camera. After the recommendeddevel-
75 speed film.  Of course, you can   opmenttime you separatet he sandwich
use 3000 speed film  in daylight or   and there is your finishedpicture.
with flash, too.                                                                        75speedcolorfilm. Setthefilmselectorto 75.


t2                    Donated to www.orphancameras.com
View original page 13
Page 14 · Read text
HOW TO LOAD A FILM PACK:OPENTHE PACKAGE                    OPERATION

                                            A specialrequest!
                                                                 As soon as you open the film pack you
                                                                                                will  begin  to accumulate waste paper.
                                                                   There will be more when you develop the
                                                                                pictures. We hope that  it won't become
                                                                                                       litter in the streets or be scattered around
                                                                          the landscape.
                                                             What to do with the wastepaper? Usually,
                                                                                                                                   it will  fit into an empty film box. Or,  if
                                                                          you're planning to take lots of outdoor
                                                                             pictures, bring along a paper bag or other
                                                                          container for waste. Everyone will appre-
                                                                                 ciate this  little extra effort on your part.

 Open the top of the box. With color film there's a set of    middle of the package. Startingat the corner,tear open the
mounts; with black and white film there's a coater. Remove    entire side of the packagealong the dotted line. When the
these and the instructionsheet (pleaseread it).  Pull out the    side is open, rip apart the front and back of the package.
film package. Handle it gently, carefully. Save the box to      Lift out the pack. Discard the little package of silica gel
carry prints in safely.  lt also can be very useful when coating   suppliedwith colorfilm. Handlethe pack by the edgesonly.
blackand white prints.                                   Always open the package and load film in the shade, not
  Hold the packagenear the edges. Don't press hard on the     in direct sunlight,to avoid foggingthe film.

                    Donated to www.orphancameras.com                          13
View original page 14Page 15 · Read text
HOW TO LOADA FILM PACK (Cont.)


l. Pushthebackdoorlatch;thedoorwillpopup.    2. 0penit all theway.Aretherollers(A) clean?   3. Holdthe film packby the edgesas shown
                                                                        lf not,cleanthemas describedin thesectionon   andpushthe closedendof the packunderthe
                                      careof yourcamera.                     doorhingeagainstspringtension.


4. Pushthe packdownintothe camera.You'll   5. & 6. Besurethewhitetabsarefreeandnotfoldedunder.Closethe backdoor.Pressbothsides
feelit snapintoplace.                         firmlyto besurethatbothsideslatch.Theblacktabof thesafetycovermuststickoutof thesmallslot.
                                                                        lf not,reopentheback,leadthetabout.
14                    Donated to www.orphancameras.com
View original page 15Page 16 · Read text
OPERATION


7 . & 8 .Pull the safetycoverall the wayoutof thecamerawithoutstopprng.Don'trrpit.                      9. Withthe safetycoverout,the white
                                                                                       tab(A) shouldstickoutof thesmallslot
                                                                                    (No.a). Don'tpullthewhitetab. You're
                                                                     nowreadyfor thefirstpicture.


1. lf there'snowhitetabin theNo.4    2. Openthe backof thecamerapartwayand,without   3. Closethebackof thecamera,makingsurethatboth
slot,dothefollowingin theshadeor    disturbingor movingthefilmpack,pushthewhitetab    sidesarelockedsecurelvandthe whitetab is outside
indoors,notin brightsun.           outintotheopen.                                    in the No.4 slot.
                     Donated to www.orphancameras.com                          15
View original page 16Page 17 · Read text
HOW TO SET THE CAMERAFOR3OOOSPEEDFI


  Set the Film Selectoras shownfor blackand white pictures     Set the white dot on the Lighten/Darken(L/D) control next
with 3000 speedfilm.                                           to the arrow,as shown. This is the Normal position.


 16                    Donated to www.orphancameras.com
View original page 17
Page 18 · Read text
OPERATION I, rtps FoRcooD DAYLIcHTBLAcKANDwHlrE PlcruREs
    Use bright, even light, coming from behind you:  Place    to get something big and solid looking into the foreground
   yourself so the light on the subject is coming over your    to help fill the print and add a feelingof distance.I shoulder, Don't havethe subject betweenyou and the sun.                                                     Time developmentcarefully: Followthe recommendations   For portraitsyou'll get best resultswhen a cloud blocksthe                                                                           in the film instructionsheet. These may changefrom time    directsun, or on an overcastbut bright day, or in open shade'                                                                                                                        t o t i m e . W i t h b l a c k a n d w h i t e f i l m n o h a r m i s d o n e i f y o u     For scenic pictures,avoid high overheadsun, shoot with                                                        overdevelopfor a few extra seconds;in fact, it may improve   the light coming from behind you and from the side.                                                some pictures. However,if you develop for less than the
     Avoid dim  light: The shutter moves slowly and your   recommendedtime, your pictures will be of poor quality,
    picture may be blurred. But if you are using 3000 speed    with a gray, washed-outlook.
    film and must make a picture without flash in dim light'
    follow the suggestionson Page 31.                        Keep an eye on the temperature: Cold weather can affect
    Watch the background: The light on the background'    the quality of your pictures. Be sure to read page 25, which
   behind your subject, should be just about as bright as the    explains how the temperature affects your pictures and
    light on the s ubj ect.  Don't p hotograph someone i n the shade   what to do about it.
      if the backgroundis out in the open and brightlylit. Strong          lf your picture is too dark or too light: Use the L/D control
    light behindthe subjectwill "fool" the electriceye (page30).    as shown on page 26 to make the next one of the same sub-
    Move in close: The biggeryour subject is in the print, the     ject, in the same locationand lighting conditions,come out
   more details you'll be able to see. For scenic pictures,try    exactly as you want it to.

                                   Never try to use flash with daylight pictures.


                       Donated to www.orphancameras.com                              t7II
View original page 18Page 19 · Read text
HOWTO SET THE CAMERAFOR75 SPEEDCOLORFILM


                                                   C A M T


                                                                               ,7.%/r/Kt:z/lt7r1
  Set the Film Selectoras shown abovefor all color pictures.   they are important. The new positionof the L/D controlthen
Set the Lighten/Darkencontrol (right) to Normal, as shown,   becomesthe Normal setting for all daylight pictures made
with this exception. On some color film packsyou'll find a    with that pack. You can still make your pictures lighter or
printed instructiontelling you to set the L/D control one mark    darker (page 26) with the L/D control. lf there's nispecial
toward Lightenfor all picturesmade with that pack. Please   instruction on the pack, set the L/D control to Normal as
followthose instructions,which may vary from pack to pack;   shown above.
                     Donated to www.orphancameras.comt8
View original page 19Page 20 · Read text
T
II
  TIPS FORGOODDAYLIGHTCOLORPICTURES                        OPERATION
    Use bright sun, coming from behind you:  You'll get    ject isn't wearing colorful clothes, add color with a bright
   strongestcolors if your sublect is in bright sun (but you can     shirt, scarf, or jacket.  Or, find a colorful background-
   also get pleasing results on an overcast but very bright day)'    anything that will fill at least one-thirdof the picture area
  Standso the light on the subjectis coming overyour shoulder.   with strong,solid color.
  Don't havethe subject betweenyou and the sun.              Time developmentcarefully: Followthe recommendations
    Avoid dim lightr The shutter movesslowlyand your picture    in the film instructionsheet. These may change from time
  may be blurred.                                                 to time. Use an accuratetimepiece. lf you have a Polaroid
   Move in close: The biggeryour subjectis in the print, the    DevelopmentTimer, check it occasionallyagainst a watch
  more color and detail you'll be able to see' For scenic pic-    with a second hand; if it's fast or slow, allow for this when
   tures, try to get something big, solid looking, and colorful   developingyour pictures. A few secondsoverdevelopment
   into the foreground.                                                  is not harmful, but prints that are much overdevelopedmay
                                                            look too bluish;those that aren't developed long enough    Focus carefully: Focus on the main sublect.  lt will be                                                                            will have a pinkish cast and the colors will be weak.  sharp, but objects much farther or nearer than the subiect
  may be fuzzy.                                       Keep an eye on the temperature: Cold weather or exces-
    Watch the background: The  light on the background    sive heat can affect the quality of your pictures. Be sure to                                                                      how the                                                                                        temperature affects                                                                              explains                                                                   which                                                       page 25,                                                        read                                                  subject.                                      on the                             as the                                             light                     as bright  should        be lust abor"rt                                                                                               to do about                                                                                                                                                        it.                                                         your                                                                  pictures                                                                     what                                                               and                                        background                                                                       if the                             shade                                  in the               someone   Don't photograph
   is out in the open and brightly lit' The strong light behind          lf your picture is too dark or too light: Use the L/D control
   the subjectwill "fool" the electriceye (see page 30).          as shown on page 26 to make the next one of the same sub-
    Have plenty of color: Look for subiects and backgrounds    ject, in the same locationand lightingconditions,come out
   with strong, bright colors in big, solid chunks.  lf your sub-    exactly as you want it to,

                                 Never try to use flash with daylight color pictures.
                       Donated to www.orphancameras.com                                                                                              19I
View original page 20Page 21 · Read text
HOWTO TAKE A PICTURE


     FOCUS: Look at your subject through the finder   moving line at the bottom of the subject'schin. For pictures   1
    r   window. Come close enoughto f ill most of the f rame.    of children, pets, nearby objects, and scenics, follow the
Placethe top line of the rangefinderat the top of your sub-    focusinginstructionson pages9 and 10.
ject's forehead. Then push the No. 1 buttons to place the

                     Donated to www.orphancameras.com20
View original page 21Page 22 · Read text
OPERATION


     t    S H O O T : F i r m l y b u t s m o o t h l y p r e s s b u t t o n N o . 2 , t h e      2   RESET:lmmediatelyafter snappinga picture,press
  Z     s h u t t e r  r e l e a s e , u n t i l y o u h e a r a   l o u d c l i c k .  D o n ' t         r,   No.3 buttondownfirmly until it locksand staysdown.
j a b a t N o . 2 -  y o u m a y s h a k e  t h e c a m e r a . W h e n s h o o t i n g    This resetsthe shutter so you'll be readyfor the next picture.
c o l o r i n t h e s h a d e o r b l a c k a n d w h i t e  i n d i m   l i g h t , h o l d N o . 2    Alwaysreset No. 3 right away.
d o w n a n d d o n ' t m o v e u n t i l y o u h e a r a s e c o n d c l i c k a s  t h e
s h u t t e r c l o s e s . T h e n  l e t N o . 2 b u t t o n c o m e u p .
                     Donated to www.orphancameras.com                                                                                               2 L
View original page 22Page 23 · Read text
HOWTO DEVELOPTHE PRINT
                                                \                                                                        I
                                                                                  I      I


First,thesmallwhitetab. Pullit all thewayoutof thecamera.Don'tblockthedoor(A),            Next,thelargeyellowtab.

      i    PUIL THE TABS: Hold the camera in your left hand,    When you pull the yellow tab, hold the camera so the lens   '?      as shown. (Don't hold it any other way!) Graspthe    faces straight ahead of you, not pointing down. This, plus
snrall white tab betweenthe thumb and forefingerand pull    grippingthe center of the tab, helpsyou to pull it out straight.
it straight out of the camera, all the way, without stopping.                                                                   Pull the yellow tab straight out of the camera all the way,When you pull the white tab out, a concealed door (A)                                                                   swiftly,without hesitating. This starts developmentof youropensand a yellowtab popsout. Don'tblockthis door in any                                                              picture,so begin timing as soon as you get the tab out. Howway while pullingthe tabs.                                                                 fast is a swift pull?  lt should take about as long as it takes  Pullingthe small white tab does not start development.                                                    you to say "PULL lT" briskly, each time you pull the tab.It only preparesthe film for the next step, which is pulling                                                                                                       lf your picture is full of white specks,pull a bit slower.the yellow tab. Grip the yellow tab in the center so it will
come out straight when you pull it out of the camera. lf you     The picture develops outside the camera.  While it's de-
pull the yellowtab out at an angle,one edge of your picture   veloping, hold the tab by the yellow tip, or lay the picture
may not develop properly.                             assembly down flat.  Don't touch or bend the white paper                                                                                                                                                                                                         I
                      Donated to www.orphancameras.com                                                                                                                                                                                                                                          I't22
View original page 23Page 24 · Read text
PULLSTRAIGHT,PULL SWIFTLY                                OPERATION


Pullit straightoutof thecamera,swiftly. Begintimingdevelopment.     Stripoffthewhiteprint.           FoldFoldupup thethenegative.negative.

or lift it off. Outdoors,don't let the picture assemblyflap     Avoid contactwith chemicalsleft on the negativeafter the
in the breeze. Developthe picturefor the full time recom-    print is removed. (Be sure to read the CAUTloNparagraph
mendedin the film instructionsheet.                     about this in your film instructions.)Fold up the negative
                                                          with the moist side in. Pleaseput it in a wastebasketor  After the recommendeddevelopmenttime, quickly strip                                                                 film box. Don't be a litterbug!the white print off the brown paper startingfrom the end
nearestto the yellowtab. A color print will look nearlydry,          lf no yellowtab pops out when you pull the white tab, stop.
but don't touch the face for a few minutes.  lt will harden   Don't pull anotherwhite tab. Page24 showsyou what to do
to a tough,glossyfinish. When it is dry, mount it on a color    in this situation.
p r i n t m o u n t ,w h i c h i s s u p p l i e dw i t h t h e f i l m .                                                    Never pull a white tab when you can see a yellow tab.   lf
  Don't touch the face of black and white prints. You must   you do so accidentally,don't pull the yellowtabs that appear
coat them to preventfading and other damage (see page 27    or you'll spreaddeveloperall over the rollers. Instead,re-
for how to coat prints).                            move the yellowtabs as shownon page24.
                          CheckDonatedthe temperature!to www.orphancameras.comlt's important. See page 25.                                                                                        23
View original page 24Page 25 · Read text
IF NO YELLOWTAB APPEARSWHENYOU PULLTHE WHITETAB, STOP!


  D o n ' t p u l l a n o t h e r w h i t e  t a b .    I n s t e a d , g e n t l y o p e n  t h e     o r  i n t h e s h a d e . W h i l e h o l d i n g t h e p a c k d o w n  l i g h i l y ( p i c t u r e
c a m e r a b a c k  j u s t e n o u g h t o g e t o n e  f i n g e r u n d e r  i t  t o h o l d     a t  l e f t ) s l o w l y o p e n t h e b a c k a l l t h e w a y a n d  t a k e h o l d o f t h e
d o w n t h e  f i l m p a c k a n d k e e p  i t   i n p l a c e . D o  t h i s   i n d o o r s         t o p m o s t y e l l o w P U L L t a b , a s s h o w n .


 G e n t l y p u l l  t h e e n t i r e p i c t u r e a s s e m b l y a l l t h e w a y o u t o f     C l o s e t h e b a c k o f  t h e c a m e r a , making sure that the next
t h e p a c k a n d d i s c a r d i t . D o n ' t t r y t o s a v e i t . W h i l e t h e b a c k   w h i t e  t a b s t i c k s o u t o f  t h e s m a l l slot next to No. 4. Check
d o o r i s o p e n c h e c k t h a t t h e  r o l l e r s a r e c l e a n ( p a g e 3 2 ) .                  t h a t b o t h s i d e s o f t h e b a c k  l a t c h secu rely.
24                    Donated to www.orphancameras.com
View original page 25
Related documents and language editions
PolaroidPDF
POLAROID 220
User manual
37 pages · EnglishRead →
PolaroidPDF
POLAROID 350
User manual
53 pages · EnglishRead →
PolaroidPDF
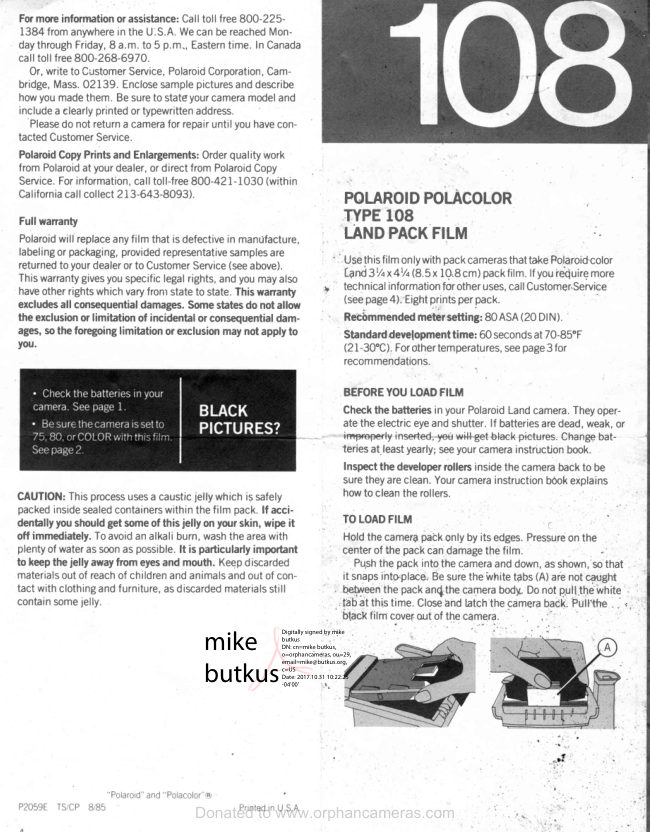
Polaroid 108 film information
User manual
5 pages · EnglishRead →
PolaroidPDF
Polaroid 110A
User manual
30 pages · EnglishRead →
PolaroidPDF
Polaroid 125
User manual
23 pages · EnglishRead →
PolaroidPDF
Polaroid 135
User manual
25 pages · EnglishRead →
PolaroidPDF
Polaroid 210
User manual
27 pages · EnglishRead →
PolaroidPDF
Polaroid 225
User manual
29 pages · EnglishRead →
PolaroidPDF
Polaroid 230
User manual
28 pages · EnglishRead →
PolaroidPDF
Polaroid 240
User manual
27 pages · EnglishRead →
PolaroidPDF
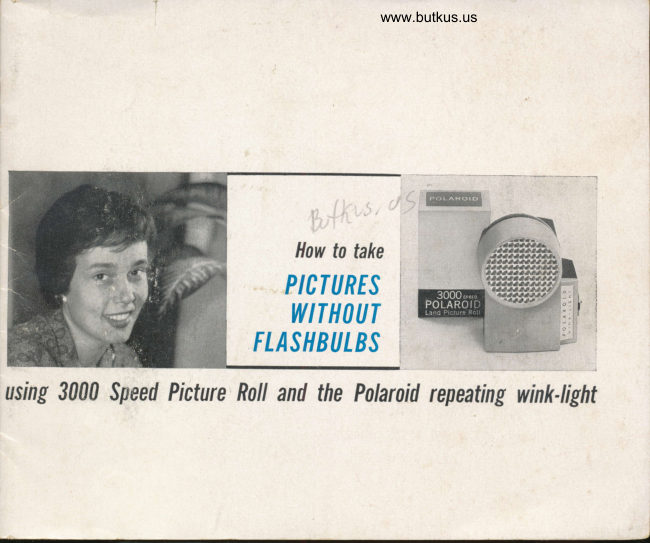
Polaroid 3000 Wink Flash
User manual
13 pages · EnglishRead →
PolaroidPDF
Polaroid 315
User manual
50 pages · EnglishRead →
From the M. Butkus archive. Original publisher and archive notices are retained.
Check the model and edition against your equipment.
PDF verified 2026-10-10.