Film cameras
Polaroid 240 User manual
User manual for Polaroid 240. 27 pages in English. Read the original PDF, download or print a copy without registration.
27 pagesEnglish2.2 MB PDF
Loading your manual…Open PDF directly
Document details
- Brand
- Polaroid
- Model / document
- Polaroid 240
- Document type
- User manual
- Language
- English
- Pages
- 27
- File size
- 2.2 MB
- Category
- Film cameras
- Document date
- Not specified in catalog
Search available document text
Find a term, then jump to its page in the original PDF. Image-only pages may not be searchable; check the PDF for exact wording and diagrams.
Page 4 · Read text
CONTENTS

GettingAcquainted
                                           Page
 I ntroduction                                         4    Check the temperaturel  lt's important             27
How to ooen the camera                              5   How to make prints lighteror darker .              28
How to close and cover the camera                     6    Care of the print .                             29
Howto hold the camera                           How to use the Cold-Cliowith color film                        J U
Howto use the viewfinder                            8    Troublesomelightingsituationsto avoid            32
How to focus the camera                          9    Fast focusingfor pictures made with 3000 speed film   ? ?
What you should know about your film               1 0   How to use 3000 speed film in dim light without flash  34
What the Film Speed Dial does .                                                  l 1    Flashpictures                              35
What the LightingSelectordoes                    L2
Practicethe 1, 2, 3 system                         14   Miscellaneous
                                                You must take care of your camera                36
Operation                                    :               Some helpful accessories                      5u
How to load a film pack                           15   A filter can pep up black and white scenics          39
How to set the camerafor 3000 speed film            18    Close-upsand portraitsare easywith these devices    40
Tips for good natural light black and white pictures     19   Copiesand enlargements                    4T
How to set the ca.merafor 75 speed color film          20    Picturetro0bles,their cause and cure              42
Tips for good daylightcolor pictures                      2l     Protectfilrn and camera from heat                 47
How to take a picture                            22   Where to write for information                    47
How to developthe print                          24    Warranty                                   47
lf no yellowtab appears                          26     List of repair stations                           48

240                    Donated to www.orphancameras.com
View original page 4Page 8 · Read text
HOWTO OPENTHE CAMERA                           GETTINGACQUAINTED
                                          u.                                                                                  O L F .                                     , F I O I D
         *i-
                                l .


l. Magnetholdscoverdown.Lift backeoge.      2. Youcanlet coverhangdownor. . .             3. . . . to removeit, pushspring(A) andlift.


4. Lilt finderfp andback;magnetwill gripit.       5.5. RaiseRaisebuttonbuttonNo.No.1;thisl; thisunlocksunlockscameracamerafront.tront     6.6. PullPullcameracamerafrontfrontoutout asasfarfar asas itit willwill go.so.

 PHOTO5, IMPORTANT: Be sure to pull the camera fiont     into place.   lf the front  isn't fully out and locked, your
out until there is a definite click and the locking bar (A) snaps     prints will come out all biack, or badly b turred,

               This booklet is designed to fit neatly inside the camera cover, under a spring ctip (photo 2).
240                   Donated to www.orphancameras.com
View original page 8Page 9 · Read text
HOW TO CLOSEAND COVERTHE CAMERA


                                                                                                                    I

  Pressdown on the locking bar. This     A magnet holds the finder up. Fold          lf you have removedthe cover: to re-
releasesthe f ront of the camera. Push    the finder down gently. Try not to bang    place it slide the hinge down over the
the front in all the way until it locks.          it on the camera.                       lock spring until it snaps into place
                                                                                       (top). Swingthe cover up and over; the
                                                               magneton top of the camerawill hold it.

                    Donated to www.orphancameras.com                          240
View original page 9Page 10 · Read text
TO HOLDTHECAMERA                           GETTINGACQUAINTED


 HORIZONTAL:Grip the two ends. Placeyour forefingers    VERTICAL:Grip the camera as you would for a horizontal
on the No. 1 buttons;youcan easilyshift the right forefinger   picture,turn it so your right hand is below. Bracethe camera
to the No. 2 button. To steady the camera, press your    againstyour foreheadand face.
elbowsinto your ribs; rest the cameraagainstyour nose.

240                   Donated to www.orphancameras.com
View original page 10
Page 11 · Read text
HOWTO USE THE VIEWFINDER


  Looking through the viewfinder window (A) you'll see a    subject is very close (3Y2tt.,for example),allow a little extra
bright, white broken line. Frame the scene with this line.   space betweenyour subject and the top frame line (above).
Always try to look through the center of the window and       lf not, you may accidentallycut off the top of someone's
concentrateon your subject, not on the white line.   lf your   head in your picture.

8                   Donated to www.orphancameras.com                           240
View original page 11
Page 12 · Read text
HOWTO FOCUSTHE CAMERA                           GETTINGACQUAINTED


 '1:           \        ::.
Lookthroughhereat thebrightspot.r,           v PushNo.I buttons.


  Holding the camera horizontal,place your forefingerson    the bright spot; this means that the camera is not focused
both No. 1 buttons as shown and push them all the way to     for that distance. Pushthe No. 1 buttonsback and forth until
your left. Lookthrough the Focuswindowand aim the bright    the two images become one -  sharp and clear. Now the
spot in the center at a nearby subject (about 5 ft. away,   camera is focused. For vertical pictures, focus with the
for example). You should see two images of your target in   camerahorizontal:turn it to aim and shoot.

240                   Donated to www.orphancameras.com
View original page 12
Page 13 · Read text
WHAT YOU SHOULDKNOWABOUTYOURFILM

  This camera uses PolaroidLand pack        t h e m a t e r i a l s t o m a k e e i g h t p i c t u r e s .
films. At presentthere are two: 3000    For each picture there  is a piece of
speed black and white, Type 107, and     n e g a t i v e f i l m , a s h e e t o f p r i n t p a p e r ,
75 speed color, Type 108. There may    a n d  a   t h i n   f o i l  c o n t a i n e r  ( t h e  p o d )
be additionaltypesof film in the f uture.        f i l l e d w i t h    t h e     j e l l y - l i k e c h e m i c a l s
 You must know the film speed num-    n e e d e d  t o d e v e l o p t h e p i c t u r e .
ber, 30OO or 75, to set the camera      After snapping the picture, you start
controlscorrectly(see opposite page).    d e v e l o p m e n t b y t h e s i m p l e a c t o f p u l l -
However,if you forget the number,just            i n g a p i e c e o f p a p e r o u t o f t h e c a m e r a .   3C00speedblackandwhitefilm.Setthecamera's
look at the film instructionsheet.      This  drags the  exposed negative, a     filmspeeddialto 3000.
  The film speed number describes   sheet  of  print  paper, and  a pod  of
how "fast" (light sensitive)the f ilm is.    chemicals between two  steel  rollers.
For example, 75 speed film  is tairly    T h e p r e s s u r e o f  t h e  r o l l e r s s q u a s h e s
"fast" but should be used in bright        t h e  p o d ,  s p r e a d i n g   t h e  c h e m i c a l s
daylight or with flash for good results.   between the negative and print paper
  However, 3000 speed black and         t o  f o r m a p i c t u r e  " s a n d w i c h " .
white is 40X as "fast" as 75 speed      T h e  p i c t u r e d e v e l o p s o u t s i d e   t h e
color film, so you can make pictures    c a m e r a . A f t e r t h e r e c o m m e n d e d d e v e l -
with it where there isn't enough light    o p m e n t t i m e y o u s e p a r a t et h e s a n d w i c h
to use 75 speed film. Of course,you    a n d t h e r e  i s y o u r f i n i s h e d p i c t u r e .        75soeedcolorfilm. Setthefilmsoeeddialto 75.
can use 3000 speed film in daylight
or with flash, too.
 The Polaroidfilm pack containsall

10                   Donated to www.orphancameras.com                           240
View original page 13
Page 14 · Read text
WHATTHE FILM SPEEDDIAL DOES                       GETTINGACQUAINTED


                         FILM   S PEED
                                                         For3000speedblackandwhitefilm.e        v For75speedcolorfilm.
 P  o

                          FILM   SPEED
 The Film Speed Dial (A) sets the camera for the kind of    sure. To prevent accidentalturning, this dial has a strong
film you are using. For 3000 speed black and white film    spring. lt must be turned a rather long way to make it snap
turn the dial to 3000;for T5speedcolorfilm turn to 75. lf you    to its next position. The other numbers on the dial (besides
don't do this, the electriceye (B) can't make a correct expo-   75 and 3000) are for films that may be sold in the future.

240                    Donated to www.orphancameras.com                                                          l 1
View original page 14Page 15 · Read text
WHAT THE LIGHTINGSELECTORDOES                                                                                                                                                                        i.
                                                                                                                                                                                                                                                                   I
  You must set the yellow square in the Lighting Selector
(shown at right) for the kind of light with which the picture                                                                                                                                                                                                                                          Itwill be taken. For example, sunlight outdoors, or flash
indoors,or just room light.                                                                                                     I  The yellow squares in the Lighting Selector move back
and forth when you push the LightingSelectorKnob (below)   With3000speedfilm,usethissideof the LightingSelector.from side to side. Try it a few times. The knob is on the front
of the camera,belowthe lens.
                                    A   RWith 3000 speed film                P  o   L
    lf there's 3000 speed film in the camera, look at the 30OO
sPEED ol.tt-y side of the Lighting Selector and move the
yellow square next to the label that describesthe lighting
iconditions. Here it's shown set for ourDooRs oR FLASH,
'the right settingfor any picture made in daylightor with f lash.
  For picturesby room light, just push the knob to placethe
yellow square next to tNDooRSwtrHouT FLASH.
                                                   Pushthe knobto setthe yellowsquare.


L2                   Donated to www.orphancameras.com                        240
View original page 15Page 16 · Read text
GETTINGACQUAINTED

With 75 speed color and all other f ilms except 3000 speed
  With any film other than 3OO0 speed film, look at the                                                    BRIGHTSUN ONLY
side of the Lighting Selectormarked 75, 150, 300 SPEED.
This side is mainly for use with 75 speed color film. The    BRIGHTSUN OR DUIL DAY
other numbers are for films that may be manufacturedin         A L S O F T A S H
the future.                                                With75speedcolorfilm,usethissideof the LightingSelector.
  Use the Lighting Selector Knob to set the yellow square
next to the label that describesthe lightingconditions.
  Remember: You must set the Lighting Selector correctly
in order to get a well exposed picture.


                                                   Pushthe knobto settheyellowsquare.


                     Donated to www.orphancameras.com240                                                                                        13
View original page 16Page 17 · Read text
PRACTICETHE 1, 2, 3 SYSTEM


 ONE is for focusing. Look through   TWOis for shooting.Practicepressing    THREE is for resetting. Right after
the Focuswindow and aim the bright    the No. 2 buttonslowlyuntil the shutter   snappinga picture, always push down
spot at varioussubjects.Pushthe No. 1    c l i c k s .I n d i m l i g h th o l dN o . 2 d o w na n d    No. 3 button firmly until it locks and
buttons and practicebringingtogether   stay very still until you hear the second   staysdown. This resetsthe shutter for
the two images of your subject in the    click as the shutter closes. Then you    the next picture. lf you don't reset No.
bright spot to make one clear image.     can move and let No. 2 up.              3 button,you won't be able to shoot.

t4                   Donated to www.orphancameras.com                       240
View original page 17
Page 19 · Read text
HOW TO LOADA FILM PACK (Cont.)


1. Pushthebackdoorlatch;thedoorwillpopup.    2. 0penit alltheway.Aretherollers(A) clean?   3. Holdthe film packby the edgesas shown,
                                                                        lf not,cleanthemas describedin thesectionon   andpushthe closedendof the packunderthe
                                       careof yourcamera.                      doorhingeagainstspringtension.


4. Pushtt'e pacl Oo*nintothe camera.You'll   b. A S. Checkto be surethatthe whitetabsarenotcaughtbetweenthefilm packandthecamera
feelit snapintoplace.                     body. Closethebackdoor. Pressbothsidesfirmlyto be surethatbothsideslatch. Theblacktab
                                               of the safetycovermuststickoutof thesmallslot. lf not,reopenthe back,leadthetabout.
16                   Donated to www.orphancameras.com                       240
View original page 19Page 20 · Read text
OPERATION


7. & 8. Pullthesafetycoverall thewayoutof thecamerawithoutstopping.Don'trip it.                      9. Withthe safetycoverout, the white
                                                                                       tab(A) shouldstickoutof thesmallslot
                                                                                    (No.4). Don'tpullthewhitetab. You're
                                                                     nowreadyfor thefirstpicture.
IF NO WHITE TAB APPEARS


1. lf there'sno whitetabin theNo.4     2. 0penthebackof thecamerapartwayand,without   3. Closethebackof thecamera,makingsurethatboth
slot,dothefollowingin theshadeor    disturbingor movingthe film pack,pushthe white   sidesarelockedsecurelyandthewhitetab is outside
indoors,notin brightsun.           taboutintotheopen.                                 in the No.4 slot.
 240                   Donated to www.orphancameras.com                            t7
View original page 20Page 21 · Read text
HOWTO SET THE CAMERAFOR3OOOSPEEDFILM


                           Movetheknobto settheyellowsquarefor thelightingcon0ltions.


             RAo                        A  RAo


 OUTDOORSOR FLASHSETTING: Use this for all subjects    DIM LIGHT SETTING: Use this for pictures without flash
in daylightoutdoors,in bright sun, in the shade,or on cloudy    indoors,in dim daylight,and outdoorsat night.
days. lt's also for all flash pictures.                         Turn the Film SpeedDial to 3000. With light from windows
  Turn the Film Speed Dial to 3000.  Set the dot on the     or fluorescents,set the dot on the Lighten/Darkencontrol (A)
Lighten/Darkencontrol (A) as shown. This is the Normal    at Normal position,as shown. With ordinarytungsten bulbs,
positionfor the L/D control.                                  set it two marks toward Lighten.

                    Donated to www.orphancameras.com                        24018
View original page 21Page 22 · Read text
TIPS FORGOODNATURALLIGHT BLACKAND WHITE PICTURES           OPERATION
OUTDOORS                                           Don't move; hold down No. 2: In dim light,exposuresmay
  Use bright, even light, coming from behind you:  Place   be as long as severalseconds, Use a tripod or other support
yourself so the light on the subject is coming over your    to steadythe camera. Hold No. 2 button down until you hear
shoulder. Don't have the subject betweenyou and the sun.    the shutter click a secondtime as it closes,
For portraitsyou'll get best resultswhen a cloud blocksthe   ALL PICTURESdirectsun, or on an overcastbut bright day, or in open shade.
For scenic pictures,avcid high overheadsun.               Move in close: The biggeryour subject is in the print, the                                                more details you'll be able to see. For scenic pictures,try  Watch the background: The light on the background,
behind your subject,should be just about as bright as the     to get somethingbig and solid looking into the foreground.
 light on the subject. Don't photographsomeonein the shade     Time development carefully: Followthe recommendations
 if the backgroundis out in the open and brightly lit. Strong    in the film instructionsheet. These may changefrom time
light behind the subjectwill "fool" the electriceye (page32).    to time. With black and white film no harm is done if you
                                                       overdevelopfor a few extra seconds; in fact, it may improve
                                               some pictures. However, if you develop for less than the
INDOORS(with 3000 speedfilm only)           recommendedtime, your pictures will be of poor quality,
  Have even light coming from behind you: Whether the    with a gray, washed-outlook.
light is coming from a windowor from lamps it should come     Keep an eye on the temperature: Cold weather can affect
from behindyou or from directlyoveryour head. The electric   the q uafity of your pictures. Be sure to read carefully page27,
eye can set correctexposurein quite dim light, if the sceneis    which explains how the temperature affects your pictures
evenlylit. But if part of the scene is brightly lit and the rest   and what to do about it.
is in shadow you won't get good results.                                            lf your picture is too dark or too light: Use the L/D control
  Don't includewindowsor lamps: lf there'sa sunlit window   as shown on page 28 to make the next one of the same sub-
or a strong lamp behind your subject or elsewherein the     ject, in the same locationand lightingconditions,come out
scene,this light will "fool" the electriceye (page32).          exactlyas you want it to.
                     Donated to www.orphancameras.com240                                                                                         19
View original page 22Page 23 · Read text
HOWTO SET THE CAMERAFOR75 SPEEDCOLORFILM                                                               r

                                        &*1; t2'*#{t"*


Settheyellowsquareas shownfor mostcolorpictures.                 Thissettingis usedonlyfor specialsituations.


                                  P  o   L  A   R  o     D  P  o   L  A   R  o     D


 ALI-PURPOSESETTING:Use it for practicallyallyour color    EXTRA DEPTH SETTING: Use  it only for subjects in
pictures-  in bright sun, in the shade,or on a dull day. Also    brightest sun, or when you want to add "depth" to your
for flash picturesindoorsor for long exposuresin dim light.    picture by getting more near and far objects into focus at
At this settingthe lens is at its widest openingand you must    the sametime. The lens openingis smallerand the shutter
focuscarefully. Checkthat the Film Speed Dial is set to 75.    speed slowerthan at the All-Purposesetting. Checkthat the
                                                         Film Speed Dial is set to 75.
           Set the L/D control as shown,Donatedunless instructionsto www.orphancameras.comprinted on the film pack show a different setting.       24020
View original page 23Page 24 · Read text
TIPS FORGOODDAYLIGHTCOLORPICTURES                       OPERATION

  Use bright sun, coming from behind you: You'll get strong-     shirt, scarf, or jacket.  Or, find a colorful background-
est colorsif your subjectis in bright sun (but you can alsoget    anythingthat will fill at least one-thirdof the picture area                                                                                                                                                                                                                                   'pleasing results on an overcast but very bright day). Stand    with strong, solid color.
so the light on the subject is coming over your shoulder.    Time developmentcarefully: Followthe recommendations
Don't havethe subjectbetweenyou and the sun.                 in the film instructionsheet. These may change from time
  Avoiddim light: The shutter movesslowlyand your picture    to time. Use an accuratetimepiece. lf you have a polaroid
may be blurred.                                     DevelopmentTimer, check it occasionallyagainst a watch
 Move in close: The biggeryour subject is in the print,the    with a second hand; if it's fast or slow, allow for this when
more color and detail you'll see. For scenic pictures,try    developing your pictures. A few seconds overdevelopment
to havesomethingbig and colorful in the foreground.             is not harmful, but prints that are much overdevelopedmay
                                                          look too bluish; those that aren't developed long enough  Focuscarefully on the main subject:  lt will be sharp, but                                                                        will have a pinkish cast and the colorswill be weak, hIobjectsmuch farther or nearer may betuzzy.
 Watchthe background:The lighton the backgroundshould     Keep an eye on the temperature: Cold weather or excessive
be just about as bright as the light on the subject. Don't    heat can affect the quality of your pictures. Be sure to read
photographsomeonein the shade if the backgroundis out    page 27, which explains how the temperature affects your
in the open and brightly lit. The strong light behind the    picturesand what to do abor"rtit.
subjectwill "fool" the electriceye (page32).                                   lf your picture is too dark or too light: Use the L/D control
  Have plenty of color: Look for sublects and backgrounds   as shown on page 28 to make the next one of the same sub-
with strong, bright colors in big, solid chunks. lf your sub-    ject, in the same locationand iightingconditions,come out
ject isn't wearing colorful clothes, add color with a bright    exactly as you want it to.

                             Never try to use flash with daylight color pictures.
240                   Donated to www.orphancameras.com                       2 l
View original page 24Page 26 · Read text
OPERATION


                                                     Efr


      S H O O T : F i r m l y b u t s m o o t h l y p r e s s b u t t o n  l \ o . 2 , t h e                                                  RESET:lmmediatelyafter snappinga picture,press     t                                                           ?
  e     s h u t t e r  r e l e a s e , u n t i l y o u h e a r a    l o u d c l i , : k . D o n ' t            t    No.3 buttondownfirrnlyurrtilit locksand staysdown.
j a b a t N o . 2 -  y o u m a y s h a k e  t h e c a m e r a . W h e i r s h o o i i n g    This r,:setsthe shutterso yor'll be readyfor the next picture.
c o l o r i n t h e s h a d e o r b l a c k a n d w h i t e i n d i m   l i g h t h o l d N o . 2    Alwaysreset No. 3 right away.
d o w n a n d d o n ' t m o v e u n t i l y o u h e a r a s e c o n d ' : l i c k a s  t h e
s h u t t e r c l o s e s . T h e n  l e t N o . 2 b u t t o n c o m e u p .
240                    Donated to www.orphancameras.com                   23
View original page 26Page 27 · Read text
HOWTO DEVELOPTHE PRINT


f,{- 1
r:.!
I-'1  First,thesmallwhitetab. Pullit all thewayoutof thecamera.Don'tblockthedocr(A).            Next,the largevellowtab. I
      '?A  PULLTHE TABS: Hold the camerain your left hand,    When you pull the yellow tab, hold the camera so the lens         as shown. (Don't hold it any other way!) Graspthe    faces straight ahead of you, not pointing down. This, plus
   srrrallwhite tab betweenthe thumb and forefingerand pull    grippingthe centerof the tab, helpsyou to pull it out straight.
     it straight out of the camera, all the way, without stopping.                                                                    Pull the yellow tab straight out of the camera all the way,  When you pull the white tab out, a concealed door (A)                                                                      swiftly,without hesitating. This starts developmentof your  opensand a yellowtab popsout. Don'tblockthis door in any                                                                 picture,so begin timing as soon as you get the tab out. How  way while pullingthe tabs.                                                                 fast is a swift pull? lt shouldtake about as long as it takes     Pulling the small white tab does not start development.                                                     you to say "PULL lT" briskly,each time you pull the tab.  lf    It only preparesthe filmlor the next step, which is pulling                                                        your pictureis f ull of white specks,pull a bit slower.   the yellowtab. Grip the yellow tab in the center so it will
  come out straight when you pull it out of the camera. lf you     The picture develops outside the camera. While it's de-
   pull the yellow tab dut at an angle,one edge of your picture    veloping, l';oldthe tab by the yellow tip, or lay the picture
  may not developproperly.                                                    ,                            assemblyuown f lat. Don'ttouch or bend the white paperor
                       Donated to www.orphancameras.com                      240
View original page 27Related documents and language editions
PolaroidPDF
POLAROID 220
User manual
37 pages · EnglishRead →
PolaroidPDF
POLAROID 350
User manual
53 pages · EnglishRead →
PolaroidPDF
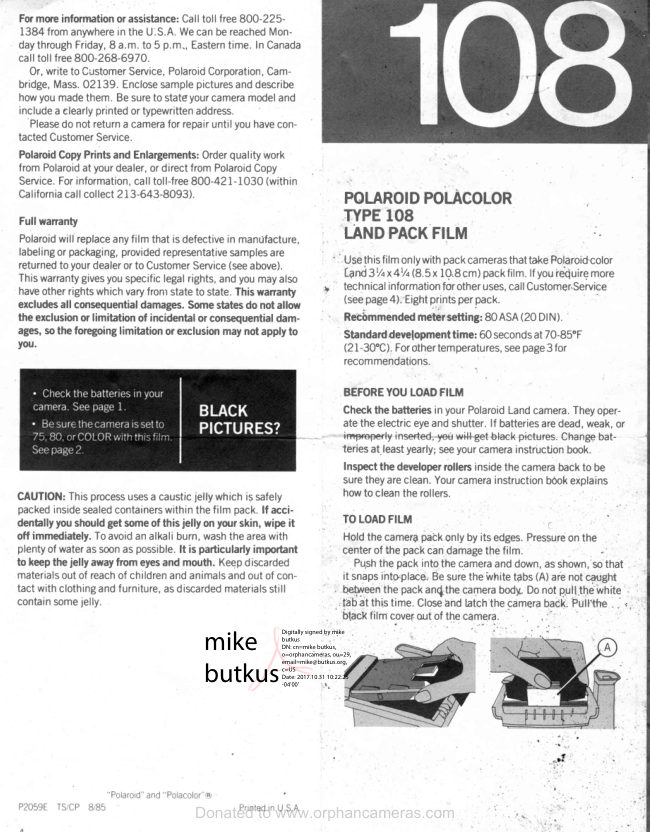
Polaroid 108 film information
User manual
5 pages · EnglishRead →
PolaroidPDF
Polaroid 110A
User manual
30 pages · EnglishRead →
PolaroidPDF
Polaroid 125
User manual
23 pages · EnglishRead →
PolaroidPDF
Polaroid 135
User manual
25 pages · EnglishRead →
PolaroidPDF
Polaroid 210
User manual
27 pages · EnglishRead →
PolaroidPDF
Polaroid 215
User manual
25 pages · EnglishRead →
PolaroidPDF
Polaroid 225
User manual
29 pages · EnglishRead →
PolaroidPDF
Polaroid 230
User manual
28 pages · EnglishRead →
PolaroidPDF
Polaroid 3000 Wink Flash
User manual
13 pages · EnglishRead →
PolaroidPDF
Polaroid 315
User manual
50 pages · EnglishRead →
From the M. Butkus archive. Original publisher and archive notices are retained.
Check the model and edition against your equipment.
PDF verified 2026-10-10.