Film cameras
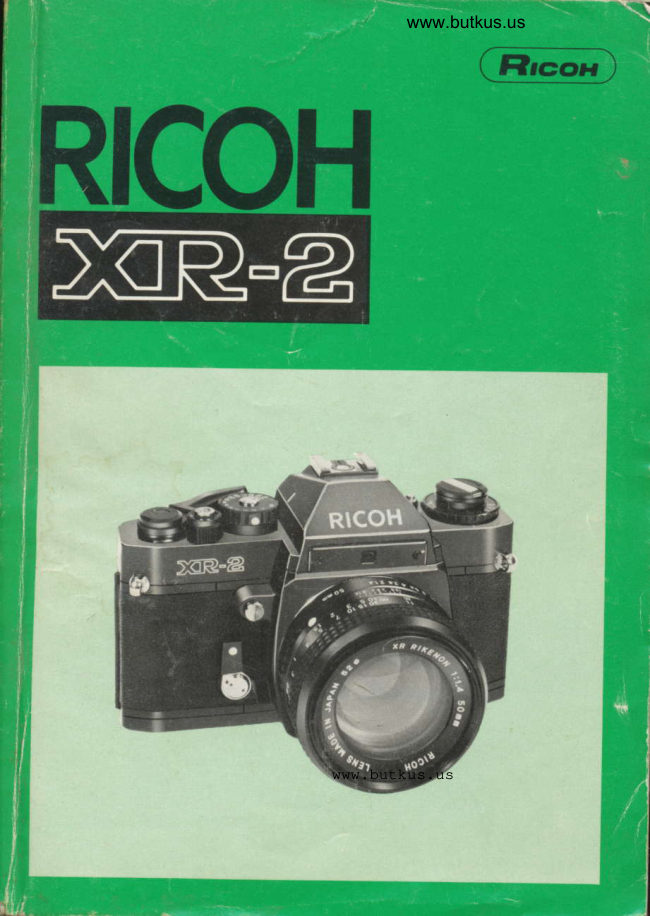
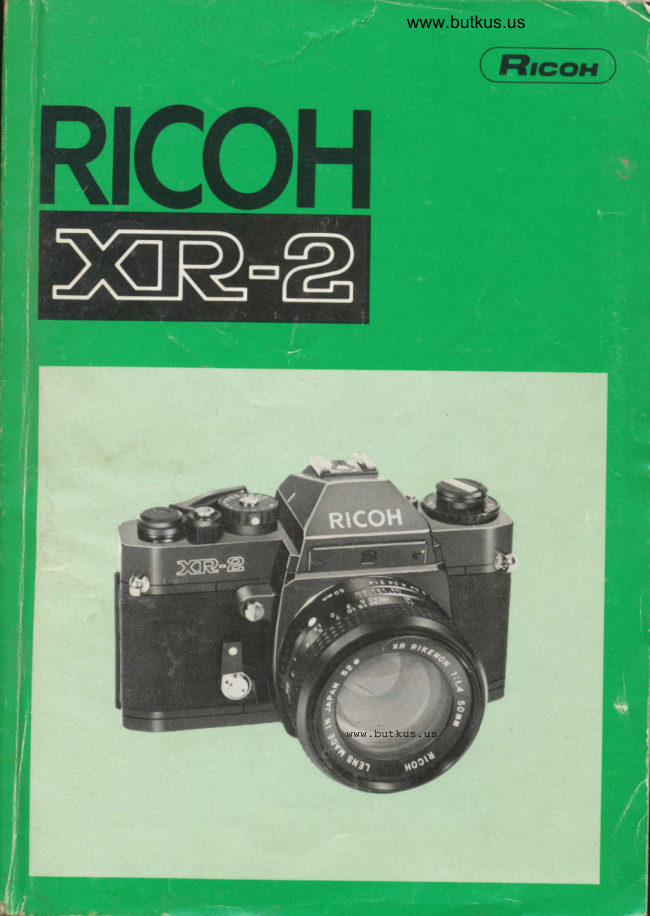
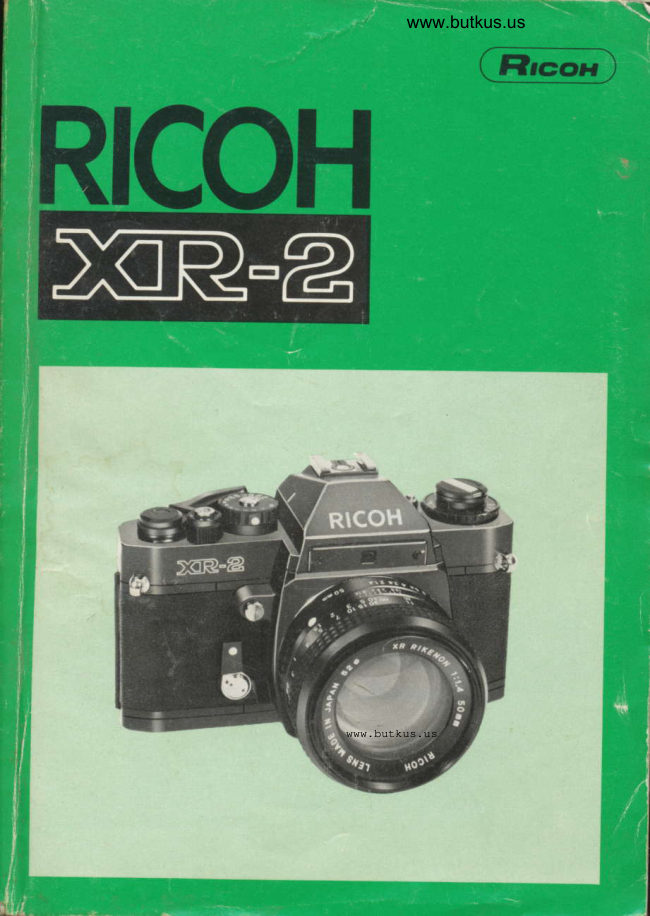
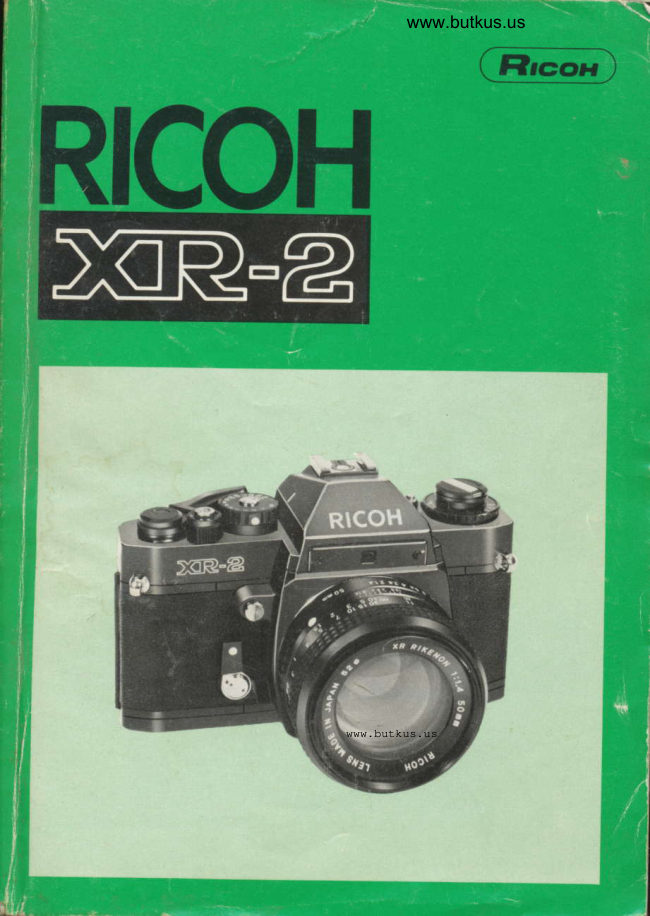
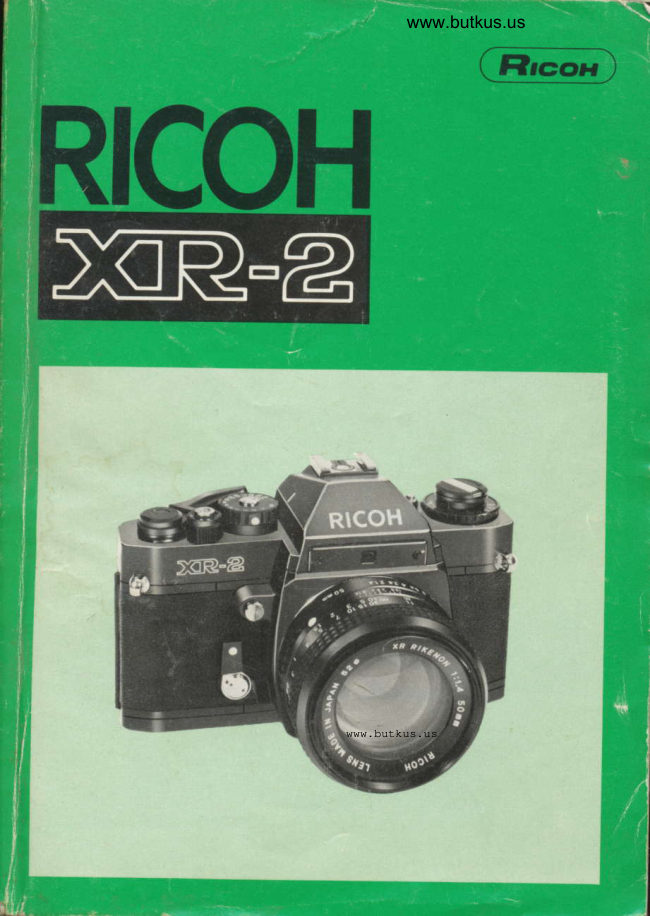
Ricoh XR-2 User manual
User manual for Ricoh XR-2. 34 pages in English. Read the original PDF, download or print a copy without registration.
34 pagesEnglish5.6 MB PDF
Loading your manual…Open PDF directly
Document details
- Brand
- Ricoh
- Model / document
- Ricoh XR-2
- Document type
- User manual
- Language
- English
- Pages
- 34
- File size
- 5.6 MB
- Category
- Film cameras
- Document date
- Not specified in catalog
Search available document text
Find a term, then jump to its page in the original PDF. Image-only pages may not be searchable; check the PDF for exact wording and diagrams.
Page 6 · Read text
www.butkus.us


Fig.23


                    Correct exposure
                    Exposition correcte
                     Richtige Belichtung
                    Juiste belichting
                     Exposici6n iorrecta
                      Korrekt exponering
                   Esposizione corrette


Fis.25
View original page 6Page 12 · Read text
www.butkus.us

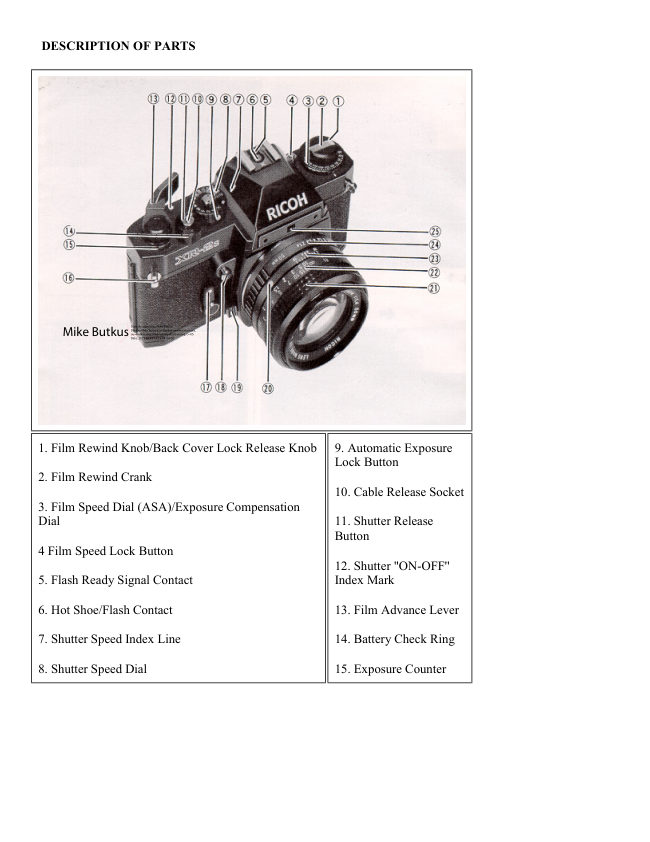
 DESCRIPTION OF PARTS
  1. Film Rewind Knob/Back Cover Lock Release Knob
  2. Film Rewind Crank
  3. Film Speed Dial (ASA),/Exrrosure Compensation Dial
  4. Film Speed Lock Button
  5. Hot Shoe/Flash Contact
  6. Shutter Speed lndex Line
  7. Shutter Speed Dial
  8. Automatic Exposure Lock Button
  9. Cable Release Socket
 10. Shutter Release Button
 11, Shutter "ON-OFF" lndex Mark
 12. Film Advance Lever
 13. Battery Check Ring
 14. Exposure Counter
 15. Neck Strap Eyelet
 16. Self-timer Lever
 17. Depth of Field Preview B,rtton
 18. Lens Release Lever
 19. Lens Locator Node
20. Focusing Ring
21. Distance Scale
22. Depth of Field Scale
23. F-Stop Ring
24. Aperture Relay Port
25. Sprocket Teeth
26. Multi-exposure Button
27. Viewfinder Eyepiece Blind Lever
28. Film Guide Rail
29. Viewfinder Eyepiece
30. Film Rail
31. "X" Flash Terminal
32. Film Rewind Shaft
View original page 12
Page 13 · Read text
I
      33. Film Chamber
      34. Battery ComPartment Cover
      35. Tripod Socket
      36. Film Rewind Release Button
      37. Film Take-uP sPool
      38. Back Cover
      39. Film Pressure Plate
      4O. Microprism-image Band
      41. Split-image SPot
      42. Exposure Meter Needle
      43. Shutter SPeed lndicator
      44. Battery Power Check Zone
      45. Aperture Readout Window

     we are most gratified that you have selected the XR-2 which we are
       sure will give you many delightfull years of picture-taking pleasure'
      The XR-2 is a 35 mm fully automatic electronically controlled ex-
       posure system (aperture-priority) sLR camera which assures you of
       superb optics and outstanding mechanical performance and reliability
      and which will justify your choice for years to come'    '

       Before Using Your XR-2.....
        please read this instruction booklet carefully and familiarize yourself
        with the equipment and its features thoroughly. Your pleasure in us-
      ingyourXR-2wi||begreaterifyouknowyourcameraproper|y.


L**
View original page 13Page 14 · Read text
www.butkus.us

 BATTERV LOADING
 The built-in through-the-lens CdS exposure metering system of your
 XR-2 operates on power activated by two 1.5V G13 silver-oxide
 batteries, which are supplied together with your camera.
  1. Remove Battery Compartment Cover (34) by unscrewing it
    counterclockwise with a coin (Fig, 1).
  2. Place the two batteries into the compartment with the plus @
    side down. as illustrated in the battery holder of Battery Com-
    partment Cover (3a) (Fig. 2). Make sure that the batteries are
     correctly placed. lf incorrectly placed, Exposure Meter Needle
    (421 in the viewfinder will not move at all.
  3. Replace Battery Compartment Cover (34) by screwing  it
    clockwise until it stops but do not force.

Tips for Better Resutts
  * shutter Release Button (10) can be pressed without batteries,
   however, the shutter will not open. Refer to "SETTING
   SHUTTER SPEED DlAL" when taking pictures without batteries.
 * Before loading, wipe off the surfaces of the batteries with a crean
   and dry cloth to ensure they are free of fingerprints or stains,
 * When your camera is not used for a long period, remove the
    batteries and keep them in a cool, dry place,
 * The batteries will last for about one year in normal use. We
    suggest you replace them regularly once a year on your birthday
    or sooner.
 * The batteries may explode if disposed of in fire.

BATTERY CHECK
check the power of the silver-oxide batteries after loading them.
  1. Turn Battery check Ring (13) clockwise until it stops (Fig.3)
 2. lf Exposure Meter Needle (42l' in the viewfinder swings into
    Battery Power Check Zone (441, the batteries have sufficient
   power (Fig. 4).                 _ 3 _
View original page 14Page 15 · Read text
3. lf Exposure Meter Needle (42) does not move or stays below
     Battery Power Check Zone (44). the batteries must be replaced.
    For replacement, use two new Mallory MS76, Eveready 576 or
     equivalent.

Tips for Better Results
                                                                    un- * Do not turn Battery Check Ring (13) often in order to avoid
    necessary consumption of the batteries.

FILM LOADING
Your XR-2 is designed to accept any standard 35 mm color or black
and white film roll in cartridge. (2, 20, 24 or 36 exposures).
  1. First of all, press Shutter Release Button (10) to see that the
    shutter has been released. (Refer to "METER/SHUTTER ON-
   OFF CONTROL").
 2. Pull up Film Rewind Knob (1)until Back Cover (38) snaps open
     (Fig. 5). Then, pull it out all the way to allow for insertion of the
     film cartridge.
 3. Swing open Back Cover (38) and place a film cartridge into Film
    Chamber (33) (Fig. 6).
  4. Push down Film Rewind Knob (1)to its original position by turn-
     ing Film Rewind Crank (2) clockwise or counterclockwise so that
    Film Rewind Shaft (32) engages the film cartridge and that the
     film cartridge is seated in place (Fig. 7).
  5. Draw the film leader across the camera back and insert it into
    one of the slits of Film Take-up Spool (37) (Fig. 8). To bring the
      slit into a convenient position, rotate Film Take-up Spool (37) in
    the direction of arrow with your finger.
  6. Rotate Film Take-up Spool (37) by advancing Film Advance
    Lever (12) to take up any slack in the film and checkto see that
     the film tip is firmly hooked onto Film Take-up Spool (37) (Fig, 9)
    and that sprocket holes on the film are fully engaged on Sprocket
    Teeth (25) (Fig. 10).
View original page 15Page 16 · Read text
www.butkus.us
 7. Close and press Back Cover (38) firmly until it snaps shut.
 8. Advance Film Advance Lever (12) two or three times, after
    depressing Shutter Release Button (10) each time, until the
   number "l"  is opposite the index line in Exposure Counter (14)
     (Fig. 1 1). because the first portions of the film can not be used for
    picture taking as they have already been exposed to light and
   two or three blank exposures should be made before taking your
     first picture. Now it is ready for your first picture'

Tips for Better Results
 * Always load your camera in the shade or in a poorly-lit place,
    never in direct sunlight or other bright light.
 * As you advance the Film Advance Lever r12), the Film Rewind
   Knob (1) will simultaneously rotate counterclockwise indicating
    that the film is advancing properly,
 * When making blank exposures with Shutter Speed Dial (7) set at
   "AUTO", set F-Stop Ring (23) to the smallest f-stop (the largest
    lens opening) so that you can make next blank exposure quickly'
    otherwise a slower shutter speed will be result which could be an
    annoyance.

 SETTING FILM SPE ED
 Each type of film, color or black and white, has its own sensitivity to
  light. This sensitivity is assigned by a numericalvalue described as an
 ASA rating (U.S.A. Standard) or a DIN rating (Europe and most other
 countries). In most cases, both ASA and DIN ratings are imprinted
 on the film package, as well as the data sheet packed with the film
 and the film cartridge itself. The higher the film speed rating, the
 more sensitive the film is to light; that is, less light is required for a
 proper exposure. The film speed, therefore, is an important element
  in insuring that the through-the-lens metering system of your camera
 determines the correct shutter speed and f-stop combinations for a
 given lighting situation.
View original page 16Page 17 · Read text
1.   Depress Film Speed Lock Button (4) (Fig' 12) and rotate Film
   Speed Dial (3) until the ASA number of your film is exactly op-
    posite the index line and click stops' For example' if the film is
   ASAlOO,makethecorrectsettingat"l0O"(Fig'13)'
2.  TakeyourfingeroffFiImSpeedLockButton(4)to|ockthefi|m
    speed setting in the camera'

Tips for Better Results
  * Each time a firm with a new firm speed rating is loaded in your.
    camera,thefi|mspeedmustbesettoassureaccuratelyexposed
     photograPhs'
  *Thesca|erepresentstherelationbetweenASAandDINnumbers"                                                                                                                            )'
                                                                                                                                                                                                                                                                                                           i       i, irrurtrated on the inside of Back cover (36) (Fig' 1

                 ,,ON-OFF"                   www.butkus.us                                                           1 METER/SH UTTER         CONTROL
                                     "LOCK-UNLOCK"                     (12) controls shutter release Film Advance Lever                                                                                                                 I
 toprotectyourcamerafromaccidentaIshutterreleasewhennottak-
 ing pictures and Shutter Release Button (10) controls exposure meter
 "ON-OFF" to avoid unnecessary depletion of the batteries'
 1. When Film Advance Lever (12) is moved to "ON" position (Fig'
      15). Shutter Release Button (1O) is unlocked'                                                                    the                                                    down'                                                                half way                                    (10) is pressed                           Button                  Release            Shutter 2. When                                                               (42)                                                                                             in                                                  Needle                                           Meter                           on and.Exposure                            is switched                circuit       erectric
     the viewfinder starts to move'

 Tips for Better Results
   *Wheneverpicture-takingiscomp|eted'besuretomoveFi|mAd-
     vance Lever (12) to "OFF" position (Fig' 16)'
   *Topreventunnecessaryconsumptionofthebatteries,donot
      press Shutter Release Button (10) often'


                            -6-
View original page 17Page 18 · Read text
www.butkus.us

SETTING SHUTTER SPEED DIAL
The shutter controls the length of time the light is allowed to strike
the film. The speed at which the shutter opens and closes is measu-
red by the numbers on Shutter Speed Dial (7). In automatic exposure
operation, correct shutter speed is set automatically.


   Simply turn Shutter Speed Dial (7) until the desired shutter speed
    is set opposite Shutter Speed lndex Line (6).
O........ "AUTO" stands for AUTOMATIC. Setting the dial at
       "AUTO" makes the camera ready for automatic exposure
           control.
 @........ The numbers 1000,500 etc. to 2 stand lor 1/1000 sec',
        1/5OO sec., etc. to 1/2 sec'
O     ..... The numbers 1,2,4, stand for 1 sec., 2 sec., and 4 sec'
@    ..... This button locks the dial at "AUTO" setting' When you
        move the dial off "AUTO", press the button and rotate the
              dial.
O     ..... "X" stands for mechanical shutter for the speed of 1/90
         sec. This setting is used when the batteries have not suf-
           ficient power or taking picture without batteries. Flash
         photography is also possible at this setting.
                          The "B" setting is used for long night@    ..... "8" stands for Bulb.
         exposure using street lights or electric signs as a light
          source, or under poor lighting conditions when flash can
  -       not be used. When set at "8", the shutter will remain open
       as long as Shutter Release Button (10) is depressed
          (preferably by a cable release).
                       -7  -
View original page 18Page 19 · Read text
Tips for Better Results
  * Do not set Shutter Speed Dial (7) between marked speeds, but at
    a click stop in accordance with indicated speeds only.
  * Shutter Speed Dial (7) does not revolve between "AUTO" and
       ,,8,,.
  * When Shutter Speed Dial (7) is set at "B" or "X"  , set the desired
     f-stop and expose manually because metering with the built-in
    exposure meter is not possible.
  * When making extremely long time exposure at "8" setting,
    remove the batteries to avoid unnecessary consumption of the
     batteries.

SETTING APERTURE
The lens opening determines the amount of light entering the lens
and exposing the film. The smaller the f-stop (f/2.O, f/2.8 etc.), the
wider the lens opening and the greater the amount of light entering
the lens. The larger the f-stop (f/16,f/11 etc.l, the smaller the lens
opening and the smaller the amount of light entering the lens. As the
fens opening is moved from f/16 to f/11, the amount of light entering
the lens is doubled. As the lens opening is moved from t/2.O to I/2.8,
the amount of entering light is cut in half (Fig. 17).
 * Rotate F-Stop Ring (23) until the desired f-stop is opposite the
   aperture index line (Fig. 18). Click stops are provided to prevent
   accidental movement from the setting made.

Tips for Better Results
  *   lf necessary, you may set F-Stop Ring (23) between two f-stops.
View original page 19Page 20 · Read text
www.butkus.us

CORRECT EXPOSURE
Automatic Exposure
Your XR-2 has a built-in through-the-lens fuf l aperture cdS exposure
meter coupled to aperture-priority automatic exposure control system
which selects and sets correct shutter speed automatically  for correct
exposure.

 Set the camera to "AUTO"
  1. Turn Shutter Speed Dial (7) until the ,,AUTO,, is set opposite
    shutter speed lndex Line (6) (Fig. r9). shutter speed Indicator
    (43) in the viewfinder indicates "A", showing that the camera is
    set for automatic exposure control (Fig. 2O).

 Preselect the aperture
 2. Preselect the desired aperture by rotating F-Stop Ring (23). F_
   stop is visible through Aperture Readout Window (45). For
 .  preselecting the aperture, refer to the following rough guide
  when using ASA 1OO film.
       Outdoors in bright sunlight      ..... f/g.O    f/16                                                     -       Cfoudy weather or in shade............. f/2.g    f/5.6                                                     -      Indoors                          ...f/1.4     t/4.O                                                     -
Exposure checking                                                        '
3. After moving Film Advance Lever (12) to,,ON,,position.  press
   Shutter Release Button (10) lightly half way down until the Ex_
  posure Meter Needle (421 gst;rs to move. The Exposure Meter
  Needle @21 in the viewfinder indicates the shutter speed you will
  be shooting at. ["1OOO" is 1/1OOO sec., ',125,, is 1/12S sec.,
  "4" is 1 /4 sec.,                           " 1 " is one full second and ,, 2 ,, is 2 seconds.l.  lf
  the needle goes above " 1ooo" (Fig. 21 ), close down the aperture
   until the needle moves below "1ooo".  lf the needte goes below
  "8.X." (FiS. 22!-, open up the aperture until the needle moves
  above "8.X,".
View original page 20Page 21 · Read text
Tips for Better Results
  * At slow speeds(below 1/3O sec.), use a tripod or other firm sup-
    port to prevent camera movement and blurred pictures. In
    shooting with a telephoto lens, be careful to minimize the camera
    shakeespecia||y.Whenusingte|ephoto|enses.agoodru|eof
    thumb is "use a shutter speed faster than 1/focal length of the
    lens". For example. with a 135 mm lens, use a shutter speed
     faster than 1 /125 sec. Otherwise. a tripod is suggested'
  *  coupling range of the exposure control for ASA 1OO film is from
   2 sec. atI/1.4 to 1/1OOO sec. at f/11 (EY O -  17) (Fig' 23)'
  * The shutter speed is automatically determined at any speed
     within the range of approx.8 sec. to 1/1000 sec., according to
    the lighting conditions of your subject'

Manual Exposure
 Manual exposure setting is used when taking flash photography or
when you wish to preselect the shutter speed'
  1. Press Automatic Exposure Lock Button (8) and move Shutter
    speed Dial (7) off "AUTO" lFig. 24]|. Then, set the desired
     shutter speed opposite Shutter Speed Index Line (6) by rotating
     Shutter Speed Dial (7). Shutter Speed Indicator (43) in the view-
     finder indicates the shutter speed you just set'
   2. Move Film Advance Lever (12) to "ON" position'
   3. Hold your camera, look at your subject through the Viewfinder
     Eyepiece (29) and press Shutter Release Button (10) lightly half
    way down.
  4. While keep pressing Shutter Release Button (10) half way down,
     rotate F-Stop Ring (23) and align Exposure Meter Needle (42)
     with shutter speed Indicator (43) (Fig. 25). F-Stop is visible
                                        (45).  lf Exposure Meter Nee-     through Aperture Readout Window
      dle @21 goes above Shutter Speed Indicator (43), tnis means
     "overexposure"; select a faster shutter speed or a smaller lens
     opening. on the contrary, if the needle goes below shutter
View original page 21Page 22 · Read text
www.butkus.us

    Speed Indicator (43), this means ,,underexposure,,; choose a
     slower shutter speed or a larger lens opening.
 Tips for Better Results
  * Do not make an exposure setting by pressing Depth of Fierd
     Preview Button (171 or turning Battery Check Ring (13) because
     these will incorrectly influence the meter's reading.

 EXPOSURE COMPENSATION DIAL
 The dial is used when exposure compensation (intentional over_ or
 under-exposure)  is necessary in AUToMATIc EXposuRE operation.
 ln unusual lighting conditions, the desired effect or the correct ex_
 posure will not be obtained in the final picture and exposure compen-
 sation is necessary.
  t' Lift up the outer ring of Exposure compensation Dial (3) and rotate
     it until the index line on the ring is opposite the corresponding
   number (+2, +1, _ 1, _2) and click stops (Fig. 26).
When the light is behind the subjects
   Set the dial at t1  or +2.
Spot-lighted subjects and dark backgrounds
  Set the dial at   1 or                  -      -2.
Tips for Bettor Results
 * when exposure compensation is unnecessary, be sure to set Ex-
   posure Compensation Dial (3) at ,,0,,.
 * Do not set Exposure Compensation Dial (3) between marked
   numbers, but at a click stop in accordance with indicated
   numbers only.


                                                             )
View original page 22Page 23 · Read text
VIEWING AND FOCUSING
since you are viewing through the lens, there is no parallax
problem.....
what you are viewing in the viewfinder will exactly appear in your
picture. This enables you to determine the exact composition of your
                                               Even when yousublect before pressing Shutter Release Button (10).
shoot close-ups, there is no danger of accidentally cutting off a por-
tion of your subject. To assure the sharpest possible pictures, your
XR-2 has a three way focusing screen with diagonal Split-image Spot
(41), Microprism-image Band (4o) and Fresnel field, and you can
 select three way focusing according to your subject'
  1. Look into Viewfinder Eyepiece (29) to compose your picture'
  2. Split-image Focusing.....is helpful for the subject with either ver-
      tical or horizontal lines'
     Rotate Focusing Ring (20) until the split image in Split-image
    Spot (41) forms a single image. When it is out of focus, your
     subject is split into two parts GiS. 27l..
  3. Microprism Focusing.....is good for the subject which lacks clear
      vertical or horizontal lines'
     Rotate Focusing Ring (20) until the image in Microprism-image
    Band (4O) appears sharP (FiS' 271'
  4. You can also focus with any part of the area surrounding
     Microprism-image Band (40). This is most useful when taking
     pictures with ultra telephoto lenses or in close-up photography
     with bellows unit, macro lenses or extension rings because the
     other focusing aids may darken appreciably'

 UNLOADING FILM              www.butkus.us
 After the last picture on the roll of film has been taken, rewind the
 film and unload Your camera.
   1. Press Film Rewind Release Button (36) (Fig' 28)'
View original page 23Page 24 · Read text
www.butkus.us

  2.  Lift up Film Rewind Crank (2) and turn it clockwise until Film
   Rewind Release Button (36) stops revolving and you feel the film
    tension released (Fig. 29). This indicates that the film has been
    completely rewound into the cartridge.     l
  3. Open Back Cover (38) by pulling up Film Rewind Knob (1).
  4. Remove the film cartridge and have the film processed as soon
   as possible.

Tips for Better Results
 * Always unload your camera in the shade or in a poorly-lit place,
    never in direct sunlight or other bright light'
 * When you reach the end of the roll film, Film Advance Lever (12)
     will tighten and refuse to advance. lf this happens, do not ad-
   vance Film Advance Lever (1 2) by force for "just one more shot",
    otherwise the film will be torn out of the cartridge'
 * Film Rewind Release Button (36) will remain in place once it is
    pressed. and return automatically to its original position when
    Film Advance Lever (12) is advanced.


                                                    v
MULTI-EXPOSU R E
Your XR-2 lras a multi-exposure device which will give you a lot of
creative fun (Fig. 30).
 1. Make the first picture in the normal way.
 2. For the second exposure, advance Film Advance Lever (12)while
   keep pressing Multi-exposure Button (26) firmly with the other
   hand (Fig. 31). This will set the shutter forthe second exposure
    without advancing the film and Exposure Counter (14)'
View original page 24Page 25 · Read text
Tips for Better Results
  * Good results in multi-exposure depend on careful shutter speed
    and lens opening setting. This means, in order to prevent overex-
    posure of the final picture, we suggest that the first picture
    should be underexposed by adjusting either shutter speed or lens
    opening.
  *  lf you want, repeat the same action for the third exposure or
     afterwards.
  * Whenever advancing the Film Advance Lever (121for second ex-
    posure or afterwards, make sure that the Multi-exposure Button
     (26) is pressed firmly with the other hand and watch to see that
    Exposure Counter (14) is not advanced, indicating that multi-
    exposure picture is ready to be taken.
Take practice shots to get yourself accustomed to the multi-exposure
technique and take creative pictures of your own.

TAKING FLASH PICTURES
You can use a flash at night or in a dimly lit room as well as for
supplementary lighting in outdoor photography. The camera and
electronic flash will be fully synchronized with the shutter speed at
"8", "X" and 4 sec. to 1/125 sec. Since proper flash exposure may
not be obtained by automatic exposure setting. always override
Shutter Speed Dial (7) from "AUTO" setting.
A. Cordless Electronic Flash Unit
 lf you are using an electronic flash unit with a built-in hot shoe con-
 tact. it can be attached directly to Hot Shoe (5) on top of the camera
 pentaprism.

B. Electronic Flash Unit wath Connecting Cord
 lf your flash unit does not have a built-in hot shoe contact, attach  it to
 Hot Shoe (5) and plug the flash cord into the'X'Flash Terminal (31).
View original page 25Page 26 · Read text
www.butkus.us


                                                                                                           'Tips for Better Results
  * "125" fi/125 sec.) on Shutter Speed Dial (7) and 'X'on Hot
    Shoe (5) are marked in red as a reminder for electronic flash syn-
    chronization (Fig. 32).
  * When using FP, M or MF class bulb, refer to the Chart (Fig. 33),
    showing the synchronizing ranges of shutter speeds.

C. Exposure for Flash Photography
The exposure is determined by the guide number of the flash bulb or
electronic flash unit. The guide number represents a relationship
between the light output of the flash and the speed of the film. Guide
numbers for flash bulbs can be found on the package and guide
numbers for electronic flash units are found in the technical
specifications. Using the guide number, you can determine the cor-
rect f-stop for a given flash situation using the following formula:
   F-stop :  Guide number .  Flash-to-subject distance
For example,  if your flash unit has a guide number of 16 (m) or 52,8
(ft.) for the type of film you are using, and your subject is 2 meters
(6,6 ft.) from the flash unit as indicated on Distance Scale (21)after
focusing, divide 16 (52.8) by 2 (6.6). The answer is 8; set F-Stop
Ring (23) to 8 (f/8)

Tips for Better Results
 *  lf you are using an auto electronic flash unit with power ratio
    control, follow the instruction sheets packed with the flash unit.
 * Most electronic flash units have a built-in dial or exposure table
    which enables you to quickly compute f-stops based on flash-to-
    subject distances.
View original page 26Page 27 · Read text
VIEWFINDER EYEPIECE BLIND
When shooting with the self-timer or cable release where you will not
be viewing through Viewfinder Eyepiece (29) at the time the ex-
posure is made, viewfinder eyepiece blind should be used to prevent
stray light from entering through the eyepiece and affecting the
automatic exposure system.
 * Move Viewfinder Eyepiece Blind Lever Q7l in the direction of
   arrow (Fig. 34).

USING SELF-TIMER
Your XR-2 has a built-in self-timer which delays the shutter release
about maximum of 1O seconds. This enables you to include yourself
 in your own picture and is also of benefit in taking close-ups or
 photomicrographs where camera movement must be avoided.
  1. First. advance Film Advance Lever (12).
  2. Merely move Self-timer Lever (16) counterclockwise (Fig' 35).
     According to the degree you have moved  it down, you can adjust
    the operating time. For the maximum delay, move it until  it
      stops.
  3. Press Shutter Releas6 Button (1O) to start the self-timer moving'

 Tips for Better Results
  * You can set Self-timer Lever (16) firstly and then advance Film
    Advance Lever (12).
  * The Self-timer Lever (16) can be returned to its original position
      after setting the lever, however, be careful that the self-timer
    mechanism will not be disengaged.
  * The camera should be placed on a tripod or other firm support
    when using self-timer.
  * When using a tripod with a long thread length (more than 5.7
    mm), be careful not to forcibly screw in the thread further than
     the depth of the socket.
View original page 27Page 28 · Read text
www.butkus.us

 * Shield the Viewfinder Eyepiece (29) bV viewfinder eyepiece blind
   when using self-timer.

CHANGING LENSES
To mount the lens on the camera
  1. Mount the lens by lining up the red dot on the lens mount with
    the matching dot on the camera mount (Fig. 36).
 2. Grasp the lens firmly around the lens barrel and turn  it clockwise
     until it clicks into place.
To remove the lens from the camera
  1. Grasp the lens firmly around thei lens barrel in one hand.
 2. With the other hand, hold camera body and press Lens Release
    Lever (18) and turn the lens counterclockwise until  it stops (Fig.
     37!'. The lens now can be removed.
You can also change lenses without looking even in the dark by
means of Lens Locator Node (19). Line up Lens Locator Node (19)
with Lens Release Lever (18) and turn the lens clockwise for moun-
ting the lens. For removing the lens, press Lens Release Lever (18)
and turn the lens counterclockwise until Lens Locator Node (19) and
Lens Release Lever (1 8) line up.

Tips for Better Results
  * Whenever a lens is mounted on the camera, make sure that the
    lens is perfectly mounted, and clicks into position.
  * Do not touch any of the internal parts or permit dust or dirt to
    enter the camera body when removing or attaching lenses.
  *  Protect the inside of the camera by putting on the body cap
    whenever the camera is carried or kept with the lens removed.
View original page 28Page 29 · Read text
DEPTH OF FIELD
When you focus on a specific subject, an area in front of and behind
the subject will appear acceptably sharp in your picture. This area of
acceptable sharpness is called "Depth of Field". The depth of field is
determined by the f-stop you select and the distance from the in-
focus subject to the film plane. As you get closer to your subject, or
as you open your lens (for example. fromf/16tof/2.8), the depth of
field becomes shallower. By stopping the lens down (for example,
from f/2.8 to  f /16), the depth of field becomes deeper. The depth of
field can be pre-determined in the following ways:
A. Depth of Field Preview Button
Pressing Depth of Field Preview Button (17) (Fig. 38)willsetthe lens
at the corresponding opening you previously set on F-Stop Ring (23).
This will enable you to preview the area of acceptable sharpness in
the picture you take, The viewfinder will become dark corresponding
to the f-stop you previously set on F-Stop Ring (23). Depth of Field
Preview Button (17) will automatically return to its original position
when you release it and the viewfinder will become as bright as
before.
B. Depth of Field Scale
After you have set the lens opening and have focused the camera, the
area of acceptable sharpness in front of and behind your subject can
be also determined on Depth of Field Scale Q2l.
Locate on Depth of Field Scale l22l the two numbers corresponding
to the f-stop you have set on F-Stop Ring (f t). The distance between
these two f-stops on Distance Scale (21)will be an area of acceptable
sharpness in your picture. For example, if your lens is focused at 3
meters (10 ft.) and you shoot at 8 (f/8), the area of acceptable
sharpness will be from 2.2 m (7.3 ft.) to 5 m (16.5 ft.), by reading
Distance Scale (2t1 opposite the both sides of the "S" numbers on
Depth of Field Scale (22) (Fig. 39).
View original page 29
Page 30 · Read text
www.butkus.us

Tips for Better Results
 * Do not depress the Shutter Release Button (10) when depress-
    ing Depth of Field Preview Button (17).

INFRARED PHOTOGRAPHY
For infrared photography using infrared films, a correction of Distance
Scale (21)is necessary because "infrared light rays" focus on a film
plane slightly behind that of "visible light rays".
  1. Normally focus on your subject and note the camera-to-subiect
    distance opposite the distance index line on Distance Scale (21).
  2. Turn Focusing Ring (20) until this camera-to-subject distance
    setting is opposite the infrared index line. For example, if
    Distance Scale (21) reads 5 m (16.5 ft.) after focusing, merely
      shift the "5" (16) scale to the "O" (red) position (Fig' 4O).

Tips for Better Results
  *  Infrared radiation'varies with the degree of infrared light rays in
    the atmosphere.
  * For exposure, follow the instruction sheets which are packed
    with the film, and expose manually because metering with the
     built-in exposure meter is not possible.

INTERCHANGEABLE LENSES AND ACCESSORIES
A wide range of XR RIKENON interchangeable lenses including ex-
 tremely wide angle lenses. telephoto lenses, zoom lenses and various
 accessories are available to enable you to expand the pleasure of your
 picture-taking. XR RIKENON interchangeable lenses and accessories
 are made of selected high quality materials under strict quality control
 to assure you of high performance and full satisfaction. Select XR
 RIKENON interchangeable lenses and accessories that will meet your
 needs.
View original page 30Related documents and language editions
RicohPDF
Ricoh XR-2 Gebruiksaanwijzing
User manual
31 pages · DutchRead →
RicohPDF
Ricoh XR-2 Handleiding
User manual
36 pages · DutchRead →
RicohPDF
Ricoh XR-2s
User manual
24 pages · EnglishRead →
RicohPDF
Ricoh Xr 2S
User manual
20 pages · EnglishRead →
RicohPDF
Ricoh XR-2
User manual
38 pages · FrenchRead →
RicohPDF
Ricoh XR-2
User manual
38 pages · GermanRead →
RicohPDF
Ricoh XR-2
User manual
36 pages · ItalianRead →
RicohPDF
Ricoh XR-2
User manual
35 pages · SpanishRead →
From the M. Butkus archive. Original publisher and archive notices are retained.
Check the model and edition against your equipment.
PDF verified 2026-10-10.