Film cameras
Polaroid Countdown 90 User manual
User manual for Polaroid Countdown 90. 28 pages in English. Read the original PDF, download or print a copy without registration.
28 pagesEnglish2.1 MB PDF

Loading your manual…Open PDF directly
Document details
- Brand
- Polaroid
- Model / document
- Polaroid Countdown 90
- Document type
- User manual
- Language
- English
- Pages
- 28
- File size
- 2.1 MB
- Category
- Film cameras
- Document date
- Not specified in catalog
Search available document text
Find a term, then jump to its page in the original PDF. Image-only pages may not be searchable; check the PDF for exact wording and diagrams.
Page 3 · Read text
WITH THIS CAMERA,USE
PolaroidLandpackfilm Type108(color)
                  or Type107(blackandwhite)
G.E.Hi-Powerflashcubes,or equivalent.
YOURFIRSTPICTURE!
To be surethat it's a success,we suggestthat you makeit indoors
withflash,exactlyas describedon page22.
BUT,BEFOREYOU START
pleasereadthisbookcarefullysoyouwillknowhowto usethecamera
andwhereto lookfor anyinformation.lf youdo notfollowthe instruc-
tions,youwill notgetgoodpictures.
                     Donated to www.orphancameras.com
View original page 3Page 4 · Read text
CONTENTS                                                           ,[']
                                                                           t,"                              :                       \ 1


GettingAcquainted                         How to develop the picture.                     26
Know your camera..                              2  Checkthe temperature.                        29
How to make a picture:a quick look...                4     lf no yellowtab appearswhen you pull the white tab....  30
How to open and closethe camera.                  6  Care of the print.                                3 1
How to hold the camera.                         How to use the Cold-Clipwith colorf ilm... .           32
How to use the viewfinder. . . ... .                     8  H o w t o m a k e p r i n t sl i g h t e ro r d a r k e r( N o n - f l a s h ) .. .. . . . .  34
How to focus with the rangefinder,                   9  How to make prints lighter or darker (Flash)          35
Kn o wy ou r f l a sh u n it a n d f la shcubes.,....           10  How to make blackand white picturesin dim light
How to attach and removethe f lash unit....           1 1    withoutflash...                             36
How to inserta f lashcube..                       1 1
The   cube         rotation                  lever..                                            .                                       T2                                        MiscellaneousW h y     y ou mu             st f o cu                   sa ccu                        ratelywhen usingf|ash........                                        L2
The controls. . . and what they do. ....                  I4  You must take care of your camera..               38
What you shouldknow about your film. . .                                 i 6   Batteryloadingand replacement....                39
                                                  Copiesand enlargements                       40
Operation                                  Somelf yourhelpfflashulpicturesaccessories.are too dark...                424 L
How to load a film pack.                                                     I 7   Picturetroubles,their causeand cure.              43
How to set the camera for flash and daylight pictures. . .  20  Where to write for information.                   46
How to make flash pictures                      22  Warra nty. . .                                 46
How to make daylightpictures..                  24   Polaroidrepair stations and offices.                47
                     Donated to www.orphancameras.com                                                    I
View original page 4Page 6 · Read text
IIIIPORTANT:Keep rollers clean (page 38);
                         change batteries yearly (page 39).
Donated to www.orphancameras.com
View original page 6Page 7 · Read text
HOWTO MAKEA PICTURE:A QU|CKLOOK
This is a previewof what you will find
in this book.These are the easy steps
you take to make an instant picture-
color or black and white -  with this
PolaroidLand camera.


                                                                                                       {
                        INSERTFLASHCUBE      ,1 AIM AND FOCUS
                                    p. 11                  Zp.8            1


Before starting you set two simple con-
trols: (A) the Film Selectorand (B) the
Lighten/Darkencontrol(p. 14 and 15).
  To make flash pictures, attach the    PULLWHITETAB          PULL YELLOWTABflash unit (see p. 11). When making                                                      p.27                             p.25                       7non-flashpictures, leave off the flash 6
unitand omit stepsI and 5.
4                    Donated to www.orphancameras.com
View original page 7Page 8 · Read text
FLASH.UBE
                      5 fllNcE 4r;5'


                            BLA.K& wHrrE
   9;:'3RATE          10  ;:ftt
Donated to www.orphancameras.com
View original page 8Page 9 · Read text
HOWTO OPENAND CLOSETHE CAMERA


1. Magnetholdscoverdown.Lift backedge.     2. To removeit, pushspring(A) andlift hinge  3. Liftfinderupandback;magnetwillgripit.
                                            (B). To replace,slidehingedownoverspring.


4. RaisebuttonNo.1;thisunlockscamerafront.   5. Pullcamerafrontoutasfar as it will go. Be   6. To closecamera,pressdownon lockingbar
                                     surelockingbar (A) snapsinto place.lf not,  and pushcamerafront in until it locks. Fold
                                   youmaygetblurredor all-blackpictures.       finderdowngently.

                    Donated to www.orphancameras.com
View original page 9Page 10 · Read text
HOWTO HOLDTHE CAMERA


                                                                 \
HORIZONTAL:Grip the two ends. Placeyour forefingerson  VERTICAL:Grip the camera as you would for a horizontal
the No. 1 buttons;you can easilyshift the right forefingerto   picture,turn it so your right hand is below.Bracethe camera
the No. 2 button. To steady the camera, press your elbows  against your foreheadand face.
into your ribs; rest the camera againstyour nose.
                    Donated to www.orphancameras.com
View original page 10Page 11 · Read text
HOWTO USETHE VIEWFINDER


Looking through the viewfinder window (A) you'll see a   subject is very close (372 ft., for example), allow a little extra
bright, white broken line. Frame the scene with this line.  space between your subject and the top frame line, as shown
Always try to look through the center of the window and   above.  lf not, you may accidentally cut off the top of some-
concentrateon your subject, not on the white line. lf your   o n e ' s h e a d  i n y o u r p i c t u r e .

8                   Donated to www.orphancameras.com
View original page 11
Page 12 · Read text
HOWTO FOCUSWITH THE RANGEFINDER


Lookthroughhere(B) at the brightspot.a       v PushNo.I buttons.


--->


Holding the camera horizontal, place your forefingers on   bright spot; this means that the camera is not focused for
both No. I buttons as shown and push them all the way to   that distance. Push the No. 1 buttons back and forth until
your left. Look through the Focus window (B) and aim the   the two images become one -  sharp and clear. Now the
bright spot in the center at a nearby subject (about 4 tt. away,  camera is focused. For vertical pictures, you can focus with
for example).You should see two imagesof your target in the   the camera horizontal,turn it to aim and shoot.
To get correct flash erposures, you must focus accurately (see page l3).
                    Donated to www.orphancameras.com
View original page 12Page 13 · Read text
KNOWYOURFLASHUNIT AND FLASHCUBES
The PolaroidFocusedFlash unit is de-    of the flash unit is a Lighten/Darken
 signedfor use only with G.E. Hi-Power  control (C) for adjustmentof individual
flashcubes, or  equivalent. With the    flash exposures(see pages 15 and 35).
flash unit attached and plugged into   The flash unit has a compartment (D)
the camera,the shutteris automatically   in the rear for two batteries.
set at a constant speed. In front of the
flashcube there is a set of variable
 louvers (A). To get correctly exposed
 pictures, these louvers automatically
open and close by the requiredamount
as the camera is focused on the sub-
ject. The total flash range extends f rom
 3yztt. to about 10 ft. f rom the camera.
You must focus accurately, to get a
correct exposure( see page 12 ). Each
flashcubegivesfour f lashes.After each
flash you must push forward the lever
(B) in order to rotatethe cube in readi-
 ness for the next picture. After the
fourth flash the lever will not return to
 its normal position,indicatingthat the
cube must be changed.The light given  BEFOREYOU CAN TAKE FLASH PIC.
 by the flashcubes is balanced to re-  TURES, YOU MUST INSERT FLASH
 semble average daylight and will give  BATTERIES:These are provided sep-
 excellent results with both Polacolor  arately with your flash unit. For full
and black and white films. On the rear   loadinginstructions,see page39.
10                  Donated to www.orphancameras.com
View original page 13
Page 14 · Read text
HOWTO ATTACHAND REMOVETHE FLASHUNIT
Hold the flash unit as shown. Slide the rails (E) on the bottom     into the outlet (G). To remove the unit, pull out the plug and
of the unit onto the camera connector(F). Slide the unit on all     slide the unit off the camera connector.
the way, till it comes to a lirm stop. Push the {lash cord plug


HOWTO INSERTA FLASHCUBE
Holdthe cube as shown,so its sidesare paralleltothe sidesof
the flash unit. Be sure that the cube socket (H) is directly
abovethe pin (l) in the flash unit, and then push the cube
down firmly so that (H) engageson (l). To remove a used
cube,pull it up.
 Use only G.E. Hi-Powerflashcubes,or equivalent.


                      Donated to www.orphancameras.com
View original page 14Page 15 · Read text
THE CUBE ROTATIONLEVER                   WHY YOU MUST FOCUS
                                        ACCURATELYWHEN                 four                                    isAfter     each of the                     flashes                                   fired,
    flashcube            must                 be                                the                       USINGFLASHthe                      rotated                                  to
next flash position.This is done manu-                                     Focusing the camera automatically
ally with the cube rotation lever (K).                                         adjusts the opening of the louvers in
With the  left thumb push the lever                                         the  flash  unit. This assures that,
forward as far as it will go. You must                                     betweena distanceof 3Yzft. and about
remember to push the lever, or you will                                     10 ft. a subjectwhich is sharplyfocused
not get a flash.  lt  is a good idea to                                                    will also receive the right amount of
always do this just after you press the                                                 light  f rom the   f lashcube to give a
No. 3 button on the camera to reset the                                           correctlyexposedpicture.For example,
shutter (see page 23).                                                                                                     if a subjectis 8 ft. from the camera,the
 When the lever is pushed after the                                                 light output from the flash unit must be
fourth flash, it  will not return auto-                                          greater than it would need to be for a
maticallyto its normal position,but will                                            subject 3Y2 tt. away,  if both are to
stay in the forward position.This serves                                        receive the same exposure.Thus, at
as a reminderthat the cube must be                                        8  ft. the louvers must be wider open
changedfor a new one.                                                       than at a3Vzft. setting.
 The leverwill returnto its normal posi-
tion whenthe flashcubeis pulledout.


t2                   Donated to www.orphancameras.com
View original page 15Page 16 · Read text
Top: CORRECTfocus on subject 3Vztt.
away. The louversopened the correct
amount, to light the subject for a well
exposedpicture.


Bottom: INCORRECTfocus. The sub-
ject distancewas 3y2 tt. but the ca mera
was focused for a greater distance. As
a resultthe louverswere too wide open.
The subjectreceivedtoo much light and
the picturewasoverexposed.


                      Donated to www.orphancameras.com                      13
View original page 16Page 17 · Read text
THE CONTROLS AND WHATTHEY DO
                                                            A. The Film Selector: lt sets the camera for the kind of film
                                                  you are using. For 75 speed color film, set it to 75, as shown.
                                                      For 3000 speed black and white film, slide it the other way
                                                                   to set it to 3000. lf you don't set the Film Selector,the electric
                                                    eye (B) can't make a correct exposure.


                                                            B. The electric eye: The electric eye only works for non-flash
                                                              pictures. When you press No. 2 button, the shutter opens.
                                                                 lnstantly,the electriceye measuresthe brightnessof the light
                                                             reflectedfrom the subjectand times the closingof the shutter
                                                                   to givecorrect exposure.
                                                  The electric eye does not measure flash exposures (see
                                                  page 1O).


                    Donated to www.orphancameras.com
View original page 17Page 18 · Read text
C. The camera Lighten/Darken control, for pictures made
without flash: Turning this L/D control adjusts the electric
eye so you can make your picture lighter or darker than it
would be if the L/D control were left at the Normal position
(shownhere).This controt has no effect on pictures made with
flash. For more details about the camera LID control, see
page 34.


D. The flash Lighten/Darken control: Turning this L/D control
a d j u s t s t h e a m o u n t o f  l i g h t c o m i n g f r o m  t h e  f l a s h u n i t s o y o u
c a n m a k e a  f l a s h p i c t u r e l i g h t e r o r d a r k e r t h a n   i t w o u l d b e  i f
the L/D control were left at the Normal position (shown here).
For more details about its use, see page 35. This control has
no effect on pictures made without f lash.


                     Donated to www.orphancameras.com                                  l5
View original page 18Page 19 · Read text
WHATYOU SHOULDKNOWABOUTYOURFILM
This camera usestwo types of Polaroid   rollers squashes the pod, spreading
Land pack films: 3000 speed black   the chemicals between the n egative
and white, Type 107, and 75 speed   and  print paper to form a  picture
color, Type 108. There may be addi-   "sandwich".
tionaltypes of film in the f uture.         The picture develops outside the
 You must know the film speed num-   camera. After the recommendedde-
ber, 3000 or 75, to set the camera   velopmenttime you separatethe sand-
controlscorrectly.                    wich and there is your finishedpicture.
 A film pack containsall the materials
to make eight pictures. For each pic-  PROTECTIONOF FILM AND CAMERA
ture there is a pieceof negativefilm, a   Extreme heat and high humiditycan
sheetof print paper,and a thin foil con-  damage your film (and also your cam-
tainer (the pod) filled with the jelly-like   era), especiallyafter the film pack has
chemicalsneeded to develop the pic-   been placedin the camera. Don't leave
ture.                                        film, or a loadedcamera, in direct sun
  After snappingthe picture,you start   or in a car during hot weather.The best
development by  pulling a  piece of   storage place in a closet is near the   An importantlabel: On some color film
paper out of the camera. This drags   bottom, where the air is cooler. Don't   packs you may see a label (A) advising
the exposednegative,a sheet of print   unwrapfilm untilyouare readyto use it.   you to turn the Lighten/Darkencontrolpaper,and a pod of chemicalsbetween                                               to a special setting for  all pictures
two steel rollers. The pressure of the                                made with that pack. Pleasedo so, or
                                                                         your picturesmay be too dark.
CAUTION: Please be sure to read the
important notice on page 48.

16                   Donated to www.orphancameras.com
View original page 19Page 20 · Read text
HOWTO LOADA FILM PACK
                                  A specialrequest!
                                                 As soon as you open the film pack you will begin to accumu-
                                                                    late waste paper. There will be more when you develop the
                                                                 pictures. We hope that  it won't become litter in the streets
                                                                 or be scattered around the landscape.
                                                 What to do with the waste paper? Usually, it will  fit into
                                                   an empty foil bag or film box. Or, if you're planning to take
                                                                    lots of outdoor pictures, bring along a paper bag or other
                                                            container for waste. Everyonewill appreciate this little extra
                                                                       effort on your part.


Open the top of the box. Pull out the film package.Handle it   by the edges only. With color film there's a set of mounts;
gently, carefully. Hold the package near the edges. Don't   with black and white film there's a coater. Please read the
press hard on the middle of the package. Starting at the   instruction sheet. Save the box to carry prints in safely. lt
corner, tear open the entire side of the foil bag along the  can also be very useful when coating black and white prints.
dotted line and remove the film pack. Discardthe moisture   Always open the package and load film in the shade, not
absorbing card supplied with color film. Handle the pack   in direct sunlight, to avoid foggingthe film.


                     Donated to www.orphancameras.com                             t7
View original page 20Page 21 · Read text
LOADING(Cont.)


 1. Pushthebackdoorlatch;thedoorwillpopup.   2. Openit all theway.Arethe rollers(A) clean?  3. Holdthe film packby the edgesas shown,
                                                                          lf not,cleanthemasdescribedonpage38.       andpushthe closedendof the packunderthe
                                                                         doorhingeagainstspringtension.


4. Pushthe packdownintothe camera.        5. & 6. Checkto besurethatthewhitetabsarenotcaughtbetweenthefilm packandthecamerabody.
                                     Closethebackdoor.Pressbothsidesfirmlyto besurethatbothsideslatch.Theblacktab of the safety
                                      covermuststickoutof thesmallslot.lf not,reopentheback,leadthetabout.

 18                   Donated to www.orphancameras.com
View original page 21Page 22 · Read text
7. Gripthe blacktab.Thisis the endof the   8. Pullthe safetycoverall the wayout of the   9. Withthe safetycoverout, a whitetab (A)
safetycover.                        camerawithoutstopping.Don'tripit.           shouldstickoutof thesmallslot(No.4). Don't
I F N O W H I T ET A B APPEARS                                                          pullthetab.You'renowreadyfor pictureNo.l.


1. lf there'sno whitetab in the No.4 slot,do   2. Openthe backof the camerapartwayand,   3. Closethe backof the camera,makingsure
the followingin the shadeor indoors,not ln   wtthoutdisturbingor movingthefilmpack,push  thatbothsidesarelockedsecurelyandthewhite
brightsunlight.                         thewhitetaboutintotheooen.                tabisoutside,intheNo.4 slot.
                     Donated to www.orphancameras.com
View original page 22Page 23 · Read text
HOWTO SET THE CAMERAFOR FLASHAND DAYLIGHTPICTURES
FOR 75 SPEEDCOLOR


                                       For flash.


FilmFilm Selector:Selector: SetSet itit toto 75.75.              Lighten/Darkencontrols: Set them to the Normal position(shown) unless a label
                                  on the back of the film pack (A) shows a special setting. You can open the back
                                             of a loaded camera to see if there is such a label. lf you do this carefully in the
                                 shade or indoorsand don't move the pack,the film will not be damaged.


Before you can take a picture, the No. 3 button on the
camera front must be down (see pages 23 and25).
20                   Donated to www.orphancameras.com
View original page 23Related documents and language editions
PolaroidPDF
POLAROID 220
User manual
37 pages · EnglishRead →
PolaroidPDF
POLAROID 350
User manual
53 pages · EnglishRead →
PolaroidPDF
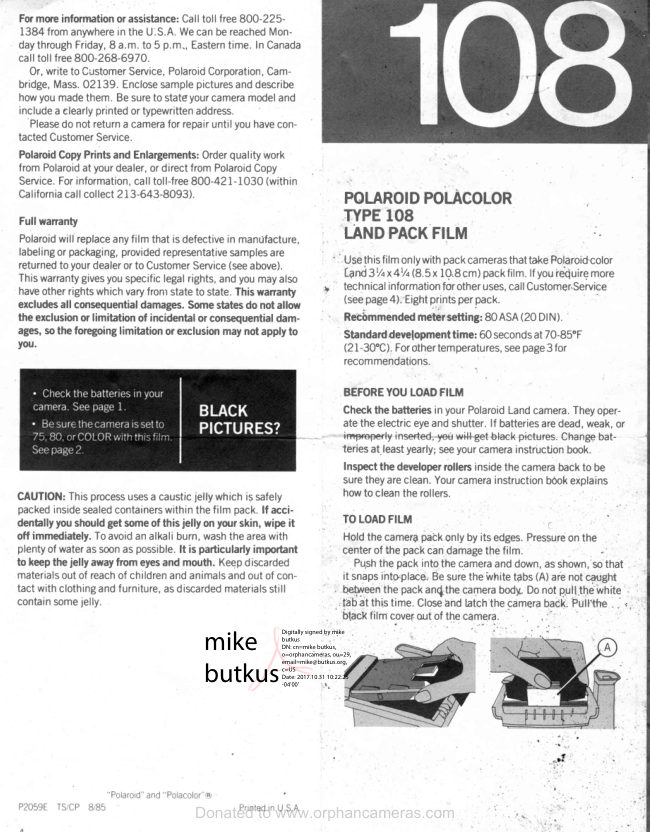
Polaroid 108 film information
User manual
5 pages · EnglishRead →
PolaroidPDF
Polaroid 110A
User manual
30 pages · EnglishRead →

PolaroidPDF
Polaroid 125
User manual
23 pages · EnglishRead →

PolaroidPDF
Polaroid 135
User manual
25 pages · EnglishRead →

PolaroidPDF
Polaroid 210
User manual
27 pages · EnglishRead →

PolaroidPDF
Polaroid 215
User manual
25 pages · EnglishRead →

PolaroidPDF
Polaroid 225
User manual
29 pages · EnglishRead →

PolaroidPDF
Polaroid 230
User manual
28 pages · EnglishRead →

PolaroidPDF
Polaroid 240
User manual
27 pages · EnglishRead →
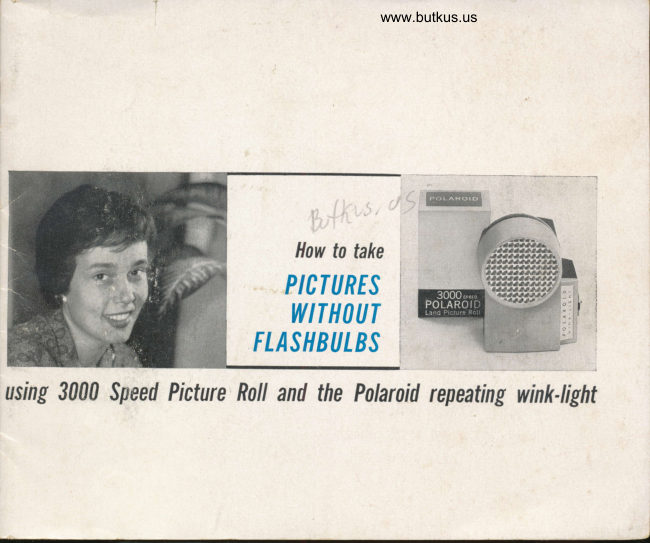
PolaroidPDF
Polaroid 3000 Wink Flash
User manual
13 pages · EnglishRead →
From the M. Butkus archive. Original publisher and archive notices are retained.
Check the model and edition against your equipment.
PDF verified 2026-10-10.