Film cameras
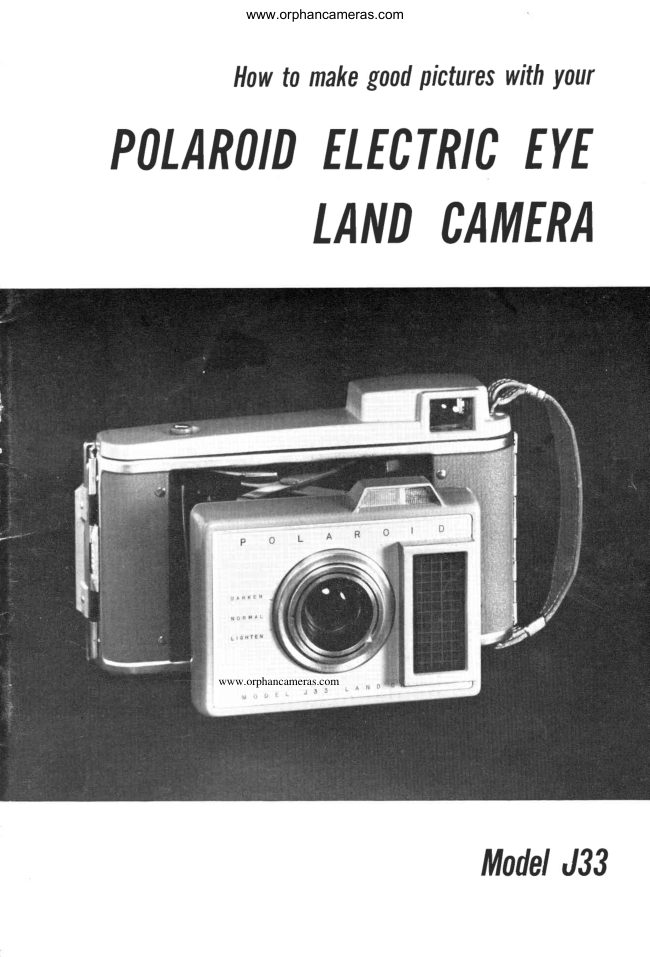
Polaroid Electric Eye Model J33 User manual
User manual for Polaroid Electric Eye Model J33. 19 pages in English. Read the original PDF, download or print a copy without registration.
19 pagesEnglish2.2 MB PDF
Loading your manual…Open PDF directly
Document details
- Brand
- Polaroid
- Model / document
- Polaroid Electric Eye Model J33
- Document type
- User manual
- Language
- English
- Pages
- 19
- File size
- 2.2 MB
- Category
- Film cameras
- Document date
- Not specified in catalog
Search available document text
Find a term, then jump to its page in the original PDF. Image-only pages may not be searchable; check the PDF for exact wording and diagrams.
Page 2 · Read text
www.orphancameras.com

      Howto makegoodpictureswithYour
POLAROIDELEf^TRI0^EYE
     LANDr,AIIIER


                   www.orphancameras.com


                 ModelJ33
View original page 2Page 5 · Read text
www.orphancameras.com
FOUREASYSTEPS
  There are four simple steps involved in
making every picture. Each is numbered
on the camera. Practice them now a few
times before you load the camera.

       To  take  picture, aim  through
viewfinder,  then push the red button Q.
This exposes your picture.


                                               Horizontalpictures

   Important:  The  shutter  actually  closes
after you hear the loud  click.  Get  in  the
habit  of  holding  the  camera  still  for  a
moment  after the  click. This  is especially
important  in low lightJevel  situations  out-
doors, and  indoors where you  are using
flash. You  will  notice  that  the  flashbulb
does not go off untii  an instant  after the
click  is heard. Be sure to hold the camera
steady until  the bulb  is fired.


                                                  Verticalpictures


       Push the white knob 9  rrp. (This
cocks the shutter and readies the camera
for the next picture.)


       Throw the blue lever O  either
way. (This simply unlocks the film so that
you can proceedwith step 4.)


4
View original page 5Page 6 · Read text
www.orphancameras.com


       Raise the cutter bar @. Pull the
film  until  it  stops. Close the cutter bar
and tear off the film.
  (For your practice runs with  an un-
loaded earnera,there'll be no film to pull,
but you can get used to the feel of raising
the cutter bar.)


  After  the development time  (usually
10 seconds)open the back door as shown
and lift out your picture.
  That's  all there is to  it. Make several
dry runs of these steps so that when you
put  film  in the camera, your very  fi.rst
picture will be a good one.


OTHERCONTROLS
  There are two other controls you  will
use from time to time:
Lighten-Darken Control
   In general,it is best to leave the black dot
on the control ring halfway between the
words "lighten" and "darken", as shown.
 This is the normal position. If you want
 Iighter pictures, rotate the dot towards
 "lighten," and if you want darker pictures,
 rotate   it  toward  "darken."  The  exact
amount will depend largely on your per-
 sonal taste. Usually, sufficient change can
 be obtained by rotating the ring only to
the mid-mark positions (seearrows).

 Close-ups
   For pictures closer than five feet, you
 simply pull the camera front out an addi-
 tional notch. This  is done by  pressing
 the lock releaseson both sides (the sarne
 ones used for  closing the camera) and
 pulling the front forward  until   it  locks
 in a new position. (Notice how the arrow on
 the brace indicates position.) When using
 this close-up position, you will  find that
 you can shoot subjects that  are 3 feet*.";
  f rom the camera, or even closer. (See
 page 15 for correct aiming instructions.)    N o r m a l              Close-up
View original page 6Page 7 · Read text
www.orphancameras.com
THEFILM
  For black and white pictures, always use
Type 37 -  3000 Speed Polaroid Land
Film.

LOADINGTHECAMERA
  Avoid opening the film or loading the
camera in  direct sunlight, because you
may fog the film. Find some shade, or  if
none is available,turn your back to the sun
and shield the film with your body.
  When you remove the  film from  the
box, save the  print  coater and printed
Picture Tips which come with   it.  (The
Picture Tips contain up-to-date informa-
tion about the film and an order blank for
copiesand enlargements.)


  To prepare the camera for loading, hold
it as shown and slide the latch to the un-
lock position. The back will open slightly.


  Set the eamera down on a flat surface,
then lift open the back cover and lay it flat.
   Lift up the inner panel and lay  it  flat.
This is the position in which the camera
is loaded.


  Before loading, examine the  rollers
(arrows). The two  steel rollers are the
heart of Polaroid Land photography. The
picture roll papers will pass between these
rollers, which squeeze the developer re-
agent evenly between the  positive and
negative sheets.
    It  is important  to keep these rollers
clean. Use a damp cloth to remove any
specksor depositsthat may appear on the
rollbr.sas the camera is used.
 rrn
View original page 7Page 8 · Read text
www.orphancameras.com
  Remove the  film  carefully  from  its  foil
wrapper.  The  film  actually  contains two
rolls:  a large white  (positive)  roll and a
spooled (negative)  roll. When you unwrap
the  film,  be  carefui  not   to  break  the
tape seals on the top of the spooled roll and
the underside of the Iarge roll  (arrows).
  Drop  the  rolls  into  the wells on either
side of the bellows, as shown. The positive
roll (white) should go in first, the negative
roll (small) second.


  Now  close the inner  panel, folding  the
film leader over the steel roller on the edge
of the inner panel.


                                                                                                                                                                ,ffi                                                                                                          'tw


  Lay  the leader  flat between the guides
 (arrows)  at  the  outer edge of the  panel.
Be sure the white  paper  lies smooth and
 flat, not tucked  into the well.


  Then close the back eover, squeezeit
 tightly shut, and slide the latch to the lock
 position. There will be a short tab of black
paper extending beyond the cutter bar.
View original page 8Page 9 · Read text
www.orphancameras.com
   Important: Hold the camera as shown,
 the left hand under the strap, gripping the
 camera securely. If you hold the camera
 in_any other w&y, you are apt to pull the
 tab out at an angle, which can cause it to
 mistrack and tear.
   With  your right hand,  lift  the cutter
 bar by  its plastic edge and grip the tab
 firmly.


   Pull the film straight out until it comesto
 a firm stop. Don't be surprised if you seem
 to be pulling out a lot of paper on this first
 pull. You must pull out the entire leader
 (about 13 inches) before the film stops,
 but it will stop automatically.


   Close the  cutter  bar by  pressing it
 all the way down. It  will latch closed,and
you can now tear off and discard the excess
paper. (Naturally, you will discard it care-
fully -  don't be a litterbug!)


  The camera is now ready for the first
picture. You can always tell what picture
 is ready to be taken by lifting the cutter
bar and looking at the tab beneath it. The
number on the tab tells what number pic-
ture is ready to be taken.

I
View original page 9
Page 10 · Read text
www.orphancameras.com
TAKINGTHEPICTURE
  Wiih  the camera loaded, you are now
ready to make your first picture. Remem-
bgfthe four easy steps -
 E    To take the picture, aim, then
push the red button  (f. Press this button
slowly; don't punch it or you will jar the
cameraand get a blurred picture. Remem-
ber, hold the camerasteady for an instant
after you hear the clich.


  Important  Warning:  On the  shutter
housing and visible through the viewfinder
is the low light-level indicator. If the red
pointer is not visible at all, or to the left
of the center of the triangle, it  is safe to
take a picture. If the red pointer is in the
center or to the right of the center of the
triangle, there is not enough light, and you
should use flash. If the needleis just en-
tering the black area, you can check by
passingyour hand in front of the electric
eye. If the needle moves, there is enough
Iight to make a picture.

                                    Lowlightindicator


       Push the white knob @ up. Get
in the habit  of doing  this  right  after you
push the button O  to take the picture, so
that  you'll always be set for the next one.
Also, the camera front  will not close if the
knob  is not pushed up.  Incidentally,  the
shutter can never go off accidentally when
the front  is closed, even if you push the red
button. Trv   it and see.


       Throw the blue lever @  either
way.


The   picture    will   not   start  developing
 until  you  pull  the  film  (step 4 described
 in  detail on the next page). Some people
 have been known  to go this  far, wait  the
recommended  development   time,   then
 pull the film and immediately  remove the
 print  -  a very faint, underdeveloped one.
                                    g
View original page 10Page 11 · Read text
www.orphancameras.com
    ;
    I     Raise the Cutter Bar @. Pull the
film  until   it  stops. Close the cutter bar
and tear off the film.
  Step 4 is that simple. After you do  it
a few times, it becomessecondnature and
the brief reminder on the camera is all you
need. This first time, however, we would
like to go into some detail with the four
pictures on this page.
  Hold  the camera with  the  left hand
under the strap. It  is important to hold it
this way to assure the correct advance of
the film.


  Shield the camera from direct sunlight
when you pull the film. Hold   it  in the
shadow of your body so that no sunlight
falls on the tab slot.
  Open the cutter bar by lifting the plastic
edge and take a firm  grip on the  film.
You'll find the best grip to use is along the
length of the forefinger and thumb, as
shown.


   Pull the film straight out with a single
motion. Pull it about as hard and rapidly
as you might pull down a window shade;
not hard enough to pull the shade off the
roll  (or the film  off the spool), but not
slowly and hesitantly either. Remember,
the film will stop automatically.
  Note:  If  the film  will not pull easily,
throw the blue lever again, as in step 3,
previous page.
  After you pull the film, press down and
latch the cutter  bar, and tear  off and
discard the excesspaper.


WAITRECOMMENDED
DEVELOPMENTTIME
  Pulling the film has started the develop-
ment process-  and advanced the  film
into position for the next picture. Follow
the instructions in the Picture Tips for
development times under  various  con-
ditions.
t0
View original page 11Page 12 · Read text
www.orphancameras.com


    When the development time is up, slide
   back the latch on the print door and open
    the door.

 !ll  -,
  t
     tII!


        Lift the print out rapidly, but carefully,
    starting with  the cutout. Don't  let the
     print  fall back on the damp negative.
   Then close and relatch the print door.


  COATINGTHEPRINT
     Coat each print as soon after removal
    from the camera as possible. If you coat
    your print properly, it  will last as long as
   any fine print.  First remove the curl by
    drawing the print face up over a straight
    edge,such as a table edge, as shown.

 II
J     Apply the print coater along the entire
    length of the print, including edges, bor-
    ders and corners, with 6 or 8 firm over-
    Iapping strokes. For the last two or three
    pictures in each roll, press the coater hard
    against the tab end of the print  (not the      d:1:4
    image) for  a moment  to  release extra      l,wffi     Iiquid, then spread the Iiquid smoothly            lll W
    acrossthe print.                             iiT#t,
      Note:  If a clean, flat coating surface
     is not available, flatten the film box and
    store the prints within   it  until you get
   home. (See page 18  for  print  storage
    reeommendations.)
                                          11
View original page 12Page 13 · Read text
www.orphancameras.com
FLASHPICTURES
  The flashgun on the J-33 Polaroid Land
Camera is built  right  into the front  of the
camera and can be used for bounce flash
or direct flash.
  Use Sylvania AG-1 bulbs (or the equiva-
Ient). Be sure to slide the bulbs out of the
packaging tube.  If you remove them in any
other w&y, you may deform the tiny  con-
tact wires, and the bulb  will not  fire.
  When using flash, open the flashgun cover
as shown.   Lift  the  flashgun out by  the
finger  projection    just  below  the  white                                    Openflashguncoverplastic button  (as shown).
   Slide off the safety shield.

   Insert the bulb by sliding  it sidewise be-
tween the flash contacts in the gun, making
sure the bulb is completely seated. Replace
the safety shield (for clarity  of illustration,
the  shield  is not shown  in  the  following
pictures).
  To  eject  used  bulbs,  Push  the  white
plastic button  at the base of the flashgun
(see arrow).
  Remember  to  hold  the camera steadY
for an instant  after the bulb fires (page 4)-       Lift out                               I nsertbulbsidewtse


Bounce Flash                    #   This  is the  preferred  type  of flash and
should be used in any room where there is
a reasonably white  ceiling no more than
12 f.eet high. Bounce flash makes pictures
with  a natural  dayiight  quality  and  the
distance from  subject  to  camera  is  not
critical, as it  is with  direct flash.
  To make bounce flash pictures, aim the
reflector straight  up, for either  vertical  or
horizontal  pictures. You must remember
to  srvivel  the  flashgun  when you change                                                  Verticalbounce                   Horizontalbounce
from  vertical  to horizontal.


  As an alternative, so you won't have to
remember  to  swivel  the  flashgun  into  a
new position when you change from  verti-
 cal to horizontal,  the flashgun can be set
 at a 45 degree angle as shown. This bounces
 the  Iight  off both  the  ceiling and a light-
 colored sidewall.   It may  result  in some-
 what  darker  pictures  than  the  regular
 bounce position above, but  this can usu-
 ally be corrected by adjusting  the control
 ring  to  the midwaY  mark  between  the
 center position and the word  "lighten".
11
View original page 13
Page 14 · Read text
www.orphancameras.com
Lighten-Darken Control Ring
  The color and height of your ceilings,
and to a lesserdegree,the distance to the
subject, will affect the exposure for your
bounceflash pictures. You will soon deter-
mine the best settings for your own home.
  For rooms rvith white ceilings and aver-
age height, T to 8 feet, set the control ring
with the red dot on the center position.


    If  you have a higher  ceiling, 9 to  11                                                             7' Io 8'ceilingsfeet, or a darker ceiling, set the black dot to
the   mid-mark     "lighten"     or   extreme       ,,,;;,eti*u;a;","=:*;-*ur"
"lighten"  position.
  The settings for the lighten-darken  con-
trcl ring given above can only be approxi-
mate.  It  is impossible to kre precise because
there are endless combinations  of  ceiling
heights and ceiiing colors, as well as wall
colors which can affect exposure.
    If  these  approximate   guides  do  not
give you proper exposure, just change the
lighten-darken  control  a  little   to  make
your  next  picture  perfect. Once you  get
a perfect exposure for any particular  room,
that setting  will always be good.            Mid-marklighten
   Caution:  Turning  the control  ring from
the  center  position   to   the  mid-mark                                                        P O L A R O I D
positions  will  change  your  picture  con-
siderably; turning   it from  the center posi-
tion to either extreme "darken"  or extreme
"lighten"  may  give you more change  in
exposure than you need.
  When   it   is  impossible  to  use bounce
flash, use  direct  flash  as  described  on
next page.


                                                                                                                                                    " M 0 0 r L J 6 3 L A t t t  l

                                         Extremelighten


  Yellow Dot For Color: The yellow dot
on the control ring (seearrow) is not to be
used for black and white pictures. When
Polaroid Color Film  is marketed, a foot-
age scale will be provided for insertion in
this corner of the ca'merafront, and the
yellow dot will serve as a footage indicator
for direct flash pictures.
View original page 14Page 15 · Read text
www.orphancameras.com
DIRECTFLASHPICTURES
   Under some circumstanees bounce flash
 is impractical.  Outdoors  at night,  or when
 ceilings are too high  or too  dark,  or  dis-
 tances too great, you can use direct flash by
 simply  rotating  the flashgun reflector so it
 is aimed directly  at the subject.
   Distance from camera to subject affects
 exposure critically  in direct  flash pictures.
 Reflectivity  of surroundings, subject color,
 ete., can also affect exposure. With so many
 variables, the instructions  below can only
 be an approximate  guide.


   For  distances  of  six  feet and  beyond,
 with  the  reflector aimed  at  the  subject,
 the  ccintrol  ring  sets the  exposure. The
 chart below shows approximate  settings.
 Estimate distances with some care because
 the amount  of light  falling on the subject
 varies greatly as distances change.


CONTROLRINGPOSITIONSFORDIRECTFLASH


     P * L A f t O P V L 4 N B


        6-7feet           8-10feet          l1-14feet          l5-20feet       Morethan20feet
       Extreme        Mid-mark/        Normal         Mid-mark/      ExtremeLighten
       Darken         Darken                             Lighten


  Direct Flash in Extreme Close-ups:
When  bounce  flash  is  impractical,  and
you want the camera only 3 to 5 feet from
your  subject,  the  reflector  is  not  aimed
 directly   at  subject.  Instead,  swivel  the
 flashgun into the 45" position  (see page L2)
and aim the reflector upwards. Light com-
 ing through a small hole in the side of the
 reflector will be enough to light the subject.
 Set control ring toward  "lighten".
14
View original page 15Page 16 · Read text
www.orphancameras.com
REPLACINGFLASHGUNBATTERY
  The battery which comes with your new
camera will  last from  2 to 5 years under
normal  storage  conditions.  The  battery
can be found  directly  in back of the flash-
gun compartment.  A replacement  is easy
to install. Simply place your thumb on the
center of the battery  compartment  cover
and rotate  the cover towards  the back  of
the camera. The battery  will automatically
fall  out  of  the  compartment  on  to  the
bellows.


  Discard  the  old  battery  and  replace
with Eveready #EgI  or Mallory #Mn1500
or equivalent.
  To  replace, simply  invert  the  camera
and slide the new battery  into the battery
compartment.  Then  rotate  the  battery
compartment  cover as  far  as  it  will  go
towards the front  of the camera.
  Be sure that  the "plus"   (*)  terminal,
marked on  the  battery,   is towards  the
viewfinder side of the camera.
 We recommend not removing the battery
until  it needs to be replaced.

USINGTHEVIEWFINDER
FORCLOSE.UPS
  Your  viewfinder  has a small square  in
the corner which   will  help you  aim  the
camera  properly   for  close-up  pictures
(3 to 5 feet). To use it, imagine two lines
extending  from  the edges of  the  square
(dotted lines in the picture  at right) and
frame your subject within  these lines. This
is particularly  important  at 3-4 feet, and
grows less important  as you move away.
Beyond 5 feet, use the entire viewfinder  to
frame your subject.


                                                 l5
View original page 16Page 17 · Read text
www.orphancameras.com
CORRECTINGPICTURES
  Here is how to spot some common errors
and how to correct them:
  Everything  Blurred:  The carneta moved.
Be sure to hold the camera securely, and
do not punch  the shutter  release -  press
it down slowly. Get in the habit  of holding
the camera  still  for an instant  or so after
you hear the loud  click.


  Subjeet Blurred: The subject moved as
the picture was taken.


   Subject Fuzzy : When the subject is f-uzzy
but the background sharp, the camera was
not set on close-up position. Remember,
closer than five feet, set to the close-up
position.

   All-Black  Picture:  Film  not exposed.
You may have pulled tab without releas-
ing the button O.  O., you may have for-
gotten to push the white knob @ uP to
cock the shutter. Get in the habit of doing
 this immediately after snappingthe shutter.


   All-White Picture: The film was fogged.
 Or, the tab was pulled while the picture
 door was open.


   Subject Dark:  Pictures in which a great
 deal of  brilliant  sky,  water, snow  or sun
 are in the background may come out too
 dark.  Avoid  low  angles, or  back-lighted
 pictures.   If  you  do need  or want  such
 pictures,  compensate  by   setting   the
 "lighten-darken"   control  ring  to  the  ex-
 treme  "lighten"   position. Be sure  to  re-
 turn  to normal after you take your picture.

 tft
View original page 17
Page 18 · Read text
www.orphancameras.com                                                                                                                                                   \


  Too-Dark, Side-Lighted Flash Picture :
This was caused by forgetting to swivel
the flashgun when you changed from a
vertical to a horizontal picture. Use the
45' position as descrihedon page 12.


  White  Areas:  Light  struck the negative
roll during loading. Do not load in direct
sunlight. Do  not  break  the  seals on the
positive and negative rolls when loading.


  Streaks Across Print:  The  tab was
pulled unevenly. Do not stop or hesitate
while pulling the tab. Pull the tab fairly    ,ffi
rapidly until the film stops automatically.


  Spots on Print: Evenly-spacedspots on
the picture are caused by foreign matter
adhering to  the steel rollers. Keep the
rollers clean (seepage 6).


   Dull or Faint Picture: The picture is
 underdeveloped.Check the Picture Tips
 for developing times under various con-
 ditions. Usually, you will want to wait a
 Iull L0 secondsafter pulling the tab.
View original page 18
Related documents and language editions
PolaroidPDF
POLAROID 220
User manual
37 pages · EnglishRead →

PolaroidPDF
POLAROID 350
User manual
53 pages · EnglishRead →

PolaroidPDF
Polaroid 108 film information
User manual
5 pages · EnglishRead →
PolaroidPDF
Polaroid 110A
User manual
30 pages · EnglishRead →

PolaroidPDF
Polaroid 125
User manual
23 pages · EnglishRead →

PolaroidPDF
Polaroid 135
User manual
25 pages · EnglishRead →

PolaroidPDF
Polaroid 210
User manual
27 pages · EnglishRead →

PolaroidPDF
Polaroid 215
User manual
25 pages · EnglishRead →

PolaroidPDF
Polaroid 225
User manual
29 pages · EnglishRead →

PolaroidPDF
Polaroid 230
User manual
28 pages · EnglishRead →

PolaroidPDF
Polaroid 240
User manual
27 pages · EnglishRead →
PolaroidPDF
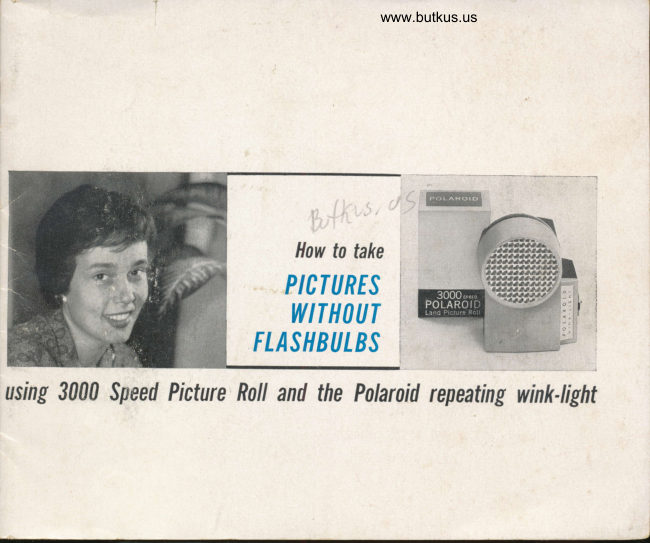
Polaroid 3000 Wink Flash
User manual
13 pages · EnglishRead →
From the M. Butkus archive. Original publisher and archive notices are retained.
Check the model and edition against your equipment.
PDF verified 2026-10-10.