Film cameras
Polaroid M60 User manual
User manual for Polaroid M60. 26 pages in English. Read the original PDF, download or print a copy without registration.
26 pagesEnglish2.0 MB PDF
Loading your manual…Open PDF directly
Document details
- Brand
- Polaroid
- Model / document
- Polaroid M60
- Document type
- User manual
- Language
- English
- Pages
- 26
- File size
- 2.0 MB
- Category
- Film cameras
- Document date
- Not specified in catalog
Search available document text
Find a term, then jump to its page in the original PDF. Image-only pages may not be searchable; check the PDF for exact wording and diagrams.
Page 3 · Read text
YOURFIRSTPICTURE!                                                                              ITo be surethat it's a success,we suggestthat you makeit indoors
withflash,exactlyas describedon page20.
BUT,
beforeyoustart,pleasereadthis bookcarefullyso youwill knowhow
to usethe cameraandwhereto lookfor any information.lf you do
notfollowthe instructions,youwill notgetgoodpictures.


                     Donated to www.orphancameras.com
View original page 3Page 4 · Read text
CONTENTS                                                                                                                                                                                     l i
GettingAcquainted
Knowyour camera.                               2   How to use the Cold-Clipwith color f ilm. . .           30
Howto make a picture:a quick look...                4    You must take care of your camera.                32
Howto open and close the camera.                   6   How to make black and white picturesin dim light . ....  34
Howto hold the camera.                           7   How to make prints lighter or darker.               36
Howto aim and focus the camera.                   8
How to focus for pictures of people.                       Y   MiscellaneousHow to focus for subjects other than people.         10                                           Some helpful accessories.                     37The c on t rol s. . . a n d wh a t t h e y do. ....               1 1
Whatyou should know about your f ilm...            L2   Copiesand en largements.. .                      38                                                          Picturetroubles,their cause and cure.              39
                                                            Protect f ilm and camera from heat.                 43
Operation                                     Where to write for information                    43
How to load a film pack.                       13   Warranty.                                  43
How to set the camerafor daylightand f lash pictures...  1 6    Polaroidoff ices and repair stations.. . . . .             44
How to attachthe flashgun.                     18   CAUTIONnotice.                             45
How to make f lash pictures                      20
How to make daylightpictures.                   22
How to develop the picture.                       24
Checkthe temperature.                        27
 lf no yellowtab appearswhen you pull the white tab . ..  2A
Care of the print.                             29    Please read this book before using the camera.


                      Donated to www.orphancameras.com
View original page 4Page 7 · Read text
HOWTO MAKEA PICTURE:A QUICKLOOK
This is a previewof what you will find in this book. Theseare
the easy steps you take to make an instant picture -  color
or black and white -  with this PolaroidLand camera.


                                              AND FOCUS


Before starting you set two simple controls: (A) the F i l m               PULL YELLOWTABSelectorand (B) the Lighten/Darkencontrol (p. 11).                     p.25                       5

4                    Donated to www.orphancameras.com
View original page 7Page 9 · Read text
HOWTO OPENAND CLOSETHE CAMERA


                                                                                                                                                             ';'J                -
1. To unlatchcover,presson centerof top. You    2. To removeit, pushspring(A) andlift hinge   3 . RaisebuttonNo.I ; thisunlockscamerafront.
canlet coverhangdown.                       (B). To replace,slidehingedownoverspring.


4. Pullcamerafrontoutasfar as it willgo. Be    5. To closecamera,pressdownon lockingbar
surelockingbar(A) snapsintoplace.lf not,   andpushcamerafrontin untilit locks.
youmaygetblurredpictures.
                                      When storing the camera be sure that nothing presseson the No. 2
                                                     button; if it's depressedeven slightly, the battery may be drained.
                     Donated to www.orphancameras.com6
View original page 9Page 10 · Read text
HOWTO HOLDTHE CAMERA


HORIZONTAL:Grip the two ends.  Place your forefingers   VERTICAL: Grip the camera as you would for a horizontal
on the No. 1 buttons;you can easily shift the right forefinger    picture,turn it so your right hand is below. Bracethe camera
to the No. 2 button. To steadythe camera,pressyour elbows   againstyour forehead and face.
into your ribs; rest the cameraagainstyour nose.
                      Donated to www.orphancameras.com
View original page 10Page 11 · Read text
HOWTO AIM AND FOCUSTHE CAMERA


THIS lS THE RANGEFINDER:Hold the camera horizontal   line moves up and down. Also, the diamondsmove in and
and put both forefingerson the No. 1 buttons, as shown.    out. Their inner points outline the picturearea.
Placeyour eye close to the f inder windowand look through    The two horizontallines are used to focus for pictures of
the finder at a plain wall, or the sky. You'll see the pattern   nearby people,as shown on the oppositepage. The distance
shownat right.                                             scafe and arrow arefor picturesof scenes,big groups,nearby
  Push the No. 1 buttons back and forth. Notice that one    objects, pets, etc. (see page 10).
8                    Donated to www.orphancameras.com
View original page 11
Page 12 · Read text
HOW TO FOCUSFOR PICTURESOF PEOPLE


FORADULTS: Placethe top line at the top of your subject's  FOR SMALL CHILDREN:lf they're 1-3 years old, place the
forehead,and move the No. 1 buttons to place the moving    top line on top of the head and the moving line at the bottom
line at the bottom of the chin.                                    of the chin. With bigger children,focus in the same way as
   lf the lines won't separatefar enoughto frame the subject    for adults.
properly,you're too close; back up a bit.
                 For vertical pictures, focus with the camera horizontal, then turn it to aim and shoot.
                      Donated to www.orphancameras.com
View original page 12Page 14 · Read text
THE CONTROLS.  .  . AND WHAT THEY DO
A. The Film Selector: lt sets the camera for the kind of fllm
you are using. For 75 speedcolor f ilm, set it to 75, as shown.
For 3000 speed black and white film, slide it the other way
to set it to 3OOO.lf you don't set the Film Selector,the electric
eye (B) can't make a correct exposure.


B. The electric eye: When you press No. 2 button, the
shutter opens.  Instantly, the electric eye measures the
brightness of the light reflected from the subject and times
the closing of the shutter to give correct exposure.  lt does
this for both daylightand f lash pictures.
G. The Lighten/Darken control:  Turning the L/D control
adjusts the electric eye so you can make your picture a little
lighter or darker than it would be if the L/D control were left
at the Normal position (shown here). When and how to do
this is explainedon page 36.

                     Donated to www.orphancameras.com                         1 1
View original page 14Page 15 · Read text
WHATYOU SHOULDKNOWABOUTYOURFILM
This camera uses Polaroid Land pack    the chemicals between the negative
films. A film pack contains all the    and  print paper to form a  picture
materialsto make eight pictures. For    "sandwich".
each picturethere is a pieceof negative    The picture develops outside the
film, a sheet of print paper,and a thin    camera. After the recommendedde-
foil container (the pod) filled with the    velopmenttime you separatethe sand-
jelly-likechemicalsneededto develop   wich and there is your finishedpicture.
the picture.                               At present there are two Polaroid
  After snappingthe picture, you start   packfilms available:3000 speedblack
development by  pulling a piece of    and white, Type 107, and 75 speed
paper out of the camera. This drags    color, Type 108. There may be addi-
the exposednegative,a sheet of print    tionaltypes of film in the future.
paper,and a pod of chemicalsbetween    You must knowthe film speed num-
two steel rollers. The pressure of the     ber, 3000 or 75, to set the camera
rollers squashesthe pod, spreading   controls correctly (see page 16).
                                                               An importantlabel: On some color film
                                                                     packsyou may see a label (A) advising
                                                                     you to turn the Lighten/Darkencontrol
                                                                                         to a special setting for  all pictures
CAUTION: Please be sure to read the                                 made with that pack. Pleasedo so, or
important notice on page 45.                                                 your pictures may be too dark.


L2                   Donated to www.orphancameras.com
View original page 15Page 16 · Read text
HOW TO LOAD A FILM PACK
                                   A specialrequest!
                                                  As soon as you open the film pack you will begin to accumu-
                                                                      late waste paper. There will be more when you develop the
                                                                  pictures. We hope that  it won't become litter in the streets
                                                                  or be scattered around the landscape.
                                                  What to do with the waste paper? Usually, it will fit into
                                                     an empty foil bag or film box. Or, if you're planning to take
                                                                        lots of outdoor pictures, bring along a paper bag or other
                                                             container for waste.  Everyone will appreciate this  little
                                                                extra effort on your part.


Openthe top of the box. Pull out the f ilm package. Handle it    by the edges only. With color film there's a set of mounts;
gently, carefully. Hotd the packagenear the edges. Don't    with black and white film there's a coater. Pleaseread the
press hard on the middle of the package. Starting at the     instruction sheet. Save the box to carry prints in safely.  lt
corner, tear open the entire side of the foil bag along the    can also be very useful when coating black and white prints.
dotted line and removethe film pack. Discardthe moisture     Always open the package and load film  in the shade, not
absorbingcard supplied with color film.  Handle the pack     in direct sunlight, to avoid fogging the film.


                     Donated to www.orphancameras.com                                                                                               13
View original page 16Page 17 · Read text
LOADING(Cont.)


1. Pushthebackdoorlatch; thedoorwillpopup.    2. 0penit all theway.Aretherollers(A) clean?   3. Holdthefilmpackby theedgesasshown,
                                                                            lf not,cleanthemasdescribedon page32.       andpushtheclosedendof thepackunderthe
                                                                     doorhingeagainstspringtension.


                                                                                                                             II
                                                                                                                                                                                                                                                                                                                                                              t-l       1
4. Pushthe packdownintothecamera.you'll    5. & 6. Checkto besurethatthewhitetabsarenotcauglrtbetweenthefilm packandthecamerabody.
feelit snapintoplace.                     Closethebackdoor.Pressbothsidesfirmlyto besurethatbothsideslatch.Theblacktabof thesafeiy
                                       covermuststickoutof thesmallslot. lf not,reopenthe back,leadthe tabout.
t4                    Donated to www.orphancameras.com
View original page 17Page 18 · Read text
I7. Gripthe blacktab. Thisis the endof the    8. Pullthe safetycoverall the wayout of the    9. Withthe safetycoverout, a whitetab (A)
safetycover.                         camerawithoutstopping.Don'trip it.           shouldstickout of the smallslot(No.4). Don't
                                                                                                 pullthe tab. You'renowreadyfor pictureNo.l.
IF NO WHITE TAB APPEARS


                                                                                                                                                                                                                                                                                                             '       'T-
 l.   lf there'sno whitetabin the No.4slot,do    2. Openthe backof the camerapartwayand,    3. Closethe backof the camera,makingsure
the followingin the shadeor indoors,not in    withoutdisturbingor movingthefilm pack,push   thatbothsidesarelockedsecurelyandthewhite
brightsunlight.                           thewhitetaboutintotheopen.                tabis outsidein the No.4 slot.
                     Donated to www.orphancameras.com                                     l5
View original page 18Page 19 · Read text
HOW TO SET THE CAMERAFOR DAYLIGHTAND FLASHPICTURES
FOR 75 SPEED COLOR


Film Selector: Set it to 75.                Lighten/Darkencontrol: Set  it to the Normal position (shown) unless a label
                                    on the back of the film pack (A) shows a special setting. You can open the back
                                              of a loaded camera to see if there is such a label.   lf you do this carefully in the
                                   shade or indoors and don't move the pack, the film will not be damaged.


16                   Donated to www.orphancameras.com
View original page 19Page 20 · Read text
FOR3OOOSPEEDBTACKAND WHITE


Film Selector: Set it to 3000.             Lighten/Darkencontrol: Leaveit at the
                                  Normal position (shown) unless you
                                    want  to make a  picture  lighter or
                                       darker.


                     Donated to www.orphancameras.com                         L7
View original page 20Page 22 · Read text
4. This is how the gun looks in place.    5. To put in a flashbulb,open the blue    6. To remove a used bulb,bulb, pushPush the
To remove it: pull out the plug, push    shield, push the bulb into the socket    red button (A). Put used bulbs in a
the lockingleverto disconnectthe rear     until it catches. Closethe blue shield    wastebasket, away   f rom  children,
hook, lift the gun from the rear.          before shooting your picture.             animals, and everybodY'sfeet.

                                                               Use only M-3 (clear, not blue) flashbulbs.

                     Donated to www.orphancameras.com                         19
View original page 22Page 23 · Read text
HOWTO MAKE FLASHPICTURES


                                                                             tt

PLACESUBJEGT: Try to have a back-     1. AIM AND FOCUS: Frame your sub-    2. SHOOT:Pressbutton No.2 smoothly
ground, preferably of a  light, bright    ject insidethe diamondsin the finder.   and slowly,without movingthe camera,
color, a few feet behind the subject.      Place the top line of the rangefinder    until you hear a loud click and the
PLACE YOURSELF: For best results,    at the top of your subject's forehead.   flashbulb fires.
                                 Then push the No. 1 buttons to placestand about 5  ft. away. Maximum
distance is about 10 ft. with 75 speed    the moving line at the bottom of the
color film, about 15  ft. with 3000    subject's chin.  For pictures of chil-                                       dren, pets, etc., follow the instructionsspeed b & w, dependingon room size,
color, etc.                           on pages9 and 10.
CHECKthat the controls are set for the
kind of film you are using (see p. 16).
20                    Donated to www.orphancameras.com
View original page 23Page 24 · Read text
FLASH PICTUREHINTS

                                       Line up groups: TrY to have everYone
                                    about the same distance from the
                                camera so they'll be lighted evenly.

                                 Watch the background:  lt can "fool"
                                        the electric eye. lf a subject is close to
                                      a white wall, the Picture maY be too
                                         dark. Move him a few feet from the
                                         wall or set the L/D control two marks
                                    toward LIcHTEN.Dark or distant back-
                                   grounds may cause verY Pale faces.
3. RESET:lmmediatelyafter snapping
a picture, press No. 3 button down                                Have plenty of color: White, black,andfirmly until  it locks and stays down.                                     gray don't improvecolor pictures.This resets the shutter so you'll be
readyfor the next picture.
                                   Spare the eyes: Let your subjects look
                                   elsewherethan right at the camera.

                                     Flash don'ts: Don't try to make f lash
YOU ARE NOW READY TO DEVELOP   pictures in daylight. Don't shoot f lash
THE PICTURE. SEE PAGE 24.            pictures in explosiveatmospheres.
                     Donated to www.orphancameras.com                          2 L
View original page 24Page 25 · Read text
HOWTO MAKE DAYLIGHTPICTURES


                                                                                                                                                                                                                     I \
                                                                                            I

   ND so the light on the subject is       l. AIM AND FOCUS: Frame your sub-    2. SHOOT:Pressbutton No.2 smoothly
coming from behind you or from the     ject insidethe diamondsin the f inder.   and slowly,without movingthe camera,
side,but not from in front of the camera.   Placethe top line of the rangefinder at    untilyou hear a loudclick.Whenshoot-
                                        the top of your subject's forehead.    ing in the shade or in dim light, hold
                                 Then push the No. 1 buttons to place   No. 2 down and don't move until you
                                        the moving line at the bottom of the    hear a second click as the shutter
                                        subject's chin.  For pictures of chil-    closes. Then let No. 2 button come up.
CHECKthat the Film Selectorand L/D    dren, pets,nearbyobjects,and scenics,
control are set for the kind of film you    follow the focusing instructions on
are using (see page 16).               pages9 and 10.

22                    Donated to www.orphancameras.com
View original page 25Page 26 · Read text
DAYLIGHTPICTUREHINTS

                                 The best light for pictures of people:
                              On a very bright, hazy day the light is
                                  even and the shadowsare soft.

                               Move in close: The biggeryour subject
                                                  is in the print,the more colorand detail
                                            you'll be able to see.

                                 Have plenty of color: Look for subjects    Lighting to avoid: Bright light behind
                                  and backgrounds with big areas of    the subject will "fool" the electriceye.
                                        strong, bright colors.                 Your subjectwill be too dark.3. RESET:lmmediatelyafter snapping
a picture, press No. 3 button down
firmly until  it locks and stays down.   Watch the background:The light on it
This resets the shutter so you'll be    should be just about as bright as the
readyfor the next picture.                  light on the subject.

                                 Keep an eye on the temperature: Cold
                                            or very hot weather can affect the
                                          quality of your pictures. Be sure to
YOU ARE NOW READYTO DEVELOP   read page 27, which explains how
THE PICTURE.SEE PAGE24.          temperatureaffectsyour pictures.
                     Donated to www.orphancameras.com                        23
View original page 26Related documents and language editions
PolaroidPDF
POLAROID 220
User manual
37 pages · EnglishRead →
PolaroidPDF
POLAROID 350
User manual
53 pages · EnglishRead →
PolaroidPDF
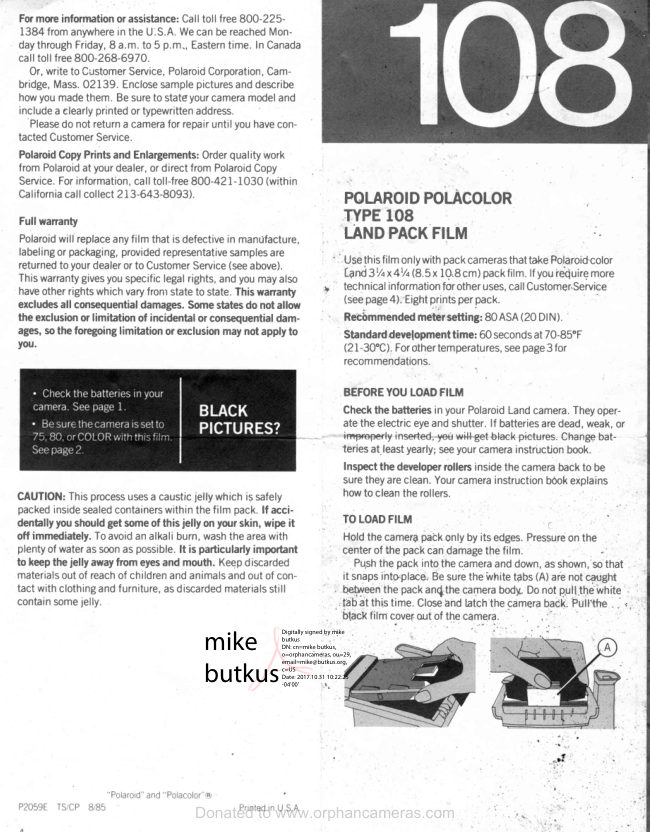
Polaroid 108 film information
User manual
5 pages · EnglishRead →
PolaroidPDF
Polaroid 110A
User manual
30 pages · EnglishRead →
PolaroidPDF
Polaroid 125
User manual
23 pages · EnglishRead →
PolaroidPDF
Polaroid 135
User manual
25 pages · EnglishRead →
PolaroidPDF
Polaroid 210
User manual
27 pages · EnglishRead →
PolaroidPDF
Polaroid 215
User manual
25 pages · EnglishRead →
PolaroidPDF
Polaroid 225
User manual
29 pages · EnglishRead →
PolaroidPDF
Polaroid 230
User manual
28 pages · EnglishRead →
PolaroidPDF
Polaroid 240
User manual
27 pages · EnglishRead →
PolaroidPDF
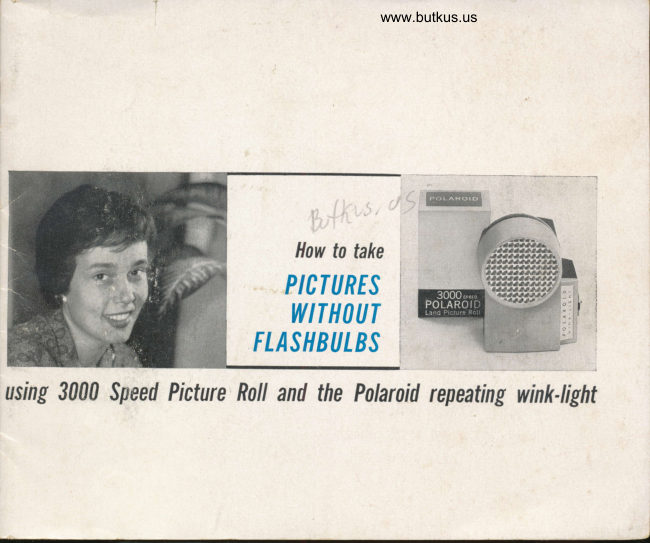
Polaroid 3000 Wink Flash
User manual
13 pages · EnglishRead →
From the M. Butkus archive. Original publisher and archive notices are retained.
Check the model and edition against your equipment.
PDF verified 2026-10-10.