Film cameras
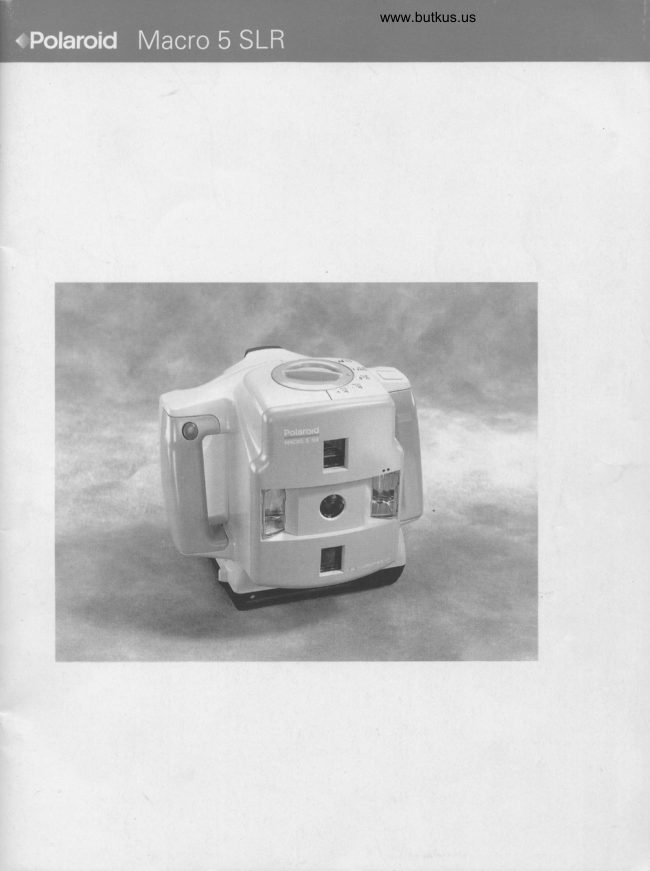
Polaroid Macro 5 SLR User manual
User manual for Polaroid Macro 5 SLR. 31 pages in English. Read the original PDF, download or print a copy without registration.
31 pagesEnglish3.2 MB PDF
Loading your manual…Open PDF directly
Document details
- Brand
- Polaroid
- Model / document
- Polaroid Macro 5 SLR
- Document type
- User manual
- Language
- English
- Pages
- 31
- File size
- 3.2 MB
- Category
- Film cameras
- Document date
- Not specified in catalog
Search available document text
Find a term, then jump to its page in the original PDF. Image-only pages may not be searchable; check the PDF for exact wording and diagrams.
Page 2 · Read text
lntroduction
The Polaroid Macro 5 SLR is a simple to
operate, fully automatic, portable camera
designed for medical and dental docu-
mentation of patient condition, manufac-
turing. quality control, law enforcement,
and other applications that require
close-up photographs. The camera uses
Polaroid self-developing instant color
films, so you know right away that you
have the picture you need.
  The camera produces reproductions
at: 0.2X (20%1, 0.4x (40%1, 1X (100%),
2X (200%l and 3X (300%). The lenses for
each reproduction size are self-contained,
so there is no need to attach accessories
when changing magnification.
  The camera has two built-in electronic
flash units that provide even illumination,
and a microprocessor-controlled expo-
sure system that automatically sets the
camera for the correct exposure at all
magnifications. The flash units also can
be used individually for side-lighting, or
in combination with auxiliary lighting.
Other featur6s include:
Dual-light rangefinder helps you place the
camera at the proper distance from the
subject for correct focus.
Date/time module that allows you to print
the date or time on pictures.
Can be hand-held or used on a triood or
copystand.
Grid screen in viewfinder for consistent
framing of subjects.
View original page 2
Page 3 · Read text
www.butkus.us


   Accessory filter kits                      Load the batteries
  o Polarizer kit to reduce reflections from the        The camera requires four AA batteries to
    flash units when photographing glossy or         provide power for the ranging lights. Alka-
    glass subjects (PlD No. 619909)                        line batteries (standard or rechargeable)
  . Fluorescein kit for external ophthalmic             are recommended; rechargeable NiCad
   photography includes a #8 yellow                   batteries also can be used.
    barrier filter and #47A blue exciter filters           The battery compartment is located in
    (PlD No.619908)                                  the handgrip; slide the battery door open
                                                                     (2); the battery holder will pop up. Un-   The numbers throughout the text refer to
                                                snap the battery clip (3) and remove the    the illustrations at the end of the book.
                                                        battery holder (4). Insert the batteries in    CAUTION: THIS CAMERA lS BATTERY POWERED.
                                                     the orientation shown on the holder (5).    TO AVOID ELECTRICAL SHOCK, CAMERA SHOULD
                                                    Replace the battery holder, snap on the   NOT BE EXPOSED TO OR IMMERSED IN WATER OR
                                                                 clip and close the door.   OTHER FLUIDS, DISASSEMBLED, OR OPERATED  IF
                                                    lmportant: Remove the batteries and   DROPPED OR DAMAGED. FOR REPAIR INFORMA-
                                                          store them separately if the camera will    TION, CONTACT NEAREST SERVICE CENTER,
                                                     not be used for an extended period of   Gamera parts (Fig. 1)                                                     time. Use of the camera in extreme heat
 a Shutter button                                       or cold will shorten batterv life.
b Right hand grip                              See Battery cautions.
 c Electronic flash units
d Lens
 e  Film door release button
 f  Film door
 s Tripod socket (on bottom of camera)
 h Ranging lights
   I  Magnification selector knob
  i  Battery compartment (inside hand grip)
 k  Left hand grip
   I Viewfinder
m  Control panel
View original page 3Page 4 · Read text
Venmo @mike-butkus-camera  Ph. 2083
PayPal Name  Lynn@butkus.org      www.PayPal.me/lynnbutkus
View original page 4
Page 5 · Read text
Load the film                           The control panel (11)
      The camera uses Polaroid HighDefinition  a Power button
        instant self-developing color films. Type           Press to turn on the camera. The flash
      990 film is recommended; GridFilm and  L r      units will begin charging, and the green
       Spectra'/lmage films also can be used.   ;', nti i,-    indicators will light up when the camera
      Each film pack contains 10 sheets of film   '             is ready for picture-taking.
      and a battery that provides power for the          The camera will turn off if the oower
      exposure controls, flash units and film             button is pressed again, or after 30 sec-
       motor. These high-speed (lS0640/29")            onds of inactivity. (Note: The camera also
       films are balanced for electronic flash and        can also be turned on by lightly pressing
       daylight (5500"K), and produce positive           the shutter button.)
       color prints.                             b Low battery indicator
       Press the film door release button; the            Yellow light comes on when the batteries
      door will drop open (6).                                  in the hand grip are weak (the ranging
       Before loading the film, check that the                lights also will become dim).
       film processing rollers are clean. Dirt or       c  Flash control/status     I ights
        bits of dried developer on the rollers can         The red light will blink while the flash
      cause a pattern of repeated spots or bars           units are charging; the green lights will
     on pictures. Clean both rollers with a soft,       come on when REaov.
        lint-free cloth. dampened with water  if            The flash units can be turned on or off
      necessary (7). Rotate the rollers as you              selectively.
      clean and inspect them.                  d Standard PC socket for auxiliarv flash
      Hold the film pack by the edges, with the                                                       Reset button
       safety cover facing up (8). Slide the pack                                                      This returns the camera to the nominal         all the way into the camera.                                                                                                                                                  f lash and Lighten/Darken settings.
   4 Close the film door. The safety cover will          The camera has a "memory" and will
      be ejected from the front of the camera             return to your custom settings for each
         (e).                                                         magnification when  it is turned on.
       The film counter will read '10'. lt                                                                         Lig hten/Da rken controls
      counts down. to show how many pictures                                                  Each setting adjusts the flash output to      remain in the oack.                                                                                                                               123                                                         increase or decrease exposure by
     To remove an empty film pack                      f-stop.
     Open the film door, grasp the tab on the                                                         Magnification indicators
     end of the pack, and pull the pack out                                                           Light up to show the selected       (10).i                                                          magnification.
                                                         Date/time control and display
                                                     Allows you to print the date or time on
I                                                                pictures.
                                                         Film counter
                                                   Counts down, to indicate the number of
                                                              pictures that remain in the pack.
View original page 5Page 6 · Read text
www.butkus.us


  Set the magnification                    Take the picture
   Turn the magnification selector knob to          Look through the viewfinder, and reframe
   the desired setting (12). The knob will             the subject as needed.
    click into position at each magnification;             Press the shutter button all the way to
   the camera will not function  if the knob is          take the picture (16)
   between lens settings                          The picture will be automatically
      In addition to the magnification, the              ejected from the front of the camera
   selector shows the camera-to-subject          when you release the shutter button. Lay
   distance and icons that represent the              the picture down flat or hold it by its wide
   approximate area of a subject included             border while it develops. Do not shake,
    in the picture.                                bend or squeeze the picture, and never
                                                      cut pictures or take them apart. See   Focusing and framing the subject
                                                    Caution notice on film box.   Hold the camera at the approximate dis-
   tance from the subject for the selected            Picture tips
   magnification. For example,  if taking pic-         r When taking portraits at 0.4X or 0.2X
   tures at 1X, hold the camera 10 in. (25cm)          magnification, turn the camera 90' for a
   from the subject.                                        veftical format to include the entire face
   Press the shutter button lightly (13); the            (17). You may want to turn off the lower
   ranging lights will go on. The lights stay            flash unit for more pleasing lighting.
  on as long as the button is pressed.  lf you       o lmportant: Always hold the camera so
   release the button, the lights go off in              the front panel is parallel to the subject
   about 15 sec. Press the shutter button               (18). Holding the camera at an angle (19)
    lightly to turn them on again.                 may cause uneven picture sharpness.
   Look over the top of the camera; note the         .  lf you wear eye glasses for distant view-
  two ranging lights on the subject (14).               ing, wear them when using the camera
  Move the camera nearer or farther from             for accurate viewing and focusing.
   the subject, until the two lights merge                                             Lighten/Darken control {2O)   (1s).
                                            The camera is designed to provide the
4 The viewfinder shows the area included                                                          correct exposure for subjects of average
    in the picture, with the ranging lights in                                                         brightness. With some subjects, you may
   the center of the picture. Use the grid                                                wish to make the picture lighter or darker
   screen to ensure consistent framing.                                                       to enhance specific details. Each setting
     lf you have difficulty seeing the ranging          on the panel indicates an exposure
    lights, check that the camera is at the cor-        change of 7a f-stop, up to 1 full f-stop.
   rect distance from the subject. See also           . Press the light arrow to lighten pictures
   Troubleshooting.                                                       (increase the exposure).
                                                           . Press the dark arrow to darken pictures
                                                      (decrease the exposure).
                                            The camera has a memory and will save
                                                 your custom Lighten/Darken setting until
                                             you press the reset button to return to the
                                                nominal setting.
View original page 6Page 7 · Read text
Date display module                         Flash control (23)
      The date display module (21)allows you         The two built-in electronic flash units are
       to print the date or the day/time on pic-           designed to provide even illumination at
       tures (22).                                                       all reproduction scales. You can turn off
       Setting the date                                       either flash unit if side lighting is needed
  1 Press MoD (mode) repeatedly untilthe               to show texture or elevation. The light
       desired date sequence is displayed:                output from the remaining flash unit will
     No printing                                  be increased to oroduce the correct
                                                      exposu re.      Month/day/year            ;;;;;
                                                           ',95             Press the flash control once to turn off       Day/month/year      e7   I
                                                                                                                                             it a second time to      Year/month/day      '95   I  ?7           the right flash; press
       Day/time (24-hour clock) P7 ltl:??           turn off the left flash; press it a third time
                                                              to turn off both flash units.       Note: An w in the display indicates which
        digit is the month.                              Lighting techniques
       Press sEL (select) to select the year,               Both built-in flash units can be turned off,
      month or day (see blinking digit).               and auxiliary lighting used. The auxiliary
       Press sET repeatedly (or hold button)                 light is connected to the PC socket on the
        until the desired digit is displayed. Repeat         back of the camera (24). Advanced photo-
       steps 2 and 3 until the desired year,              graphers may find it useful to experiment
     month and day are all set.                        with different lighting arrangements.
       Press sEL again to lock in the date.                  . The auxiliary lighting must be electronic
                                                                flash   do not use tungsten, halogen or       Setting the time                                     -                                                          fluorescent lights.       Press woo until the day/time mode is
                                                  o The built-in flash can be combined with       displayed. The first set of digits in the dis-
                                                               auxiliary lighting.       play is the day of the month, followed by
       the time in hours and minutes.                 o Test exposures may be required to deter-
   2  Press seL and the hours will blink. Press          mine the correct location and settings for
                                                        the auxiliary flash unit for correct expo-       SEr to toggle through the hours. Press sEL
      again to lock in the hour. The minutes will          su re.
     now blink.                                Outdoor usef.   Press sET to toggle through the minutes.         The camera is designed primarily for
       Press seL again to lock in the minutes.             indoor use; if it mustbe used outdoors:
   4  Press seL again to lock in the time.             o Select an area that is not subjected to
      Shufting off the date display option              bright sunlight, which may cause over-
                                                exposed pictures.       Press woo until a series of dashes ap-
      pears in the display.                                  . Shade the subject from direct sunlight.  (lt
       Note: The date module is powered by the             is difficult to see the ranging lights in very
                                                              bright light.)       battery in the film pack, or by the batter-
        ies in the handgrip.  lf there are no batter-          . Use the built-in flash units to ensure con-
        ies or film in the camera for more than 5             sistent exposure.
       minutes, you will need to reset the date/
      time after replacing the batteries.
View original page 7Page 8 · Read text
www.butkus.us


GridFilm                                   Troubleshooting
This film has a grid pattern which is                Difficulty focusing
created during manufacture. The grid           The ranging lights may be difficult to see
pattern appears as an overlay on any           when using the camera in very bright
picture taken with the film.                                light, or when photographing very dark
  The oattern consists of 17 vertical and            subjects.  lf you have difficulty seeing the
13 horizontal lines.                               ranging lights:
  To help you define location on the grid,         . Check that the camera is set for the de-
the vertical lines are identified by letters            sired magnification, and is at the correct
across the top, and the horizontal lines             distance from the subject.
are identified by numbers along the left           . Look over the top of the camera, rather
border (25). You can specify the location                                               than through the viewfinder.
on the picture by a letter-number combi-          . Check the battery indicator;  if necessary
nation.                                                    replace the batteries in the handgrip.
Calculating measurement from the                                       Camera will not function:  lf the batterygrid paftern
                                                              in the film pack is weak or dead, the flashWhen taking pictures at 1X magnification,                                                         units will not charge and/or the controleach square ofthe grid pattern represents                                                 panel will not function.5mm (0.2 in.). The chart below shows the
                                    No image in viewfinder.' The magnifica-value represented by each square in pic-
                                                      tion selector knob ls between settings.tures taken at each magnification.
                                                   Pictures too light: The camera may be
                                                 too close to the subject for the selected
Magnification      Grid square value                                                    magnification. The Lighten/Darken con-
   0.2x               1 in.     25mm              trol may be set incorrectly. Very light
                                                     subjects may require setting the control
   0.4x              0.5 in.     13mm                                           toward Darken. There may be bright
    1X              0.2 in.     5mm          ambient light affecting the exposure.
                                                Pictures too dark: The camera maY be    2X              0.1 in.     2.5mm                                                 too far from the subject for the selected
    3X            0.07 in.     1.7mm            magnification. The Lighten/Darken con-
                                                            trol may be set incorrectly. Very dark
                                                  subjects may require setting the control
                                           toward Lighten.
                                              Subject not sharp: The camera is at the
                                          wrong distance from the subject. (Pictures
                                                     also will be incorrectly exposed -  too                                                               light or too dark.)
                                                Portions of picture out of focus, or
                                                 distorted suhject: The camera is not
                                                            parallel to the subject.
View original page 8Page 9 · Read text
Care and Maintenance                EMC statement
   Lens care: Avoid touching the lens. To            Polaroid Corporation certifies that this
  remove dust or fingerprints, breathe on           product conforms to the following
   the lens and wipe  it gently with a clean,               sta nda rds:
   soft facial tissue. Do not use silicone-             Safety: Low Voltage Directive 73l23lEEC
   treated eyeg lass tissues.                                                      Eltc.- EN55022, Class B; EN50082-1; tEC
   Temperature.. The camera and film are            801-2, 801-3, 801-4
  designed for use at temperatures of
  55-95'F (13-35'C). Store below 75oF
   (24"C1. Never leave film or a loaded cam-
  era in a hot area (such as the luggage
  compartment of a car).
  Caution: To prevent electric shock, do
  not remove camera covers. No user serv-
  iceable parts inside. Refer servicing to the
  nearest Polaroid Service Center.


 Gamera specifications
                     Lens-to-suhject      Lens focal       Effective
  Magnificationr distance           length2         Lens aperture     Depth of fieldg
  0.2x (20%l       52 in.l132cm      221mm                       f t20                 8.8 in.l22cm
  o.4x (40%l       26 in./66cm       188mm                       f 134                3.8 in./1Ocm
  1X (100%)         9.9 in./25cm       128mm            f/47                0.86 in.l22cm
 2X(200%l         4.8 in./12cm        85.4mm                    f t67                0.31 in./0.8cm
 3X (300%)         3.1 in./8cm       64mm            f/100                0.20 in./0.5cm

 I    lf the exact magnification must be documented, include a scale in the picture (26). The scale
 and the subject must be at the same distance from the camera.
2 The camera contains separate lenses for each magnification. Each lens has the proper focal
  length for minimum perspective distortion and more working space between the camera and
 subject, and a small lens aperture for better depth of field.
3 The depth of field, or distance zone within which the subject will be in sharp focus, is limited
  in close-up photography. The zone will extend about half its distance in front of, and half
 behind, the point of sharpest focus.
 Note: The camera has a fixed shutter speed of 1/50 sec.
View original page 9Page 10 · Read text
www.butkus.us


Free technical assistance                     Battery cautions
lf you need assistance or additional infor-         . The batteries used in this device may pre-
mation about specific applications, call             sent a risk of one or more of the following
toll free at 1-800-225-1618, Mon.-Fri.,8 nu          occurrences: Release of toxic materials,
to 8 PM (Eastern time). Or, write to the              release of flammable vapors, rise in
Customer Care Center, Polaroid Corpora-          surface temperature. Do not recharge,
tion,201 Burlington Road, Bedford. MA,            incinerate or mutilate.
01730-1 406.                                          . Replace batteries with same type. Use of
     lf outside the U.S.A.. contact the nearest        another battery type may present a risk of
Polaroid Office. (See list on back page.)                fire or explosion.
Warranty                                             . Dispose of used batteries promptly. Keep
Your Macro 5 camera has been thorough-        awav from children. Do not disassemble
ly tested and inspected before shipment.         and do not dispose of in fire. The cell may
All parts are guaranteed against defects           explode. Check with local codes for possi-
in materials and workmanship for one full          ble special disposal instructions.
year from the date of original purchase.            . When replacing batteries, replace all at
During this period, any such defects will           the same time. Mixing fresh and dis-
be remedied by Polaroid Corporation             charged batteries could increase internal
without charge, except for transportation             cell pressure and rupture the discharged
costs. The warranty excludes damage                batteries.
resulting from normal wear, mishandling                                         Radio and television interference
or accident, and a charge will be made for                                 FGG requirements
such repairs. The warranty does not in-                                                This device complies with Part 15 of theclude the batteries, or damage caused by                                        FCC rules. Operation is subject to the fol-leaking batteries.                                                lowing two conditons:
U.S.A.: This warranty excludes conse-                              1 This device may not cause harmful inter-quential damages.                                                  ference
Outside U-S.A-: This warranty does not                           2 This device must accept any interferenceaffect your statutory rights.                                                     received. including interference that may
Service                                      cause undesired operation.
Before returning a camera for service,
contact the Polaroid Customer Care
Center or the nearest Polaroid Office for
shipping and service information. The
camera should be packed in its original
shipping carton or other sturdy container,
and shipped, prepaid and insured, to the
nearest Pola roid Office.
View original page 10Page 11 · Read text
FCC Notice (U.S.A- only)
       Warning: Changes or modifications to
        this unit not expressly approved by the
        party responsible for compliance could
       void the user's authority to operate the
       equipment.
        This equipment has been tested and
       found to comply with the limits for a
        Class B digital device, pursuant to Part 15
         of the FCC Rules. These limits are de-
       signed to provide reasonable protection
        against harmful interference in a residen-
          tial installation. This equipment generates,
       uses and can radiate radio frequency
       energy and, if not installed and used in
       accordance with the instructions, may
       cause harmful interference to radio
       communications. However. there is no
       guarantee that interference will not occur
         in a particular installation.  lf this equip-
      ment does cause harmful interference to
        radio or television reception, which can
       be determined by turning the equipment
         off and on, the user is encouraged to try
        to correct the interference by one or more
         of the following measures:
      . Reorient or relocate the receiving antenna.
      . lncrease the separation between the
      equipment and receiver.
      . Consult the dealer or an exoerienced
        radio/TV technician for help.
     EMI Notice (Canada)
       This digital apparatus does not exceed
       the Class B limits for radio noise emis-
        sions from digital apparatus set out in
       the Radio Interference Regulations of
       the Canadian Department of Communi-
        cations.


 l
lI
View original page 11Page 15 · Read text
lntroduction
  L'appareil Macro 5 SLR de Polaroid est
  simple d utiliser, compldtement automa-
  tique, portable. pr6vu pour la photogra-
  phie documentaire m6dicale, dentaire, de
  cont16le industriel et de controle oualit6
  ou d'enqu6te judiciaire.
    Cet appareil sert pour toutes les appli-
  cations qui n6cessitent des prises de vue
  en macrophotographie.  ll utilise des films
  couleur Polaroid d d6veloppement instan-
  tan6, ainsi vous avez votre photo imm6-
  diatement.
    L'appareil permet des rapports de
  reproduction de: 0,2X (20%1,0,4X (40%1,
  1X (100%), 2X (200%), et 3X (300%). L'ob-
  jectif correspondant d chacun de ces gros-
  sissements est int6g16 dans l'appareil,
  aussi  il n'y a pas d'accessoires d manipu-
  ler lorsque vous changez de rapport de
  reproduction.
     L'appareil contient deux flashes
  6lectroniques, contr6l6s par un micro-
  processeur qui permet une exposition lu-
  mineuse parfaite, d tous les rapports de
  prises de vues. Les flashes peuvent 6tre
  utilis6s individuellement pour des 6clai-
  rages de profil ou en combinaison avec
  d'autres sources de lumidre.
  Autres ca ract6ristiq ues:
o Deux spots lumineux vous aident i placer
   la camera d la bonne distance du sujet
  pour obtenir une image nette.
o Le module heure et date vous oermet
  d'imprimer ces informations sur la photo.
. L'appareil peut 6tre fix6 sur un tr6pied ou
  sur un statif de reproduction.
. Le viseur est collimat6 pour un meilleur
  caorage.
View original page 15Page 16 · Read text
www.butkus.us


   Kit filtres                              Chargement des piles
 o Kit polarisant pour r6duire les reflets du            L'appareil utilise quatre piles AA pour ali-
   flash sur des sujets brillants ou des sur-          menter les spots de mise au point. Piles
   faces vitr6es (PlD: 619909).                           alcalines ou batteries rechargeables sont
                                                            Des accus NiCad rechar-  . Kit de fluoresc6ine pour prises de vue ex-         recommand6es.
   ternes de l'ceil incluant un filtre barridre           geables peuvent aussi 6tre utilis6s.
   jaune 8 et deux filtres excitants bleus                Le compartiment d piles est situ6 dans
   47A (PlD:619908).                                         la poign6e, ouvrez la trappe (2); le recep-
                                                        teur de piles apparait, d6tachez-le de la   Les num6ros dispers6s dans le texte se
                                                           prise (3) et prenez-le (4). Ins6rez les piles   r6fdrent aux illustrations d la fin de ce
                                               dans le sens indiqu6 sur le r6cepteur (5).   manuel.
                                                Remettez le r6cepteur d sa place et fer-
   ATTENTION: CET APPAREIL EST ALIMENTE PAR                                         mez la trappe.
   DES PILES. POUR EVITER TOUT CHOC ELECTRIOUE
                                                    lmportant: Retirez les piles si I'appareil     IL NE FAUT PAS IMMERGER LA CAMERA DANS
                                                         doit rester inutilis6 pendant une longue   UN LIOUIDE, LA DEMONTER OU ESSAYER DE LA
                                                         p6riode. L'utilisation de l'appareil sous   REPARER. SI UNE REPARATION EST NECESSAIRE,
                                              une forte chaleur ou par grand froid   CONTACTEZ VOTRE CENTRE DE MAINTENANCE LE
                                                        raccourcit la dur6e de vie des piles.   PLUS PROCHE.
                                                       Yoir Prdcautions sur les piles.   Parties de I'appareil (illustrationl  )
a D6clencheur
b Poign6e droite
c Flash 6lectronique
d Objectif
 e Poussoir d'ouverture du magasin film
 f Trappe film
   Pas de vis pour tr6pied I
 h Spots de mise au point
   I  56lecteu  r de g rossissement
  i Logement piles
 k Poign6e gauche
   I  Viseur
m Panneau de contr6le
View original page 16Page 17 · Read text
,ffi
  Chargement du film                       Le panneau de contr6le (11)
   L'appareil utilise du film couleur Polaroid         Bouton de mise sous tension
   haute d6finition. Le film 990 est recom-          Appuyer sur le bouton pour mettre
   mand6, le "GridFilm" et le film lmage                l'appareil en marche. Les flashes com-
   peuvent aussi 6tre utilis6s. Chaque pack          mencent d se charger, et les t6moins
   de film contient 10 vues et une pile qui ali-         verts s'allument lorsque l'appareil est
   mente la cellule d'exposition, les flashes            pr6t pour la prise de vue.
   et le moteur d'avance du film. Ces films              L'appareil s'arr6te en appuyant sur le
   trds sensibles (640 ISO/29') sont equili-           bouton ou automatiquement aprds 30 se-
   br6s pour le flash 6lectronique et la lu-           condes d'inactivit6. (Note: L'appareil peut
   midre du jour (5500'K) et produisent des           aussi 6tre mis en marche par une l6gdre
   tirages papiers couleur.                            pression sur le d6clencheur.)
  Appuyez sur le poussoir d'ouverture du       b  Indicateur de charge des piles
   magasin film, la trappe s'ouvre (6).             Une lumidre jaune apparait lorsque les
   Avant de charger le film, assurez-vous               piles contenues dans la poign6e sont
  que les rouleaux de d6veloppement              d6charg6es (l'intensit6 des spots de mise
   soient propres. Des depots de produit ou         au point diminue).
   des d6bris de cassettes provoquent des            Cont16le flash
   taches ou des rayures sur la photo. Net-          La lumidre rouge clignote pendant que
   toyez les rouleaux avec un tissu doux                les flashes se rechargent; les lumidres
  non pelucheux. humect6 si n6cessaire              vertes s'allument lorsqu'ils sont pr6ts.
    (7). Faire tourner les rouleaux en les net-            Les flashes peuvent 6tre mis en service
   toyant pour les v6rifier.                        ou 6teints.
3  Prendre le pack de film par le bord, avec       d  Prise standard pour un flash auxiliaire
    le carton de protection au-dessus (8). En-                                           e Touche "reset"
   foncer le pack dans le magasin.                                                        Cette touche remet l'appareil sur ses
4 Fermer la trappe. Le carton de protection          169lages de bases.
   s'6jecte automatiquement sur le devant           Vos 169lages correspondant d chaque
  de l'appareil (9).                                grossissement peuvent 6tre mis en
     Le compteur est sur 10.  ll d6compte et         m6moire et servir si cette fonction est
  vous indioue combien de vues  il reste d             activ6e.
   prendre.                                                   Cont16le luminosit6 plus clair/plus fonc6
  Pour retirer un pack vide                    Chaque cran permet de 169ler la puis-
   Ouvrir la trappe, attraper la languette sur         sance des flashes par tier de diaphragme
    le bord du pack et le tirer hors de l'ap-            pour obtenir une photo plus claire ou
   pareil (1O).                                          plus fonc6e
                                                            Indicateu rs de grossissement
                                        Un indicateur lumineux signale la posi-
                                                         tion retenue.
                                                    Affichage date et heure
                                            Vous permet d'imprimer la date ou
                                                         l'heure sur la ohoto.
View original page 17Page 18 · Read text
www.butkus.us


      Compteur de vues                              La photo sera automatiquement 6ject6e
      D6compte et indique le nombre de vues           sur le devant de I'appareil lorsque vous
       qui reste d faire.                                    rel6cherez le d6clencheur. Laissez la ohoto
                                                    d plat ou tenez-la par le bord pendant     Ghoix des grossissements
                                                               qu'elle se d6veloppe. Ne secouez pas et      Tournez le s6lecteur sur le rapport                                                    ne frottez pas la photo pendant qu'elle se       souhait6 (12). Le s6lecteur clique en face                                                     d6veloppe; ne la coupez pas. Voir la no-      de chaque grossissement; I'appareil ne                                                                  tice Prdcaution sur la boite de film.       peut fonctionner si le s6lecteur se trouve
       entre deux positions.                          Conseils de prise de vue
       En plus du grossissement, le s6lecteur          . Lorsque vous prenez un portrait i 0.4X ou
      indique la distance entre la cam6ra et le           0,2X de grossissement, tournez l'appareil
       sujet et un dessin repr6sentant la surface         d 90' pour obtenir une image verticale de
       qui sera photographi6e.                             tout le visage (17). Vous pouvez 6teindre
                                                                               le flash inf6rieur pour obtenir un meilleur     Mise au point
                                                               6clairage.
       Positionnez la cam6ra d la distance indi-           . lmportant: Toujours tenir la camera      qu6e par le s6lecteur. Par exemple pour
                                                                 paralldle au sujet (18). Tenir la cam6ra      un grossissement de 1X d 25 cm du sujet.
                                                  pench6e (19) peut provoquer des d6fauts      Appuyez sur le d6clencheur l6girement                                                 de nettet6.       (13); les spots de mise au point s'allu-                                                               . Si vous portez des lunettes, gardez-les      ment. lls restent allum6s aussi longtemps
                                                   pour une meilleure vision lorsque vous      que vous maintenez cette l6gdre pres-
                                                                       utilisez I'appareil.       sion, sinon ils s'6teignent au bout de
      quinze secondes. Pressez l69drement le          Cont16le d'exposition (2Ol
      d6clencheur pour les rallumer.                      L'appareil est programm6 pour vous don-
      Regardez au-dessus de l'appareil et voyez         ner une exposition correcte du sujet que
        les deux points lumineux sur le sujet            vous photographiez. Sur certains sujets
       (14); approchez ou 6loignez I'appareil            vous pouvez avoir besoin d'6claircir ou
      pour les superposer (15).                       de foncer des d6tails. Chaque point sur le
      Le viseur montre la surface exacte pho-          panneau de contrOle indique que l'exposi-
:      tographi6e, avec le point lumineux au               tion varie de % de diaphragme et cela
       ce nt re.                                            jusqu'd la valeur de 1 diaphragme.
       Si vous avez des difficult6s d voir les          o Pressez la fldche claire pour 6claircir la
       spots, v6rifiez que l'appareil est d une            photo (augmenter l'exposition).
       distance correcte du sujet. Voir aussi          o Pressez la fleche fonc6e pour assombrir
      D6faut de prise de vue.                                  la photo (diminuer l'exposition).
      Prise de vue                                       L'appareil possdde une memoire et sau-
                                                        vera vos 169lages sauf si vous appuyez      Regardez d travers le viseur et cadrez la
                                                       sur la touche "reset," d ce moment  il      photo comme vous le souhaitez.
                                                       reprend ses 169lages de base.       Appuyez sur le d6clencheur pour faire
       votre photo (16).
View original page 18Page 19 · Read text
Affichage de la date                           Note: Le module date est aliment6 par les
  Ce module (21) vous permet d'afficher la            piles des poign6es ou par les batteries
   date ou I'heure sur vos photos (22).              des packs de film. S'il n'y a pas de piles
                                              ou de film plus de 5 minutes dans I'appa-   Affichez la date
1 Appuyez sur MoD (mode) par d coup                      reil, vous devrez reprogrammer la date et                                                           I'heure aprds avoir remis des piles.   jusqu'd ce que la s6quence d6sir6e appa-
    ra   I sse:                                      Gontr6le flash (231
   Pas d'impression                                Les deux flashes 6lectroniques donnent
                                                     ',95          une lumidre uniforme i tous les rapports   Mois/jour/ann6e      8 e7
                                         '95          de prise de vue propos6s par I'appareil.   Jour/mois/ann6e     e7  s
   Ann6e/mois/jour      '9s   I  ?7          Vous oouvez 6teindre chacun des flashes
   Jour/heure (horloge en24hl 27 l4:?2          pour donner un 6clairage particulier, mon-
   Note: Un M sur le tableau indioue oi se             trer une texture ou un relief. La lumidre
   trouve le mois.                                 provenant du flash restant sera accrue
2 Appuyez sur sEL pour choisir l'ann6e,             automatiquement pour que l'exposition
   le mois ou le jour; regardez les "digit"                soit correcte.
   clignota ntes.                                   Appuyez sur le contrOle flash une fois
                                                pour 6teindre le flash de droite; appuyez  Appuyez sur sET plusieur fois (ou l6cher
                                              une seconde fois pour 6teindre celui de   le bouton) jusqu'd ce que les "digit" re-
                                                  gauche; appuyez une troisidme fois pour   cherch6s apparaissent. R6p6tez I'op6ra-
   tion jusqu'd l'affichage de l'ann6e. du              6teindre les deux flashes.
   mois et du jour que vous d6sirez.              Technique d'6clairage
  Appuyez sur sEL pour valider la date.              Les deux flashes 6lectroniques peuvent
                                                           etre 6teints, et vous pouvez utiliser un   Affichez I'heure
                                                         flash auxiliake. Ce flash auxiliaire sera  Appuyez sur MoD jusqu'ir ce que le jour et
                                                  connect6 sur la prise au bas de l'appareil   l'heure apparaissent. Les deux premiers
                                                          (24). Les photographes exp6riment6s se   chiffres donnent le jour, suivis par l'heure
                                                        serviront de cette source lumineuse pour   et les minutes.
                                                       obtenir des 6clairages sp6ciaux.  Appuyez sur sEL et I'heure clignote. Ap-                                                           . Le flash auxiliaire doit 6tre 6lectronioue -   puyez sur sET pour faire avancer l'heure.
                                              ne pas utiliser du tungstdne, de I'halo-  Appuyez sur sEL pour valider, ) present
                                              gdne ou des lampes fluorescentes.   les minutes clignotent.
                                                           . Les flashes int6gr6s peuvent 0tre utilis6s  Appuyez sur sET pour faire avancer les
                                              en combinaison avec un auxiliaire.   minutes. Appuyez sur sEL pour valider les
                                          o Un test d'exoosition est alors necessaire   minutes.
                                                oour ddterminer les corrections d r6aliser4 Appuyez sur sEL encore pour valider
                                              de manidre d obtenir une image correcte.    I'heu re.
   Eteindre cette option                           Utilisation'ext6rieure
  Appuyez sur MoD jusqu'd ce que la s6rie           Cet appareil est congu pour r6aliser des
   de traits apparaisse sur l'6cran.                  photos en int6rieur. Si vous devez
                                                                         l'utiliser d I'ext6rieur:
View original page 19Page 20 · Read text
www.butkus.us

. Ne choisissez pas un endroit en plein            D6faut de prise de vue
  soleil qui donnerait des images surex-             Difficult6 de mise au point
  pos6es.                                         Les spots de mise au point peuvent etre
r Evitez la lumidre directe sur le sujet, cela              difficiles d voir lorsque vous utilisez I'ap-
  rend difficile le repdre des spots de mise             pareil sous une forte lumidre, ou sur un
  au point.                                               sujet trds sombre. Si vous avez des diffi-
o Utilisez les flashes int6gr6s pour avoir              cult6s d voir les spots de mise au point:
  une r6partition de la lumidre harmo-                . V6rifiez que l'appareil est sur le bon rap-
  nieuse.                                              port de grossissement,  et qu'il est a une
                                                     distance correcte du sujet.  GridFilm
                                                         . Regardez par dessus l'appareil plut6t qu'd Ce film intdgre une grille qui est inscrite
                                                      travers le viseur.  lors de la fabrication. Cette grille apparait
                                           o V6rifiez le t6moin de piles; si n6cessaire  en surimpression sur toutes les photos
  faites avec ce film. Ce moddle de grille            remplacez les piles qui se trouvent dans
 comprend 17 lignes verticales et 13 lignes           les poign6es.
  horizontales.                                      L'appareil ne fonctionne pas.. Si la
    Pour vous aider d rep6rer le sens de lec-          batterie du pack de film est d6charg6e ou
  ture des images, les lignes horizontales            morte, les flashes ne peuvent se rechar-
 sont identifi6es par des chiffres et les ver-         ger et/ou le panneau de contrOle ne fonc-
  ticales par des lettres sur les bords (25).           tionne pas.
 Vous pouvez ainsi pr6ciser une position          Pas d'image dans le viseur: Le s6lec-
 exacte sur une photo par la combinaison           teur de grossissement est entre deux posi-
 de la lettre et du chiffre.                               tions.
 Calcul de mesure d partir du moddle          lmage trop claire: L'appareil est trop
 de grille                                         prds du sujet pour le grossissement
 Lorsque vous prenez une photo d un gros-          choisi. Le contr6le plus clair/plus fonc6
 sissement X1 chaque ca116 de la grille              est mal 169l6. Les sujets trds clairs nrices-
 represente une surface de 5mm. Le ta-              sitent de foncer la photo b I'aide du s6-
 bleau ci-dessous vous donne les valeurs            lecteur clair/fonce.  ll y a trop de lumidre
 pour tous les grossissements.                    ambiante et cela surexpose la prise de vue.
                                          Image trop fonc6e.' L'appareil est trop
 Grossissemenf       Valeur sur Ia grille           6loigne du sujet pour le grossissement
                                                          choisi. Le cont16le plus clair/plus fonc6     0,2x           25mm
                                                       est mal 16916. Les sujets trds sombres
     0,4x           13mm                                                      n6cessitent d'6claircir la photo d l'aide
      1X           5mm                 du s6lecteur clair/fonce.
      2X            2,5mm                    Sujet flou: L'appareil n'est pas d la
      3X            1,7mm                 bonne distance de prise de vue. (Les
                                              images peuvent 6tre 69alement trop
                                                            claires ou trop sombres.)
                                                   Partie d'image floue et sujet d6form6:
                                                      L'appareil n'est pas paralldle au sujet.
View original page 20Page 21 · Read text
Maintenance et entretien                  Homologation
 Entretien de I'objectif: Evitez de                  Polaroid Corporation certifie que cet ap-
 toucher I'objectif. Pour enlever la pous-             pareil est conforme aux normes suivantes:
  sidre ou les empreintes de doigt, soufflez          S6curit6: Directive bas voltages
 sur l'objectif et frottez-le doucement avec          73l23lEEC
 un chiffon doux. Ne pas utiliser de tissus                                               Homologation-' EN55022, Classe B;
 d lunette trait6 d la silicone.                       EN50082-1  ; IEC 801-2, 801-3, 801 -4.
  Temp6rature.' L'appareil et le film sont
 pr6vus pour 6tre utilis6s d des temp6ra-
 tures comorises entre 13 et 35'C. Stockez
 en dessous de 24"C. Ne jamais laisser le
 film ou I'appareil cha196 dans un endroit
 surchauff6 comme un coffre de voiture
 par exemple.
  Attention: Pour 6vitez tout risque de
 choc 6lectrique ne jamais d6monter le
 capot de l'appareil. Aucune r6paration ne
 peut Ctre effectu6e en dehors du Service
 Aprds Vente Polaroid.

 Caract6ristiques de I'appareil

                       Distance                                            Profondeur
  Grossissementl        sujetlobjectit      Focal&         Ouverture         de champ3
    0,2x (20%l          132cm        221mm           fno             22cm
    0,4x(40%l          66cm        188mm               f/34             1Ocm
    1X (100%)          25cm        128mm               f/47             2,2cm
   2XQ00%l          12cm         85,4mm                               f t67              0,8cm
   3X (300%)           8cm        64mm               t1100              0,5cm

1 Si le grossissement exact doit 6tre visible, ins6rez une 6chelle dans votre photo (26).
  L'6chelle et le sujet doivent €tre d 6gale distance de l'appareil.
2 L'appareil contient plusieurs objectifs correspondant aux diff6rents rapports de
 grossissement. Chacun de ces objectifs a sa propre focale pour 6viter les d6formations
 optiques, permettre une distance de travail int6ressante et un diaphragme permettant une
 bonne profondeur de champ.
3 La profondeur de champ, oir distance d laquelle le sujet est net, est limit6 lorsque l'on fait de
  la macrophotographie. Cette zone de nettet6 s'6tend d'environ la moiti6 de la distance en
 avant du sujet et de la moiti6 en arridre du point de nettet6.
 Note: L'appareil est 6quip6 d'un obturateur d vitesse fixe au 1/50 sec.
View original page 21Page 22 · Read text
www.butkus.us
h,i
          Assistance technique                       Pr6cautions poul les piles
             Si vous souhaitez des informations              r Les piles utilis6es dans cet appareil peu-
          compl6mentaires ou un support tech-             vent pr6senter des risques: 6coulements
           nique contactez Polaroid. (Voir liste des            toxiques, vapeurs inflammables, 6leva-
           adresses en dernidre page.)                         tion de temp6rature. Ne pas recharger,
          Garantie                                             brOler ou d6t6riorer les piles.
                                                                     . Remplacez les piles par des moddles           Votre appareil Macro 5 a 6te test6 et v6ri-
                                                                identiques. Utiliser des piles de moddle               fi6 avant son d6part de l'usine. Toutes les
             parties sont garanties contre une mal-               diff6rent peut pr6senter des risques de
                                                                      court-circuit ou d'explosion.           fagon ou un d6faut de fabrication pendant
          un an d compter de la date d'achat. Du-         o Jeter les vieilles piles. Ne pas laisser les
             rant cette p6riode toutes les r6parations              piles d la port6e des enfants. Ne pas
           sont prises en charge par Polaroid, ex-              d6t6riorer ou br0ler les piles. Elles peu-
           cept6s les frais de transport. La garantie           vent exploser. V6rifier localement les
            exclut les dommages caus6s par une utili-          instructions sur le recyclage ou la r6cu-
           sation normale, une chute ou un accident,          p6ration.
          ces 16parations sont payantes. La garan-         r Lorsque vous remplacez les piles,         I
              tie ne s'applique pas aux piles ou aux            changez les toutes. M6langer des piles
        dommages caus6s par les piles. Cette            neuves et usag6es peut provoquer le
             I       garantie ne prive pas l'acheteur de la ga-         d6chargement de toutes les piles.
            rantie legale relative aux d6fauts ou vices                                      DOC Remarque (Canada)
           cach6s.
                                                        Le pr6sent appareil num6rique n'6met
          Service                                      pas de bruits radio6lectriques d6passant
          Avant de renvoyer votre appareil en r6pa-           les limites applicables aux appareils
              ration, contactez le centre de 16paration          num6riques de la classe B prescrites
            Polaroid. L'appareil doit etre emball6            dans le Rdglement sur le brouillage
          dans son carton d'origine ou dans un               radio6lectrique 6dict6 par le ministdre
          paquet solide, puis post6 en recommand6         des Communications du Canada.
             et assu16.


                       I
                           It
                      i

    a
View original page 22Page 24 · Read text
www.butkus.us


                                                                                                                                                                                         'i'o
     Filterkits (Zubehiir)                          Einlegen der Batterien
   o Polarisationskit zur Reduzierung von                    Ftlr das Funktionieren der MeBstrahlen
     Blitzlicht-Reflexionen beim Fotog rafieren           benotigt die Kamera vier AA Batterien. Es
    von glanzenden bzw. Glasobiekten  (Art.          werden Alkalin-Batterien, Standard oder
     Nr. 619-909).                                        aufladbare, empfohlen; aufladbare NiCad
   . Das Fluoreszein-Kit  frir duBerliches Foto-            Batterien konnen ebenfalls verwendet
     grafieren in der Augenheilkunde enthiilt           werden.
    Nr.8 UV-Sperrfilter und Nr. 47A Blau-             Das Batteriefach  ist im Handgriff inte-
     Kontrastfilter (Art. Nr. 619-908).                         griert. Beim Schieben der Batteriefach-
     Die im Text angegebenen Numerierun-           Klappe (2) springt die Batteriehalterung
    gen beziehen sich auf die Abbildungen             hervor. Entriegeln Sie den Batterieclip (3)
   am Ende der Anleitung.                        und entfernen Sie die Batteriehalterung
                                                                      (4). Legen Sie die Batterien wie in der Hal-    VORSICHT: DIESE KAMERA IST BATTERIEBETRIE-
                                                    terung angezeigt ein (5). Setzen Sie die     BEN. UM ELEKTRISCHE SCHLAGE ZU VERMEIDEN.
                                                      Halterung wieder ein, befestigen Sie den    SOLLTE DIE KAMERA NICHT MIT WASSER ODER
                                                             Clip und schlieBen Sie das Batteriefach.    ANDEREN FLUSSIGKEITEN IN KONTAKT KOMMEN
    BZW. BEI BESCHADIGUNG AUSEINANDERGENOM           Wichtig: Entfernen Sie die Batterien und
    MEN ODER IN BETRIEB GENOMMEN WERDEN.              lagern Sie sie separat, wenn die Kamera
   WEGEN NOTWENDIGER REPARATUREN NEHMEN               frir ldngere Zeit nicht benutzt wird.
     SIE KONTAKT MIT DER NACHSTGELEGENEN              Kameraeinsatz bei extremer Hitze oder
    POLAROID NIEDERLASSUNG AUF.                               Kiilte wird die Batterieleistung verringern.
    Bestandteile der Kamera (Abb. 1)             Siehe Hinweise zum lJmgang mit
                                                             Batterien. a Versch   I uBknopf
 b Rechter Handgriff
 G  Elektronische Blitzgeriite
 d  Objektiv
 e  Entriegelungsschalter   frir die Film-
    Ladekla ppe
  t Film-Ladeklappe
 s  Stativsockel (an der Unterseite der
    Kamera)
 h  Entfern u ngs-MeBstra h len
   I  Drehschalter frir die Abbildu ngsmaBstiibe
  i  Batteriefach (im Ha ndgriff)
 k  Linker Handgriff
   I Sucher
m  Kontrollanzeige
View original page 24Page 25 · Read text
T


   Einlegen des Films                         Die Kontrollanzeige  (1 1)
   Die Kamera verarbeitet selbsttiitig ent-      a Ein-/Ausschalter
   wickelnde Polaroid High Definition Farb-          Drucken Sie diesen Schalter, um die
   Sofortbildfilme. Der Filmtyp 990 wird            Kamera betriebsbereit zu machen. Die
   empfohlen; GridFilm und lmage Filme               Blitzgerdte werden sich aufladen, und
   konnen ebenfalls verwendet werden.           wenn die Kamera aufnahmebereit ist,
   Jeder Filmpack enthSlt 10 Bilder sowie             leuchten die grunen Kontrolleuchten auf.
   eine Batterie, die Strom frir die Belich-         Um die Kamera auszuschalten,  ist der
   tungskontrollen, Blitzgerdte und den                Ein-/Ausschalter erneut zu betAtigen. Die
   Filmtransport liefert. Diese hochemp-            Kamera wird sich auBerdem automatisch
   findlichen (150640/29') Filme sind auf            nach 30 Sekunden ausschalten. wenn sie
   Elektronenbl itz sowie Tageslicht (5.500"K)           nicht benutzt wurde. (Beachten Sie: Die
   ausgerichtet und liefern Farb-Positivauf-          Kamera kann auch durch leichtes Drricken
   sichtbilder.                                   des VerschluBknopfes  in Betrieb genom-
   Drticken Sie den Entriegelungsschalter         men werden.)
   der Film-Ladeklappe; die Klappe wird auf-         Anzeige bei schwachen Batterien
   springen (6).                                Beim Aufleuchten des gelben Kontroll-
   Uberprtifen Sie die Entwicklerwalzen auf            lichtes lSBt die Batterieleistung der im
   Sauberkeit, bevor Sie den Film einlegen.           Handgriff integrierten Batterien nach, und
  Schmutz oder Reste getrockneter Entwick-         die MeBstrahlen werden schwdcher.
   lerchemikalien auf den Walzen kann das            B litzkontrolle/B litza nzeigen
   Auftreten sich wiederholender Punkte            Wiihrend sich die Blitzgeriite aufladen,
   oder Linien auf den Bildern verursachen.             blinkt ein rotes Licht. Es erscheint grrines
   Reinigen Sie die beiden Walzen mit                   Licht, sobald sie aufnahmebereit sind.
  einem weichen, fusselfreien Tuch; falls              Die Blitzgeriite konnen wahlweise an-
   notwendig, mit Wasser angefeuchtet (7).              u nd a usgeschaltet werden.
   Drehen Sie die Walzen beim Reinigen         d  Externer Blitzansch    I uB
  und riberprtifen Sie sie auf Sauberkeit.                                           e  R tickste  ll- Knoof
   Halten Sie den Filmpack an den Kanten,                                                                 Stellt die Kamera auf den nominalen
   mit dem Filmdeckblatt nach oben (8).                                                         Blitzwert und die normalen Hell-/Dunkel-
  Legen Sie den Filmpack vollstdndig in die                                                                 einstel lu ngen zu rrick.
   Film-Ladeklappe ein.                                                     Die Kamera besitzt einen "Soeicher"
4 SchlieBen Sie das Filmfach. Das Deckblatt        und wird zu lhren individuellen Einstellun-
   wird automatisch an der Vorderseite der         gen frir jeden AbbildungsmaBstab auto-
  Kamera ausgeworfen (9).                         matisch zuriickkehren. sobald Sie sie
  Das Bildzdhlwerk wird "10" anzeigen. Es            einschalten.
   zahlt riickwerts. damit Sie die Anzahl der           Hell-/Dunkel-Kontrollen
   verbleibenden Bilder ablesen konnen.            Jede Einstellung stellt die Blitzleistung  fiir
   Entfernen eines leeren Filmpacks                die Belichtung um jeweils lzs Blendenstufe
   Offnen Sie die Film-Ladeklappe, greifen           hoher oder niedriger ein.
   Sie den Streifen am Ende der Packung, und
   ziehen Sie die Packung daran heraus (1O).
View original page 25
Related documents and language editions
PolaroidPDF
POLAROID 220
User manual
37 pages · EnglishRead →
PolaroidPDF
POLAROID 350
User manual
53 pages · EnglishRead →
PolaroidPDF
Polaroid 108 film information
User manual
5 pages · EnglishRead →
PolaroidPDF
Polaroid 110A
User manual
30 pages · EnglishRead →
PolaroidPDF
Polaroid 125
User manual
23 pages · EnglishRead →
PolaroidPDF
Polaroid 135
User manual
25 pages · EnglishRead →
PolaroidPDF
Polaroid 210
User manual
27 pages · EnglishRead →
PolaroidPDF
Polaroid 215
User manual
25 pages · EnglishRead →
PolaroidPDF
Polaroid 225
User manual
29 pages · EnglishRead →
PolaroidPDF
Polaroid 230
User manual
28 pages · EnglishRead →
PolaroidPDF
Polaroid 240
User manual
27 pages · EnglishRead →
PolaroidPDF
Polaroid 3000 Wink Flash
User manual
13 pages · EnglishRead →
From the M. Butkus archive. Original publisher and archive notices are retained.
Check the model and edition against your equipment.
PDF verified 2026-10-10.