Film cameras
Polaroid Miniportrait User manual
User manual for Polaroid Miniportrait. 23 pages in English. Read the original PDF, download or print a copy without registration.
23 pagesEnglish2.4 MB PDF
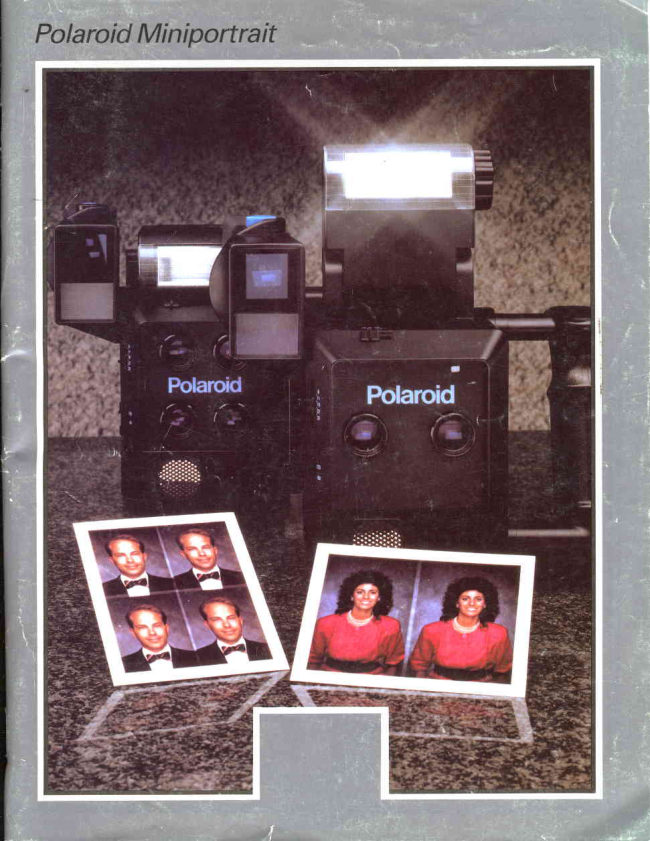
Loading your manual…Open PDF directly
Document details
- Brand
- Polaroid
- Model / document
- Polaroid Miniportrait
- Document type
- User manual
- Language
- English
- Pages
- 23
- File size
- 2.4 MB
- Category
- Film cameras
- Document date
- Not specified in catalog
Search available document text
Find a term, then jump to its page in the original PDF. Image-only pages may not be searchable; check the PDF for exact wording and diagrams.
Page 3 · Read text
Camera parts (Picture 1)
                                                      A. Electronicflashunit
                                                      B. Polaroidpackfilm holderModet73A
                                                   C. Shutterbutton
                                                   D. Viewfinder
                                                      E. Cameracontrols:
                                              Camera onloff swrtch
                                                      Distanceselector
                                                 Lens apertureselector
                                                         Shutterspeed selector


                                                                                                          cn=mike butkus,                mike              DigitallyDN:o=orphancameras,signed by mike butkus       Portraitselector                                                                                                                             ou=29,
                                                                                                                 email=mike@butkus.org,                                                                                                                     c=US       Portraitcounter
                                                                                                                         Date: 2017.10.31 14:54:17 -04'00'                 butkus                Socketfor remoteshutterrelease                                                    Socketfor AC adapter
                                          X (sync)socket
                                                 F. Sonarrangefindertransducer lntroduction                                          G. Tripodsocket(on bottomof camera)
The PolaroidMiniportraiVStudioPolaroid         H. Lenses
Camerasare designedto meeta varietyof                 l. Batterycompartment(insidehandgrip)
 photo-identifcationneeds.Thereare two             J. Handgrip
 differentcameramodels.The Model403 pro-       K. Flashtilt knob
ducesfour portraitson eachsheetof Polaroid       L. Flashcontrols(on backof flash unit):
31/+X41/ain. (8.5x 10.8cm) instantpackf ilm;        Ready light
the Model203 producestwo portraitson each         Filmspeedselector
sheet.                                  M. Flashsync adapter
  The basicoperationis the samefor both
models;theModel403 is featuredhere.The      Accessories
Model203 is shownwhereverthereare impor-
tantdifferencesin operation.                Remote Shutter Release(2): 1m (approx.
 . Poftraitcombinations:Model403 produces     39 in.) long;allowsthe photographerto move
  4 identicalportraits,2 pairsof identicalpor-     aroundand work closelywith the subjectwhile
  traitsor 4 differentportraits;Model203 pro-       takingpictures.(PID# 6124i2)
  duceseither2 identicalor 2 differentportraits.    Supplementary Lenses 78 (3): Producea
. Availablefilms:Colorprints,black& white        smallersubjectsize,allowingyou to include
  printsor black& whiteprintswith usable       morethan one personin each portrait.
  negatives.                              (PrD# 600272)
. Built-inelectronicflash unit;thecameraalso      Film Holder 73A: This holderis shippedwith
  can be usedwith othertypesof lighting.         the Model403 camera;additionalholderscan
. Sonarrangefinder,to ensurethat the camera    be loadedwith differentfilm types for easy                                                                                                       interchangeability.(PlD# 612413)  is at the correctdistancefor sharpfocus and
  correctimagesize.                          Film Holder 73B: Allowsuse of a validation
                                               plate(below).(PlD# 612414\. Film processingtimeron the backof the film
  holder.                                    Film Holder 73C: This holderis shippedwith
                                             the Model203 camera;it is identicaltothe 73A
The numbers throughout the text refer to         film holderexceptfor the locationof the timer.
the pictures on the fold-out pages at the        (PtD# 612415)
back.


                           www.orphancameras.com
View original page 3Page 4 · Read text
ValidationPlate (4): For use withthe 73B Film    camera.A set of batteriesis includedwith the
 Holder;platemay be custom-printedfor more     camera.
secureidentificationpictures.(PlD# 612410)      A fresh set of alkalinebatteriesshouldlast
AC Adapter (5): Enablesthe camerato use         for approx.80 flashes.The flashunitshould
electricalpower,ratherthan batteries.lmpor-      rechargein 10-12sec. with freshbatteries;
tant: The use of other AC adapters may       when the rechargetime reaches30 sec.,
damage the camera.(PlD# 612411for          replacethe batteries.
12O-voltsupply,PID# 612427 tor 2?O-volt        The batterycompartmentis insidethe hand
supply,PID# 612698for 24O-voltsupply,           grip.Openthe lid (7) and insertthe batteriesin
PID# 612559for 1O0-voltsupply)                the orientationshowninsidethe compartment
                                                      (8).Then closethe lid.Auxiliary CameraSync Cord (6): Allowsa                                                                                     lf the camerawill not be usedfor ansecondcamerato be synchronizedwith the                                          extendedperiodof time, removethe batteriescamera.(PID# 612409)                                       and storethem separately,to preventdamage
Flash sync adapter:The adapteris shipped     causedby leakingbatteries.
with the camera.lt is designedto reversethe       Note: An AC adpaptermay be preferredfor
polarityof an externalflashunit,to make it         high-volumeuse (seeAccessories,).
compatiblewith the camera'sbuilt-inflash.
(PtD# 613249)
                                 Model 73A film holder (9)The accessoriesare availablefromyour
PolaroidCameraDealer;or contactthe nearest     A. Darkslide
PolaroidOffice(addresseson back page).         B. Door latch
                                           C. Filmtab slots
                                   - 1 ^    ^      ! !                         D. Cameramountingbrackets            tvo!71             J UCO  !r
                                                   (on backof holder)               Ynl           E.F. TimerFilmdeveloperrollers
Load the batteries
                                 Load the filmThe camerausesfour 1.5voltAA batteries,
which providepowerfor the shutter,electronic    The holdermay be loadedeitherbeforeor after
flashunitand sonarrangefinder.Alkalinebat-            it is attachedto the camera.lf the holderis not
teriesare recommended.Do not use NiCad       attachedto the camera,check that the dark
rechargeablebatteries;theymay damagethe       slideis fullyinserted,to preventfoggingthe film.
                     Pofaroid31/qx41/qin.(8.5x 10.8cm)pack films
                 Speed (approx.
 Film type          ISO equiv.)       Description
 Studio Polaroid     125122'        A medium-speed,medium-contrast,medium grain,
 Studio PolaroidSilk                    daylightand electronic{lashbalanced (5500"K)color
                                          printfilm.
                                     This film yields a positivecolor print with extended
                                         tonal range and lower image contrast. lt is balanced
                                              for use with electronicflash or in average daylight
                                     (5500"K).
 Polacolor100       100/21"          Similar to Polacolor ER film (above) except that it
 Polacolor100 Silk                  producesa higher-contrastprint.
Type107          3000/36"      A very high-speedblack-and-whitefilm, which yields a
 High-speed                          positiveprint.
 Type 667          3000/36'      Same as the above, but prints need not be coated
 High-speed                              after processing.
 Type 665                       A black-and-whitefilm which producesa high-quality
 Pos/Neg                             negative,in additionto a positiveprint.
View original page 4Page 5 · Read text
Pullbothsidesof the latchto openthe door;     Attach the holder to the camera
the doordoes not openflat. Beforeloadingthe                                            Generallythe holderis attachedso the film tabfilm,checkthat the developerrollersare clean                                                  slotsface down (Model403),or to the right(see C/eanthe developer rollers).                                         (Model203).  Always hold the film pack by the edges,not                                            Placethe holderagainstthe backof thein the center.Slidethe pack in at an angle(10),                                         camera,makingsurethat it is properlyseated.then push it down into place.                                     Then engageboth slidinglocks,to gripthe  Checkthat the white tabs are not caught                                           holderfirmly(16).betweenthe pack and the holder(11).Close
and latchthe door,withthe end of the blacktab
stickingout.                        Camera location
  Pullthe blacktab straight,all the way out of                                           Set asidean areafor photography,so thethe holder(12).A smallwhitetab willappear.                                         camera,backdropand subject'schairneednot  The holderis now loaded.Attachit to the                                       be continuallyrearranged.camera,if you have not done so already.
                               Use a tripodNo white tab?
                                     The camerashouldbe mountedon a sturdyOpenthe door and,withoutmovingthe film                                                   tripod,with a risingcenterpost(17).Orientthepack,pushthe whitetab out (13).Then close                                      cameraso that the tripod'sadjustmentleversand latchthe door.                                                           will not obstructthe film tabs as they are pulled
                                              out of the camera.
The film processing timer (14)            The tripodsockethas a removablethread
                                           converter(18);if your tripodhas a largerfas-To set the timer: Pressand holdthe SET                                               teningscrew,removethe converter.buttonuntilthecorrectprocessingtime is
displayed(seethe film instructionsfor recom-
mendedtimes).The timerwill alwaysreturnto     Seatrng the subject (19)
this settingaftera processingcycle.                                   A seat shouldbe providedfor the subject.
To reset the timer to a new time: To reset it       Avoidchairswith high backs,whichmay
to a longertime than is displayed,simplypress     appearin the picture.Adjustthe heightof the
and holdthe SETbuttonuntilthenew time is       cameraso that the lensesare about levelwith
displayed.To resetit to a shortertime:             the eyes of the seatedsubject.
                                            Seat the subjectcloseto the background,to1. Pressthe SETand STARTbuttonssimulta-                                         ensurea lightbackgroundand alsothe small-neously.The presettime is cancelledand zero                                                est possibleshadowbehindhim.is displayed.
2. Pressand holdthe SETbuttonuntilthenew                                The operating distancetime is displayed.
                                      The distancefrom the front of the cameratoTo load/change the timer batteries: lf the                                              the eyes of the subjectshouldbe 1.2m(47 in.).displayor tonesfade,or if the timerstops                                 When usingthe SupplementaryLenses78, thefunctioning,the batteriesshouldbe replaced.                                               correctcamera-to-subjectdistanceis 1.92mThe timerusestwo 1.5 volt GP-89A(or equiva-                                             (76 in.) (See also Appendix: Depth of field.)lent)batteries.
  Slidethe batterycoveropen(15) and inseft
the batteriesas shown.Then replacethe cover.    Turn on the camera
Alwayspressthe SET and START buttons                                      Pushthe switchto "1" to turn on the powerforsimultaneouslyafterreplacingthe batteries.                                              the camera'sshutter,rangefinderand flash unit
                                                  (20).
                                                   ! !
                                                   ! !


                        www.orphancameras.com
View original page 5Page 6 · Read text
Set the cameracontrols                    Note:The rangefinderwill not work whilethe
                                                  flash is recharging;it willwork only if the flash Distance:Set the switchto 1.2or 1.92m(20);                                                               is off or ready.  this sets the rangefinderfor the desired                                             (See also Appendix: Depth of Field.\ distance.
 Film speed: Set the switchto 80 or 3000 (21);    Theviewtinder
  this sets the flashfor the correctamountof light.
                                  When the camerais 1.2m(47 in.)fromthe
 Lens aperture and shutter speed (20): Use       subject,framethe subjectwithinthe fullframe
 the guidelineson the backof the flashunit(21),     (23-A).Wh6n at 1.92m,use the partialframe
 and set as indicated.                             (23-B).
                                         The viewfinderof the Model203 camera
 The electronic flash                        also containsa bar and three dots.These are
                                         used when the subject'sface must be a specific
 The flash unitis designedto provideeven           size in the finishedportrait.
 illuminationand properexposure.To turn on                                                                                                                                                                                                             i
 the     flash,         simply                raise                    the                        flash                       head                                    allthe                              The portraitselector and counter     (221. way        The flash                  turns                            off                    when                               the                             head is
 tifieddown.The flash reflectorshould be        The portraitselector(24) can be set for different
 pointeddirectlytowardthe subject.                  portraits,identicalportraitsor 2 pairsof identi-
   Note: The camera'sshutterand rangefinder     cal portraits(Model403). The portraitcounter
 willnot work whilethe flash is recharging;they     (25) shows the next portraitor pair of poftraits
 will work only if the flash is offor ready.           (Model403). lf the selectoris set for identical
  The cameraalso can be used with other           poftraits,the counteralwaysreads "1".
 typesof lighting(see also Appendix: Alterna-        Model 403: Slidethe portraitselectorto
 tive lighting techniques).                         the desiredsetting.Then set the counterand
                                                  electronicshutteras follows:
 Ihe sonar rangefinder                       1. Turn off the flash.
The sonartransduceron the front of the cam-        2. Makea "blank"exposure:Pushin the dark
era emits sound waves,which bounceoff the       slide (to avoid wastingfilm),then pressthe
subjectand returnas echos.The transducer        shutterbuttonallthe way down.
measuresthe time it takes for the echo to            3. Turn the wheel (25-C)in the directionof the
 return,and calculatesthe distancefrom the        arrowso "1" is visiblein the window.
camerato the subject.                                                  lmportant: Wheneverthe portraitselectoris
   lmportant: Be sure the sound waves from      changedto a differentsetting,the camera must
the transducerhave a clear path to the subject.    be reset as describedabove,to preventpossi-
  To use the rangefinder,look throughthe          ble double-exposures.
viewfinderand pressthe shutterbuttonhalf-         Model 203: Slidethe portraitselectorto the
way. lf the camera is at the correctdistance,      desiredsetting.lt is not necessaryto resetthe
both lightswill be on (23). lf the camera is too       counterand shutter.
close,the left-handlightwill be on; if too far,
the right-handlightwill be on.                               DDO D
    lf the camerais mountedon a tripod,use the
rangefinderonly when settingup for the day's
photography.lt is not necessaryto check the
distancefor every poftrait,althoughyou may
want to check occasionallywhile shooting.
    lf the camerais hand-held,use the range-
finderfor each portrait,to ensurethat all sub-
jects are at the correct distance.


                                                                                                                       .:,xa&e, &,
View original page 6Page 7 · Read text
Takingthe picture               No yellow tab?
          1. Removethe darkslidefrom the film holder     Do not pull anotherwhite tab. Instead,carefully
          (26).                                  openthe holderfar enoughto get a fingeron
                                                        top of the film pack to hold it down (32). Grasp          2. Checkthat the flash ready lightis on. The                                                      the topmostyellowtab, and gentlypull it allthe        camera'srangefinderand shutterwill not work                                            way out and discardit (33). Inspectthe rollers         whilethe flash is charging.                                               and clean them if necessary(see Cleanthe
          3. Framethe subjectin the viewfinder.lf the       developer rollers).Close and latchthe holder,
        camerais hand-held,pressthe shutterbutton      with the next white tab stickingout. (You will
          (27) halfwayto check that the camera is at the     have to reshootthe portraitsthat were on that
          correct distance.                             pieceof film.)
           4. Pressthe shutterbuttonallthe way to take
         the picture.                        Cteanthe developerrollers
                                                                                                           vari-                                                                               a                                                                                       rollers                                                              the developer                                                                  Dirt                                                   on                                                                      can Qause       Processing the titm                                                                             on                                                                        repeated                                                                                  spots                                                       problems                                                             such as                                                          ety                                                                  of
        Model 403: Pullthefilm tabs straightdown         picturesand jammed film. Inspectthe rollers
           (28). lf necessary,bracethe camerawhile       when loadingfilm,and cleanthem as follows.
          pulling.                                      With both hands,lift the steel loops,and
        Model 203: Holdthe camerafirmlyby the        removethe rollerassembly(34). Clean both                                                                 rollerswith a soft, lint-freecloth,dampened        handgrip,whilepullingthe film tabs straight                                                          with water if necessary(35). Or, hold the roller         out (29).                                                 assemblyunderclean runningwater. Rotate
           1. Pullthewhitetab straight,allthe way out of                                                     both rollersas you clean and inspectthem.
          the camera.A largeyellowtab will appear.lf                                                Notethat one rollerturnsmoreeasilythan the
           not, see No yellow tab?                                                            other. Neverscrapethe rollerswith anything
           2. Pulltheyellowtab: Gripthe tab firmly,and       metallic,nor with your fingernail,and never
           pull it straight, at moderate speed, without       attemptto disassemblethe rollers.Also clean
          hesitation,allthe way out of the camera(30).       the film tab slot (36).Then replacethe roller
           3. Startthe timer.The correctprocessingtime     assembly.
         shouldalreadybe set. Pressthe STARTbutton                  D O
         once:the timerwill countdownto zero.At the                   DU
        end of the processingtime, a seriesof short
         toneswill sound.The timerwill resetfor the
          next picture.
           4. Processthe picturefor the fulltimerecom-
        mendedin the film instrudions.Then separate
          the printfrom the negative,startingat the end
         nearestthe yellowtab (31). Informationon
         handlingof printsand negativesis in the film
           instructions.See Cautionnotice.


1


                               www.orphancameras.com
View original page 7Page 8 · Read text
Picturefaults and probablecauses      Very light image or none at all: The film was
                                          foggedor extremelyoverexposed.Do not pull Repeated,evenly-spacedspots: Due to did                                               the blacktab beforeinsertingthe film pack into on the steel rollersin the film holder.                                               the holder,and do not removea loadedfilm
 Missing corners or orange-red marks along      holderfrom the camerawithoutinsertingthe
 edges: Causedby pullingthe yellowtab out of      dark slide. Be sure your exposureis basedon
 the cameraat an angle.                         the correctfilm speed.
 Oblong in print: The whitetab was not pulled      Nearly black or solid black image: Caused
 allthe way out. Whenthe yellowtab was          by insufficientor no exposure.Be sure you
 pulled,that whitetab was pulledback into the      have removedthe dark slide,and that the
 camera.                                  exposureis based on the correctfilm speed.
 Many smallwhite specks: Causedby pulling     Broad streak or curtain-shaped mark: Due
 the yellowtab out too fast. This also can cause      to hesitationor stoppingwhilepullingout the
 pink lines,streaksor blotcheson color prints.      yellowtap
                                                      --< Muddy-looking print: The printwas not proc-                                                                              f                                           Doublxxposure:  The shutterand portrait    \essedlongenough.Underprocessedcolor                                                                 {                                             counterwere not re-setafterthe portraitselec-    \ printsmay be brownishpink.                                                                              \  tor was movedto a differentsetting.--'/                          l
                            uu                                                                            ! n

Depthot field                           you shouldalways use the smallestpossible
                                              lens aperture(highestpossiblef-number).The depth of field,or distancezone within                                        The table shows the approximatedepth ofwhichyour subjectwill be in focus, increases                                                       fieldat the variousf-numbersettings.as you close down the lens aperture.Thus,

                            Approximate depth of field
Aperture         Gameraat47 in. (1.2m)            Cameraat 76 in. (1.92m).
    il8                44-51in.(111-130cm)                 68-85in. (172-217cm)
   il11              43-53in. (108-134cm)                 65-90in. (166-228cm)
   il16               41-56in. (104-142cm)                 61-98in. (156-249cm)
   fl22                39-60in. (99-153cm)                 57-111in. (146-281cm)
  132               36-69in. (91-174cm)                 52-140in. (131-356cm)
.With     SupplementaryLenses78.

Note: The sonar rangefinderhas a much smaller"depthof field", or distancezone withinwhich it
signalsthat the subjectis at the correctdistance.When the camera is set tor 1.2m,this range is
approximately5 in. (12.7cm)and the subjectcan be 44.5-49.5in. (1.13-1.26m)away. When set
for 1.92m,the rangeis approx.7 in. (17.8cm),and the subjectcan be 71-80in. (1.8-2.0m)away.
A small change in distance,such as when the subjectleans forwardslightly,may causethe
rangefinderto signalthat the camera is too close,althoughthe subjectis stillwell withinthe cam-
era's rangeof sharpfocus.The rangefinder's"depthof field" is not affectedby the lens aperture.
View original page 8Page 9 · Read text
Altern ative Ii g hting t*h n iques         The flash sync adapter
                                 Some flash units have a differentpolaritythan
Electronic flash illumination                                              the camera'sbuilt-inflash.The adapter
Use electronicflash with colorfilm or Type 665                                            reversesthis polarity,to allow proper
film.                                             synchronization.
Lightingtechniques:                        To determinewhetherthe adapteris needed
. Directflash:The flash is aimed straightat the     with your flashunit:
  subject.The flash unit shouldhave a guide        1. Plugthe synccordon your externalflash
 numberof at least40 (in feet)for ISO25115"     unitintothe cameraas you wouldnormally.
  film,or 24 (in meters)for ISO 100/21"film                                                   2. Turnon the camera.(lf usingthe camera's  (1400BCPS).                                                   builfinflashin additionto the externalflash. Reflectedflash:Thisgivesa soft light,mini-                                                     unit,raisethe flash,and waitfor the Ready
  mizinglinesand wrinklesand avoidingharsh      lightto go on.)
 shadows.The lightfrom the flash does not                                                   3. Pressthe shutterbutton.The externalflash  strikethe subjectdirectly,but is first reflected                                          shouldfire. (lf the cameraflashwas on, both  from a largediffusingsurface,such as a                                                flashunitsshouldfire.)  white card or a lightingumbrella.Two typical
  set-upsare shown (37,38). You will need a            lf the flashunit(s)did not fire:
  fairlypowerfulelectronicflash unit.                1. Turnoff the cameraand disconnectyour
. See also Basic portrait lighting techniques.      externalflashunit.
                                                   2. Connectthe flashsync adapterto the
Electronic f lash synchron ization             cameraand to the synccordon your external
The flashunit(s)can be synchronizedwith the      flashunit.
camerain one of two ways.Eitherconnectthe                                                    3. RepeatSteps2 and 3 above.The flashflash unit'ssync cord to the "X" socketon the                                                 unit(s)shouldfire.camera,usingthe flashsyncadapterif neces-
sary (see below).O[ rotatethe reflectoron the     Exposure
cameraflashupward,and use it to triggerthe                                           Set the shutterto either 1/60or 1f125sec. Setoff-camera"slave"flashunit(s).                                              the lens apertureas indicatedby the guide
    lf yourflash unitcan be usedfor either                                     numberof yourelectronicflashunitfor the
"manual"or "automatic"operation,alwaysset                                      speedof film you are using.The guidenumber
the controlsfor manualoperation;donot use                                                            will be in the instructionsprovidedwith the
an automatic-onlyflashunit.                                                flashunit.lt will generallyreferto directflash;
                                                       for reflectedflash,open the lens apertureby
                                           two f-stops.
                                     Make a test picture.lf exposurecorrectionis
                                         needed,see below.


                     Exposure correction with electronic flash
         lf the first picture is too dark                                               lf the first picture is too light
    Move lightscloserto subject                     Use a smallerlensaperture
          (seetable below)                                            or
                 or                             Move lightsfartherfrom subject
         Increaselightoutput                                 (seetable below)
      (see flash unit instructions)                                      or
                  or                                  Decreaselightoutput (see
     Use a largerlens aperture                                                \   flashunit instructions)


                        www.orphancameras.com

                                                                                                                                                                                                                                                                                                                                                                                                                                                                                                                                                      l * ; i , r i . . J i , - . . - , " . . , {                       . r   - ; ! - , .           - , . .           . " ; .               . d A . - . - , - l                -  -   b j - J * ; ' i ! . - , . : ! * ;
View original page 9Page 10 · Read text
Tungsten illumination                         the camerato one of the shutterspeed/lens
 With high-speedblackand whitefilms,you can     aperturecombinationsindicatedby the meter.
 use tungstenlighting.Use lampsintended                lf the meter indicatesa settingfor whichthe
 especiallyfor photography,mountedin appro-     cameracannotbe set, then the lightsare too
 priatereflectors.To avoiddiscomfort,keepthe      close or too far from the subject.Adjustthem
 lampsat least2m (6-7 ft.) from your subject.       accordingly.
  See Easic portrait lighting technique.          Make a test picture.lf exposurecorrectionis
                                          needed.see below.
 Exposure
 For initialexposuredetermination,use an
 exposuremeter.Take a readingand then set

                   Exposurecorrectionwith tungstenlighting
         lf the first picture is too dark                                               lf the first picture is too light
     Movelightscloserto subject                     Use a smallerlensaperture
          (seetable below)                                           or
                 or                               Use a fastershutterspeed
     Use a largerlens aperture                                       or
                  or                             Move lightsfartherfrom subject
     Use a slowershutterspeed                               (seetable below)
                                                                       or
                                                     Put diffusersover lamps(see
                                                             instructionswith lighting)


How changing the lamp distance            To maintainthe correctexposurebalance
affects the exposure                         throughoutthe picture,the otherlampsin the
The table below indicatesin f-stopshow the        set-upshouldbe movedcloseror fartheraway
exposurecan be adjustedby movingthe main       in the same proportionas the main lamp. Do
lamp neareror fartheraway from the subject.      not changethe camerato-subjectdistance.

                           ORIGINAL
  Newdistancefor exposure   LAMP-SUBJECT      New distance for exposure
    INCREASEof about        DISTANCE           DECREASEof about
   1 f-stop         1/2 f-stop                        1/2f-stop             1f-stop
      4ft.             5ft.              6ft.                71/2ft.                       81/2ft.
   (1.30m)      (1.50m)      (1.80m)       (2.2om)            (2.60m)
      5ft.               51/2ft.            7ft.                81/2ft.              10 ft.
   (1.50m)       (1.70m)        (2.10m)       (2.60m)             (3.00m)
      51/2ft.               61/2ft.               8ft.                  91/2ft.               11 ft.
   (1.70m)      (2.00m)        (2.40m)        (2.e0m)             (3.40m)
View original page 10Page 11 · Read text
Basic portrait lighting t*hnique         UnitedStatespassport pictures
Four basic lightsare used for completeportrait     Polacolorpicturesmadewiththe Model203
lighting(39).                             camerameetthe requirementsfor United
                                             StatesPassports.(A)MAINLIGHT-for pleasingand effective
"modelling"to the subject'sface. Generally,it
is positionedto one side of the camera,at         The United States Passport Office has
aboutthe angleshown,and pointingdown at        specific photographic requirements. Com-                                                 plete and up-to-date details should bethe subject'shead at an angleof about45'
                                                obtain'edfrom the Passport Office.from the horizontal.lt casts distinctshadows.
This lightshouldbe at least2m (6-7 ft.) from         Film: Use only PolaroidPolacolorinstantfilm.
the subject(40).                             Pose: A head-and-shouldersportrait,showing
(B) FILLLIGHT-to softenthe shadowscast by     a full-face,frontalview.
the main light.This lightis generallyaimedat       Background: The subjectshouldbe seatedin
the subjectfrom near the cameraviewpoint.lts       front of a plainwhite background,
distancefrom the subjectmust be adjusted                                             Subject size: The distancefrom the top of thecarefully,so that it does not eliminatethe                                      headto the chin must be 1lo 13/ein. (Usetheshadowsaltogether,or cast a shadowof its                                             bar and three dots in the viewfinderto verifyown (41).                                               the subjectsize, as follows:Alignthe bar with
(C) RIMLIGHT- to give a pleasinghighlightto       the subject'schin, and checkthat the top of the
the subject'shair,or a rim lightto the shoulder.    head is betweenthe highestand lowestdots.)
ldeally,it shouldbe a smallfocusingspotlight,                                                Picture size: The picturemust be at leastaimed at the subjectfrom behind,and well                                          2x2in.above.Be sure it does not shine straightinto
the camera lens (42).                            Picture handling: Picturesshouldbe allowed
                                                     to dry beforethey are handled.The pictures(D)BACKGROUNDLIGHT-to lightenthe                                   may be cut eitherwith a print cutter(madetobackgroundso the subjectwill standout                                              the requiredsize)or carefullywith a pairofagainstit. Usually,identificationdocuments                                                 scissors.requirea photographwith a lightbackground
(43).
                                            on                                                    oo
Working with fewer lights
You can replacethe fill lightwith a white card
orfoilreflector,as shownin picture(37).The
rim light may not be necessaryfor your
requirements.
    lf spaceis limited,one main light,a reflector
card and a second lightfor the backgroundwill
satisfymost photo-identificationneeds.


                        www.orphancameras.com

                                                                                                                                                                                                                                                                                 . i ; : , " : & , , , . . . - , * - - . - .              -   ; . ^ ; : J               L
View original page 11Page 12 · Read text
Warranty(U.S.A.only)               Caution
Your PolaroidMiniportraitInstantCamerahas      This processuses a causticpaste.Avoidcon-
been thoroughlytestedand inspectedbefore       tact with skin, eyes and mouthand keep away
shipment.All partsare guaranteedagainst        fromchildrenand animals.lf you get some
defectsin materialsand workmanshipfor one      paste on your skin, wipe it off immediately
 full year from the date of originalpurchase.       and wash with water to avoid an alkali burn.
 Duringthis periodany such defectswill be                  lf eye or mouthcontactoccurs,quicklywash
remediedby PolaroidCorporationwithout        the areawith plentyof waterand see a doctor.
chargeexceptfor transportationcosts.To take    Keep discardedmaterialsaway from children,
advantageof this warranty,the cameramust       animals,clothingand furniture.
be repairedby an AuthorizedSeruiceCenter.
  The warrantydoes not includethe batteries,     For more  information
or damagecausedby leakingbatteries.             r^r                                          For additionalassistancein the use of your  TH.SWARRANT'EXCLUDESALL6bruSf_
QUENTIALDAMAGLS.
warranty(outsideu.s.A.)                           l-"*l,i?;1X3:#"#i:1."?n3%jffiy
YourStudioPolaroidInstantCamerahas         Care Center,PolaroidCorporation,
beenthoroughlytestedand inspectedbefore      20.1BurlingtonRoad,Bedford,MA 01730.
shipment.Ali partsare guaranteed                              lf outsidethe U.S.A.,contactthe nearest
agiinst defecisin mateiialsand workmanship     PolaroidOffice(liston backpage).
for one full yearfromthe dateof originalpur-
chase.Duringthis periodany such defectswill                   En                                                                              Etlbe remediediy PolaroidCoiporationwithout
chargeexceptfor transportationcosts.To take
advantageof this warranty,the cameramust
be repairedby an AuthorizedServiceCenter.
  The warrantydoes not includethe batteries,
or damagecausedby leakingbatteries.
  THISWARRANTYDOESNOTAFFECT
YOURSTATUTORYRIGHTS.
Service
Camerasdamagedby accident,mishandling
or tamperingwill be promptlyrepairedat a
reasonablecharge.Pleasepack the camera
carefullyin its originalshippingcartonor other
solid cohtainer,w-ithpleniy'ofpadding,and
ship it prepaidand insuredto the nearest
PolaroidServiceCenter(addresseson back
page).
View original page 12
Page 13 · Read text
o Compte-tempssitu6a la partiepost6rieure
                                       du dos, permettantde controlerla dur6edu
                                         d6veloppement.
                                        Les chiffres repdres figurant dans le texte
                                            renvoient aux diff6rentes illustrations
                                        regroup6essur le d6pliant situ6 en fin de
                                                           livret.
                                      Description (lllustration 1)
                                            A. Flash6lectronique
                                            B. Dos film-packPolaroidModele734
                                          C. Declencheurde I'obturateur
                                          D. Viseur
                                            E. Reglagesde la chambre:
                                                                                    InterrupteurMarche/Arr6t
                                              S6lecteurde distance
                                             S6lecteurdes diaphragmes
                                         Reglagede la vitessed'obturation
                                              S6lecteurde portraits
                                        Compteurde portraits
                                               Prisepourd6clencheursouple
                                                Prisepour adaptateursecteur
                                                PriseX (sync)
                                               F. Transducteurde tel6metreultrasonique Introduction                                        G. Ecroude pied
Les chambresStudioPolaroid/Polaroid       H. Objectifs
Miniportraitsontconguespourrepondreaux         I. Logementde la pile (a I'int6rieurde la
nombreuxdomainesd'applicationde la photo      poignee)
d'identite.Deuxappareilssontpropos6s:le        J. Poign6e
Modele403 d6livre4 portraitsd'identit6par      K. Griffede flash
planchede film 8,5 x 10,8cm (31/+x41/+        L. Commandesdu flash (au dos de ce dernier):
pouces);le Modele203fournitquanta lui          Voyant Pret
2 portraitspar planche.                         S6lecteurde sensibilit6du film
  Les deux moddlesfonctionnentde fagon      M.Adaptateursynchroflash
identique;seul le Modele403 est repr6sent6
ici sauf lorsde diff6rencesimportantesde       Accessoires
fonctionnement.
o Diff6rentescombinaisonspossibles:Modele    D6clencheursouple (21:Longueur:1m.
  403: 4 portraitsidentiques,2 pairesde por-     Permetau photographede se d6placertout en
  traitsidentiquesou 4 portraitsdifferents;       proc6dantaux prisesde vues. (Ref. 612412)
  Moddle2O3.2 porlraitsidentiquesou            Lentilles additionnelles78 (3): R6duisentles
  2 ditterents.                            dimensionsdu sujetet permettentd'inclure
. Diff6rentsfilmsdisponibles:Tiragescouleur,    plus d'une personnepar portrait.(Ref. 600272)
  noiret blancou tiragesnoiret blancavec      Dos film-pack Moddle73A: Ce dos est fourni
  negatifsr6utilisables.                    avecle Modele403;plusieursdos chargesde
. Flash6lectroniqueincorpor6;la chambre       filmsdifferentspeuvent6treinterchanges
  peut aussi6tre utiliseeavec d'autrestypes      facilement.(Ref.612413)
  d'6clairages.                        Dos film-pack Modile 738: Permetd'utiliser
o Tel6metreultrasonique,permettantde       une plaquede validation(au-dessous).(Ref.
  s'assurerque la chambrese trouved une      612414)
  distancecorrecte,pour une bonnemise au
  pointet un formatd'imagesatisfaisant.

                      www.orphancameras.com
View original page 13Page 14 · Read text
I)'os film-pack Moddle 73C: Ce dos livr6 avec   Chargementdes piles
 la chambreModdle203 est identiqueau dos
 73A mais avec un emplacementdiff6rentdu    La chambren6cessiteI'utilisationde quatre
                                                pilesTypeAA/1,5volts,quifournissentle cou- compte-temps.(R6f.612415)
                                               rantd I'obturateu6au flash6lectroniqueet au Plaque de validation (4): Utilisableavec le                                           t6l6mdtred ultrasons.llest recommand6 dos Moddle73B;cetteplaquepeut 6tre grav6e                                                   d'utiliserdes pilesalcalines.Ne pas utiliserde sur commandepour une s6curit6accrue.(R6f.                                                pilesrechargeablesCad/Niqui pourraient 612410)                                   endommagerla chambre.Un jeu de pilesest
 AdaptateurAC (5): Permetde brancherla       fourniavecla chambre.
 chambresur le secteur,au lieud'utiliserdes      Un jeu de pilesalcalinesneuvesconespond
 piles.lmportant: l- utilisationd'un autre type   A environ80 6clairs.Avec des pibs neuves,le
 d'adaptateurpeut endommagerla chambre.    flash doit se rechargeren 10-l2secondes
 (Ref.612411pourun courantde 120volts;        environ.Lorsquele temps de rechargement
 Ret.612427pour un courantde220 volts;          atteint 30 secondes,les piles doivent 6tre
 Ref.612698pourun courantde240 volts;       chang6es.
 Ref.612559pourun courantde 100volts)         Le logementdes pilesest situ6 d I'int6rieur
 Cible de synchronisationde liaison (6):      de la poign6e.Ouvrezle couvercle(7) et intro-
  ll permetd'utiliserun secondappareil,en         duisez les pilesdans ce logement@mme
 synchronisationavecla chambre.(R6f.612409)   indiqu6(8) puis fermez le couvercle.
                                                  Si la chambredoit resterinutilis6ependant Adaptateur synchro flash: Cet accessoire                                      une assez longuep6riode,sortezles pileset fourniavec le mat6rielinversela polaritdd'un                                            rangez-less6par6mentafin d'6viterd'endom- flash ext6rieurpour le rendrecompatibleavec                                     mager la chambresi une fuite se produisaitsur le flash incorpor6de la chambre.(R6f.613249)                                               I'uned'entreelles.
 Vous pourrez vous procurerles accessoires       Note: En cas d'utilisationintensiveilest
 chez votre distributeurde chambresPolaroid,    pr6f6rabled' utiIiser un adaptateur-secteur (voir
 ou en contactantPolaroid(i I'adresseindiqu6e   Accessoires).
 en dernidrepage).


                 Film-packsPolaroid8,5 x 10,8cm (31/ax4%pouces)
                    Sensibilit6
Type de film    (lSO 6quiv.approx.) Description
Studio Polaroid       125122"      Filmsde sensibilit6moyennedonnantun tiragecouleur
Studio PolaroidSoie                    positifd contrastemoyen.lls sont6quilibr6spourla
                                 lumidredu jour et pourle flash6lectronique(5500'K).
Type669/6695/108   80120"     Ces filmspermettentd'obtenirun tiragecouleur
PolacolorER                            positifavecune grandegammede tonalit6set un
                                      faibleniveaude contraste.lls sont6quilibr6spourle
                                    flash6lectroniqueou la lumidredu jour (5500'K).
Polacolor100         100/21"       ldentiqueaux films Polacolorci-dessus,mais il
Polacolor100 Soie                     produit un tirage d plus haut contraste.
Type107            3000/36'      Filmnoiret blancd trds hautesensibilit6
Hautesensibilit6                  produisantun tiragepositif.
Type 667            3000/36'      ldentiqueau pr6c6dentmais ne n6cessitepas
Haute sensibilit6                 de laquageaprdsle d6veloppement.
Type665                            Film noir et blanc produisantun n6gatif
Pos/Neg                              d'excellentequalit6, en plus du tirage positif.
View original page 14Page 15 · Read text
Dos film-pack Modile 73A(9)          Pour r6gler le compte-temps sur un autre
                                      temps de d6veloppement: Pour d6terminer
A. Volet de protection                     un temps sup6rieur,appuyezsimplementsur
B. Loquet de fermeture                            le boutonSET jusqu'd ce que le temps d6sir6
C. Fentesde sortiedu film                     apparaisse.Pourd6terminerun tempsinf6rieur:
D. Verrousde fixation                                                  1. Appuyezsimultan6mentsur les boutonsE. Rouleauxde d6veloppementdu film
F. Compte-temps(sur la paftie post6rieure     SET et START.Le temps pr6-r6gl6s'annuleet                                               lez6ro apparait.  du dos)
                                                  2. Appiyez sur le boutonSETiusqu'Ace que
Chargementdu film                           le temps d6sir6apparaisse.
                                       Pour charger/changer les piles du compte-Le dos peut 6tre charg6avantou aprdsavoir                                         temps: Changezles piles si I'intensit6de6t6 fix6 sur la chambre.S'il n'estpas fix6 sur la                                               I'affichagediminueou si le compte-tempschambre,v6ritiezquele volet de protectionsoit                                                   s'arr6te.Deux piles 1,5 volts GP-89A(oucompldtementins6r6,afind'6viterde voiler                                            6quivalentes)sont n6cessairespour le le film.                                        compte-temps.  Tirezde chaque c6t6 du verrou pour ouvrir                                              Ins6rezles pibs comme indiqu6aprds avoir le couvercle;celui-cine s'ouvrepas totalement                                            ouvert le couverclede leur logement(15). i plat. Avant de proc6derau chargementdu                                         Aprds avoir mis en place les nouvellespiles, film, v6rifiezla propret6des rouleauxde d6ve-                                      appuyezen m€me temps sur les boutonsSETloppement(voir Nettoyagedes rouleaux de                                                    et START.developpementl.
  Tenez toujours le chargeur par le bord et
non par le centre.Inclinez-lepour I'introduire   Commentfixerle dos surla chambre
 (10) puis abaissez-ledans son logement.                                   En g6n6ral,le dos est fix6 sur I'appareilavec   V6rifiezqu'aucunelanguetteblanchene soit                                                 les fentesde sortiedes languettesdirig6es coinc6eentre le dos et le chargeur(11). Fer-                                            vers le bas (Moddle403),ou vers la droitemez et verrouillezle couvercle,I'extr6mit6de                                        (Moddle203). la bande de protectionnoire devant d6passer                                             Fixez le dos sur la partiepost6rieurede du dos.                                                  I'appareilen veillantd ce qu'il soit correctement  Tirezdfondla bandede protectionnoire                                              plac6.Bloquezensuiteles deux verrousafin (12).Une petitelanguetteblancheapparait.                                      de maintenirsolidementle dos en place(16).  Le dos est maintenantcharg6.Fixez-led la
chambresivous ne I'avezpas encorefait.                             Emplacementde la chambre Si la languette blanche n'est pas visible,
 ouvrezle dos en veillantd ne pas d6gagerle     R6servezun espacefixe A la photographie,ce
 film-packde son logementet d6pliezla lan-      quivous permettrade r6glerd6finitivementla
 guetteblancheafin qu'elled6passenormale-    distancedu fondd I'appareiletcelledu tabouret'
 ment (13). Fermezet verrouillezle couvercle.
                                     Fixationsur pied
 Compte-temps(14)                                       La chambre doit 6tre fix6e sur un pied robuste
 Reglage du compte-temps: Appuyez sur le            i cr6mailldre(17). Orientezla chambrede
 boutonSET (reglage)jusqu'itce que le temps    fagond ce que les poign6esde commandene
 de d6veloppementd6sir6apparaisse(pour      g6nent pas I'extractiondu film.
 d6terminercelui-ci,reportez-vousau mode      La chambreest munied'un 6croude fixation
 d'emploidufilm).Aprdsun cyclede d6velop-    6quip6d'unedouillede conversion(18) qu'il
 pement, le compte-tempsretourneraautomati-    suffitd'6terselon le type de pas utilis6.
 quementau r6glagede dePart.


                       www.orphancameras.com                              -l
View original page 15Page 16 · Read text
CommentfaireasseoirIe suiet(19)    T6l6mdtred ultrasons
Pr6voirun sidge pour le sujet. Evitezles sidges   Le transducteuri ultrasonssitu6 d I'avantde
dont le dossiertrop haut pourraitapparaitresur    I'appareil6metdes ondes sonoresqui, en
la photo.La chambredevra 6tre r6gl6ed une     rencontrantle sujet, renvoientun 6cho. Le
hauteurtelle que les objectifssoienten l6gdre    transducteurmesurele temps qu'il faut d l'6cho
contre-plong6epour un sujet assis.             pour reveniret d6termineainsi la distancequi
  Installezle sujet le plus prds possibledu       s6pare I'appareildu sujet.
fond afin d'6claircirce dernieret de r6duireau       lmportant: Veillezd ce qu'il n'y ait pas
maximumI'ombreport6e.                       d'obstacleentre I'onde sonore et le sujet.
                                         Pour utiliserle t6l6mdtre,regardezparle
Distancechambre- suiet                viseuret appuyezi mi-course sur le d6clen-                                            cheur.Si I'appareilesti la bonnedistance,les
La distanceentre la face avant de la chambre    deux voyantsserontallum6s(23); si I'appareil
et les yeux du sujet doit 6tre de 1,2Om            est trop prds, le voyantgauchesera allum6;s'il
(47 pouces).Si I'on utiliseles lentillesaddi-       est trop loin, le voyantdroit s'allumera.
tionnellesTS,ladistanceest port6ed 1,92 m        Si la chambreest fix6e sur un pied, n'utilisez
(76 pouces). (Voir en Annexe: Profondeurde       le t6l6mdtreque pour v6rifierla distancecor-
champ).                                      recteen d6but de s6ancede prisede vue. On
                                           peut en effetse dispenserde faire ce contrOleA
Utilisationde la chambre             chaque prisede vue, ce qui ne vous emp6che                                        pas de faire un contrOlede temps d autre.
Placezle boutonsur "1" pour d6clencher           Si I'appareilest tenu d main lev6e,utilisezle
I'obturateur,le t6l6mdtreet le flash (20).          t6lemdtred chaqueprisede vue pour vous
                                           assurerd'6tre d la bonnedistance.
Rqlage de Ia chambre                    Note: Le t6l6metrene fonctionnepastant
                                      que le flash se recharge;il ne fonctionneraque
Distance:Placezleboutonsur1,20ou 1,92m     si le flash est 6teintou compldtement
(20),ce quirdglerale t6l6mdtresurla distance   recharg6.
d6sir6e.                                           (Voir 6gafementen Annexe:Profondeur
Sensibilit6du fllm: Plae,ezle boutonsur 80     de champl.
ou 3000(21),ce quid6termineraI'intensit6
lumineusedu flash.                    Viseur
Ouverturede diaphragmeet vitessede       Lorsquela chambreest d 1,20 m(47 pouces)
I'obturateur(20):Suivezlesinstructions      du sujet, cadrezle sujet dans la totalit6 du
figurantau dosdu flash(21)et proc6dezaux     viseur(2$A). Quand elle est i 1,92 m
r6glagesindiqu6s.                          (76 pouces),utilisezle cadragepartiel(2$B).
                                          Sur le viseurde la chambreModdle203
 Ftashilt*tronique                          figure 6galementune barreet trois points.lls                                            serventde repdreslorsqueI'on d6sireobtenir
Le flash est congu pour fournir un 6clairage      un visagede taillesp6cifiquesur la photo.
r6gulieret une expositioncorrecte.Pour
d6clencherle flash, ilsuffit d'en relevercom-     S6lecteuret comptenr de portraitspldtementla t€te (221etde I'abaisserpour
I'arr6ter.Le r6flecteurdu flash doit 6tre dirig6     Le s6lecteurde portraits(24) peut 6tre 16916de
sur le sujet.                               fagoni obtenirsur une m€me planchedes
  Note: L'obturateuret le t6l6mdtrene peu-       portraitsdiff6rents,des portraitsidentiquesou
vent pas fonctionnertant que le flash se       deux pairesde portraitsidentiques(Moddle
recharge.                                 4Og).Le compteurde portraits(25) indiquela
   L'appareilpeut 6galement6tre utilis6 avec     successionde portraitsou de paires de por-
d'autrestypes d'6clairages(voir6galementen     traits (Moddlezt03).Sivous ex6cutezdes
Ann ex e: Diffdre ntes tec hni q ues d' ec Iairag e) .      portraitsidentiques,le compteurindiquera"l" .
View original page 16Page 17 · Read text
Moddle403: Placezle s6lecteurde portraits   3. D6clenchezle compte-temps.Letempsde
        surle r6glaged6sir6.R6glezensuitele comp-   d6veloppementd6sir6doit6tred6jd16916.
        teuret I'obturateur6lectroniquecommesuit:    Appuyezunefoissurle boutonSTART;le
         1. D6brayezle flash.                    compte-tempsse remettradz6ro.A la fin du                                         tempsde d6veloppement,unes6riede coups         2. Proc6dezd uneexposition"en blanc".                                                    brefsretentit.Le compte-tempsse rdglepour        Ins6rezle voletde protection(pour6viter                                                          la vuesuivante.       d'endommagerle film)puisappuyezi fondsur                                                      4. D6veloppezla photopendantle temps          le d6clencheur.                                            indiqu€dansle moded'emploidufilm.S6parez         3. Tournezla molette(2$C) dansle sensde                                                ensuitela photodu n6gatifen commengantpar          la fldchejusqu'Ace quele chiffre"1" appa-                                                     I'extr6mit6la plusprochede la languettejaune         raissedansla fen6tre.                                                    (31).Le moded'emploidufilmcontientles
          lmportant:Lorsquele rfulagedu s6lecteur   indicationsconcernantla manipulation
       de portraitsestmodifi6,I'appareildoit6tre        (voirle paragrapheAttention).
       16916commeindiqu6ci-dessus,afind'6viter
       unedoubleexposition.                                   La languettejaune n'apparaitpas        Mod6le203:Placezle s6lecteurde portraits
       en positiond6sir6e.ll n'estpasn6cessairede   Netirez pas suruneautrelanguetteblanche;
          r6-initialiserle compteuret I'obturateur.       maisouvrezsutfisammentle dospourintro-
                                                  duireun doigtafinde maintenirle film-pack
                                                      (32).Attrapezlalanguettejaunela plushaute       Prlsede vues                          puissortez{adoucementet jetez-la(33).V6ri-
 16      1. Sortezle voletde protectiondu dos(26).      liezlapropret6desrouleauxet nettoyez-lessi                                               n6cessaire(voirNettoyagedes rouleauxde         2. V6ritiezquele voyantPr€tdu flashs'allume.                                              ddveloppemenf.)Fermezet verrouillezle dos       Le t6l6mdtreet I'obturateurne fonctionnent                                            aprdsvous6treassur6quela languette        pas'tantquele flashesten coursde charge.                                             blanchesuivanted6passe.(Vousdevrezfaire
         3. Cadrezle sujetdansle viseur.Si I'appareil  unenouvelleprisede vuedesportraitsquise
        esttenuA mainlev6e,appuyezsur le d6clen-  trouvaientsurcettepartiedu film).
       cheurd mi-course(271pourv6rifierque
         I'appareilestA la bonnedistance.          Nettoyagedes rouleaux
         4. Pourprendrela photo,appuyezi fondsur   de d6veloppment          le boutonde I'obturateur.
                                          Lessaletdsse trouvantsurlesrouleauxde
                    BE                   d6veloppementpeuvententrainerdiverspro-
                      E O                   bldmestelsquedestachesr6p6t6essurles
                                          imageset un bourragedu film.V6rifiezla      D6veloppement                     propret6desrouleauxlorsquevouschargezle
      Modde 403:Sortezle filmen tirantbiendroit     filmet, si n6cessaire,nettoyez-lesen proc6-
        surleslanguettes(28).Si n6cessaire,immobi-   dantcommesuit.
         lisezI'appareilpendantcetteop6ration.         Relevezdesdeuxmainslesbouclesm6talli-
                                           queset sortezles rouleaux(3a).Nettoyezles       Moddle203:TenezfermementI'appareilpar                                          deuxrouleauxA I'aided'unchiffondouxnon          la poign6elorsde I'extractionbiendroitedes                                              pelucheux,humect6si n6cessaire(35)ou        languettes(29).                                          passezlesrouleauxd I'eaucourante.Faites
         1. Sortezla languetteblanchede I'appareilen    tournerlesrouleaux,touten lesnettoyant,et
          la tirantbiendroit.Unelanguettejauneappa-    inspectez-les.NotezqueI'undesdeuxrou-
          raitalors.Sinonvoirle paragrapheintitul6La     leauxtourneplusfacilementque I'autre.Ne
        languettejaunen'apparaitpas.                grattezjamaislesrouleauxA I'aided'unobjet
         2. Tirezsurla languettejaune:Tenezsolide-    m6talliqueou avecvosongles,et n'essayez
       mentla languetteet sortez{ade I'appareil      jamaisde less6parer.Nettoyez6galementla
       en tirant droit, i vitesse mod6r6eet sans      fentede la languettedu film(36).Puisremettez
        t-coups (30).                               lesrouleauxen place.


                             www.orphancameras.com
3"-
View original page 17Page 18 · Read text
Imagesd6f*tueuses et causes       Eprcuve trls pale ou complOtement
 probables                               blanche: Le film a 6t6 voil6 ou consid6rable-"
                                       ment surexpos6.Ne pas retirer la bande
 Tachesr6p6t6eset r6guliOrementespa-      amorcenoireavant de placerle film-packdans
 c6es:Duesd dessalet6ssurlesrouleaux        I'appareil,nisortirle dos de I'appareilsans
 m6talliquesdu dos.                             avoir remis le volet. Assurez-vousque vos
 Coinsnon d6velopp6sou tached'un rouge    r6glagesd'expositioncorrespondentbien d la
 orang6le long des bords:La languettejaune   sensibilit6du film utilis6.
 a 6t6extraitede travers.                    Epreuve trds fonc6e ou complitement
 Marqueoblongue:La languetteblanchen'a      noire: Le filmest insuffisammentexpos6ou
 pas6t6compldtementextraitede I'appareil.De   non expos6.Assurez-vousque le volet de
 ce fait,lorsquevousaveztir6 la languette        protectionsoit bien enlev6, et que les r6glages
 jaune,la languetteblanchea 6t6entrain6eA      d'expositioncorrespondentbien d la sensibilit6
  I'int6rieurde I'appareil,endommageantainsila   du film utilis6.
 photo.                                    Larges bandes ou zones: C'est le r6sultat .
 Quantit6de petitspointsblancs:lls indi-      d'une h6sitationou d'un arr€t i I'extractibnde
 quentquela languettejaunea 6t6extraitetrop    la languettejaune.
 rapidement.Uneextractiontroprapidepeut       Ilouble exposition: Les re{lages de I'obtura-
 aussiprovoquerdeslignesroses,destrain6es   teur et du compteur de portraitsn'ont pas 6t6
 ou desmarbruressur les6preuvescouleur.     modifi6sen m6me temps que celuidu s6lec-
 Epreuvemoutonn6e:L'6preuveest insuffi-      teur de portraits.
 sammentd6velopp6e.Lesous-d6veloppement
 se traduitavecle filmcouleurpardes6preuves                                                  17
 d dominantemarron/rouge.
                            EE
 Profondeurde champ                   jours int6r6ti travailleri une ouvertureaussi
                                                     petite que possible (c'est-i-dire au nombre f/ le
 La profondeurde champ,quiestla zonedans    plus 6lev6).
 leslimitesde laquellele sujetphotographi6      Le tableauci-aprdsdonne la profondeurde
 restenet,estd'autantplusgrandequeI'ona     champ approch6epour I'ouverturede dia-
 ferm6le diaphragme.De ce fait,on auratou-    phragmeutilis6e.

                         Profondeur de champ approximative
                          Appareili1,20m                     Appareili 1,92m
Diaphragme                 (47 pouces)                         (76 pouces).
     It8                111-130 cm (44-51pouces)            172-217cm (68-85pouces)
    fl11               108-134cm (43-53pouces)            166-228cm (65-90pouces)
     il16                104-142 cm (41-56 pouces)            156-249cm (61-98pouces)
     ft22                 99-153 cm (39-60pouces)           146-281cm (57-111 pouces)
    il32                91-174cm (36-69pouces)          131-356cm (52-140pouces)
  *Avec        les lentillesadditionnelles78.
 Note: En raisonde son extr6mepr6cision,la profondeurde champ ou zone dans laquellele
 t6l6mdtresignaleque le sujet est d une distancecorrecteest infime.LorsqueI'appareilest16916
 sur 1,20 m, cettezone est d'environ12,7cm (5 pouces)et le sujet peut se trouvera 1,13- 1,26 m
 (44,5- 49,5 pouces).Quand la chambreest regl6esur 1,92 m, la zone est d'environ17,8cm
 (7 pouces)et le sujet peut 6tre a 1,80-2,O m (71- 80 pouces).Un petitchangementde distance
 d0 par exemplei une l6gdreinclinaisondu sujetvers I'avantpeut 6tre signal6 par le t6l6mdtre
 @mme une erreurde distance,m6me si le sujet est bien dans la zone de profondeurdechamp
 (zonedans laquelleI'imagerestenette).
View original page 18Page 19 · Read text
Ditf6rentestechnigues d'*l ai rage       la polaritepourpermettreune sychronisation
                                           appropri6e.Eclairage au flash 6lectronique                                        Poursavoirsivous avez besoinde I'adapta-Utilisezle flash6lectroniqueavec les films                                               teur avecvotreflash:couleurou le type 665.
                                                  1. Raccordezle cordonde synchrode votreTechniquesd'6clairage:                                              flasha la chambrecommevous le faites
. Eclairagedirect:Le flash est dirig6sur le        habituellement.
  sujet. Le flash doit comporterun nombre                                                2. Mettezla chambreen marche(sivous  guide d'au moins 24 (en mdtres)pour les                                                   utilisezle flashincorpor6de la chambreavec  filmsde 1OOl21'ISOou 40 (en pieds)pour                                             votreflash,basculez-leen positionverticaleet  lesfilms de25115"ISO (1400BCPS).                                          attendezque le t6moinlumineuxPrdtsoit
. Eclairageindirect:Cettetechniquepermet      allum6).
  d'obtenirune lumidredouce qui att6nueles                                                   3. D6clenchez.Votreflash ext6rieurdoit  contourset les ridesen 6vitantles ombres                                                    "partir"(si le flashincorpor6de la chambre  dures. La lumidredu flash ne doit pas frapper                                                    6taiten marche,les deuxflashes'doivent  directementle sujet mais 6tre r6fl6chie                                              6claireren m6metemps).  d'abordpar une grandesurfacediffusante
  tellequ'uneplaquede cartonblancou,         Si le(s)flash(es)ne part(ent)pas:
  mieux,un parapluie.Les deux montages        1. EteignezI'alimentation6lectriquede la
  sont illustr6sen figures37 et 38. llest n6ces-   chambreet d6branchezle cordonde synchro
  saire,par ailleurs,de disposerd'un flash       du flashext6rieur.
  6lectroniqueassez puissant.                                                   2. BranchezI'adaptateurdans la prisesynchro
. Voir 6galemenl Principesd'6clairagepour     de la chambreet reliezle cordonde synchro
  le portrait.                             du flash.
Synchronisation f lashes 6lectroniques          3. Recommencezles op6rationscomme
de studio                                    indiqu6en paragraphe2 et 3 ci-dessus.Le(s)
On peut procdderde deux manidres:soit          flash(es)doi(ven)tpartir.
brancherle cordonde synchronisationdu flash
pilotesur la prisesynchro"X" de la chambre,     Exposition
soit tournervers le haut le r6flecteurdu flash      R6glezI'obturateursur 1/60dmeou
incorpor6dont l'6claird6clencheraautomati-   1/125dmede secondes.R6glezI'ouverturedu
quementles autresflashesde studiogrAced     diaphragmeen vous basantsur le nombre-
leur celluled'auto-d6clenchement.            guide du flash 6lectroniqueselon la sensibilit6
  Si le(s)flash(es)peu(ven)t6tre utilis6(s)      du film utilis6.Le nombreguideest indiqu6
en "manuel"ou en "automatique"utiliseztou-    dans le mode d'emploifournipar le construc-
jours la positionmanuelle.Ne pas utiliserde       teur du flash. ll est valablepour le flash direct;
flash(es)exclusivementautomatique(s).        pour le flash indirect,ouvrezde deux dia-
                                      phragmessuppl6mentaires.
Adaptateur synchro f lash                        Faitesune photod'essai.Si cela est n6ces-
La polarit6de certainsflashespeut diff6rerde      saire,corrigezI'expositioncomme cela est
celledu flashincorpor6.l-adaptateurinverse      indiqu6ci-dessous.

                   Gorrection de I'exposition pour le flash 6lectronique
Si la premidre photo est trop sombre                    Si la premidre photo est trop claire
  Rapprochezles projecteursdu sujet                 Fermezdavantagele diaphragme
        (voir tableauci-dessous)                                 ou
              ou                                   Eloignezles projecteursdu sujet
  Augmentezla puissancede l'6clair                            (voirtableauci-dessous)
    (voirle moded'emploiduflash)                              ou
             ou                               R6duisezla puissancede l'6clair
   Ouvrezdavantagele diaphragme                         (voirle moded'emploiduflash)


                      www.orphancameras.com
View original page 19Page 20 · Read text
Eclairage au tungst6ne                        Exposition
   Avec les filmsnoiret blanc,de hautesensibi-    Pourd6terminerle tempsde posede base,
     lit6,ilest possibled'utiliserun 6clairageau         utilisezun posemetre.En fonctiondes r6sultats
   tungstdne.N'employezque les lampes6tu-      de lecture,r6glezI'obturateuret le diaphragme
   di6espour la photographieet mont6esdans     de l'appareil.Si le posemdtreindiquedes
   des r6flecteursappropri6s.Pour 6vitertoute    tempsde poseou des ouverturesde
   g6ne,placezles lampesd au moinsdeux       diaphragmequi ne figurentpas sur la chambre,
   mdtres(6-7pieds)du sujet.                      c'estque les 6clairagessont plac6strop pres
     Yoi Principesd'6clairage pour le portrait.     ou trop loin du sujet.
                                               Faitesuneprisede vue d'essai.Si une
                                                correctionest n6cessaire,voir ci-apres.

                    Correctionde I'exposition pour 6clairageau tungstdne
Si la premidre photo est trop sombre                    Si la premidre photo est trop claire
 Rapprochezles projecteursdu sujet                 Fermezdavantagele diaphragrne
       (voirtableauci-dessous)                                ou
             ou                             Augmentezla vitessed'obturation
  Ouvrezdavantagele diaphragme                             ou
             ou                        Eloignezles projecteursdu sujet(voirtableauci-dessous)
   R6duisezla vitessed'obturation                              ou
                                        Placezles diffuseursdevantles lampes(voir le mode
                                                   d'emploifourniavecvotreeclairage)


   Influence de la distance 6clairage/sujet       du projecteurprincipal.Pour conserverun
   sur I'exposition                               6clairage6quilibr6sur I'ensemblede la photo,
   Le tableauci-dessousindiquedans quelles              il convient,selon le cas, d'6loignerou de rap-
   proportions(exprim6esen diaphragmes)        procherles autresprojecteursdans les m6mes
    I'intensit6de la lumidretombantsur le sujet       proportionsque le projecteurprincipal.Ne pas
   peut 6tre modifi6epar le simpled6placement    changer la distanceappareil-sujet.


                              DISTANCE
     Nouvelledistance pour        PROJECTEUR-SUJET     Nouvelledistance pour
AUGMENTERI'expositiond'environ      AU DEPART      DIMINUERI'expositiond'environ
  1 diaph.                1/zdiaph.                                   1/zdiaph.            1 diaph.
   1,30m             1,50m           1,90m           2,20m             2,60m
   (a pieds)              (5 pieds)           (6 pieds)         (7 % pieds)          (8 % pieds)
   1,50m            1,70m           2,10m           2,60 m              3,00m
   (5 pieds)            (5 % pieds)         (7 pieds)         (8 % pieds)          (10pieds)
   1,70m             2,00m           2,40m          2,90m             3,40m
  (5 % pieds)          (6 % pieds)        (8 pieds)        (9 % pieds)         (11pieds)
View original page 20Related documents and language editions
PolaroidPDF
POLAROID 220
User manual
37 pages · EnglishRead →
PolaroidPDF
POLAROID 350
User manual
53 pages · EnglishRead →

PolaroidPDF
Polaroid 108 film information
User manual
5 pages · EnglishRead →
PolaroidPDF
Polaroid 110A
User manual
30 pages · EnglishRead →
PolaroidPDF
Polaroid 125
User manual
23 pages · EnglishRead →
PolaroidPDF
Polaroid 135
User manual
25 pages · EnglishRead →
PolaroidPDF
Polaroid 210
User manual
27 pages · EnglishRead →
PolaroidPDF
Polaroid 215
User manual
25 pages · EnglishRead →
PolaroidPDF
Polaroid 225
User manual
29 pages · EnglishRead →
PolaroidPDF
Polaroid 230
User manual
28 pages · EnglishRead →
PolaroidPDF
Polaroid 240
User manual
27 pages · EnglishRead →
PolaroidPDF
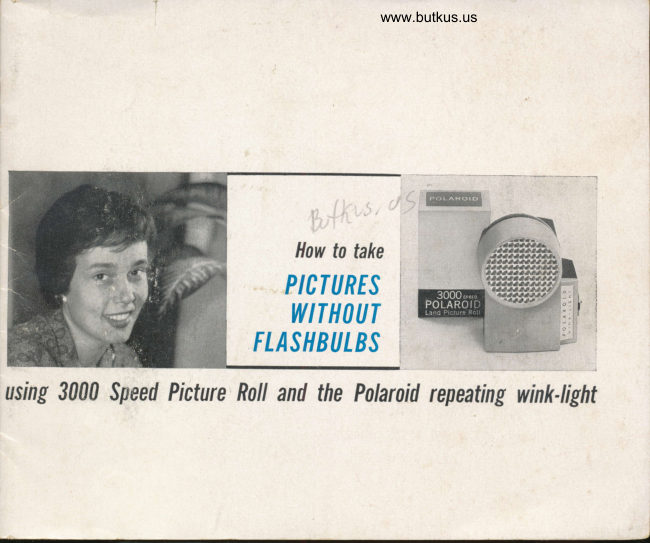
Polaroid 3000 Wink Flash
User manual
13 pages · EnglishRead →
From the M. Butkus archive. Original publisher and archive notices are retained.
Check the model and edition against your equipment.
PDF verified 2026-10-10.