Film cameras
Polaroid Swinger Model User manual
User manual for Polaroid Swinger Model. 24 pages in English. Read the original PDF, download or print a copy without registration.
24 pagesEnglish3.3 MB PDF
Loading your manual…Open PDF directly
Document details
- Brand
- Polaroid
- Model / document
- Polaroid Swinger Model
- Document type
- User manual
- Language
- English
- Pages
- 24
- File size
- 3.3 MB
- Category
- Film cameras
- Document date
- Not specified in catalog
Search available document text
Find a term, then jump to its page in the original PDF. Image-only pages may not be searchable; check the PDF for exact wording and diagrams.
Page 2 · Read text
www.orphancameras.com


            ColourSwinger
            ColourSwingerll
           SuperColourSwinger
           SuperColourSwingerll
View original page 2Page 3 · Read text
www.orphancameras.com
KNOW YOURCAMERA                                        L I G H T E N


                                           DARKEN


               ao
       M


                 www.orphancameras.com


The camera shown above is the supERcolouR swtNGERn.
The chart below describesthe features of the four camera models.
                                               Film   Development Tripod
 CameraModel                Film Types    Selector    Timer     Mount
  Super                      88 colour
  Colour Swinger ll            & 87 b/w       yes        yes       yes
  Super                      88 colour
  CofourSwinger             & 87 b/w       yes       No        yes
  colour Swinger ll             88 colour      No        yes      No
  Colour Swinger              88 colour
View original page 3Page 4 · Read text
www.orphancameras.com
 LIST OF CAMERAPARTS
    Back lock                                           t .  Flash cube socket and shield
    Yellowtab slot                         J .  T-handle
    White tab slot                   K .  Film Selector
    Developmenttimer                     (SuperColourSwingerll and
    (SuperColourSwingerll and            Super ColourSwingeronly)
    ColourSwingerll only)                  L.  Viewfinder
    Shutter releaseand lock         M . Developerspreader
    Lens ring and distancescale        N .  Battery holder
    Lens (3-element,II4mm,  f /9)        o. Tripod mount
     Electriceye and                        (SuperColourSwingerll and
   LIGHTEN/DARKENcontrol                Super ColourSwingeronly)
                                          P. Cameraserialnumber


FOURIMPORTANTPOINTSTO REMEMBER

 1. FILM: Your camera model will take only the film or films indicatedbelow. Each
film pack makes8 prints,3Ycx33/ein. (approx.8.2x 8.6 cm).
  Camera Model              You can use the PolaroidLand films indicated
  Super ColourSwinger.ll
  & Super Colour Swinger       Type 88'3 golour and Type 87 black and white
  Colour Swinger ll
  & Colour Swinger                     Type 88'r.colouronly
'r'The new, improved Polaroid Polacolor 2 Land film, Type 88.,

        Use regular flashcubes(range 4-10  ft.; L2-3m) or Hi-Powercubes (range?.-f!4Sttr
4-I4  ft.; L2-4.5m). Do not use Magicubes.
3. BATTERIES:Both daylight and flash pictures are dependent on good batteries.
Alkalinebatteriesare recommended.Change them whenevernecessary,or at least
once a year (see page 16).
4. lN CASE OF TROUBLE:lf you are unable to get good pictures,this may be due
either to a fault in the camera, or to incorrect operation of the camera. Before you
send your camera in for repair, pleasewrite to CustomerService,giving full details
of the trouble, or call us (for full details,see page 23) so that we-may-discussthe
problemwith you.


FLASHSAFETYPRECAUTIONS:Never use flash closer than 4  ft. (1.2m) from your
subject;nevershoot flash picturesin explosiveatmospheres.
View original page 4Page 6 · Read text
www.orphancameras.comTHE DEVELOPMENTTIMER

 The sUPERcolouR swtNGERl and the
 colouR swtNGERlr modelshavea develop-
 ment timer.  lt helps you develop your
 picturesfor the right length of time.

 To set the timer: Wind the arrow clockwise
 to the red dot (A); be sure it stays there.
 Then turn the number ring so the desired
 time is at the point of the arrow.
 To start the timer: Push thg button (B)
 away from srART.
  Never try to turn the arrow counter-
 clockwise-  you will damage the works.
 lf you haveturned the arrow too far, start
 the tim er and let it run for a few seconds.
 and then reset it.


THE SHUTTERLOCK
The shutterreleasebutton shouldbe lockedwhen the camera
is not in use. To lock the button, turn  it clockwise.This is
recommendedbecausesteady light pressureon the shutter
button could depressit enough tb diain the batteries.lf the
batteriesare weak or dead,the shutter and f lash will not
operate.


      Give earth
       a chance , !
            , , . please
      don't litter.
View original page 6Page 7 · Read text
www.orphancameras.com
        HOW TO LOAD FILM

           Alwaysdo this in the shadeor in dim light,
             not in direct sunlight,to avoidfoggingthe
              film.

              1. Openthe package:Handlethe f ilm bag
             carefully and only by the edges.Tear the
           bag along the dotted line and removethe
            pack. Hold it only by the edges.
             Pleasebe sure to read the f ilm instruc-
              tion sheet carefully.

              2. Unlock and open the camera back:
          Push up both ends of the back lock and
          open the back all the way.

              3. Insertthe pack: Hold the film pack by
            the edgesas shown. Push the closedend
              of the pack under the light shield (A)
            againstspringtensionand then push the
           pack down into the camera.
           On somecolourf ilm packsyou may f ind
             instructionsadvisingyou to set the lrcHr-
         EN/ DARKENcontrol one mark toward
          LfcHrENfor all pictures made with that
            pack. Please follow that advice; it  is
            important.


              4. Checkthe white tabs: Be sure that they
            are not caught betweenthe pack and the
          camera.


              5. Closeand lock the back: Hold the back
           closed and push down on the centre of
            the lock ( B). The black tab (C) on the
             safetycover must stick out in front of the
             lock.
View original page 7Page 8 · Read text
www.orphancameras.com
 6. Grip the black tab: Hold the camera
 by the T-handleand get a grip on the
 blacktab. The btacktab is th; ehOof the
  safety cover.
 7 . Pull the safety cover all the way out
 of the camera: pull  it straight unO be
 carefulnot to rip it.


 8. Lookfor the white tab: When the safety
 coveris removed,a white tab (A) should
 stickout of the small slot next to the lock.
  lf you can see a white tab, you-   are now
 readyto take picture No. l.


                                                                                                                            www.orphancameras.com


 IF NO WHITETAB APPEARSWHEN
YOU PULL OUT THE SAFETYCOVER
 lf there is no white tab in the slot, do
the followingin the shadeor indoors,but
not in bright sunlight:
 l. Unlock the back of the cam era, open
it part way and, without disturbing or
movingthe film pack,push the whitJtab
out into the open.

2. Closeand lockthe back of the camera,
makingsure that the white tab is outside
and in front of the lock.
View original page 8Page 10 · Read text
www.orphancameras.comSET THE LENS FOR DISTANCE
For 75 speed film: For most pictures of
people,set the lens to 5 ft. (1.5m). Use
the ColourSpot in the viewfinderto place
your subjectat this distance(see below).
  For other distances,always measure
and set the lens to the right mark. For
the sharpestpictures of distant scenes,
turn the lens to oo.

For 3000 speed film: For almost all pic.
tures,turn the lens to 5 ft. (1.5m); every.
thing f rom about 3 ft. (90 cm) to fa r away
will be in focus. For the sharpestpictures
of distant scenes,turn the lens to oo.


THE COLOURSPOT
The Colour Spot (shown right) enables
you to placemost people5 ft. (1.5m) away
f rom the camera.To use, placethe spot
overyour subi:ct's f ace. Back up or move
closeruntil the spot coversyour subject
from the top of the head to the chin. Set
the lens to 5 ft. (1.5m).
  With groups,try to haveeveryoneabout
the same distance away and use the
ColourSpot on one f ace for 5 ft. (1.5m).
  Do not use the Colour Spot with small
childrenor pets;measurethe distancein
some other way.
View original page 10
Page 11 · Read text
www.orphancameras.com


  HOW TO TAKE A PICTURE              Shoot:Hold the cameraas shown,so your
                                                  right thumb stops your forefinger from
   Aim: Frame your subject as you want it    pushingthe camera down. Pressthe red
   to appear in the finished picture. Your    button smoothlyand slowlywithout mov-
   subject's face need not remain in the    ing the camera.Hold the button down for
   ColourSpot when you take the picture.    about a second,then let it come up.


1 0
View original page 11Page 12 · Read text
www.orphancameras.com
FLASH PICTURES

This camera uses regularflashcubesor
Hi-Powercubes.Eachcube containsfour
f lashbulbs.
Swingout the shield(A).This uncovers
the flashcubesocket(B).

Insert and wind: A new cube goes in at
a 45 degreeangle.Pressit into the socket
firmly, then turn it clockwiseas far as it
will go to wind up the spring motor. lt
will stop with one bulb pointingstraight
ahead.After each f lash the spring motor
turns the cube to the next good bulb.
After the fourth flash the cube stops at
a 45 degreeangle.
    lf you insert a partly used cube, wind
up the motor and place the cube so a
new bulb points straight ahead and a
used bulb points straightdown.
  To removea cube, pull it straightout.


FLASHRANGE

This camera gives best flash pictures
when your subjectis about 5 ft. (1.5m)
away f rom the camera.
  The flash range extendsf rom 4 to 10
 ft. (L.2 to 3m) with regularflashcubes;
from 4-I4  ft. (I.2-4.5m) with Hi-Power                                'tar                         away,yourcubes.lf your subjectrs too
pictureswill be too d ark. Do not take f lash
picturesf rom closerthan 4  tt. ( 1 .2m).


                                                                            1 1
View original page 12Page 13 · Read text
www.orphancameras.com
 HOWTO DEVELOPYOURPICTURE

  IMPORTANT:The film tabs must be
   pulled out of the camera straight to as'
   sure proper picture development.

   Set the developmenttimer now, if your
   camera has one. Do not start it yet.

   FIRST,PULL THE WHITE TAB OUT OF THE CAMERA


                                                                                                              Digitally signed by mike butkus
                                                                                   DN: cn=mike butkus,              mike           o=orphancameras, ou=29,
                                                                                          email=mike@butkus.org, c=US
                                                                                                 Date: 2017.10.31 15:42:04
                                                                                                            -04'00'               butkus
      l.  Let the camerahang freely: Don't hold     2. Pull the white tab (B) all the way out
   onto the camera body! Use the T-handle    of the camera: This causes a yellow tab
   (A), as shown.                            (C) to pop out of a narrow door in the
                                      end of the camera.Be sure that the neck
                                             strap of the camera does not block the
                                           tab slot during tab pulling.

                                                IF A YELLOWTAB DOES NOT COME
                                  OUT, DON'T PULLANOTHERWHITE
                                      TAB!

                                                   Dirt in the developerspreadermay cause
                                            the yellow tab to get jammed. First, re-
                                  move the jammed yellow tab, as shown
                                       on page 15. Then clean the developer
                                         spreader(see page I7).

                              NEVERPULL A WHITE TAB IF YOU
                               CAN SEE A YELLOWTAB, OR YOU
                                    WILL CAUSEA JAM!

                                                                            lf you accidentallypull a white tab while
                                           a yellow tab is showing,don't pull an-
                                              other. Instead,followthe steps shown on
                                     page 15.
T2
View original page 13Page 14 · Read text
www.orphancameras.com


THEN, PULLTHE YELLOWTAB OUT


3. Grip the center of the yellow tab.         4. Pull the yellow tab all the way out of
                                         the camera: Pull straight and smoothly,
                                             at medium speed,without slowingdown
                                           or stopping.lf you do not pull straight,
                               someof the pictureareamay not develop.

                             THE PICTUREIS NOW DEVELOPING
                              OUTSIDETHE CAMERA,SO START
                               TIMING DEVELOPMENTRIGHTAFTER
                              PULLINGTHE TAB OUT.


                                         NEXT PAGE,PLEASE                                                                    13
View original page 14Page 15 · Read text
www.orphancameras.com
                                                   5. Developthe picture for the full time
                                           given in the film instruction sheet: Let the
                                                 film hang from the yellow tab without
                                       moving,or lay it down flat.
                                             Don't touch or bend the part (A) where
                                            the picture is developing.

                                                   6.  Lift off the print: After the f ull develop-
                                    ment time, r?pidly strip the print from
                                            the negative, starting at the end  ( B)
                                         nearest the yellow tab. Never allow the
                                                print to drop back onto the damp nega-
                                                    tive.
                                          Avoidcontactwith chemicalsleft on the
                                          negativeafter the print is removed.Fold
                                            the negative,moist side in, and discard
                                                                            it. Pleasereadthe cnunoN notice,page23.


                              CAREOF PICTURES

                                   A colourprint will be slightlymoistat f irst,
                                         so don't touch the surf ace  f or a  f ew
                                         minutes.lt will hardento a tough glossy
                                                                                     f inish.
                                                                                  lf the print curls after you lift it off the
                                            negative,do not try to straighten it; you
                                  may crack or otherwisedamage the pic-
                                               ture. lt will straightenout in about an
                                          hour, dependingon the humidity and
                                      tem perature.


                              FOR COPIESAND ENLARGEMENTS

                                         Contactyour dealeror the nearestPolaroid
                                                  office (see last page for addresses).
                                           For best copiesand enlargements,you
                                      must start with sharplyfocused,well ex-
                                     posed pictures.Pick colour pictureswith
                                            plentyof colourin them. Avoidscratching
                                               or    f ingerprinting your  pictures. Re-
                                  member -  the betterthe originalpicture,
                                            the better the copy or enlargement.


I4
View original page 15Page 16 · Read text
www.orphancameras.com IF NO YELLOWTAB APPEARSWHEN
YOU PULLTHE WHITETAB, STOP!
Do not pull a nother white ta b. Instead,
do the followingin the shadeor indoors:
 1. Carefu lly open the camera back with-
out movingthe pack.You can use a pencil
point to make sure the pack does not
move.


2. Take hold of the yellowtab that failed
to come out through the slot. Still beingcareful not to move the pack, gently pull   I
the yellow ta b a ll the way out of the
cameraand discardthat pieceof film. Do
not try to save it.

3. Whilethe back is open, checkthat the
developerspreaderand the yellow tab slot
are clean. lf necessary,clean them as
shownon page 17 .

4, Closeand lock the camera back, mak-
ing sure that the next white ta b (A) is
outsideand in front of the lock (B), as
shown.


IF YOU ACCIDENTALLYPULL TWO
WHITETABS IN A ROW
You will get two yellow tabs out at the
same time. Both piecesof film will be
ruined,and unlessyou are careful,you
may lose a third picture.
  Do not open the camera. Grip both
yellowtabs firmly, pull them both out
together,and discardboth piecesof film.
This may cause developerto be spread
around the inside of the camera back.
Openthe backof the cameraand, without
disturbingthe film pack,cleanthe camera
as shownon page 17.
View original page 16
Page 17 · Read text
www.orphancameras.com
                             CHANGEBATTERIESEVERYYEAR
                                       There are two batteries to operate the
                                            shutter and to fire the flashcube.lf they
                                           get weak you will get all-blackpictures.
                                                                                   I f you are not sure of the condition of
                                            the  batteries, test them as explained
                                         below, and change them if necessary.In
                                       any  event, the  batteries should be
                                     changed at least once a year.
                                      The battery holder and batteries are
                                   marked with plus + and minus -  signs
                                                  to show how new batteries should be
                                            inserted.
                                      Take hold of the finger grip (A) on the
                                          holder latch. Pull down to unlatch it. The
                                          holderswingsout on a hinge. Put in new
                                       1.5V alkalinebatteriesin the shown posi'
                                                tions. To replacethe holder,push it back
                                      up until the latch snaps into place.

                                     To test the batteries: Be sure there is no
                                                 film or flashcubein the camera. Set the
                                           Film Selectorto 75 it your camera model
                                       has one. Completelycoverthe electriceye
                                            with your f inger to excludeall light. Stand
                                            facing lamp light (not direct sun). Press
                                            the shutterbutton.You will hearone click.
                                        Hold the button down for a few seconds.
                                                                             lf the batteriesare in order,you will hear
                                          a second click of the shutter when you
                                        uncover the electric eye. lf the batteries
                                          are weak or dead or improperlyinstalled,
                                      you will hear only the f irst click.


  GENERALCAREOF CAMERAAND FILM                                                 Salt water can causecorrosionin parts
   Protectyour camera and film: Keep them     of your camera,and dry salt depositscan
    in a carryingcaseor bag when not in use.    scratch the lens. Rain, water and high
        It is particularlyimportant to protect    humidity can also cause damage, so
   film from heat and humidity. Don't re-    always keep the camera dry.
  move film from its sealedwrapper until      Dust and sand can scratch the lens; if
   you are ready to use  it. Don't leave a    they get inside the camera, they can
   loaded camera or packages of film  in     affect its operation.
   directsunlight,or in a car in hot weather.
      lf you store film or a loaded camera in   How to clean the lens: Breathe on  it to
   a closet, keep it near the floor where it   dampen the surface,then wipe it lightly
    is cooler.                                 with clean, dry, absorbent cotton. Never
     Extreme heat can damage your film    use siliconecoatedeyeglasstissues.Clean
   even if it is in a sealed package.           the viewfinderwindows in the same way.16
View original page 17Page 18 · Read text
www.orphancameras.com
YOU MUST KEEPTHE
 DEVELOPERSPREADERCLEAN
The spreader must be kept clean or you
 will not get good pictures. The two steel
 rollers in the spreader assembly play a
leadingpart in developmentof your pic-
ture. Inspectthem frequently;if possible,
do it before loading each new film pack.
 lf the rollersare not kept clean,you may
havethe followingproblems:(1) no yellow
tab appearingwhen a white tab is pulled;
(2) developerchemicalssmearedon the
back of a picture; (3) repeated spots on
Jhe face of a print.
1. Remove the spreader assembly: Use
two hands and lift both steel loops (A)
together.Lift the assemblyout of the
camera.

2. Cleanthe rollers:Wipe the rollersclean
with a dry, lint-freecloth. Never scrape
themwith anythingmetallic,nor with your
fingernail.Rotateboth rollers,to be sure
theyare completelyclean.On the side(B),
where the rollers are partiallycovered,
there is a narrow slot. Inspect the slot
and clean it if necessary.
    lf any particleson the rollersor in the
slot are particularlydifficult to remove,
use a damp cloth. Never submerge the
rollersin water; doing so could eventually
hamperthe free rotationof the rollers.

3. Cleanthe tab slot: lf dirt collectshere,
the yellowtab cannot pop out. Carefully
open the narrow door (C) and clean the
slot (D) with a cloth.

4. Replacethe spreaderassembly:First,
be sure the roller assemblyis the right
way up. The edge outline (E) of the as.
semblyshould match the outline printed
insidethe cameradoor.With your thumbs
rn the positionshown,presslightlyin the
directionof the rollers and then down.
The assemblywill click into place.
View original page 18Page 20 · Read text
www.orphancameras.com PICTUREHINTS- FLASH

Get close to your subjects: For all flash
shots of one, two (or even three) people,
 you will get best results if your subjects
 are about 5 ft. (1.5m) from the camera.
Alwaysuse the ColourSpot carefully. For
 largergroups,back up a bit, and set the
 correctdistance.


Line up groups: Try to have everyone
aboutthe samedistancef rom the camera
so they will all be lightedevenly.lf some
are nearer to the camera than others,
partsof your picturewill be much too light
or too dark.

Spare the eyes: Let your subjects look
elsewherethan right at the f lash.


Picka good background:For colour shots
alwaystry to have your subjects near a
brightlycoloured background. For black
and white, any light-tonednearby back-
groundwill be good.


Don't try to make flash pictures in day.
light.


                                                                           1 9
View original page 20Page 21 · Read text
www.orphancameras.com
        TEMPERATURE1S IMPORTANT!

          The important thing is the temperature
              of the camera and film at the time you
            are developingthe picture.
          When developmentis not at the stan-
           dard recommendedtemperature,the de-
            velopingtime must be adiusted.Seeyour
              film instructionsfor full details.
           When the temperaturegets below65" F
             (18'C), colour film won't develop well
            without the Cold-Clip,describedbelow.
       HOW TO USE THE COLD.CLIP

          The Cold-Clipis carried in a pair of slots
           on the back of the camera.
              1. Before taking a  picture, warm the
            Cold-Clipin an insidepocket,or between
            your body and arm, f or about 5 minutes.
              2. Take the picture;then pull the white
            tab out of the camera.Just beforepulling
             the yellowtab, take out the warmedCold-
             Clip and hold it as shown.
              3. Pull the yellowtab out of the camera
           and placethe entire film unit insidethe
            Cold-Clipwith the tab hanging out as
           shown. This must be done within 10
           secondsafter pulling the tab out.
              4. Put the Cold-Clip,with the film inside,
           between your body and arm while the
             picturedevelops.Don't squeezethe Cold-
              Clip tightly, or you may force developer
            from the film. Developthe picturefor 60
           secondsinsidethe Cold-Clip,then remove
           and separate.
                       lf developergets on the Cold-Clip,wipe
                       it clean before using it again.
             Don't use the Cold-Clipfor black and
             white pictures.
            Pfeaseread the cnurloN notice on p. 23-
View original page 21Page 22 · Read text
www.orphancameras.com
 POSSIBLEPICTUREPROBLEMS

 Black picture (not exposed): Be sure -
 the batteriesare not dead or improperly
 installed;the FilmSelector(if your camera
 modelhas one) was set correcily;the f lash
 fired properly;there was no flashcubein
 the socket when you took a daylight pic-
 ture.


 White picture (light struck): Do not pull
 Ih.  safety cover out of the film pack
 before putting it into the cam era; do not
take a partly used film pack out of the
camera;be sure the Film Selector(if your
camera model has one) was not set for
colourwith black and white film.


Many small white specks (too rapid tab
pull):Try to pull the yellowtab a litile more
slowly.
  Colourprints may have a pink motile,
in addition to white specks,as a result
of pulling the yellowtab too fast.


Missingcorner;orange-redmark on colour
pictures(angled tab pull). Pull the yellow
tab out straight- alwaysusethe T-handle
when pullingtabs.


                                                                2T
View original page 22Page 23 · Read text
www.orphancameras.com
                                      Oblongin print (white tab caught):Be sure
                                                  to pull the white tab straight and all the
                                    way out of the camera. lf even part of
                                                                              it stays attached, at will be pulled back
                                                 into the camera,onto the picture,when
                                       you pull the yellowtab.


                                       Repeatedspots (dirty rollers): Clean the
                                         spreaderassembly.


                                           Black and white prints gray and muddy;
                                              colour prints with weak colours: Develop
                                            the picture for the full time given in the
                                                  film  instructions. Remember, in  cool
                                        weather you m ust develop black a nd
                                           white pictureslonger;for colour pictures,
                                      use the Cold-Clip.

                                             Overall bluish or reddish tint:  lf you de-
                                          velop for too long a time, colour pictures
                                  may look too blue overall.Pictureswith a
                                                definitepink or reddishoveralltint proba-
                                                 bly were not developedfor the f ull recom-
                                  mended time. A pink mottle on colour
                                               prints is usually caused by pulling the
                                            yellow tab too fast (see page 2I), rather
                                          than by underdevelopment.


                                         Fuzzy picture (possible movement): Be
                                          sure that both the camera and your sub-
                                                   ject don't move while you snap the pic-
                                                   tu re. Squeeze the shutter button gently,
                                                  to  prevent camera shake. Hold the
                                      camera so your th u m b stops your forefin -
                                           ger from pushing the camera down.


22
View original page 23Page 24 · Read text
www.orphancameras.com
   WARRANTY

     IF THIS CAMERAPROVESDEFECTIVEWITHINONE YEAROF ORIGINALPURCHASE
    DATE,WE WILL REPAIROR, AT OUR OPTION,REPLACEIT FREEOF CHARGE.WE
ft.  WILLMAKE NO CHARGESFORLABOUR,SERVICEAND PARTS.WE WILLALSOSUPPLY.7   ONE PACK OF FILM TO REPLACEPICTURESSPOILEDBEFORETHE DEFECTWAS
         I D E N T I F I E D .
     THE WARRANTYDOESNOT COVERDAMAGECAUSEDBY ACCIDENT.MISUSE.OR
   TAMPERINGWITH THE CAMERA.A CHARGEWILL BE MADE FORSUCH REPAIRS.
,    TO TAKE ADVANTAGEOF THE ABOVE WARRANTY,THE CAMERA MUST BE
   RETURNEDTO AND REPAIREDBY A POLAROIDSERVICECENTRE(LIST ON NEXT
    PAGE)OR AN AUTHORISEDTNDEPENDENTREPATRSTATTON(L|ST AVATLABLEON
    REQUEST).FORRETURN|NSTRUCT|ONS,SEE BELOW.


   TO OBTAININFORMATIONAND HELP    TO RETURNA CAMERAFOR REPAIR
         lf you ever have a problem with the   To returnyour cameratorrepair,you may
    camera or film, or  if you don't know    eitherask your dealerto handlethe return
    whetheror not a repair is needed,we urge    for you or you may mail the camera
    you to seek help promptly to avoid film     yourself. Pack it carefullyto assure safe
    waste and disappointment. See your    travel and send it by insured parcel post
     dealer or write to the nearest Polaroid    mail. Address it to the nearest Polaroid
     Office (next page). When writing, send    Service Centre. (See next page for ad.
    sample pictures and, most important,   dresses and  for  information about
     state what camera model you have.   AuthorisedIndependentRepairStations.)
    Pleasebe sure to includea clearlyprinted     Whichevermethod you select, be sure
     return address.                              to include a note describingthe nature
                                                   of the problemor sample pictureswhich
                                                   illustrateit.
                                                                                      lf you are near a ServiceCentre, it may
                                        be more convenientfor you to bring the
                                     camera in, insteadof mailing it.


      CAUTION:The PolaroidLand processuses a causticjelly which is safely packed
        insidesealedcontainerswithin the metal-plasticpack. lf accidentallyyou should
        get some of this jelly on your skin, wipe it off immediately.To avoid an alkali
        burn, wash the area with plenty of water as soon as possible.lt is particularly
        importantto keepthe jelly away from eyes and mouth. Keep discardedmaterials
        out of reach of children and animals,and out of contact with clothing and
         furniture,as discardedmaterialsstill contain some jelly.


                                                                  23
                                                                                                                                   -/
View original page 24Related documents and language editions
PolaroidPDF
POLAROID 220
User manual
37 pages · EnglishRead →

PolaroidPDF
POLAROID 350
User manual
53 pages · EnglishRead →

PolaroidPDF
Polaroid 108 film information
User manual
5 pages · EnglishRead →
PolaroidPDF
Polaroid 110A
User manual
30 pages · EnglishRead →

PolaroidPDF
Polaroid 125
User manual
23 pages · EnglishRead →

PolaroidPDF
Polaroid 135
User manual
25 pages · EnglishRead →

PolaroidPDF
Polaroid 210
User manual
27 pages · EnglishRead →

PolaroidPDF
Polaroid 215
User manual
25 pages · EnglishRead →

PolaroidPDF
Polaroid 225
User manual
29 pages · EnglishRead →

PolaroidPDF
Polaroid 230
User manual
28 pages · EnglishRead →

PolaroidPDF
Polaroid 240
User manual
27 pages · EnglishRead →
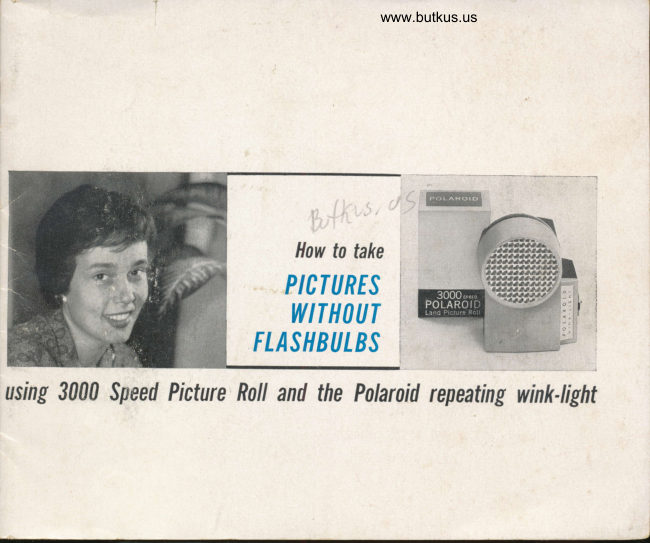
PolaroidPDF
Polaroid 3000 Wink Flash
User manual
13 pages · EnglishRead →
From the M. Butkus archive. Original publisher and archive notices are retained.
Check the model and edition against your equipment.
PDF verified 2026-10-10.