Film cameras
Zeiss Ikon IKOFLEX Guide Reference guide
Reference guide for Zeiss Ikon IKOFLEX Guide. 35 pages in English. Read the original PDF, download or print a copy without registration.
35 pagesEnglish3.8 MB PDF
Loading your manual…Open PDF directly
Document details
- Brand
- Zeiss Ikon
- Model / document
- Zeiss Ikon IKOFLEX Guide
- Document type
- Reference guide
- Language
- English
- Pages
- 35
- File size
- 3.8 MB
- Category
- Film cameras
- Document date
- Not specified in catalog
Search available document text
Find a term, then jump to its page in the original PDF. Image-only pages may not be searchable; check the PDF for exact wording and diagrams.
Page 2 · Read text
www.orphancameras.com

 re


                  www.orphancameras.com


with rpeciolC0t0Rseclion
                       by KENNETHS. TYDINC$ S.P.l
View original page 2Page 3 · Read text
www.orphancameras.com
                      fntroduetion

     The  photographic  world  always  buzzes with  excitement  when
 Carl Zeiss introduces a new camera. From  past experience we have
 learned that  if the name of Carl Zeiss is on a camera,  it  is good. The
 Ikoflex cameras are Carl Zeiss' very own-and   they are gooa !
      Carl Zeiss Ikon  has lavished  the  finest  optical and engineering
 brains on this line so that they are models of mechanical perfection
 with lenses that are optical achievement.
      Mechanically,  the film  is transported  and automatically  locks  at
 the end  of  the frame.  Double  exposures are prevented because the
 shutter lock  is released only when the film  is advanced. A red signal
 shows whether  an exposure has been made. The  automatic  shutter
 wind  of the Ikoflex  IIa advances the film and cocks the shutter  at the
same time. The film channel and mask prevent film scratching and as-
 sure absolutely  correct  film  positioning.  The  flash synchronization
 socket accepts a standardized compur  tip and both the Ikoflex  Ia and
 IIa synchronize with any flashlamps or speedlights. Three viewfinders
-the   ground-glass, the direct-vision  open-frame  finder, and the pris-
matic  vis\^/s1-sfford   the  variety  necessary to meet every  possible
shooting condition. The depth of field scale is built around the focus-
ing knob  for  instant reference. The camera back  is sturdy and bolted
securelv to the camera body so that  light  leaks are impossible. The
body is light  for portability  and rugged for durability.
      optically,  the superb Tessar and Novar lenses have earned world-
wide reputation because they cut sharply from  corner  to corner,  il-
luminate the film uniformly  from edge to edge, and provide a contrast
crispness for the highest visual acuity. The focusing screen is brilliant
because of the fresnel lens and extra-bright ground glass. The magni-
fier  in the finder hood  is large enough  for  the eye to see the
screen in  its magnified rendition.  Finally, the precision of the optical".rii."
and mechanical assembly allows each to work  at its finest advantage,
yet the Ikoflex  is so simple  in design that one is able to produce  fine
results from the first  roll  of film.  It  is an ideal camera for beginner,
artist, or even the most critical  scientist. Learning  to use the Ikoflex  is
the most inexpensive down-payment for photographic enjoyment. Our
book will show you how to both operate and enjoy your lkoflex. Let's
get started!
View original page 3Page 4 · Read text
www.orphancameras.com
                           Prefaee
             There  are two  basic  picture  taking  problems-controlling     the
         subject and recording   it. Before you can record a picture with _your
        camera, you must learn to operate the camera's controls.  If you don'tr.
           you'll be in the same boat as the artist who has a number of paints but
        cannot use them since he never learned to mix colors and wield a paint
         brush. You  must, therefore, learn  to use your camera so well  that
         operating-                it will be second nature.
            The  author's  system  for  making   all  camera  manipulations   a
         matter  of  second nature  is  called  the  Snrn-snr  Svsrnlr.    It  has
        been developed from  extensive experience  in  lecturing,  writing,  and
        teaching beginners to use their camera expertly  in a very short time.
               It  is founded on two simple principles:  sTIvDARDIZATIoN, AND PRE-
         SETTING  OF BOTH  1VIATERIALS AND CAMERA  CONTROLS:
                1. Standardization  is essential. It  alone will  give you the con-
         fidence to make perfect pictures. This  will  involve using one film, one
         developer, one flashlamp,  etc., of known and tested performance.
               2. Pre-setting  is the second half  of the SAFE'SET METHOD.
         Just as equipment must be standardized, so must be the procedure  ofl          actually  taking  the  picture.  The many  variables  of  shutter  speed
         aperture, focus, and effect can be pre-set and completely controlled by
        you. You simply pick your subject size beforehand, select the proper
          setting from  tables and, at the peak of  effect, snap the picture. The
        knowledge that your picture  will be perfect enables you to devote your
          errtire attention to your subject. You needn't worry  about changes of
         aperture, shutter, speed, etc., if your subject changes position.

                How rHE SAFE-sETMErHoo  Hrr.PS You
           The use of this method helps you additionaily  because:
               1. All troublesome camera changes and variables are eliminated.
        Every picture-taking  factor  is pre-set. Last minute fumblings and de-
         lays are completely eliminated.
                2. Each frame  is completely  filled with  subject matter.  All  black
       and white negatives on a roll can be enlarged to a uniform  size during
         picture processing after the  first basic dimension has been chosen.
        There's no need to raise or lower the enlarger housing.
               3.  All color exposures are so uniform  that they project with equal
          quality,  should you wish  to make black and white  prints  from them
         thb uniform  size will enable you to enlarge every frame with the same
       exposure time.
                                                                                                                        (
View original page 4Page 5 · Read text
www.orphancameras.com
      4. Flash shots can easily be taken with  the Slrr-sur   Mnrnot.
Your  exposure  is directly  related  to the flash-to-subject distance. A
 perfect picture can be gotten each time  if the controls are safe-set and
 your camera-to-subject distance is kept constant by moving back and
 forth as the subject moves.

                   THa Sers-sET CrrARr
    The  Slre-ser   Cn.rnr   is  the  heart  of  the method  because   it
gives you  all the information  you need quickly.  With  a Sara-snr
CruRt,   the  necessity for  memorizing  or  calculating  the  aperture
opening  for  flash  pictures   is  completely  eliminated.  For  example,
 let's work out a chart step by step for the use of SM or SF flashlamps
with ASA 50 black and white  film. The chart should be written  on a
piece o{ tape or some similar permanent material so  it can be pasted
on the back of your  flash reflector or camera carrying  case. For the
purpose of this example, first check the following:
                 IKOFLEX SAFE-SET CHART
     Lens        Film, B&W  Shutter Speed Flashlamp
   3-inch focal      A.S.A. 50       7/25     SM (General Electric) or
      length                          SF (Sylvania)
    Then add four  lines  for  the four  most  frequently  used subject
sizes. Each line is divided  into focusing distance for that size and for
the lens  iris opening  required  with  the flashlamp  for  that  particular
distance. The chart should look like this:
                SAFE-SET CHART UNFILLED

Subject size                  Distance                            Iris  (f/)  opening
Full body
Three-quarter body
Head and shoulders
Head

    Now find the flash exposure guide number recommended with an
SM or SF lamp for an ASA 50 film  at Ll25 shutter speed. This in{or-
mation can be found on the outside wrapper of the flashlamp package.
If the guide number suggested is r40, then consult the chart on page
76 which has  all the distance and  iris openings calculated for you
for this number and  fill  in the empty boxes so that the chart  will now
look like this:
6
View original page 5Page 6 · Read text
www.orphancameras.com

                               Camerq    Set   al:                      Film:  120 Size,  Colot,  Tungstq         Film:  Black-and-lVbite,    A.S.A,  40
                        Shutter      -    l/25  s.econd          Kodak  Ektachrome,  Type B + SlEF      Kodak  Plus-r,   Ansco  Superpan
                                                                     .Light  Balancing   Filter                   Supreme
                  Lamps      -   #5 or #25.            Ansco  Color,  Tungsteo  Type  + UV16
                 Subiec  Size      Focusing  Distance
            Head                              -        Ztl  feer                     t/22 + tH.                                f/22 + 3H
            Hcad md  Shoulders   -     1% feet                               {/ 22                                                          f . 2 2 + 2 H
                3/4 Body                      -       5r,2 feer                                                   t - r o                                t/22 + lH
                 Fult  Body                     -         l0  feet                      t/8                                                   t/ 16
                                         han dk e rchi ef
  *       When the chart is completed and has been pasted onto your flash
        reflector, this  is how  it should be used for  flash:  If you want to take
       a full-length  picture  of a group  of people, scan your  chart  for the  fullrf,
       body  line. From   it you  will  learn  that  for  black and white  film  with
       a shutter speed oL Ll25   (this  is an excellent speed to use with   all
        flash lamps and flashtubes), a lO-foot  setting must be used. So set
       your  camera's  focusing  scale at ten  feet. This  scale must  never be
      moved, a quarter  turn  of the lkoflex's  focusing knob  will change the
       focus from  infinity   (as far as the eye can see) to as little  as 5 feet.
             If you leave the knob  alone, you  will  be sure that  your  distance  is
        correctly  set for  the group  shot that you plan  to take. With  the SM
        or SF lamps, the lens opening for  l0-feet  is between f/B and  f/ll.
       Rotate the right  aperture setting gear of the Ikoflex  to B or rotate the
       gear at the bottom  of the shutter for the Ikoflex  Ia so that this settine
          is opposite the proper  index marks. Now  everything  has been safel
         set. After  you have checked to make sure the  Ikoflex  Ia  shutter  is
      cocked or the knob has been turned with the Ikoflex  IIa, automatically
        setting, the  shutter,  walk  toward  the  subject  while  looking   at  thl
       gro_und glass. When the image seen on  it  is short, stop walking,  stand
       still,-compose your  picture, and release the shutter. The photograph
          will be technically  perfect.

           snruss oF PiaruRES FRoM THE DTFFERENTsaru-ssr  srzrs
           Taking pictures by flash is an excellent starting point  for  all be-
       ginners. The modern flashlamps and flashtubes ut"             of high
       precision manufacture which  will perform  uniformly "r,u-plesevery hour  aid
       every day.

                     THr  S,lrr-sET CTTARTOurDooRS
         When outdoor illumination   is uniform  and constant, your basic
       exposure-l/S0    at f.lL6, for  example-will   remain  pretty much  the
      same whether you are taking  a landscape or posing  a fiiend   for  a
View original page 6Page 7 · Read text
www.orphancameras.com
 portrait.  Disregard  the flash factors and keep your  outdoor  settings
unchanged, only alter your focusing distance with the focusing knob.
Once the focused setting has been made for any particular size of your
chart, leave the focusing knob alone. Merely move forward  or back-
ward  until  your  subject  is sharp on the ground  glass; then release
the shutter.

           TYDINGS SAFE-SETMETHOD
                OUTDOORS
      Light:  Clear  duy,  not  harsh,  sunlight.  Film;   Daylight  color,
Typ" A  with No. 85 conversion  filter, Typ" B with  a No. B5B;  or
Ansco Color, tungsten type, with conversion  filter No. 11.

Sale-Settings

     Typ" B film with No. B5B filter:
S-Shutter:  Ll25 second
A-Aperture:    Color  f 19; black andwhite   f 122
F-Focus:  30 feet for sharpness from infinity  to 15 feet
          12 feet for sharpness {rom 15 feet to 9 feet
E-Effect:   Release shutter at peak of action or expression
    27/a-inch squa,re lrame                        Bantarn
                                                  1*1r/r-inch  lrame

                                     Field, Size   Subject  Code Distancel Fietd, Size
  Subject  Code    Distance     inches
 tr{ead             R     2',8" (0.8M)   2Ix2L     child's    #     2'8"     l7xll
                                   Head
Head &    +I      3',6" (.96M)   28x28   Head     s     \',5"    2LxL4
Shoulders
                                   Head &        t       5',     30x203/+                s', (r.52M) 40x40    Shoulders
                  7', (2.r3M) 56x56
                                                                                                                                                                                                                                                                                                                                                                                    I        7'      42x28
Full body                            B0xB0      +    I0'  (3.05M)
                                                   Full body                           +     T4'     90x60

       Wnar   rF You AnB SlrcHTLy  Our  or  Posrrrorq?
    The depth of field (depth of sharpness)  of the 3-inch Ikoflex lens
is so great that should your focus be slightly  off, the picture  will  still
be sharp  if the iris opening is narrow. That's because your top aiew-
ing lens shows less depth than the bottom  taking  lens records. At  this
I
View original page 7Page 8 · Read text
www.orphancameras.com
 point   it  is wise  to review  the advantages  of  the  Ikoflex  Twin-lens
system.
      1. A twin  lens reflex camera, as the name implies,  is really two
cameras in one. One carnera is used to take the picture  while the sec-
ond coordinated camera is used to show focus and composition. The
top  (viewing)   lens is always open at  its widest  aperture even when
the bottom  (taking)  lens is stepped down. Because the viewing  lens
 is always open, you can see the picture  before, during,  and after the
exposure, so that you can know  definitely  whether  the picture  was
taken  correctly.  With   single  lens  reflexes where  viewing   is done
through  the taking  lens, the image gets darker  as the lens is stopped
down  and  disappears  completely  during  the  exposure,  leaving  the
photographer  with  an eternal uncertainty  as to whether  the picture
has been taken at the right moment or focus.
      2. The twin  lens reflex camera represents an efficient combina.
tion  of adequate film  size and portability.  The pictures are sufficiently
large  (27/+ x 2a/a inches) and a standard  roll  of black and white  or
color  film  can be bought  anywhere  in  the  world.  The  film  size  is
called No. 120 or 82.
      3. The camera  is small and  light. Even a child can use  it.  It's
easy to carry and always ready for instant use.
      4. The ground  glass acts as a combined  rangefinder  and view-
finder. You  will  quickly  find  yourself  focusing  and composing  your
picture  simultaneously  with  the complete elimination  of the time  loss
that occurs when a separate rangefinder and viewfinder  must be used.
      5. A black and white B x 10 picture requires a moderate  (4x)
enlargement from  the full frame as contrasted with an immense  (Bx)
e,nlargement frame  of a miniature  (35mm)  negative  size;  because
the enlargement  is so moderater  grain,  which  so often plagues the
35mm camera user,  is seldom seen on a print  from  a twin  iens  roll
film  reflex camera.
      6. The  rl3.5lens,  whether   it be rhe Tessar of the Ikoflex  IIa  or
the Novar  of the Ikoflex  Ia,  is amazingly  sharp to the very edges and
color corrected  for the finest results.
      7. The  Ikoflex's  viewing  lenses have a special condensing  lens
called  "Extrabrite"    to  gather up every  bit  of  light  for  a brighter
viewing image. Brilliance   is increased about ten times at the
     B. The square format  permits  composition  in any one of"orn"r..three  -
pleasing patterns:  square, vertical,  or horizontal.  This choice allows
you  to present your  subject  in  its most favorable  pattern  with  less
need for dark room cropping.
10
View original page 8Page 9 · Read text
www.orphancameras.com
      9. The 3-inch Tessar or Novar  has a great depth  of sharpness,
especially when a hyper-focal  distance table  is used. Slight  focusing
errors will not ruin a picture's sharpness.
     10. The Synchro-Compur  shutter  of  the  Ikoflex  IIa  and  the
Prontor SV of the Ia each has built-in-M-X  synchronization.  All flash-
lamps and  all flashtubes can be synchronized  to them without  addi-
tional and often expensive synchronizers.
     11. The automatic exposure stops eliminate the need for a con-
stant reference  to a red counting  window  found  in many  cameras.
This need for locating the next exposure number can be a real nuisance
if you're taking action pictures or working  in poor light.
     12. The  Ikoflex   IIa  winds  the  film  and  tensions  the  shutter
simultaneously so that  it  is possible to take a picture per second.
     13. The camera is equally suitable for studio, portraiture,  copy-
ing, or medical and scientific photography.
     14. The shutter release is conveniently  located. You can use the
sports finder  or prismatic  focuser at eye level and release the shutter
eadily without   jarring   the camera. The  convenience  of  the  release
button  allows you  to wind  the camera while  holding    it against your
face  at eye  level  for  uninterrupted   picture  taking.  The  wind  and
release of the Ikoflex  IIa and the wind,  set, and release of the Ikoflex
Ia can be operated very rapidly  after a little practice.
     15. Contact  prints  are  of an adequate  size, you  don't need to
enlarge them for viewing.
     Since the square area of the 2L/a-inch size is almost three times
greater than the 1r/r-inch  size, the Ikoflex  size is preferred  over the
35mm frame whenever  a great amount  of  detail  is required  in  the
final print. The Ikoflex size is the one chosen by engineers in micro-
filming  blueprints,  etc. These then  constitute  the advantages  of the
Ikoflex Twin Lens Reflex system.

Cornparison    Chart   of  the  Ikoflex   Carneras
    Now  that we have some knowledge  of how the Ikofiex  is to be'
used, let's examine  the two models  that  are  in  current  production.
Incidentally, many  of the older models are similar  in appearance and
design  but may  lack  such  desirable  features  as built-in   flash,  the
"Extrabrite"   viewing  ground  glass and  field  lens,  etc. While  these
features are desirable,  it  is still the basic camera which must take the
picture, and the countless Ikoflexes  of past years have produced  in-
numerable  great pictures. Right now they are  still doing so through-
out the world.
                                                 t1
View original page 9Page 11 · Read text
www.orphancameras.com


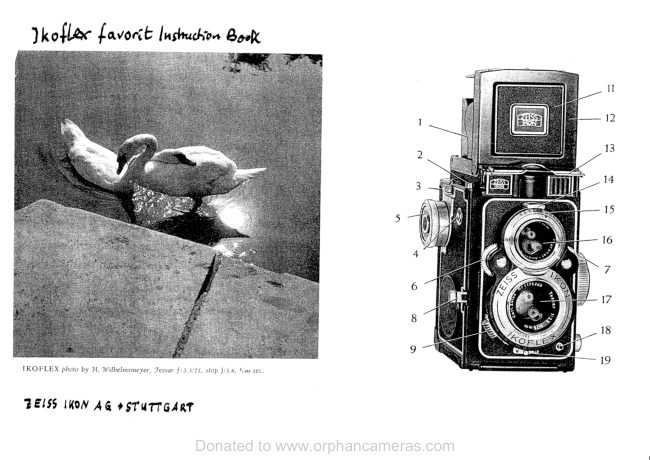
                    TH E PARTS OF T H E  I K O F L E X l o
   I R ig h t sid e o f   f inder hood                   leo s e o n d  f l o s h s y n c h r o n i z o l i o nm e c h -
 2 B od y  sh u t t e r releose threoded  for       o n i s m
       f i tt in g co b le re leose                        l6 Sy n c h r o - s w i t c h
 3 S i g n o l w i n d o w  o f  d o u b l e e x p o s u r e   1 7 F o c u s i n g m o g n i f i e r
   pre ve n t io n d e vice                                                         l 8 R i g h t s i d e o f   f i n d e r h o o d w i t h e x -
 4 Eyelet for corrying strop                  posure toble
 5 F ilm  t ro n sp o rt knob                   19 Frome-type sports finder eyepiece
 6 Au t o mo t ic p ict u re counter           2A B o l t f o r c l o s i n g f i n d e r h o o d
 7 Se t t in g wh e e l  of  outomotic frome   21 Bo l t f o r c l o s i n g c o m e r o b q c k
    c o u n le r                             22 U p p e r  f i l m s p o o l h o l d e r
  I  E x p o s u r ei i m e s e t t i n g r i n g             23 Depth of  field scole
 9 S h u t t e r w i n d i n g  l e v e r                 24 F o c u s i n g k n o b
l 0 D i o p h r o g m s e t t i n g l e v e r               25 Lower film spool holder
I l  T o k i n g l e n s                             2 6 F i l m w i n d o w
| 2 V i e w i n g l e n s                        27 C o n t o c t n i p p l e
l 3 W i n d o w  f o r v e r i f y i n g e x p o s u r e l i m e   28 Tripod th reod
    s e t t in g                              29 Sports finder frome  in  fronf side of
1 4 W i n d o w  f o r v e r i f y i n g d i o p h r o g m s e t -         fin der hood
       t i n g                                 30 Plote covering front  side  of  finder
l 5  L e v e r f o r w i n d i n g d e l o y e d o c t i o n r e -       h o o d  f r o m  t h e   i n s i d e
14
View original page 11Page 12 · Read text
www.orphancameras.com


                                  www.orphancameras.com


                           Ti-IE PA RTS O F T H E   I K O F L E X I l o
  I R i g h t s i d e o f   f i n d e r h o o d               1 4 F l o s h s y n c h r o n i z o t i o ns w i t c h
 2 D o u b le e x p o su re prevention                         I 5 F o c u s i n gm q g n i f i e r
 3 Body shutter releose th readed to  fit    1 6 L e ft s i C : o f  f i n d e r h o o d w i t h e x p o s u r e
    c ob le re le ose                                   to b l e
 4 S i g n o l w i n d o w  c f  d o u b l e e x p o s u r e   17 Ey e p i e c e o f   f r o m e - t y p e s p o r t s f i n d e r
   pre ve n t io n                                                                           l 8 B o l t f o r c l o s i n g f i n d e r h o o d
 5 Ey ele t f o r co rrying stroP                1 g B o l t f o r c ! c i i r q c q r n e r o b o c k
 6 K n o b f o r o d v o n c i n g f i l m o n d w i n d i n g    2 0 U p p . r s p o o l c h o m b e r
    sh utter                                         2l De p t h - o f - f i e i ds c o l e
 7 Au t o rn q t ic p ict u re counter               2 2 F o c u s i n gk n o b w i t h d i s t o n c e s c q l e
 8 S e t t i n g w h e e l o f p i c t u r e c o u n t e r       23 Low e r s p o o l c h o m b e r
  I  S h u t t e r s p e e d s e t t i n g w h e e l           24 Fi l m v r i n d o w
l 0 D i o p h r o g m s e t t i n g w h e e l               2 5 C o n t o c i n i p p l e
l 1 T o k i n g l e n s                          26 Tr i p o d t h r e o d
l 2 V i e w i n g l e n s                        27 Sp o r t s f i n d e r  f r o m e   i n   f r o n t s i d e o f
l 3 W i n d o w   f o r  v e r i f y i n g s h u t t e r s p e e d       finder hood
   o n d d i o p h r o g m s e t t i n g s              28 Pl o t e c l o s i n g f i n d e r h o o d  f r o r n  i n s i d e
                                        15
View original page 12Page 13 · Read text
www.orphancameras.com
Read  it carefully. The valuable information   in  it  will  not be repeated
here. Keep your instruction booklet with your Guide. Each will com-
plement the information   in the other.
      2. Set the distance scale on your camera's focusing knob to thirty
feet for landscapes or far distant areas or to twelve feet for medium
close-ups.
      3. Set the shutter speed to 50, meaning l/50  second.
      4. Set the aperture at f16.3. In  the window  on the Ikoflex  this
is the space between B and 5.6  (f 16.3).  If you've used black and white
film, however, set the aperture at llLI.
      5. Hold the camera correctly and firmly  at waist level or use the
Ikoflex  prismatic  viewfinder   for  eye-level shots. Keep your  eyes fo-
cused on the ground glass and look at it, not through  it. What you see
there is what you  will  get on your  negative. With  your camera set at
thirty  feet and f16.3 everything   will  be in sharp focus from  fifteen
feet to as far as the eye can see. I{ the focusing knob  is set at a twelve-
foot distance, the subject can be between nine and  fifteen feet and
will  still be recorded sharply. In this way you have a two-stage system
of focus. Two  distance settings provide  a line  of continuous  focus
from nine feet to as far as the eye can see (called infinity).  Thus you
will  not need to focus on each object you wish  to photograph. Im-
portant note: The top viewing lens is always wide open, since it does
not always show the  full area of sharpness the ground  glass should
be used carefully. Even though the ground glass of the viewing  lens
can show the subject out  of focus,  it may  still be in focus because
of the narrow lens aperture of the taking lens. (Chapter Z).

            OurDooR  Sue-Iecrs on Dnr.rurrn  Srzr
      6. The setting for pictures  of subjects having a definite size such
as a  full  body, head and shoulders,  or head  only,  difiers  from  the
usual thirty-  or twelve-foot settings used for landscapes. The chart on
page B shows the various  field sizes for these distances. You  select
the desired size, pre-set the distance that  will  produce  it, and walk
toward the subject until the ground glass image appears sharp. Then
you trip the shutter and get a technically  perfect picture.
      7. At the moment of best composition, height of action, peak of
expression, or point  of interest, press the shutter release down gently.
Squeeze it rather than punch  it. Your  Synchro-Compur  shutter  will
do the rest.
    The fihn should not be wound  to the next exposure until you are
certain that other pictures will be taken. There are two reasons: the
16
View original page 13Page 14 · Read text
www.orphancameras.com
      shutter should not be left cocked  for  long periods  of time  (winding
      the film cocks the Ikoflex  IIa  shutter)   ; second, the film has a tendency
       to change its position slightly  (buckle)   if  it is left in one position  for
      long periods.  If a number  o{ pictures are to be taken  in quick  suc-
t}'   cession, you can naturally  wind  the film  immediately.   It  is normally
      impossible to take a double exposure with either Ikoflex.
            In order to use your color film most efficiently, wait  for a clear,
     sunny day when colors will be most brilliant.   If  the sky  is dull andil3overcast, your  final pictures will  also be dull and overcast. For other
       lighting conditions, use an exposure chart or an exposure meter. Ex-
     posure estimation under these conditions without  these aids can be-
     come quite tricky.

                      OuroooR FLASH Seru-spr
                  If  you're a beginner, you may  naturally  think  that   it  is  silly  to
     use a flashlamp  or a flashtube outdoors when the sun is shining  bril-
        liantly.  Actually,  however,  a  brilliant  day has many  photographic
      shortcomings. Near-distant subjects such as heads, flowers, parts  of
     houses, etc., may have inky-black shadows produced when the sun
        is shining brightly. A portrait taken under these conditions may show
      a sunlit nose and two black holes where the eyes should be. To  elim'
       inate the black shadows, use a supplementary  flash. As the color  film
      being used is of the outdoor  typ",  the supplementary   (fill-in)   light
      provided must be blue. Use either blue flashlamps of the 58  or 258
      type or electronic flashtubes (speedlights) which  are generally bal-
     anced for daylight-type color film.

               FLASH wIrH  Coron  Fnvr-A.S.A.     I0
             1. The Shutter Speed-I   l25th second. When  flash  is used with
      the Synchro-Compur  the shutter speed should be set at Il25  second,
      the flash setting of the shutter at X.
            2. The aperture atf,l9  for the color film; B&W A.S.A. 50 at IlL6.
             3. Focus at thirty  feet or at twelve feet, depending on your  sub-
       ject, close or distant
            4.  If  the subject is six feet from  the camera and a number 58
     lamp  is used  in  a polished,  efficient  reflector,  the lamp  should  be
      placed atthe camera for a I:1  fill-in  ratio. A  1:l  ratio means that the
       highlight  and the shadow side receive an equal amount  of  light. The
       figure 2:1 means that the highlight  or brighter  side is twice as bril-
       liant as the shadow. A 3:1  ratio would  indicate that the highlight  is
                                             L7


                                                     )
View original page 14Page 15 · Read text
www.orphancameras.com
three times the shadow's intensity. The  first number  always provides
the strength  of the highlight  while the second number  after the colon
tells us what the strength  of the shadow side is to be.
         If  our camera  is set to twelve  feet  for B&w   (or  four  feet  for
color),  then we should use one thin  perfectly  white  handkerchief
over our flashlamp  to reduce the intensity  of the  light,  because the
nearer we are to our subject, the greater  is the strength  of  light  that
reaches it. However, as our outdoor  lighting  generally  is the same
wherever we are, approaching  closely with  the flashlamp would  burn
up (over-expose) our subject. Therefore, we can reduce the intensity
o{ the lamp by covering   it with  a thin  white  handkerchief. When wL
reach a camera-to-subject distance of  eight  feet for B&W  or three
feet for  color, then two  thicknesses of handkerchief  are required.
And, when we are at six  feet for B&w  or two  feet for  color,  three
thicknesses should be used. Other  effects that can be gotten  with  a
blue lamp on the camera will be discussed in Chapter  Il.  So  if you
think  that you will be using trlue or regular flashlamps or flashtubes
for a fill-in, make up_a standardized chart so that you  will know  just
how many handkerchiefs  to use for  the correct  fill-in  efiects.  I{  the
lamps are used without  handkerchie{s,  the flashlamp  or flashtube  will
act as the dominant  or main  light and the sunlight then becomes your
fill-in  light  (see Chapter ll-Flash).

fkoflex   Safe-set  fndoor   Flash
     Since the sun doesn't  shine  strongly  inside  every  pdrt  of  our
houses and not  at  all  during  the  night, we must  provide   artificial
illumination   to  see. This  lighting   is seldom uniform  and never as
strong as the sun.  If we want  to take pictures, we must either take
great care in illuminating   the rooms  or use flashlamps  or flashtubes.
Flash  is simple  to use but  its functions  must be outlined  so that   it
can be used to best advantage. With  flash, you must remember  that
the  ignition   of  the lamp  and  the opening  of  the  shutter  must be
matched. The flashlamp may reach peak illumination  for  rls},  r1200,
or l/1000  of a second or less. One shutter speed works well with  all
types of flashlamps or flashtubes-L125  second. If you set your shut-
ter speed at Ll25 you can always be certain that you are prepared
for any form  of flash photography  that you may need to  ,rr". bon,t
be afraid  to take action shots. The slowness of  the Ll2S second is
usually meaningless. The speed of the flash itself-whether      it be l/50
(class M),  r1200 (class F),  or 1/1000 as with a flashtube-actually
stops the motion. The  Il25  second only allows the shutter synchron-
IB


                  )
View original page 15Page 16 · Read text
www.orphancameras.com
ization  to take place during   its open time  while  the actual picture  is
made by the flash itself.

Proeedure    for  fndoor   Flash  Pictures
    Here  is the simple procedure  for making an Ikoflex  flash picture:
      1. Refer to the SAFE-SET CHART,  pre-select your  film. Then
make your equipment adjustment.  If you  still have outdoor color film
in your camera, use blue lamps or a speed light. Otherwise, load your
camera with  indoor  color  film. Use the clear white flashlamp and  its
color correction  filter   if one is needed. As an example,  if indoor  Ekta-
chrome  is used, an BIEF   filter must be used over the camera  lens.
Otherwise  the  result  will  be too  blue. Check Chapter 3 to see that
flash and film  will match  correctly.
      2. From the chart, pre-select a subject size and subject distance.
      3. Set your distance scale.
      4. Choose the aperture  for this distance and set it.
      5. Looking  at your ground glass, move back and forth  until your
subject is sharp. Do not touch the focusing knob.  If you do, you will
find that you have turned  your  scale a considerable  distance because
the lkoflex's  focusing knob  is very sensitive to change. A quarter  turn
is sufficient to shift   it from  infinity  to three feet. So leave your  focus-
ing control alone and, instead, walk towards your  subject until   it  is
sharp.
      6. Even  it you are a few inches in front  of or behind your  actual
distance setting when the peak of action occurs and you take the pic-
ture, the image  will  still be sharp. The depth of sharpness adequately
compensates for  slight  variations  or errors  in camera-to-subject  dis-
tances. (See Chapter 4)
      7. Sfhen you are satisfied with  the ground  glass sharpness, com-
pose your  picture  (you can learn  to do this  while  focusing)  and  at
the peak of action  or expression press the release downward  gently.
A  click  of the shutter, a flash of the lamp, and you have taken a suc-
cessful indoor  picture. Then wind your  film   if you are going to take
another picture within  a short time.
                 Tur  Krv  ro SAFE Ptctunrs
    The instructions given for using the SAFE-SET METHOD  are
simple  and  will  produce  a  technically  perfect  picture  each  time.
Check on yourself each time you take a picture  by using  the letters
in the word S-A-F-E to remind you of the four  vital factors in taking
a picture:
                                          L9
View original page 16Page 17 · Read text
www.orphancameras.com
      S-snurrnn;    A-ApERruRE;   F-Focus;   E-Exposunr
    The Ikoflex  is a truly  flexible  instrument,  capable of many tech-
nical uses under  varying   light,  shutter speed, and distance  settings.
It  is possible to  alter the shutter speeds, the  iris  openings, and the
focus through  close-up devices so that you can derive the  full bene-
fits of  its technical and scientific  possibilities.  Chapter 2 will  {urther
elaborate  the  S-Shutter,    A-Aperture,    F-Focus,   and  E-Expo-
sure. You  will learn how to change your camera with the SAFE-SET
METHOD  so that a never-ending  array  of subjects can be recorded
with your Ikoflex.


20


                                )
View original page 17Page 18 · Read text
www.orphancameras.com
 4.   Loading and Unloading  the Ikoflex
          If your camera is new to you, or  if  it has been loaded by your
 camera store clerk, wait until you hear the end of the paper baclirrg
 flapping in the take-up spool chamber, after you have wound the film
 past the twelfth exposure.Now:
       1. Open the back by pulling the locking bolt down.
      2. Pull out the take-up spool film retainer from the outside of
 the camera and turn  it so that it remains in the expanded position.
      3. Take out the exposedroll, hold the paper firmly, and then seal
 the spoo1.Place the empty spool in the take-up chamber and fit the
 slot so that  it engagesthe winding knob. Then pull up and turn the
 spool holder so the spool drops into position. Tuin takl-up spool film
 retainer until it snapsback into closedposition, thus holding spool in
 place.
      4. Pull out the unexposedfilm spool holder and turn  it so that it,
 too, remains in the extendedposition. Removeany spoolsthat may be
 there. Place an unexposedfilm roll in the chamb"i ro that one
 prong engagesthe right side of the spool. Then press down "u-"ruthe lip
 side_of the_spool_asyou simultaneously release the unexposed spool
 holder so that it slips in and holds the other side of the un&posed film
 spool. The Ikoflex springs will now hold the film firmly so the paper
 leader cannot unravel.
      5. Gently pull out about five inches of the paper leader and in-
 sert the_tongueinto the large slit of the take-up rpoot. Turn the wind-
 ing knob one or two turns to fix the tongue in and on the spool.
      6. close the back and_engagethe lock by pressing back bolt up.
      7. open the film window on the bottom of the       and look
 into it as you turn the winding knob slowly until the number"u-"ra   I appears
 in the center of the window.
     B. close the window. Turn the exposurenumber setting knob by
pressing it and turning  it counterclockwise(or follow thJdirection
arrow on the knob of the IIa)  until  it catchesand the window beside
the winding knob showsthe numeral l. Now your shutter is set, your
counter is at l, andthe safety window beside the shutter release,Lext
to the focusing hood, is red, indicating that an exposurecan be made.
The exposure can only be made when the focusing hood is opened.
After the releaseis pressed,the exposure safety winiow  will be silver
in color. Turn the winding knob until you  flel a slight resistance;
then slowly continue winding  until the knob can tuin no further.
These safety features prevent double exposures and blanks.
36
View original page 18Page 20 · Read text
www.orphancameras.com
                           korr,nx      Il  Loeonvc
     The Ikoflex  Ia differs from  the Ikoflex  IIa  in that once the wind-
 ing knob can turn no further,  the shutter must be cocked for an ex-
 posure to be made. The shutter  is not cocked automatically.  The red
 color  in the exposure safety window  indicates that an exposure can be
 made, while a silver color  indicates  that an exposure has been made
 and that the camera should be wound  to the next film frame. The lko-
 flex IIa winds the film and cocks the shutter simultaneouslv  so that   it
 is ready immediately  for the next picture.

                       WrNorNc Frrnr
      Film should be wound to the next exposure only  if  it is to be used
 immediately.  Otherwise  the  film   will  not  lie  properly   in  the  focal
 frame and parts of  it,  if exposed, may be blurred. So it is best to wind
 the film  only when a picture  is to be taken.
     The exposure counter ceases to operate after the twelfth exposure
and you should continue winding   until you hear the end flapping  in
the take-up chamber.

        Cr,rannvc  rns  ExposuRE CouNrER BEFoRE Loeorue
         If the exposure counter has been set in error,  it must be cleared
before fresh  film  is loaded;  otherwise you  will  be unable  to count
your exposures. The exposure counter  is cleared by  first opening the
focusing hood, pressing the shutter release, and then winding  the film
so  it  is automatically  set with  the lkoflex  IIa  or by hand cocking  the
shutter  of the  Ikoflex  Ia and repeating  this sequence until  the  ex-
posure counter passes 12. Only now should the  film  be loaded  into
the camera.


3B
View original page 20Page 21 · Read text
www.orphancameras.com
l-J .   S: The Shutter
                                     .WORKS
            HoW  THE CAMERA SHUTTER
    The shutter controls the flow of light through the lens of your
camera. The  iris diaphragm controls the  intensity- of  light  seen
th*.rgh   it. The shuttei         the length o{ time the light  is per-                              "oitrol,                   An exposure is the product o{ the iris open'mitte; to strike the film.
i"g       ,fte shutter speed. The- longet tL" shutter remains open, the
    ""a     Hght wilt enter ihtorrgh the lens. The iris opening controls the*3r"
depth #  ,h.rpness as welf as the volume of light admitted to the
film's surface. This volume of available light determines whether  it
will be necessaryto leave the shutter open for a long -or for a short
time. When the volume of light is very low, you may be required to
leave the shutter open for as long as an hour or more. Exposures so
made are called time exposures and are designated by the letter T'
 If, on the other hand, a large amount of light  is available, then an
         can be made in as little time as I/500  second. A  short
 "*por,rr"            is used to stop the fast motion of moving objects.
 "*po.r..r"

        SHUTTER SPEEDS FOR MOVINGSUBJECTS
                    LTNE OF T,IOTION
suBJECr Ar 25 FEEr                           10             s
walking at J miles per hour     l/50         r/t00        r/r50
Children playing              1/r00       r/200       r/300
Street activity            Vrco      r/200      u3a0
Swimmers, skaters               r/ rca      r/200       r/30a
                                                   *r/500Vehicles at 2A m.p.h.    ,              I /ZoO      L/400
                                                   *r/500Football, running              r/200       r/400
                                                   *r/500Vehicles at 40 m.p.h.          r/400       r/500
Tennis                    *L/500       t/soo      *l/500
Horse race                  *l/500      *l/r00      *l/500
 Airplanes                 *L/500     *t/500      *t/500

N-8. Wben your subiect  is at 50 ft., multiply  all speeds by
       2(L/ 100x2= L/50\.
      For 100 t't. subiect distmzces, multiply  all speeds by
     4 (l/l0o x 4=I/2r).
     *PAN to stop motion.
                                         39
View original page 21Page 22 · Read text
www.orphancameras.com


  T h e   l k o f l e x   l f o ' s  s h u t t e r s p e e d c o n b e  C h o n g i n g  t h e s p e e d s o f   t h e    l k o f l e x   l o .
      s e e n  f r o m o b o v e   i n   t h e w i n d o w .
               Crroosr\c rFrE Busr Snurrnn  Spnrn
      Frotrl the motion chart, you can choose the correct shutter speed
 rvhich rviil stop action and thus prevent the image from  becc,,riring
 blurrecl- You  will  find that slow-moving objects do not r.equire fast
 slleeds.Slow speeds generally allow you to use a narrow  iris gpeni'g
 n hich rt.ill produce a gain in overall sharpness.A faster shutter .p""i
 requires a wider  iris opening. Consequently, the depth of sharpness
w ill be verv shallow. The choice of iris opening can procluce an over-
 all sharpness or an out-of-focus background. As an example, land-
scalleswith trees or people in the foreground usually require a narrow
opening ancl thus a slow shutter speed to produce an overall depth
of sharpness.A portrait. on the other hand. may look better with a'
out-of-{ocus background. The wide opening needed to produce this
out-of-focus background must be coordinated with a rapid shutter
speed so that the lens opening-shutter speed relationship will rernain
correct.
     Action  pictures may require the fastest speed of your  Ikoflex
Sr nchro-Compur shutter  ( l,i 500 second) to stop the motion.
    Your  Ikofler  is equipped with a Svnchro-Compur shutter. The
shutter is uttiversalh-famous for  its accuracv. The built-in flash en-
ables the shutter to be s\.nchronizeclsuccessfulh with  all fornrs o{
flashlarnps or  fl ashtubes.
+o
View original page 22Page 23 · Read text
www.orphancameras.com


T h e w i n d i n g   l e v e r f o r  t h e   l o ' s d e l o y e d - o c t i o n r e l e o s e            T h e   s h u t t e r     r e l e o s e
   c o n b e  s e t o n l y    i I    l h e  s y n c h r o - s w i t c hi s o n X .            w i l l   o p e r o t e   o n l y       i f
                                                                                                                                                             t h e      f i n d e r   h o o d         i s
                                                                                        o p e n .


              SvrclrRo-ColrpuR Srtlirrrn SpcEDS
    Your Ikr,flex IIa Sy'nchro-Compur shutter has speeds of B.  l. 2.
5. 10, 50' 100- 250, and 500. The Ikoflex Ia has a Prontor-SV shutter
rvith a top speed of 300. The numbers are actuallv frac;tions referring
tcr parts of a second. For instance the 5 means  I /5 second. the 25
rneans I,i25 second. the 500 means l/500 second.
    Both the S1-nchro-Compurand the Prontor-SV shutters have only
a B setting. The B means that when the shutter release is pressed. the
shutter mechanism rvill open and remain open only as long as pressure
is maintained. As soon as the pressure is released, the shutter will
close. The B. also knorvn as "Bulb,"  setting is used for short expo-
sures up to three or four seconds.
    Time Expo..ures (T)  can be rnade with either shutter, usirrg a
special self-locking cable release which has a set screw to hold the
cable releaseplunger down" When the set screw is released.the shutter
H'ill close.
    Bulb and Tirne exlrosures are a valuable aid  in  scientific pho-
tographr. nhere long exposures must be made. Thel' are also useful
for photographing firervorks where the shutter relnains ol)en fn,r a
longer period to catch the whole action of a skvror:ket.
                                        4r
View original page 23Related documents and language editions

Zeiss IkonPDF
ZEISS IKON IKOFLEX I
User manual
17 pages · EnglishRead →

Zeiss IkonPDF
Zeiss Ikon Ikoflex
User manual
17 pages · EnglishRead →

Zeiss IkonPDF
Zeiss Ikon Ikoflex IIA
User manual
32 pages · EnglishRead →

Zeiss IkonPDF
Zeiss Ikon Ikoflex III 23 - 24 pgs. missing
User manual
26 pages · EnglishRead →
Zeiss IkonPDF
Zeiss Ikon Ikoflex Ia
User manual
29 pages · EnglishRead →

Zeiss IkonPDF
Zeiss Ikon Ikoflex Ib
User manual
31 pages · EnglishRead →
Zeiss IkonPDF
Zeiss Ikon Ikoflex Ic
User manual
32 pages · EnglishRead →

Zeiss IkonPDF
Zeiss Ikon IKOFLEX 1A
User manual
18 pages · FrenchRead →

Zeiss IkonPDF
Zeiss Ikon Ikoflex 1A numérisation d'une seule page
User manual
26 pages · FrenchRead →

Zeiss IkonPDF
Zeiss Ikon Ikoflex IIa Gebrauchsanleitung
User manual
32 pages · GermanRead →
Zeiss IkonPDF
ZEISS IKON IKOFLEX
User manual
16 pages · Not specifiedRead →
Zeiss IkonPDF
Zeiss Ikon a guide to the IKOFLEX I-a
Reference guide
12 pages · Not specifiedRead →
From the M. Butkus archive. Original publisher and archive notices are retained.
Check the model and edition against your equipment.
PDF verified 2026-10-10.