Film cameras
Zeiss Ikon Ikoflex Ia User manual
User manual for Zeiss Ikon Ikoflex Ia. 29 pages in English. Read the original PDF, download or print a copy without registration.
29 pagesEnglish2.1 MB PDF
Loading your manual…Open PDF directly
Document details
- Brand
- Zeiss Ikon
- Model / document
- Zeiss Ikon Ikoflex Ia
- Document type
- User manual
- Language
- English
- Pages
- 29
- File size
- 2.1 MB
- Category
- Film cameras
- Document date
- Not specified in catalog
Search available document text
Find a term, then jump to its page in the original PDF. Image-only pages may not be searchable; check the PDF for exact wording and diagrams.
Page 3 · Read text
www.orphancameras.com


The
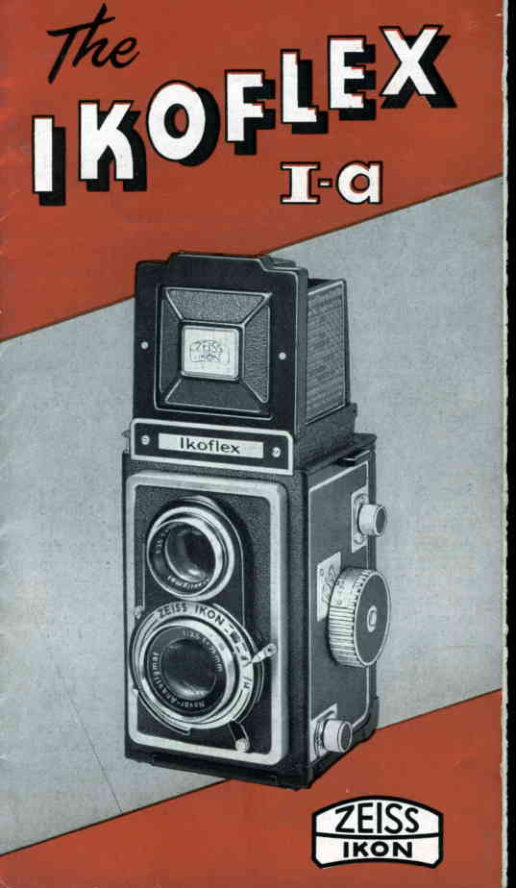
       I K O F LE X  I a
manufacturedby ZEISSIKON A.G. STUTTGART,is
a twin-lensmirror reflexcamerataking 12 2rI attx)tf atl
pictures on B IIl8  roll film as well as colour film'
its viewing lens renders an unusually brilliant and
sharp image of the motive on a bright ground glass'
Since the viewing and taking lenses, which have
equal focal length and lens speed,are coupled,the
txopt-Ex  .utt be manipulatedfast with one hand,
and it permits convenientcompositionand framing
as well as 1000/oaccuratefocusing.Both the taking
and the viewing lens are coated to prevent reflexes'
Since the taking lens is excellentlycolour corrected
 it ensuresblack and white as well as colour photo-
graphs of unmatchedsharpnessand deftnition' \X/ith
 ihe- aid of the dependableground glass focusing
mechanismthe efftiiency of the high-speedlens of
 the lroplEX  can be fully exploited.
 The IKoFLEX Ia is equippedwith a fully synchro-
 nised shutter and an automatic fflm transport lock
 preventingdouble exposuresand blanks'
 Beforeinsertingtbe first film into your TK0FLEX  I a
 carefully practisethe manipulationsdescribedin tbis
 instruction book, 1l you take tbis trouble, you will
 lrom tbe oery beginningmake good picturesand the
 IKoFLEX will remain to you a sourceol constant
 pleasure,
 The  technical development may  require  slight  dranges on the
 camera as compared to the description.


                                                                                                                                                                                                                                                                                                  I
                                                  -..",.--!is,,?:^,-.---,          ;tl;rr-            .      .   .-   *L,
View original page 3Page 4 · Read text
www.orphancameras.com


OPENING AND CLOSING OF THE
FINDER HOOD
For viewing the object on the ground glass, open the
finder hood by pressing bolt (20) to the left. The hood
will automatically erect itself. For pin-point focusing
swing out the focusing magnifier which is fftted to the
frontside of the ftnder hood. \Vhen closing the ffnder
hood, ftrst fold the focusingmagnifter,then the left and
 right sides,then the rear side and ftnally the front side,
which will catch automaticallv.


FOCUSING

The specialfeature of the IKoFLEx  is the ground glass
imageproducedby a mirror reflex systemand a viewing
lens, which ha{the\same optical efffciencyas the taking
lens. The ground $lass image rendered by the viewing
lens of the IKoFLEX is equal in sharpnessand compo-
 sition to the image produced on the ftlm by the taking                             ' l
lens. A ground glass image is especiallysuitable for                        PrI
studying the effect and sharpnessof a picture and above
 all, permits 1000/oaccuratefocusing.
View original page 4Page 6 · Read text
=. 4Er
          -       www.orphancameras.com


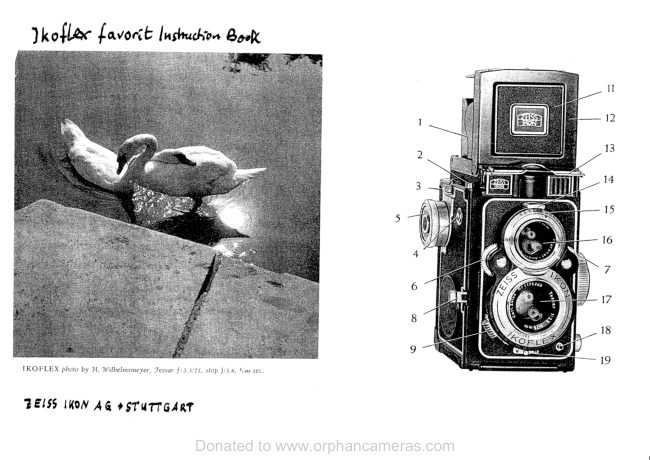
   THE PARTSOF THE IKOFLEX IA
      1 Right side of finder hood
,>-v  -   2 Bo-dyshutter releasethreaded for fttting cable
           release
      3 Signalwindowof doubleexposurepreventiondevice
      4 Eyelet for carrying strap
      5 Film transport knob
      6 Automatic picture counter
      7 Setting wheel of automaticframe counter
      8 Exposuretime setting ring
      9 Shutter winding lever
     10 Diaphragm setting lever
     11 Taking lens
     12 Viewins lens
    /13  Windoi'  fo. verifying exposuretime setting
        i  t+ \V;ndow for verifvine diaphrasm settins         '     15 L.u.r  for winding d-elayeilact"ionreleaie and
          flash synchronizationmechanism
     16 Synchro-switch
     17 Focusingmagnifter
    1B Right ride oflffnder hood with exposuretable
     19 Frime-type sports {inder eyepiece
     20 Bolt for closins finder hood
       2l  Bolt for closini cameraback
     22 Upper ftlm spool holder
     Z3 Dipth of fteld scale
     24 Focusingknob
     25 Lower film spool holder
     26 Film window
     27 Contact nipPle
     28 Tripod thread
     29 Spoits finder frame in front side of ffnder hood
     30 Piate covering front side of finder hood from
         the inside
View original page 6Page 7 · Read text
www.orphancameras.com


    OPENING AND CLOSING OF THE
     FINDER HOOD
         For viewing the object on the ground glass, open the
          ffnder hood by pressing bolt (ZO) to the left. The hood
            will autornatically erect itself. For pin-point focusing
         swing out the focusing magni{ier which is fitted to theII
          frontside of the ffnder hood. \When closing the ffnder
        hood, ffrst fold the focusingmagniffer,then the left and
           right sides,then the rear side and ftnally the front side,
        which will catch automaticallv.


    FOCUSI NG
       The specialfeatureof the IKOFLEx is the groundglass
        image prodtrcedby a mirror reflex system and a viewing
         lens,which has the sameoptical efftciencyas the taking
         lens. The ground glass image rendered by the viewing
        Iensof the IKoFLEX is equal in sharpnessand compo-
          sition to the image produced on the ftlm by the taking
         lens. A ground glass image is especiallysuitable for
         studyingthe effect and sharpnessof a picture and above
            all, permits 1000/oaccuratefocusing.
View original page 7Page 8 · Read text
www.orphancameras.com


The  unusually bright ground glass image of  rhe
I K O F LEX shorvs a surprisingly clear pre-view of an
object.Taking lens and viewing lens are coupledso that
both lensesare foctrsedsimultaneously.Since the ground
glass image gives a very good idea of what the actual
photographof the scenerywill look like and whether it
is worthwhileto take it, the IKOFLEX is most suitable
to judge in advancethe photographiceffect of a scene.
The novel ftnder systemhas such a high light intensity
that the ground glass image is evenly illuminatedto the
very corners.
Focusingis donewith the focusingknob (24). \With a 90o
turn this knob coversall distancesettingsfrom 3 feet to
in{lnity. The ground glassclearly shorvswhen the rnotive


                                              ToLusinq
                                                                      llte  piewllndet  innqe
                                                 by turnincl tlrc rlislrutcc
                                                                  settitrtl krtttlr
View original page 8Page 9 · Read text
www.orphancameras.com


is completely sharp. Thanks to these  f eatures, the
 I K o F LEx permits very convenientand 1000/o accurate
focusing.Even if the diaphragm aperture of the taking
lens is reduced,the viewing lens retains its full light
intensity and therefore,permits pin-point focusing.The
depth of {ield of the stopped-downtaking lens can be
exactly ascertainedfrom the depth of fteld scale (23).

Needle-sharpfocusingcan be achievedwith the aid of
the focusingmagnifter(17). This magnifteris swung out
rvith the right index ftnger after pressingthe right side
of the ftnderhood toward the insideof the hood. In using
the focusing rnagniffer, the focusing eye must be as
close as possible to the lens and directly above the
centerof the magnifter.


)tatfiilier                                                                                                                                                                                                                    I
fcrrlrirt-lrofrtl f trcrr.sirttt
View original page 9Page 10 · Read text
www.orphancameras.com


T H E D E P T H O F F I E L D S C A L E
Beside the focusing knob (24) is the depth of fteld scale.
The bracket-like lines of this scale indicate the depth of
fteld for any given lens aperture and distance setting;
the figures at the convergent end of these lines indicate
the diaphragm  settings. The depth of  fteld for a given
lens aperture can be read off the focusing scale at the
two distance settings to which the left and right brackets
of the respective diaphragm  setting point. when  using
distance setting 5 m (approx . 16 feet) and diaphragm
setting 77, the depth of  fteld ranges from 3 m (approx.
10 feet) to 15 m (approx. 49 feet). tVith diaphragm setting
16 it would range from 2,5 m (approx. 8 feet) to infinity
and with diaphragm setting 3,5, from 4 m (approx. I 4 feet)
to 6 m (approx. 20 feet). This scale therefore, perrnits in
any case an exact control of the depth of  fteld.


                                                   Dislrtrtce settittQIerrolr
                                w i tb del>tlt- ol - liel d -
                                           scale
View original page 10Page 11 · Read text
www.orphancameras.com


H O \ 7  T O S E T T H E D I A P H R A G M

The diaphragm is set with lever (10). The settings can
be verifted in the diaphragm setting aperture (1a). The
 larger the diaphragm setting figures the smaller is the
lens aperture. Every reduction of the lens aperture en-
larges the depth of fteld but conditions an increase of the
 exposure. Small lens apertures (large diaphragm setting
 figures) are used in order to obtain a large depth of fteld.
However,  in  taking  pictures from  the hand  the lens
aperture should not be reduced too nruch, otherwise the
camera cannot be held  still during the required long
exposures.It is advisable to use the exposure table on the
 left side of the ftnder hood (18). Howewer, since the
I K o F LE X ground glass permits 1000/o accurate focusing,
 it  is recommendable to use short exposure times arrd a
wide rather than srnall lens aperture.


D iaplrl d tltrr sclt itttl
lepar  I prl/rrss tpltear
i t t  t l t e r n i , r r l t t r l i
View original page 11
Page 12 · Read text
www.orphancameras.com


TH E EX POSU RE TABLE
The exposuretable (18) on the left side of the ftnder
hood indicatesthe exposuretime for the most important
lighting and taking Conditions.The exposuretimes are
valid for picturestaken in sunlightwitha40ASAgrades
fihn. In case a film with different sensitivitv is used or if
different lighting conditionsprevail, the foilowing points
sl-rouldbe observed,
   1. In using 20 ASA ftlm multiply the exposure time
    on the table by 2.
     In using 80 ASA film divide the exposuretime on
     the table by 2.
  2. The exposuretime given for diaphragm setting 8
     rnustbe multipliedby 2 if diaphragmsetting 11 is
    used, and multiplied by 4  if diaphragrnsetting 16
      is employed.
  3. \,)/hen the sky is very cloudy, multiply the given
    exposuretimei b-y 2,-if the iliy  is r"uily ove"rcast
      thi given exposuietimes must be multiplied by 4.
  4. During the months of September,October, March,
    and April the given exposuretimes must be multi-
     plied by 2, during the months of November and
    December,January and February they have to be
     multiplied by 4. D.uring the latte-r foui months the
     given exposure times are applicable only from
    10 a. m. to 14 p. m.
The exposuretimes given on the table are valid for
medium northern latitudes.
Under all lighting conditions,even under the most dif{i-
cult circumstances,the photo-electricexposure meter
IKOPHOT, manufacturedby  the ZEISSIKON A.c.
STuTTGART, indicateswith-utmost dependabilitythe
exact exposuretime required for any picture.  It  is a
vital photographicaccessoryfor the tKoFLEx.
View original page 12Page 13 · Read text
www.orphancameras.com


THE SHUTTER
The IKoFLEX  Ia  is equipped with a fully synchronized
Prontor-Sv shutter with  sl'rutterspeeds ranging from 1 to
t/gooseconcl.The shutter speeds are set with setting ring
 (8). Thc shutter speed settingscan be verifted from abovc
in the window (13). The ftgures appearing in this window
indicate fractions of  a second, 5  for  instance means
 r/s second.
For long exposures use setting "8".  With  this setting
the shutter remains open as long as the shutter release
(2)  is pressed. All time exposures should be made with
a cable release and from a tripod or another ftrm support
(table, clrair, etc.), in order to avoid any shake of the
canrera. The clelayed action release can not be used for
 trrrrecxposures.


 I t/rrl.rlrtc litttg.r
'cllirtrl rinq (palues
dltpear ilr llre 11'j111f1rJ1'
View original page 13
Page 14 · Read text
www.orphancameras.com


T H E  Z E I S S    I K O N  C A B L E R E L E A S E  e q u i p p e d
 with plunger catch may be used for long time exposures.
 It  is screwed into the thread of the body shutter release                'photographs
 (2) - For  action             and  short time exposures
                      'tBtt                                                ttpress the plate                    toward                                   Ctt, slightly turning  it, so
 that  it remains in this position. For long time exposures
                                     plateB must stand
                                            off from C. Upon
                                 pressingthe cable
                                  release with  the
                                two plates in this
                                     position,the plun-
                                 ger remainsin the
                                  "releaseposition"
                                         until a slightpres-
sure is applied to
plate  "8"  .  \With
this plunger catclr
you  can  make
time exposures of
unlimited  lengdr
without  constant-
ly  pressing  the
cable release.
View original page 14Page 15 · Read text
www.orphancameras.com


TH E RED-DOT S ETTI NC

In order  to  exploit under good lighting  conditions the

large depth of  fteld of a reduced taking  lens aperture,

set the diaphragm lever and the focusing knob on the

red dots. Vith   this setting everything beyond approx.

13 feet  rvill be rendered sharply  without  any  further

focusing. You need only do the framing on the ground

glass or, for split-second snapshots, with the frame-type

sports finder. Llnder especially good lighting conditions
nrake a l/too second exposure/ otherwise t/ro second er,
under less favorable conclitions,1/,r;second.


Recl-clotsettinQ Jor
srrap-sbols
View original page 15
Page 16 · Read text
www.orphancameras.com


HO\)7 TO HOLD THE IKOFLEX
DURING THE EXPOSURE
\When taking pictures from the hand the  I K o FLEX is
hooked to a carrying strap, which must be adjusted in
a way as to permit viewing easily the picture in the
ftnder hood. It is advisableto hold the camerawith the
right hand, whose index ftnger sets the exposuretime
while the thumb winds the shutter and then rests on the
body shutter release.The left hand supportsthe camera.
Thumb and index ftnger of the left hand manipulate
the focusing knob (24) while the middle or the index
ftnger sets the diaphragm. The exposure is made by
gently pressing the body shutter release (2) as far as
possible.After every shot advancethe ftlm by one frame
by turning the ftlm transport knob (5) until stop.


                                            fhe IKOFLEX readt
                                                                                     f or takinq piclrrres
View original page 16Page 17 · Read text
www.orphancameras.com


            TH E FRAM E-TYPE
             S PORTS FI N DE R
                      For taking pictures at eye
                          level use the built-in frame-
                       type sports ftnder. Press up-
                        rvard the inner plate of the
                         frontside wall  of the ftnder
                    hood (30). The frame of the
                           front part of the ftnder hood
(29) and  tl're eye piece (19)  in the rear part  form  the
sports finder.  Proper framing  is guaranteed when the
edges of  the eyepiece cover exactly the edges of  the
frontside frame.  Focusing  is done in advance on the
ground glass or  with  the  aid  of  the red-dot  setting.
This frame-type viewftnder  is preferably used for sports
photographs and other split-second snap-shots.


Tranrc linder f ctr
..rrafr-.sLrolsarrd sporl.s
pfislctqraphl"
View original page 17Page 18 · Read text
www.orphancameras.com


LOAD I NC TH E CAM E RA
For loading the camera disengage the fflm lod<ing
mechanism.This mechanismis out of gear if, after the
twelfth exposureof the preceding ftlm (number 12 on
the frame counter),the ftlm has beenadvanced.After the
twelfth exposurethe ftlm transport knob can be turned
indeffnitelywithout any resistance.
However, should the ftlm transport locking mechanism
not be out of gear, the mechanismhas to be advanced                         'tuntil number  l2tt has passed the picture counter. To
this end wind the shutter, releaseit and keep pressing
the body shutter releasewhile turning the fflm winding                                         ttknob. Once the number   lzt' has passed the frame
counterwindow the ftlm locking mechanismis out of gear.
Open the camera back with bolt (21), pull out the film
spool holder (22) in the upper spool chamber and turn
it so that  it cannot snap back. Then insert the empty
take-up spool into the spool chamberso that the prong
                                        of the ftlm wind-
                                    ing knob (5) en-
                              gageswith the slot
                                       of the spool.The
                                 spool holder will
                             engageby turning
                                                              it back, then the


                                                        'Jnsertinq

                                                      the empty  flntspool  in-
                                                              to the take-up cbanrber
View original page 18Page 19 · Read text
www.orphancameras.com


spool can be conveniently turned with the ftlm winding
knob.
Insert the unexposed ftlm  spool into  the  lower spool
charnber, handling the lower spool holder as the upper
one, to that the beginning of the protective paper points
toward  the upper  spool chamber. Pull  the  protective
paper over the picture frame, insert  it into the long slot
of the take-up spool and turn the ftlm winding knob (5)
until  the  protective paper  is properly  tightened. Be
careful that the paper winds evenly on the take-up spool.
Then close the camera and watch the protective paper
passing the ftlm window (26) of the camera and turn the
ftlm winding knob until number  " 1 " appears in the ftlm
window.  This done, the  ftrst frame  of  the unexposed
ftlm is ready for exposure. Close the film window  (26),
turn  the wheel  (7)  of  the  automatic   f rame  counter
mechanism counter clockwise until some resistance is
felt in the mechanism. The frame counter now indicates
number " l"  .
 It  is advisable to
Ioad the I KO FLEX
in  diffused  doy-
lighr; when  you
are  outdoors  in
sunshine, Ioad  it
in the shadow ofyour body.                                I
                                                         .t
)trsertinq
1l.tgpytttect i rt tl l>tl>er
View original page 19Page 20 · Read text
www.orphancameras.com


AUTOMATIC FILM TRANSPOTITLOCK
AND AUTOMATIC FRAME COUNTER
After  every exDosure aCvance the  filnr by  turning  the
film winding knob (5) until stop. As frame numbers neecl
not be watched in the film window (26) the ftlm can bc
properly advanced even in the dark. The number of the
frame which  is ready  for  the exposure automatically
appears in  the picture counter window (6).Simulta-
neously a red  dot appears in  the signal windo'*'(3)
beside the finder hood, indicating that the section of the
ftlm in the picture frame has not yet been exposed. If
the  ftlm  is nct advanced after  the  shutter has been
released a white signal appears in this aperture.
The ftlm can be advanced only  if the shutter has been
released. Likewise, the shutter can only be released if
the ftlm has been advanced. Consequently,the IKoFLEX
excludes double exposures or blanks.


                                                                     .ietlirrrt the  f yor,r,
                                                     cLrunler
View original page 20Page 21 · Read text
www.orphancameras.com


U N L O A D I N G T H E C A M E R A


The  lilm  transport  locking mechanism automatically
disengages after the twelfth  exposure, so that the ftlm
can be advanced freelv. Turn the ftlm winding knob (5)
until the end of the protective paper passes the open
Iilm window (26).open  the camera back by pulling out
the bolt (21). Pull out the ftlm spool holdei  e2f  a'd
remove the spool only after having glued the label of the
exposed film.  Irnrnediately remove the empty   f eeding
spool  f ronr the lower spool chamber anC insert  it  into
,lt. ypper spool chamber. Take care that the prong of
the fthn rvinding l<nob engages properly with the sloi of
the spool. This done, a new ftlm may be inserted.


Tilm  1oi111fe11rdnd
triptttl  tlread   orr  tl;e
bttttorrt  trj   tlrc
I K OFLEX


     t9
View original page 21Page 22 · Read text
www.orphancameras.com


THE EXPOSURE

Set the diaphragm and the shutter speeds according  to
the exposure table on the ftnder hood or according to the
data obtained from  the photo-electric exposure meter.
The red dot in the signal window  (3) indicates that the
ftlm has been advanced after the last exposure. If a white
mark  is in the signal window, the ftlm winding knob (I)
has to be advanced until  stop.

Prior  to  every shot wind  the  shutter with  lever  (9).
study,  compose, and  focus the  object on  the ground
glass. The moment the ground glass image shows that
a photograph  is worthwhile  to be taken, press the body
shutter release. During  the exposure hold  the camera
safely  in both hands while  the  right thumb  gradually
presses down the release (2)  until  stop. Do  not move
the camera during the exposure. After  the release, turn
film winding knob  (5)  until  stop. At  this momenr the
next frame of the film  is ready for exposure.

The bottom of the IKOFLEX  is equipped with a tripod
thread, into which can be fttted the screw of the tripod.
All  pictures requiring an exposure time  of more than
r/zs sec. should be made from a tripod.  For these ex-
posures it is recommendable to use a cable release,which
has to be screwed into the body release (2).
View original page 22
Page 23 · Read text
www.orphancameras.com


TH E D E LAYED ACTI ON RELEASE


 motion and, after approx. 10 sec. automatically releases
 the shutter, the exposure time being the one sit before-
 hand.


 posure.
Exposureswith the delayed action release can not be
made when using                 ttBttthe  setting
(time  exposures)
or  when  setting
the synchro-lever
 ( 16) on the nrark
near M.


1l'indin4  tl-teIeper  lor
dela'ycd acl itrrr rclease
'-s)lrchro--srpilclrrrrr X)
View original page 23
Related documents and language editions

Zeiss IkonPDF
ZEISS IKON IKOFLEX I
User manual
17 pages · EnglishRead →

Zeiss IkonPDF
Zeiss Ikon IKOFLEX Guide
Reference guide
35 pages · EnglishRead →

Zeiss IkonPDF
Zeiss Ikon Ikoflex
User manual
17 pages · EnglishRead →

Zeiss IkonPDF
Zeiss Ikon Ikoflex IIA
User manual
32 pages · EnglishRead →

Zeiss IkonPDF
Zeiss Ikon Ikoflex III 23 - 24 pgs. missing
User manual
26 pages · EnglishRead →

Zeiss IkonPDF
Zeiss Ikon Ikoflex Ib
User manual
31 pages · EnglishRead →
Zeiss IkonPDF
Zeiss Ikon Ikoflex Ic
User manual
32 pages · EnglishRead →

Zeiss IkonPDF
Zeiss Ikon IKOFLEX 1A
User manual
18 pages · FrenchRead →

Zeiss IkonPDF
Zeiss Ikon Ikoflex 1A numérisation d'une seule page
User manual
26 pages · FrenchRead →

Zeiss IkonPDF
Zeiss Ikon Ikoflex IIa Gebrauchsanleitung
User manual
32 pages · GermanRead →
Zeiss IkonPDF
ZEISS IKON IKOFLEX
User manual
16 pages · Not specifiedRead →
Zeiss IkonPDF
Zeiss Ikon a guide to the IKOFLEX I-a
Reference guide
12 pages · Not specifiedRead →
From the M. Butkus archive. Original publisher and archive notices are retained.
Check the model and edition against your equipment.
PDF verified 2026-10-10.