Film cameras
Zeiss Ikon Ikoflex User manual
User manual for Zeiss Ikon Ikoflex. 17 pages in English. Read the original PDF, download or print a copy without registration.
17 pagesEnglish2.4 MB PDF

Loading your manual…Open PDF directly
Document details
- Brand
- Zeiss Ikon
- Model / document
- Zeiss Ikon Ikoflex
- Document type
- User manual
- Language
- English
- Pages
- 17
- File size
- 2.4 MB
- Category
- Film cameras
- Document date
- Not specified in catalog
Search available document text
Find a term, then jump to its page in the original PDF. Image-only pages may not be searchable; check the PDF for exact wording and diagrams.
Page 2 · Read text
INSTRUCTION BOOK FOR THE
     IKOFLEX II 2't^*2't


ZEISS IKON AG.
D R E S D E N                                  C 2549a E.
View original page 2Page 3 · Read text
- Side flup of view finder hooda
b - Exposnre counter
c - Eyes for  carrying  strap
d - Film  winding  knob
e - Knob   for  setting  the  exPosure
    counter
f  - Knob   for  exchanging  the  feed
    spool
9 =  Lens for taking  the picturett
h -  Finder lens
 i -  Focussing lever
k -  Frame of front  flap of finder hood
  l -  Flap for transforming  light hood
     into  direct  vision  finder


                          www.orphancameras.com
View original page 3Page 4 · Read text
ITI:  Magnifier
I l -  Side fl"p  of finder hood
o :  Aperture  for  direct  vision  view  finder
P :  Catch for releasing finder hood
! [ : Knob  to open thb camera for loading
r   Scale showing depth of focus
D   I)istance scale
View original page 4
Page 5 · Read text
W2
t                                            v * Roller
   on the  film                    w - Studs for holding the take-up
u - Stud for holding feed spool              spool

4
                       www.orphancameras.com
View original page 5Page 6 · Read text
Important  note  !  Although   the  Ikoflex  has very  few  controls  to  attend   to,
 it  is best  to  familiarise  oneself with  them  beforb loading  a spool of film  into
 the camera.  Mistakes  will  then  not  oecur  later  on.

A. Size of film  to use
The  Ikoflex  takes__a picture   of  size 2t l n" *2,I  n".  Films   of  type  B  II  are
usedo which normally__give 8 pictures  of size 2rl;'-Jrln",     but  in the Ikoflex
aFty      are  a_utggatically  arranged  to         .                                     _give_ 12 exposrrte j  in  the  2, I n" * 2r l n"
size instead.  The  spools are light-tighl  when they  are taken from  iLeir  con-
tainerso but  the camera should be loaded
in  the  shadeo and  n o t  in  bright  sun-
ligh_t, in  order  to  avoid  the  possibility
of  fog.

B. Loading the camera
l.  Move  the button  (q) in the direction
    of  the  arrow  and open up  eamera
   as shown  in  illustration.

)
View original page 6Page 7 · Read text
2.  I)raw  knob   ( f )  outwards  and  place
    the  full  spool on the two  studs. The
   tapered  end  of  the  film,  (black  side
    facing   interior    of  camera)   should
    point  towards   the  guide  roller   (.r).


3.  Detach  the gummed  strip  of the  film
    spool  and  lead  the  paper  over  the
    guide   roller   (.r)  and  insert   the   ta-
    pered  end  into  the  slot  provided   in
    the  empty   spool  on  the  other  side
     of  the  camera.


                        www.orphancameras.com
View original page 7Page 8 · Read text
4. Turn  the  film winding  knob a little
    in order to make sure that  the  film
    is running  properly  over the  guide
    roller.
5.  Close the camera  by pressing  in  the
   back.


6. IJncover the red window  (t) by push-
    irg aside the shield, and move on the
    film  by  turning  the knob  (d)  until
    first a hand  and  then  the  figure   t
   appears in the red window.  The first
   picture frame now  lies ready for  ex-
   posure. Shut the red window again, to
   avoid any possibility  of fogging when
   working with panehromatie  film.
View original page 8Page 9 · Read text
'When
7.         winding  on  the  paper  leader
    of  the   film   to  make   the  camera
   ready  for  the  first  exposure,  the  film
    counter   will   also  move   oil,  and   to
    set  it  at  the  correct  figure   it  is  only
   necessary  to  press the  button    (.)  in
    the  direction   of  the  arrow  when  the
    figure   I has appeared  at the red win-
   dow.  The  counter   will   then   spring
   back  to show  the number    l.

C. Unloading the camera
l .  After the twelfth  exposure, give the
    film winding  knob  several c-omplete
   turns  to run  the film  with  its paper
   backing through the camera.
2,o  Open the camera as on page 5 and
  gum down the free end of the paper
   on the spool. Pull the knob (d) out-
   wards and remove the exposed spool.

                        www.orphancameras.com
View original page 9Page 10 · Read text
3. L)raw  our  the  knob   (f),  withdraw
    the empty  spool and  transfer   it  to
    the  take-up spool holder.  One end
    of the spool has a round holeo while
    the  other  carries a slot.   pull  out-
   wards the knob  (d) and arrange for
    the  slot  to   fit  over the stud  *,  of
    the spool holder.

D. Making the exposure
Focussing is done o_n the ground-glass-ff
screen of  the view  finder.      speclaily-magni-
accurat.e focus is necessar]; the
      glass in the hood ("i)  of the vi"ew-{Vi1S
finder can be used. The' depth of focus
for the various diaphragm si-zesis shown
on the scale (r).
l.  Push the catch (p) to the side, and
   the view-finder hood will  spring into
   position automatically.
9
View original page 10Page 11 · Read text
a'l,    .  As  in   all  mirror  reflex cameras? a
    luil-sized  upright   picture,  reversed
     i"ft   to  righi    i;   teett when  looking
   down into the view-finder'


 3.   If   it  is required to hold the camera
     in  a  rath6r  high  Position, the  ex-
    posure may  b;  -tde    at  eYe-level'
    For  this purpose the fl*p  (l) is raised
    and the  ttttf  hood thur  transformed
     into a direct vision view'finder'


 1 0                         www.orphancameras.com
View original page 11Page 12 · Read text
that   vertical   or  hofizontal   lines  of
            the  object  photographed  run  parallel
             to  the  sides of  the  finder,  aj  other-                   oofallingo'           wise              lines  will  result.


       4.  Focussing   is  done  by movement   of
           the  focus lever  (i) which  is besr done
            with  the  left  hand,  as shown  in  the


          ready  to make  the  pieture.J

      1 1
View original page 12Page 13 · Read text
J .  For  the  longer-    instantaneous  ex-
   posures  it   is  useful  to  steadY the
    ir*tta   with  the left hand as shown.
   This makes blurred  images  almost
   impossible.


6. When the magnifying glass is needed
    to obtain  specially accurate focus,  it
   can be rele-asedfrom  its catch with
    the forefinger of the  right  hand, and
    raised into working  Position.


 t2
                         www.orphancameras.com
View original page 13Page 14 · Read text
1. When the magnifying lens is in use,
           the eye should be brought as near to
                    it as possible, as shown in the figure.
        B. After  each exposure? wind  on  the
             film  with  the film winding  knob  (d).
         Watch                    exposure eounter (b) to ,.,                      !h.
        when the next number has appeared,

      Two  point  focus
        In order to have the apparatus always
         set           and  ready  for  average  pictures   tire            o                        r r
       t_o_llowrngr.orrgwrng rsis recommendedrecommended::  stopStop  aboutabout  ffll\I l0 andand, distancedistance  ,between 2l and
      45 feet.  Both  of these positions are *uik"d   with  red dors-
                 position   all  objects  within  a distance  of about  13 1/, feet  to oo (ir-         |n.th.is
         tiy]     ,lI" :lgp]va                 enoughdefined.-  By_setting inl-rn"itli   to l/ru sec.and      emproyrng_ thrs tocussing,  nearly  every  picture  can be taken  whic-li can not
      be controlled  on the gr6und  grass sc"teir owing  to  lack  o?ii*".
          Diaph^ragP                        The diaphragm is set with the aid of the lever (B).       fhe                                            .
       rn cameras fitted with the Klioihut"ter,  the scale is ;;;r;;;J;"        tl"  oppolii"
       side of the shutter. The larger-!h_elens stop numbero trr"r-*.rrl"tn"
      consequently the focal deptf, will be greater', requiring  ; dG;;  exposure"1iJii""L.time.
       l3
View original page 14Page 16 · Read text
2- The Klio  shutter.  The  rflio  shurter
       allows speeds of  t to ,lrrrrh sec. as well
        ajs Igru                      short  time" exposures.  It              ?nd
      should be borne in mind thar itr"  shutrer
      has  to  be  set by lever (J) every time
      before an exposure is made.
                    f n s t a n t a n e o u s  E x p o s u r e s    :
      Turn  the Ring  (R)  until  the red index
       points  to  the  required  exposure time.
     The numbers  denote fractions  of a se-
      cond.  The ex.posureis made by means
       of the lever (D) or the flexible'release,
      whichr.trisrs screwedscrewed intointo  thethe bushbush (C).(C).
                                                             r ioro  the ring (R)  until the index points            l.r"*g^ft;r"^!*posurer                        on                               the                                    lever.(D)                                               o, ?rr'ii"  n"*iti"                                                                 ;nen;      n".h"f..1"_r^.j"-1,_fthe shutter, which r"jr-ol",i;  closed                                                                            ""t".*"                                by                                    a secondd                                                pressure.
          short  time  expo,sures:  Turn the ring (R) until the index points       to the  letter B.  The- shutter                                opened ty  .-pJ"r'rr""  oo-i".r"" roy li-."                                       _is
      the flexible releaseand is closed ooly wh"ti tni.^ pi"rr"""   l".r"r.    .
            .  P* p o s - u r e s w i t h  d e l - a y e d a c t i o n   r e r e a s e : T h e K r i o s h u t t e r
      also has a delaved action rerease which  is set first ry  tne-teoe* (St-;;
     then bv the lever (J). a pr"*"""    in1 il;;  @)"#ir  .ii  .rr" crockwork                                             ""      l5
View original page 16Related documents and language editions

Zeiss IkonPDF
ZEISS IKON IKOFLEX I
User manual
17 pages · EnglishRead →
Zeiss IkonPDF
Zeiss Ikon IKOFLEX Guide
Reference guide
35 pages · EnglishRead →

Zeiss IkonPDF
Zeiss Ikon Ikoflex IIA
User manual
32 pages · EnglishRead →

Zeiss IkonPDF
Zeiss Ikon Ikoflex III 23 - 24 pgs. missing
User manual
26 pages · EnglishRead →
Zeiss IkonPDF
Zeiss Ikon Ikoflex Ia
User manual
29 pages · EnglishRead →

Zeiss IkonPDF
Zeiss Ikon Ikoflex Ib
User manual
31 pages · EnglishRead →
Zeiss IkonPDF
Zeiss Ikon Ikoflex Ic
User manual
32 pages · EnglishRead →

Zeiss IkonPDF
Zeiss Ikon IKOFLEX 1A
User manual
18 pages · FrenchRead →
Zeiss IkonPDF
Zeiss Ikon Ikoflex 1A numérisation d'une seule page
User manual
26 pages · FrenchRead →

Zeiss IkonPDF
Zeiss Ikon Ikoflex IIa Gebrauchsanleitung
User manual
32 pages · GermanRead →
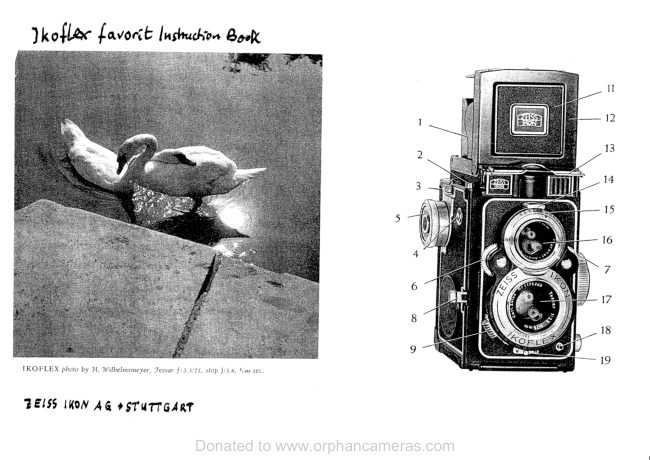
Zeiss IkonPDF
ZEISS IKON IKOFLEX
User manual
16 pages · Not specifiedRead →
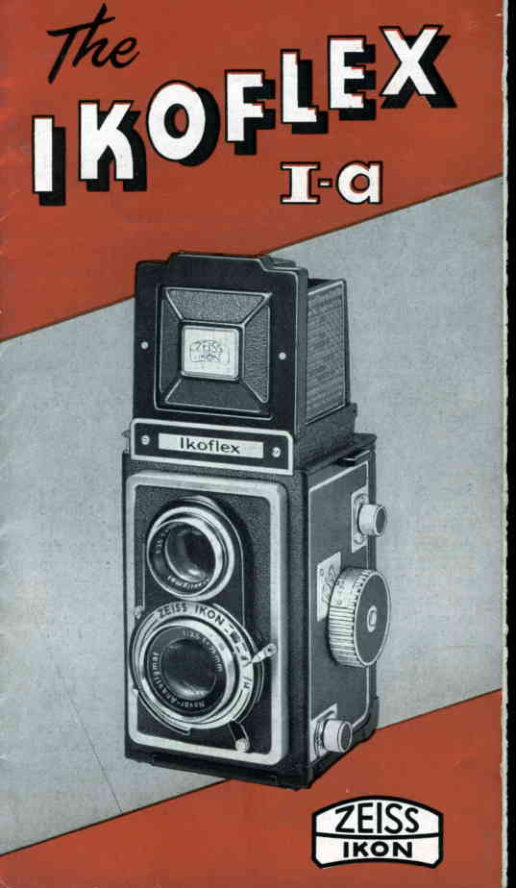
Zeiss IkonPDF
Zeiss Ikon a guide to the IKOFLEX I-a
Reference guide
12 pages · Not specifiedRead →
From the M. Butkus archive. Original publisher and archive notices are retained.
Check the model and edition against your equipment.
PDF verified 2026-10-10.