Film cameras
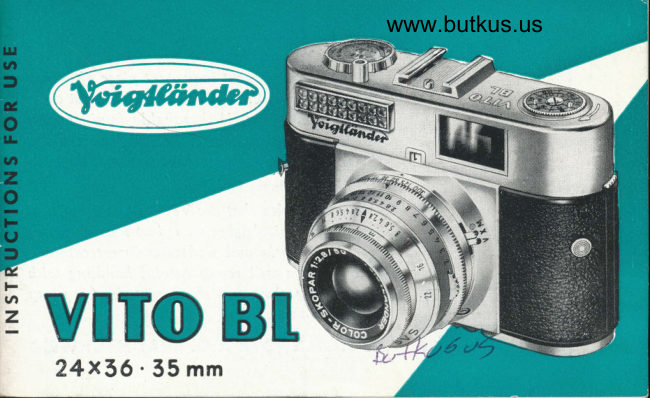
Voigtlander Vito BL User manual
User manual for Voigtlander Vito BL. 38 pages in English. Read the original PDF, download or print a copy without registration.
38 pagesEnglish8.3 MB PDF
Loading your manual…Open PDF directly
Document details
- Brand
- Voigtländer
- Model / document
- Voigtlander Vito BL
- Document type
- User manual
- Language
- English
- Pages
- 38
- File size
- 8.3 MB
- Category
- Film cameras
- Document date
- Not specified in catalog
Search available document text
Find a term, then jump to its page in the original PDF. Image-only pages may not be searchable; check the PDF for exact wording and diagrams.
Page 3 · Read text
Rrrht  Here
                               is the first and most important piece of adoice
                           for the VITO BL: Please reail this booklet care-
                             fully. Make yourself thoroughly familiar roith
                              all the operations anil controls of the catnera.
                      Then you can load your first film and begin to
                       take pictures.
                    Remember also that the VITO BL is an optical
                  and mechanical precision instrument which
                        requires gentle and understanding treatment.
                   The camera wiII repay careful handling with
                           beautifully clear and sharp pictures for many2OOYEARS                        Vears to corne.
                VOIGTTANDER     BRAUNSCHWEIG
View original page 3Page 4 · Read text
www.butkus.us   Poge
CONTENTS    Opening the comero ond inserting the film  .  .    6-9
                    Setting the film counter                          10
                  Determining ihe exposure .                  11-14
                    Setting fhe shutter ond operture ...            15-17
                    Setting the distonce ....                       18-19
                 Ropid winder . Double exposure lock  .
            Releosing                                 2O-21
                   Ffosh exposures .                            22-25
                 Unlooding the conrero                       26
                Chonging portly exposed films .             27
                 Aperture ond depth of field                  28
                    Hints for using the exposure meter         29-32
                 Filters Focor lenses                       33-34
                 Accessory ronge finder Kontur finder .. ..  35
                Core of comero ond lens             ..... ..  36
View original page 4Page 6 · Read text
www.butkus I  Focusing scole               m
2 Depth of field indicotor                       ffi
 3 Milled knob
    of light-volue scole
 4  Light-volue scole ring
 5 Shutter speed scole
     for exposure times from
      1/coo to I sec.
 6 Synchronizing lever
    for flosh contoct M or X
    ond self-limer V
 7 Film reversing lever
 8 Rewind knob with
    film indicotor
 I  Aperture scole
l0  Exposure meter -
   BEWI-AUTOMAT
ll   Film counter window
12 Releose button
                       -3-
View original page 6Page 7 · Read text
T
    3 Milled knob
I         of light-volue scole        I  Rewind knob with;,rl          film indicotor
il    l3 Viewfinder eYePiece
        Bose plote lotchI   14.wu   15 Bose plote floP
i0    l5  Flosh contoct
           for the connection of flosh units
iS   17 Press-button
          of Exposure-Metertlt    l8  Ropid winder to tension
s         shutter ond odvqnce film
    19 Tripod bushIi"R\.J   20 Film counter setting ring
        Cqmero suPPort##    2l
9
View original page 7Page 9 · Read text
oPENING THE cAMERA qnd INSERTING THE FtLM
     The VITO B[ tqkes qll makes of miniEture film, blqck-qnd-white or colour,
       qvqilqble lhroughout the world. These films qre sold in doylight cossettes hotd-
      ing 36 or 20 exposures 24x35mm. For reqsons of economy olso doylight or
     dqrkroom spools with reqdy cut lenglhs of film or 35 mm butk film, which musl
     be cul beforehqnd fo suit the number of photogrophs intended cqn be used.
                                  During looding qnd unlooding qvoid
                                      Digitally signed by mike butkus
                                cn=mike butkus,mike          DN:
                              o=orphancameras,                                               ou=29,                       hondling the cossetes in brilliqnt light;
                               email=mike@butkus.org, c=US
                                  Date: 2019.04.21 14:28:01 -04'00'butkus                             so cqrry oul qll operolions in the shqde -
                                        even the shqdowof your own bodywilldo.
                                To Open the Cqmerq
                                                          first lift up the bose plote lotch ond turn  it
                                             through o quorter turn to the right. Then fold
                                        owoy the bose plote flop (see illustrotion), ond
                                           swing ihe bock open (the illusfrotion on the
                                                     right shows the comero fully open).
View original page 9Page 10 · Read text
www.butkus.us 8 Rewind Knob with Film
     Indicotor
t3 Viewfinder Eyepiece
14 Bose Plqte Lotch
15 Bose Plote Flop
17 Press-button
    of Exposure Meter
l8 Ropid Winder to tensi-
   on Shutter ond odvonce
     Film
22 Film Chomber for Doy-
     light Cossette
23  Shoft of Rewind Knob
24  Tronsport Sprocket
25  Toke-up Spool
View original page 10Page 11 · Read text
Inserling lhe Cqsselle:   The norrow slit of the toke-up spool must
                          foce upwords to toke the beginning of the
                             film. lf necessory turn the toke-up spool
                         wifh the finger or by working the ropid
                        winder until it is in the correct position.
                           Then:
                  o Pull out o short length of the film leoder
                         from the cossette, ond push it into the
                                          slit of the toke-up spool os for os it will
                    go (see illustrotion).
                  o Drqw the cossette ocross the film win-
                     dow ond insert it in the film chomber.
                                      lf the shoft of the rewind knob does not
                         immediotely engoge the centre spool of
                            the cossette, push the reversing lever bock-
                       words (see illustrotion on poge 26) to ex-
                        tend the rewind knob. Turn the lotter to
                      ond fro o little, then push fte knob bqck
                             into lhe body.
                      -8-
View original page 11Page 12 · Read text
www.butkus.usThis is how the looded comero
must oppeor before closing.The
film lies flot in the film trock,
with the sprocket engoging the
film perforotions.
To Close lhe Cqmerq
first push the bock ogoinst the
body, ond press the bose plote
flop into position. Lock the bose
plote lotch, ond fold down.
Note: lf the comero bock should
not close properly, check thqt
the cossette is properly in posi-
tion (left).
                                                           -?-
View original page 12Page 13 · Read text
The Film Counler qnd Film lndicolor:
                          Every time the film is odvonced (see poge 20), the film
                           counter outomoticolly shows ihe number of exposures  still
                                 crvoiloble. The numbers ore eosily reod off from obove.
                          With 36-exposure cossetles: Turn the film counter setting
                            ring urrdefneoih the comero (see illustrotion) until the
                                 dior"mond mork I oppeors in thd counter window. Pull the                               ropid winder once or twice until ii locks, press the releose                               buiton, ond work the ropid winder uniil it locks once
                           more. The film counter window now indicotes No. 36
                                for the first exposure.
                          With 2O-exposure cosseltes: Turn the film counter setting
                              rino until No. 22 oppeors in the counter window. Then
                                  cor-ry on os descri6dd obove; the film counter should
                                indicote No. 20 for the first exposure.
                      To set the film indicotor built into the rewind knob, turn
                          the milled ring to the oppropriote symbol:
               RD (UT)  :  Dovliqht tvpe reversol colour film                RA (UK)  :  Artiiidiot fibtrt fype reversol colour  f ilm               ND (NT)  :  Doylight type negotive colour film                NA (NK)  :  ArtifiCiol light type negotive colour film                                                  :                                          (N)                                                                               film                                            Block-ond-white negotive              N                                             (U)   :                                                 Block-orrd-white                                                                reversol film              R&-      (\o-
                   -10-
View original page 13Page 14 · Read text
www.butkus.usDETERMINING  THE EXPOSURE
A speciol feoture of the built-in BEWI-AUTOMAT exposure meter is its outo-
molic press-bulton operolion ond scole lock lo indicote lhe correcl shutter speed
ond cperlure. You con lherefore sight the subiect through rhe finder fo delermine
lhe required view, qnd ol lhe some time qulomoticotty meosure the tight with
lhe photo-electric exposure meler. The scqle lock retoins the result for fulure
reference.
In proctice this method (pointing the meter of the subiect from the comero
position) is known os reflected light meosurement, since ihe selenium cell of the
BEWI AUTOMAT reocts to the light reflected from the subiect. An olternotive
method is incident light meosurement.  In ihis cose o diffusing screen is mounted
in front of the selenium cell, ond the meter pointed from the subiect ot the
proposed comero position. A diffusing screen is enclosed with every comero,
ond con be corried in the ever-reody cose.
View original page 14
Page 15 · Read text
The BEWI AUTOMAT is moun-
ted in o shock-proof spring-
suspension system. lt covers o
greot meosuring ronge with o
high initiol sensitivity. The spec-
trol sensitivity of ihe cell is
corefully motched to give cor-
rect results with block-ond-
white os well os colour films
even in tricky light conditions.
    Cell windowe
@  Film speed index
@  Milled film speed setting ring
    Aperlure scole
    Press-bufton for toking o reoding@o   Window for lighl-volues
    Shutfer speed scoleAfo,o
@ Twin scole wirh ASA ond DIN
   speed volues
-12-
View original page 15Page 16 · Read text
Using lhe Exposure Meler:            www.butkus.us
 First set the speed of the film looded in the comero. Turn ihe milled ring (3) until
the oppropriote speed volue of the twin scole (B) is opposite the film speed
index (2). The twin scole indicotes film speeds in ASA ond DIN speed groups
(see olso comporison ioble on the following poge).
To toke o reoding, sight the subiect in the finder, ond of the some time fully
depress the button (5) for ol leqst one second. On releosing the button (let it
slide out slowly) the scole reoding is outomoiicolly locked. You con now reod
off the correci lighi volue in the window 6 (see olso poges r5-]z).
When using the meter, plesse note especioily:
o The cell window must be completely unobstructed, ond not portly covered up by one finger.
o After operoiion of the scole lock o red dot moy oppeor ot the bottom of the shutter
  speed scole (7). This is o worning signol to indicote thot the ovoiloble light is insuffi-
   cient for o reoding. ln thot cose even the shulter speed settings still visible on lhe
   scole ore useless.
                                                            -t3-
View original page 16Page 18 · Read text
THE BETWEEN.LENS SHUTTER  www.butkus.us
works of speeds ronging from 1 to i/soo sec., hos full M-X synchronizotion ond
o builf-in self-timer. The electricol contoct for flosh synchronizotion (see poges
22-25) ond the operotion of the self-timer (see poge '17) ore both controlled-by
the synchronizing lever (see orrow in illustrotion). For oll exposures mode
without flosh or use of the self-timer it is quite immoteriol whether the syn-
chronizing lever is set on M or X.
Lens operture ond shutter speed controls
ore coupled together on o single scole,
ond the relotionship between operture
ond shutter speed is expressed in terms
of "light volues". The light volue de-
pends on the lighting conditions pre-
voiling of the time of moking on exposure,
ond when it is opplied io the comero
conirols ii olwoys provides the correct
operture-speed combinqtion. Combin-
otions such os f 5.6 ond 1/eo sac., f 8 ond l/ac;
or f I1 ond l/tr sec., correspond to the some
lighi volue.
                           -15-
View original page 18Page 19 · Read text
Setting shuller ond operlure:
Press in the left-hond milled knob on the
light-volue sco!e ring (see block orrow in
illustrotion obove) ond turn the ring by meons
of the two knobs until the oppropriote  light
volue number (see poge 13) clicks into
position obove ihe red index-mork on ihe
shutter setting ring (see white orrow). lf ne-
cessory turn the shutter setiing ring in the
opposite direction so thot o number of the
exireme end of the scole ring con click into
position.
You now hove one of the mony possible combin-
otions of shutter speed ond lens operture,  e, g. 1/eo sec.
ot f 5.6 (see illustrotion below) ot light volue'l  l.
 lf o different shutter speed (or operture) is required,
turn the shutter setting ring until the desired shutter
speed or operture number comes opposite the index-
mork.     The               number           other
       then          be                outomoticolly-  opertureodiustedor shutlerin lhespeedcor'   will-rect proportion.
-16-
View original page 19Page 20 · Read text
With o light volue scole there is, however, o limit to lhewww.butkus.usnumber of possible combinotions o.f shutter sp.eed ond lens operture, os when the shutter speed ring' is turned, either the
shutter speed or operture mork moy reoch the end of the scole.
 But.pleose nole: When the shutter mork (block dot under the shutter scole) reoches the end
ot fhe shutter scole ond comes opposite the green letter"B",the self-timer becomes inoperot-
ive; if the. light volue remoins uhchonged ihe correct exposure is 2 seconds. The ihuit.t
speed,morkmoy come.opposite "-8" witlr o lig}t volue between 7 ond2 (e.S. 1.y.4:    f 4-see illustrotion). In this_.event,.if o still smoller operture
 is required to obtoin sufficient depth of field (see poge 28),      i
you must set the desired operture number on the light            ;
volue scole ring to the opeiture index-mork, ond exp5se   i
for the number-of second! indicoted in oreen fiqures on          i
the time scole under the operture nu-mber. With th"
exomple here illustroted this ivorks out ot 4 secs. ot f 8,       r8 secs. ot fll,  15 secs. ot f 16 ond 30 secs. ot f22.                       r
Seiling the self-timer:
When the correct combinotion of shutter speed ond lens
operture- hos been-chosen ond the shutter tensioned, turn
the synchronizing lever to the "V" mork (see illusfrqtion).
When the releose button is pressed, the shutter opens
outo_moticolly ofter o deloy of obout 8 secs., ond' the
synchronizing lever outomciticolly iumps out of the V-position. Do not use the self-timer when the shutter is setto "8".
                                -17 -
View original page 20Page 21 · Read text
SETTING                  You cqn either eslimote the subiect di-
                                        slqnce, or befler still meosure it with qn      the DISTANCE
                                  qccessory rcngefinder. The Voigtltinder
                                           slip-on rangefinder  is porticulorly suitoble
                                     for this purpose. lts speciol confrqsl re-
                                           flector qnd robust design ensure qbsolute
                                  qccurdcy over q rqnge from infinity to
                                  3 feet.
                           To focus the comero lens turn the lorge
                                       milled ring until the oppropriote dislonce
                                        figure engroved on it comes opposite the
                              mork | (see illustrotion). Between the di-
                                       stonce figures you will see two odditionol
                                  symbols: V ot obout ll  feet, ond O ot
                                 obout 33 feet. These ore the zone focus
                                         settings (see opposite poge).
                              -18-
View original page 21Page 22 · Read text
Tone Focusing:                    www.butkus.us
   Condid oction shots (for instonce of
    children ot ploy) often yield surprisingly
    live pictures. On such occosions don't
    woste iime by focusing on exoct distonces.                                                                                      /*iffit sslzl     lnsteod, set the focusing scole to the neor    fl
    zone mork f  for subiects between 8 ond
    17 feei, or to the for zone mork Q for
I    subiects belween l7 feet ond infinity. You
    must, however, stop down to of leost f/5.6
    to ensure odequote depth of field.
    Provided the light is good enough, these
                                 whenI   focusing zones ore very useful
   photogrophing sports subiects, where
    distonces moy chonge very suddenly.
                               -19-
View original page 22Page 23 · Read text
THE RAPID WINDER           One full movemenl of the ropid winding
                                      lever lensions fhe shuller, ond odvqnces    dnd DouBtE lNTERtocl(                                      the film qnd film counler. The spring lhen
                                        relurns the lever to its originol position.
                           The ropid winding lever con of course
                                olso be worked in o number of short
                                movemenfs. In thrrt cose keep pulling the
                                      lever until ii locks.
                      An outomotic lock prevents the ropid
                                winder from being operoted o second
                                   time before the shutter is releosed. At the
                        some time, the shutter con only be
                                     releosed ofter working the ropid winder.
                                     This prevents both double exposures ond
                                   blonk fromes.  lf the comero is empty, the
                                        ropid winder moves  f reely without tension-
                                   ing ihe shutter.
                              -20-
View original page 23Page 24 · Read text
'(/'--\=/HOtDING ond REtEASING     www.butkus.us-r--=                                                                        1'1 ,---\Z(
When exposing, hold the comero in one
of the woys suggested in the illustrotions
on the right. The speciolly lorge ond
bright opticol finder shows o full-size
view of the subiect.
To releose ihe shutter, hold your breoth,
ond gently depress the releose button os
for os ii will go. Never iqb ot  ii.
Short instontoneous exposures (l/so second or
fosler) ore usuolly mode with the comero held
in ihe hond. Whenever possible, don't moke
hond-held exposures longer thon l/so second,
unless you hove o supporl for your orms or
you con leon ogoinsi something solid. For time
exposures ot the B selting preferobly mounl lhe
comero on o tripod, ond expose with the oid
of o coble releose. This screws into ihe socket
in the releose button.
                         -21 -
View original page 24Page 25 · Read text
FLASH SHOTS
     The PRONTOR-SVS shulter permits syn-
      chronized flqsh shofs up lo the fqstesl
       shutler speed ol tltoo second. Any flosh
     gun on the mqrkel cqn be connecfed lo
      the shuller.
      Pleqse Note:
      Wifh block-ond-whiie  film the flosh (cleor
      or blue bulbs, or electronic flosh) con be
      used on its own, or combined with doy-
       lighf or oriificiol light sources such os
      iungsten lomps.
     With doylight colour film only blue-
      cooled flosh bulbs or electronic flosh con
     be used os supplementory light. With the
        ortificiol light types of colour film only
       cleor flosh bulbs should be used.
     -22-
View original page 25Related documents and language editions
VoigtländerPDF
Voigtlander Vito Automatic
User manual
25 pages · EnglishRead →
VoigtländerPDF
Voigtlander Vito B
User manual
37 pages · EnglishRead →
VoigtländerPDF
Voigtlander Vito BR
User manual
29 pages · EnglishRead →
VoigtländerPDF
Voigtlander Vito C
User manual
20 pages · EnglishRead →
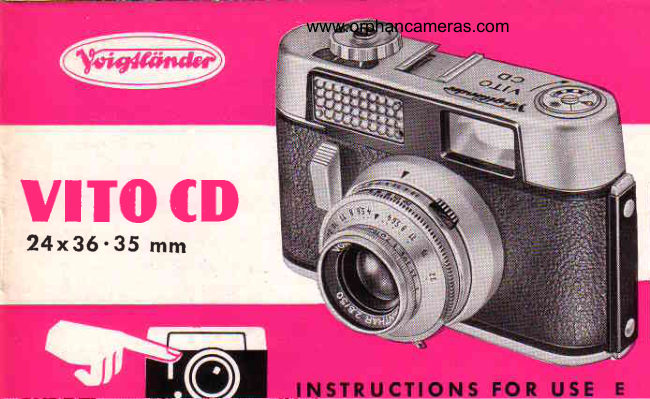
VoigtländerPDF
Voigtlander Vito CD
User manual
21 pages · EnglishRead →
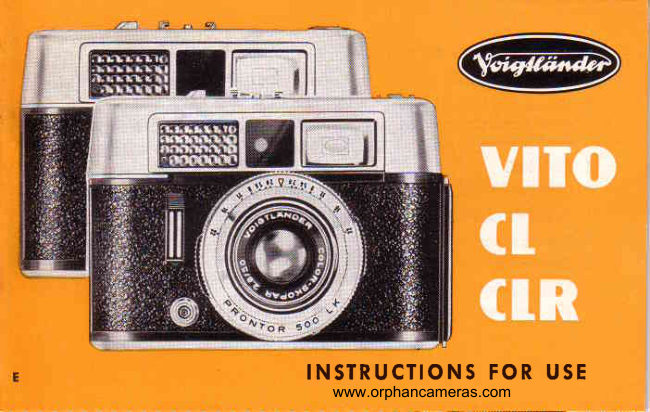
VoigtländerPDF
Voigtlander Vito CL_CLR
User manual
26 pages · EnglishRead →
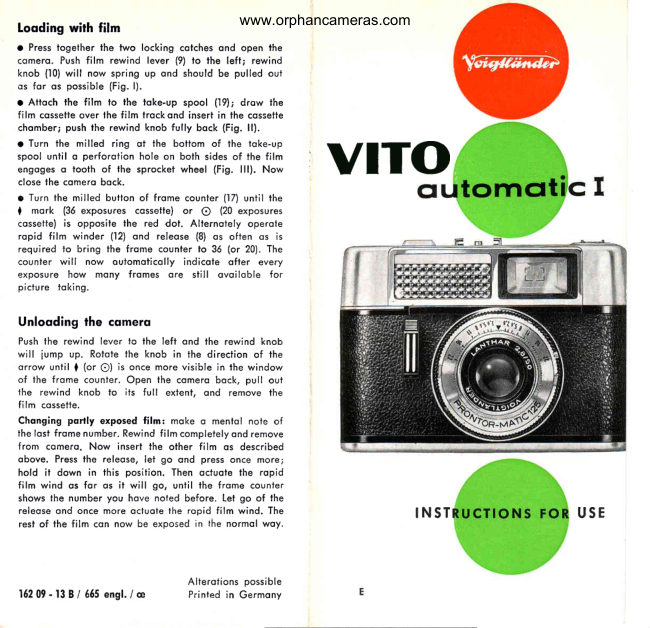
VoigtländerPDF
Voigtlander Vito automatic I
User manual
5 pages · EnglishRead →
VoigtländerPDF
Voigtlander Vito automatic II
User manual
22 pages · EnglishRead →
VoigtländerPDF
Voigtlander VITO Automatic
User manual
18 pages · FrenchRead →
VoigtländerPDF
Voigtlander Vito B
User manual
33 pages · FrenchRead →
VoigtländerPDF
Voigtlander Vito C
User manual
24 pages · FrenchRead →
VoigtländerPDF
Voigtlander CLR Gevrauchsanleitung
User manual
29 pages · GermanRead →
From the M. Butkus archive. Original publisher and archive notices are retained.
Check the model and edition against your equipment.
PDF verified 2026-10-10.